How to Convert Free Users to Paying Customers
Looking for a way to convert free users to paying customers? Consider creating a membership website.
A membership site can help you offer a freemium model to your audience and cater to more users. This way, you can convert free users to paying customers by providing them content “upgrades” or the ability to subscribe to a membership plan when they’re ready.
In this article, we’ll look closely at how you can convert free users to paying customers using ProfilePress.
What is the freemium model?
The freemium model is used by businesses to let users get a glimpse of what your content is like by offering some part of premium content for free.
For example, you can let users access basic or limited content for free while the rest of the premium content is hidden on your WordPress site. This encourages users to subscribe or pay for a membership plan to access high-quality, premium content.
Here are some of the significant benefits of using the freemium model on your brand’s website:
- Drive more conversions. If you give your audience a “peek” at what your premium content is like, there is a high chance more users will decide to subscribe and pay you to keep accessing high-quality content on your site.
- Generate more revenue. With an increase in conversions, you also increase your customer base. This increase in customers ultimately helps your business generate more revenue as more users will want to pay you to access premium content on your site.
- Create a sense of exclusivity. A membership site not only creates a sense of exclusivity around your brand but also encourages more free users to become paying members of your site, so they also get extra perks and benefits. In addition, it’s also a great way to encourage users to stick with your brand long-term.
- Cater to different types of users. With a membership site, you not only cater to users who want to pay extra to access premium content but also to users who cannot pay extra but still want to access the premium content on your site.
While the freemium model is a great way to get users to become paying members, it has its cons. Some users will want to become paying members after only seeing free content, and others will not like it when you ultimately ask them to subscribe to access premium content. In addition, it can also cause your business to use up resources when offering quality content to users for free.
Converting free users to paying customers in WordPress
One of the biggest flaws of a freemium model is that it causes your business to deplete resources quickly without generating any income during the process. This is because you’re catering to free users who don’t want to pay you but still want to access premium content on your site.
A simple way to prevent this is by creating a membership site in WordPress so you can cater to both types of users on your site.
While WordPress, by default, doesn’t let you create and manage a membership site, you can use a WordPress membership plugin such as ProfilePress.
ProfilePress offers an all-in-one solution for creating a full-fledged membership site while giving you the tools to easily manage free and paid customers for your business.
You have complete control over who can access content on your WordPress membership site. This way, you can only let users who pay for a membership plan access premium content while ensuring free users can only access the freemium content.
Step #1: Install the ProfilePress plugin
Get the ProfilePress plugin and install it on your WordPress site. To do this, navigate to Plugins → Add New and upload the plugin’s .zip file before clicking on the Install Now button.
Once the plugin is installed and activated, navigate to ProfilePress → Settings and click on the License tab from the top.
Enter the license key given to you at the time of purchase and click on the Activate License button to continue.
Step #2: Configure plugin settings
Once you activate your plugin’s license key, it’s time to start setting up payment methods on your site so you can accept payments from your audience. To do this, navigate to ProfilePress → Settings and click on the Payments tab from the top.
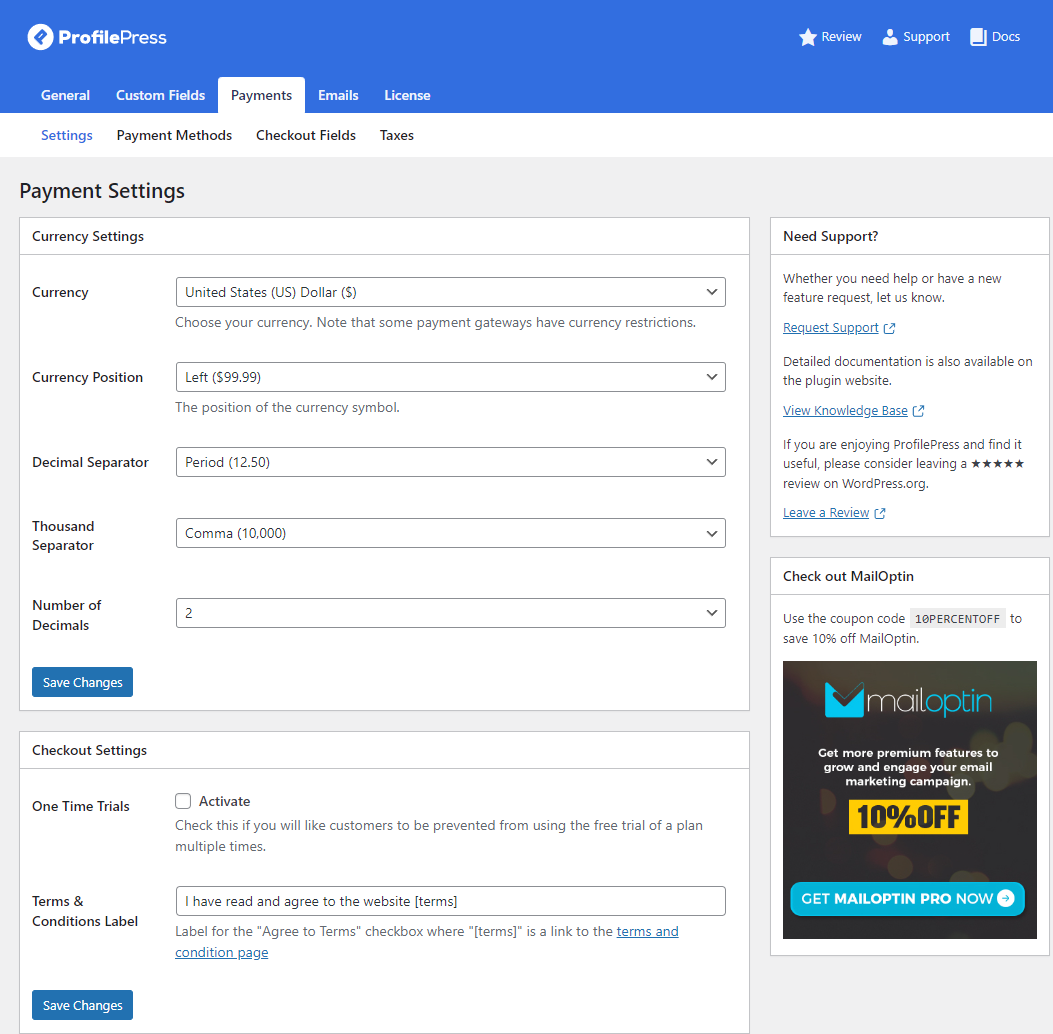
The Settings section will let you set currency options according to the currency you want users to pay, or your business can accept.

The Payment Methods section will let you configure various essential payment methods for any membership site. You can click the Configure button next to the payment methods to configure it according to your business.
Click on the Save Changes button to continue.
Step #3: Create a membership plan
You will need to create a membership plan to convert free users. To do this, navigate to ProfilePress → Membership Plans and click on the Add New button.
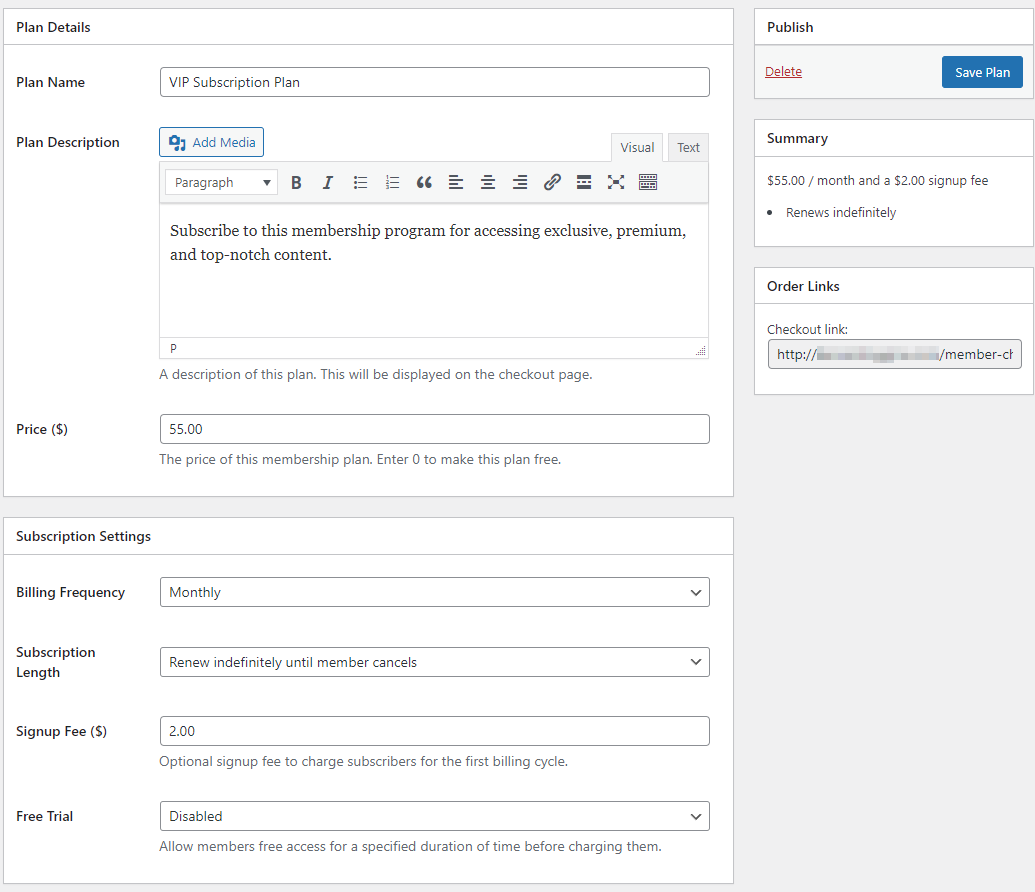
Give your membership plan a name and specify what users can expect from the membership plan when they subscribe using the Plan Description field. After setting a price, you can set the Billing Frequency dropdown menu to specify the billing period for your membership plan.
For example, you can create a weekly, monthly, or even daily subscription plan that lets users access premium content on your site. Once the subscription period ends, users will have to re-subscribe or pay you again to renew their subscription.
You can also accept recurring payments for membership plans you create with ProfilePress. You can select Renew Indefinitely until member cancels using the Subscription Length dropdown menu to let users automatically re-subscribe to your membership plan until they decide to cancel themselves.
Click on the Save Plan button to continue.
Step #4: Set up member registration and login
You also need to consider how members can register and log in to your membership site. For this, you will need to create member registration and login pages that offer an easy way for all free users to register as members and eventually become paying members.
Navigate to ProfilePress → Forms & Profiles and click on the Add New button. Make sure to select Login from the Form Type options after giving your login form a new name.
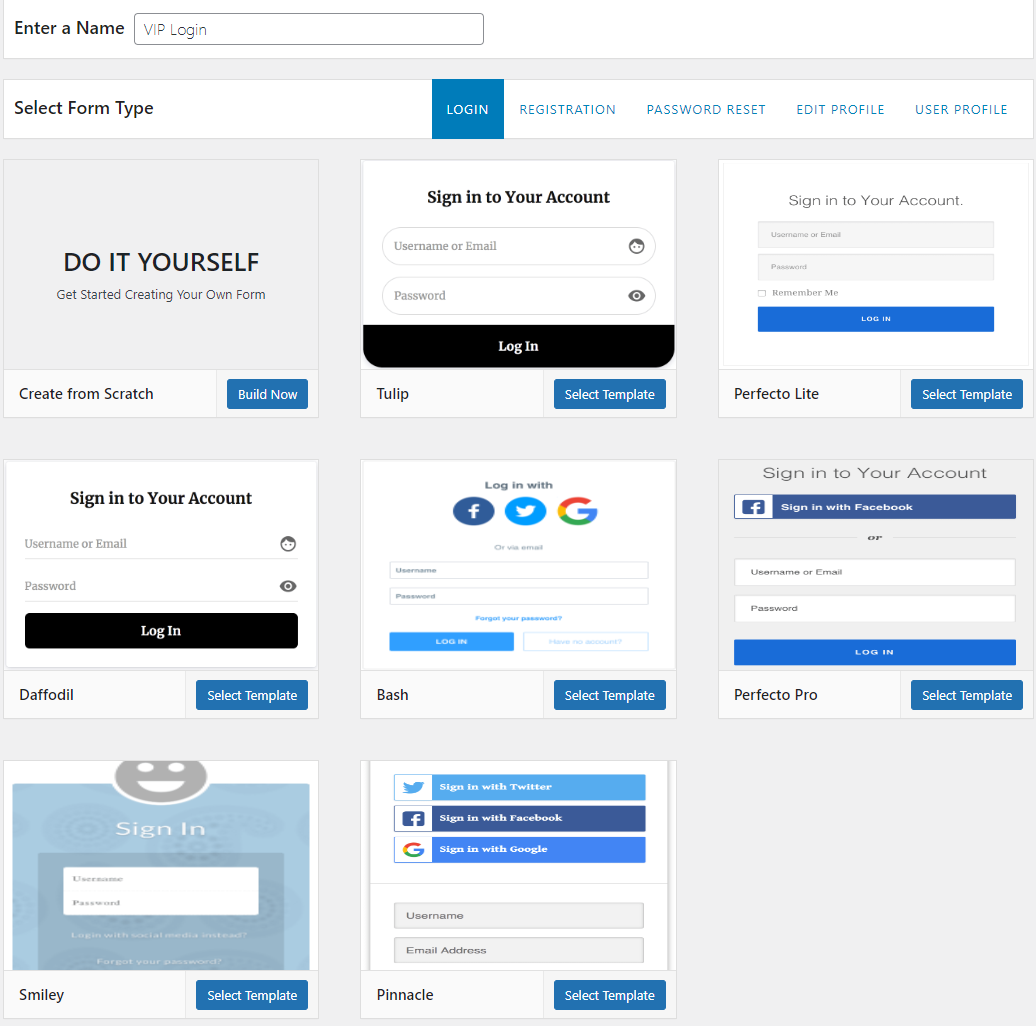
You can select from any pre-built templates to quickly create an attractive-looking, easy-to-navigate login page on your membership site.
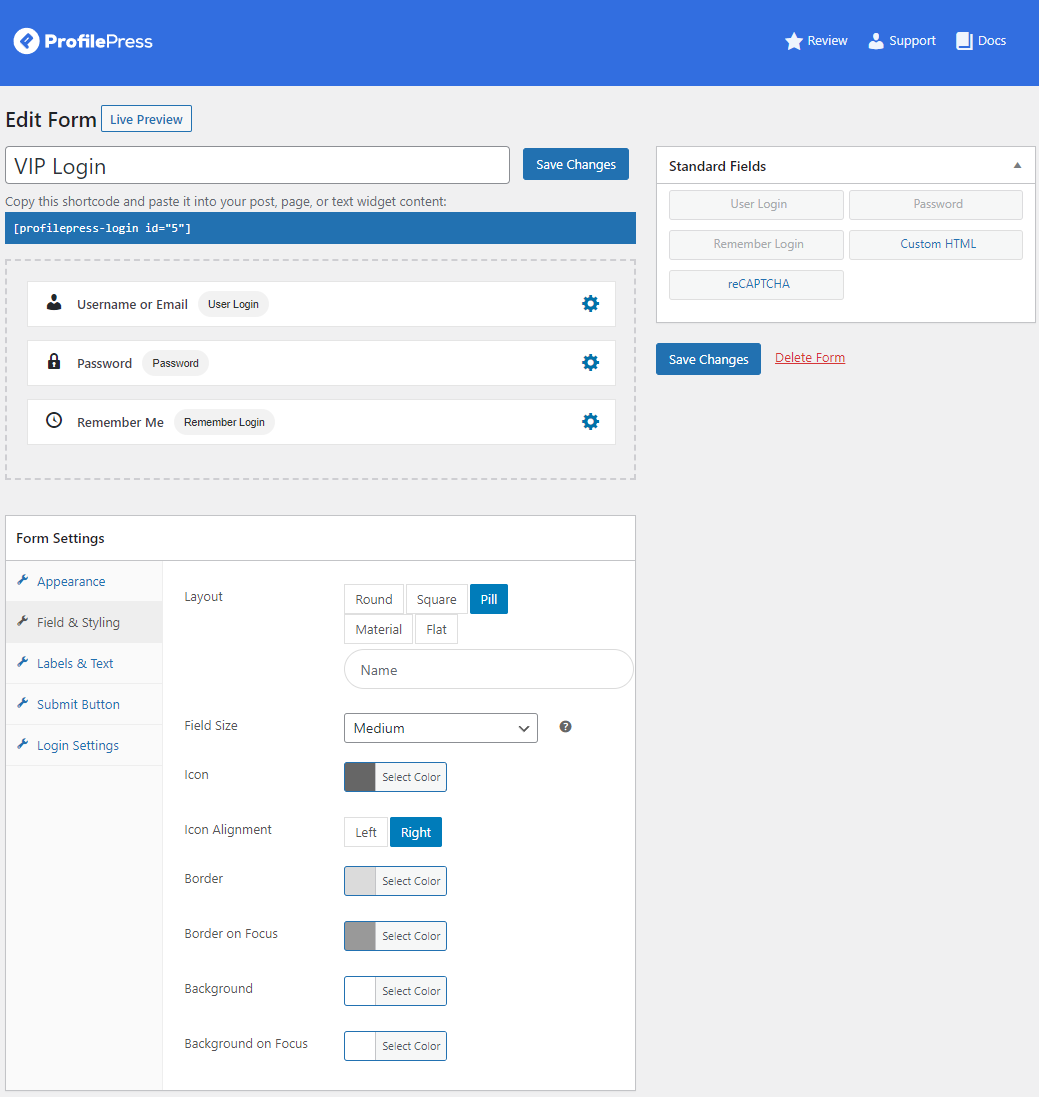
Here, you can edit and customize form fields that appear on the login page of your membership site. Using the Form Settings meta box, you can also change how certain elements look on your login form.
Click on the Save Changes to continue.
Next, copy the Shortcode of your newly created login form and navigate to Pages → Add New.

Paste the login form shortcode in a Shortcode block and click on the Publish button before continuing.
Similarly, you can also create a custom registration form by navigating to ProfilePress → Forms & Profiles and clicking on the Add New button.
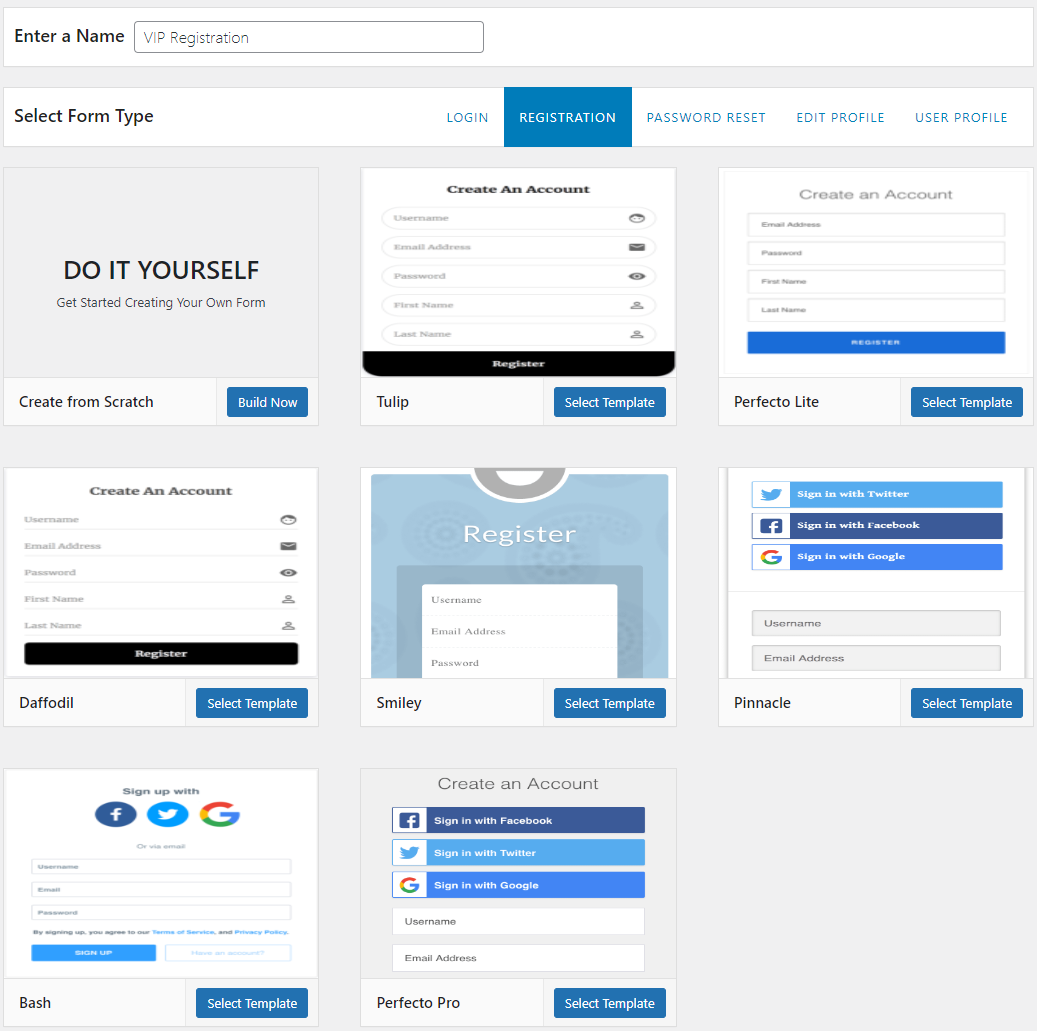
Make sure to select Registration instead of Login using the Form Type section before selecting your desired template.
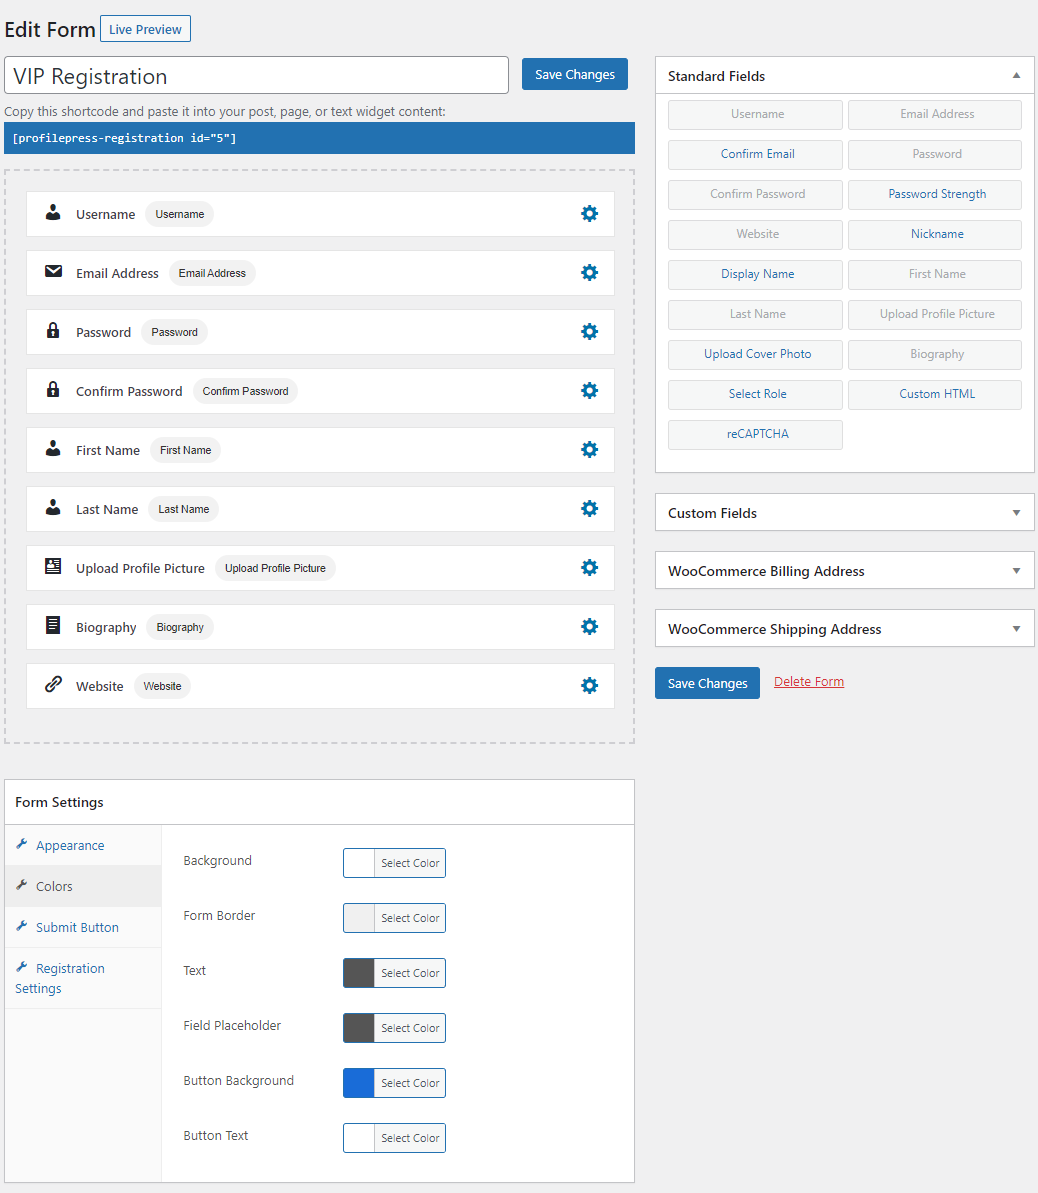
Depending on your chosen template, you can add extra fields to collect all the information you need when a user first registers on your site. Once you’re done customizing how your registration form looks, click on the Save Changes button to continue.

As before, create a new page by navigating to Pages → Add New and paste the registration form shortcode before clicking on the Publish button.
Step #5: Restrict premium content
With a subscription plan and essential membership pages created, it’s time to start restricting access to premium content. To restrict premium content, navigate to ProfilePress → Content Protection and click on the Add a Protection Rule button.
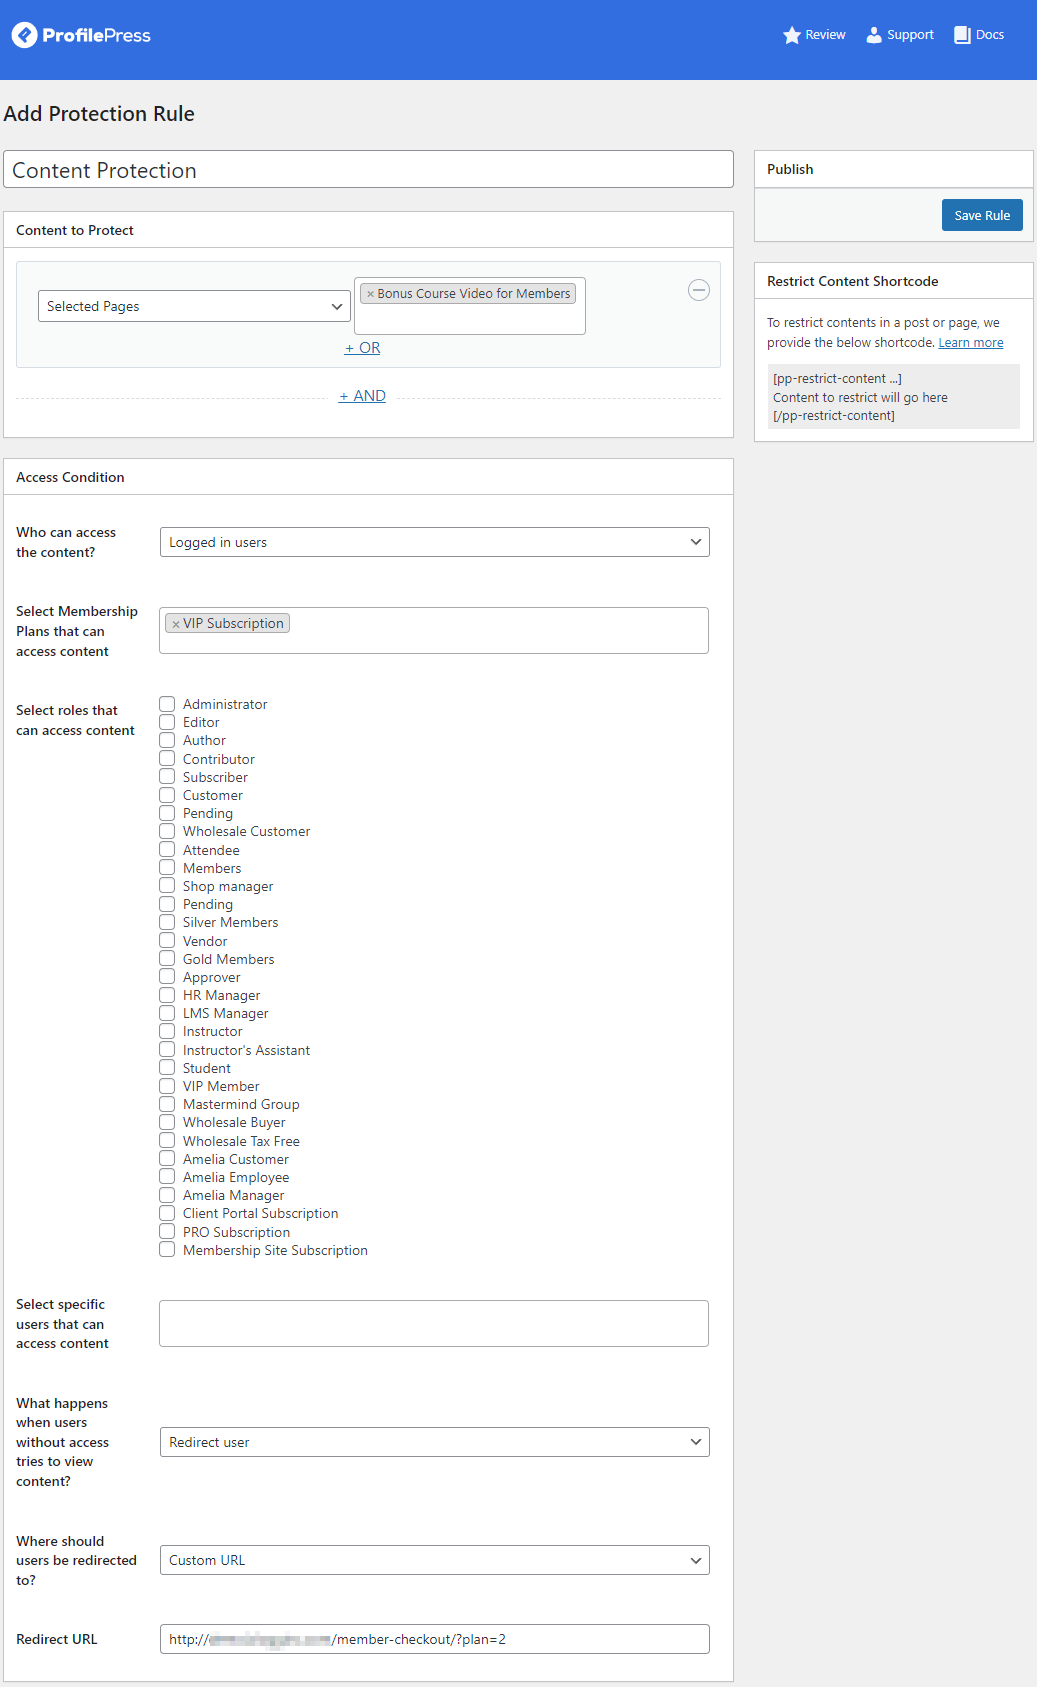
Using the Content to Protect meta box, you can select specific pages, posts, categories or any content on your site and hide it from unauthorized users or free users on your site. Using the Select Membership Plans that can access content select your membership plan so only users who are subscribed to you can access members-only content on your site.
You can also redirect users who haven’t subscribed to the membership checkout page. To do this, navigate to ProfilePress → Membership Plans and copy the Checkout URL of your subscription plan.
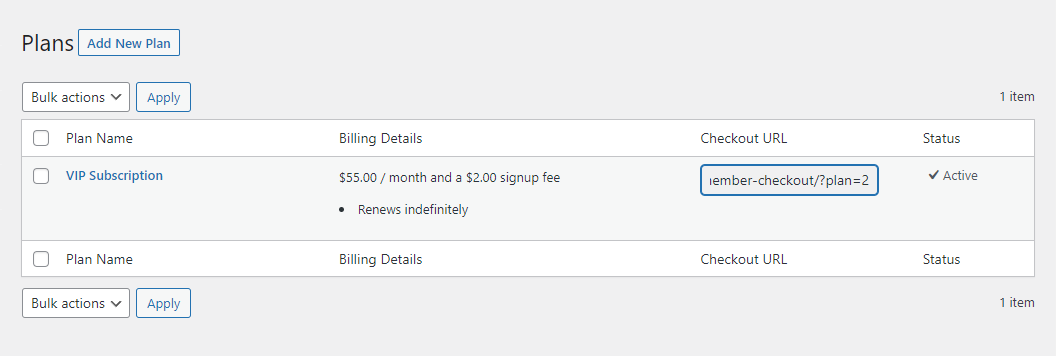
Select Redirect user using the What happens when users without access try to view content? dropdown menu and select Custom URL using the Where should users be redirected to? dropdown menu.
Now paste the checkout URL using the Redirect URL field and click on the Save Rule button to save changes on the front-end of your WordPress site.
Step #6: Create a pricing page
One of the best ways to encourage free users to subscribe to your premium membership plan is by letting them know what they’re missing out on.
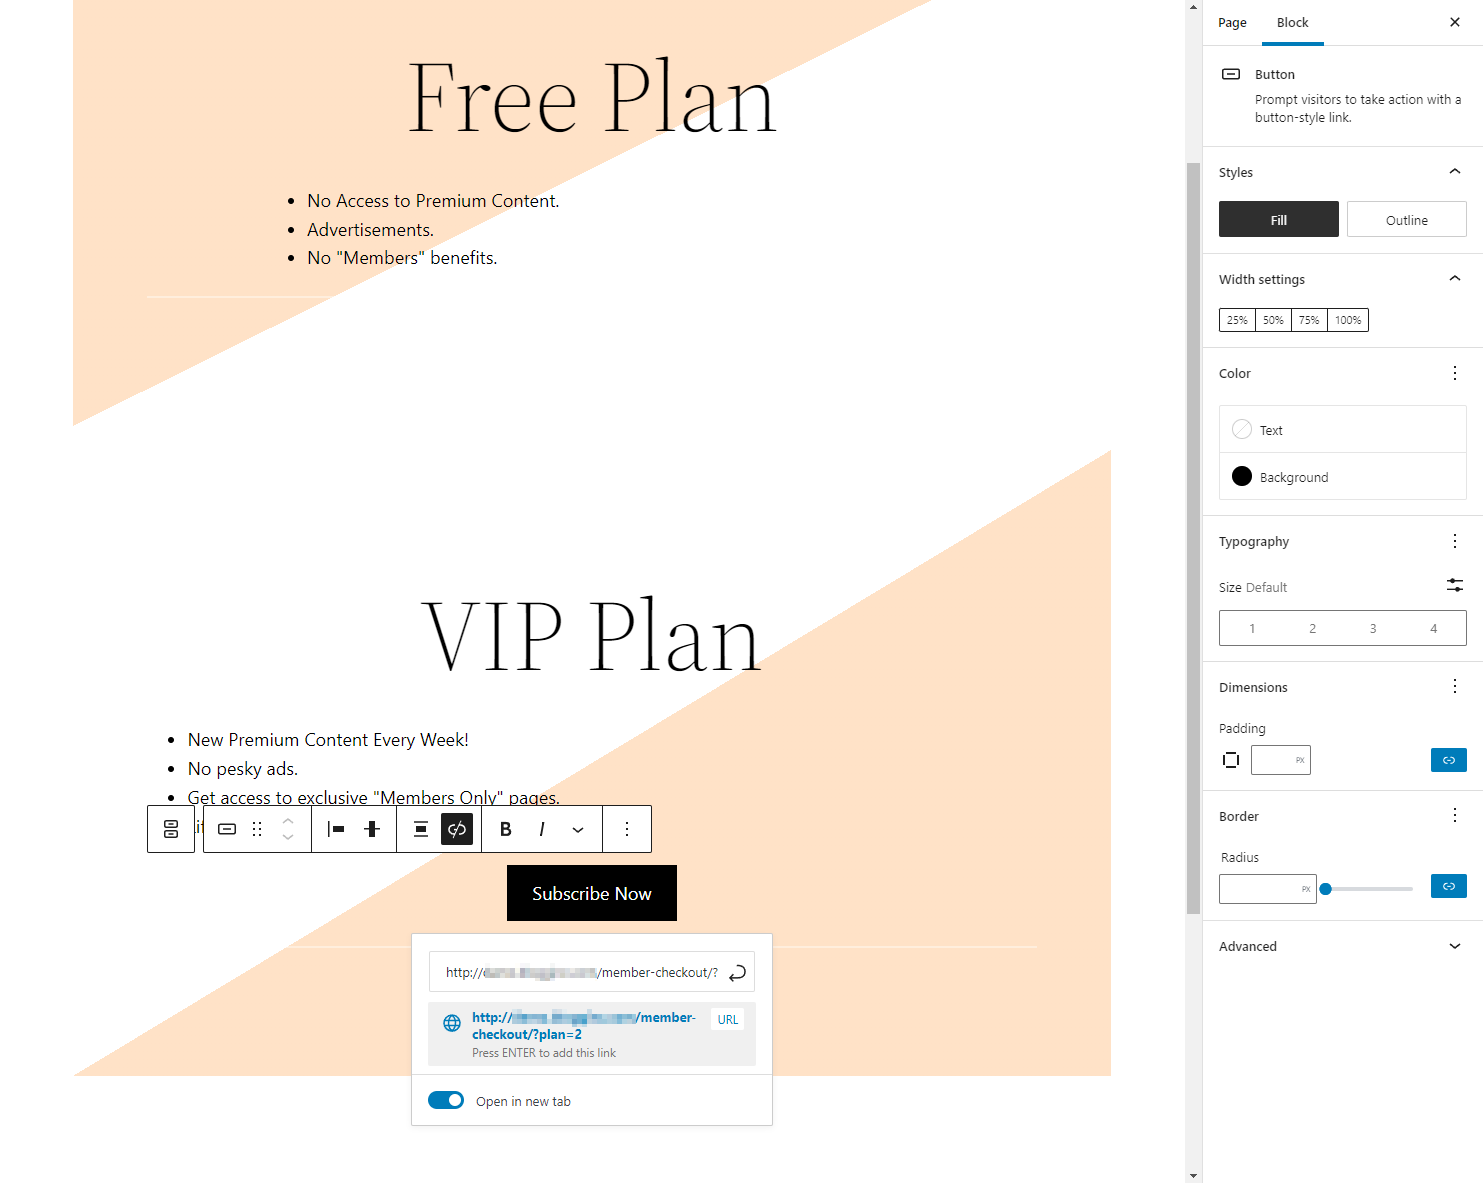
Creating a pricing page lets users learn about the benefits of subscribing to your premium subscription plan to convert free users to paying customers. You can display a strong call to action button that lets users subscribe easily.
Step #7: Let free users subscribe to premium content
This way, when free users try to access premium content on your WordPress site, they will be redirected to purchase the subscription plan.
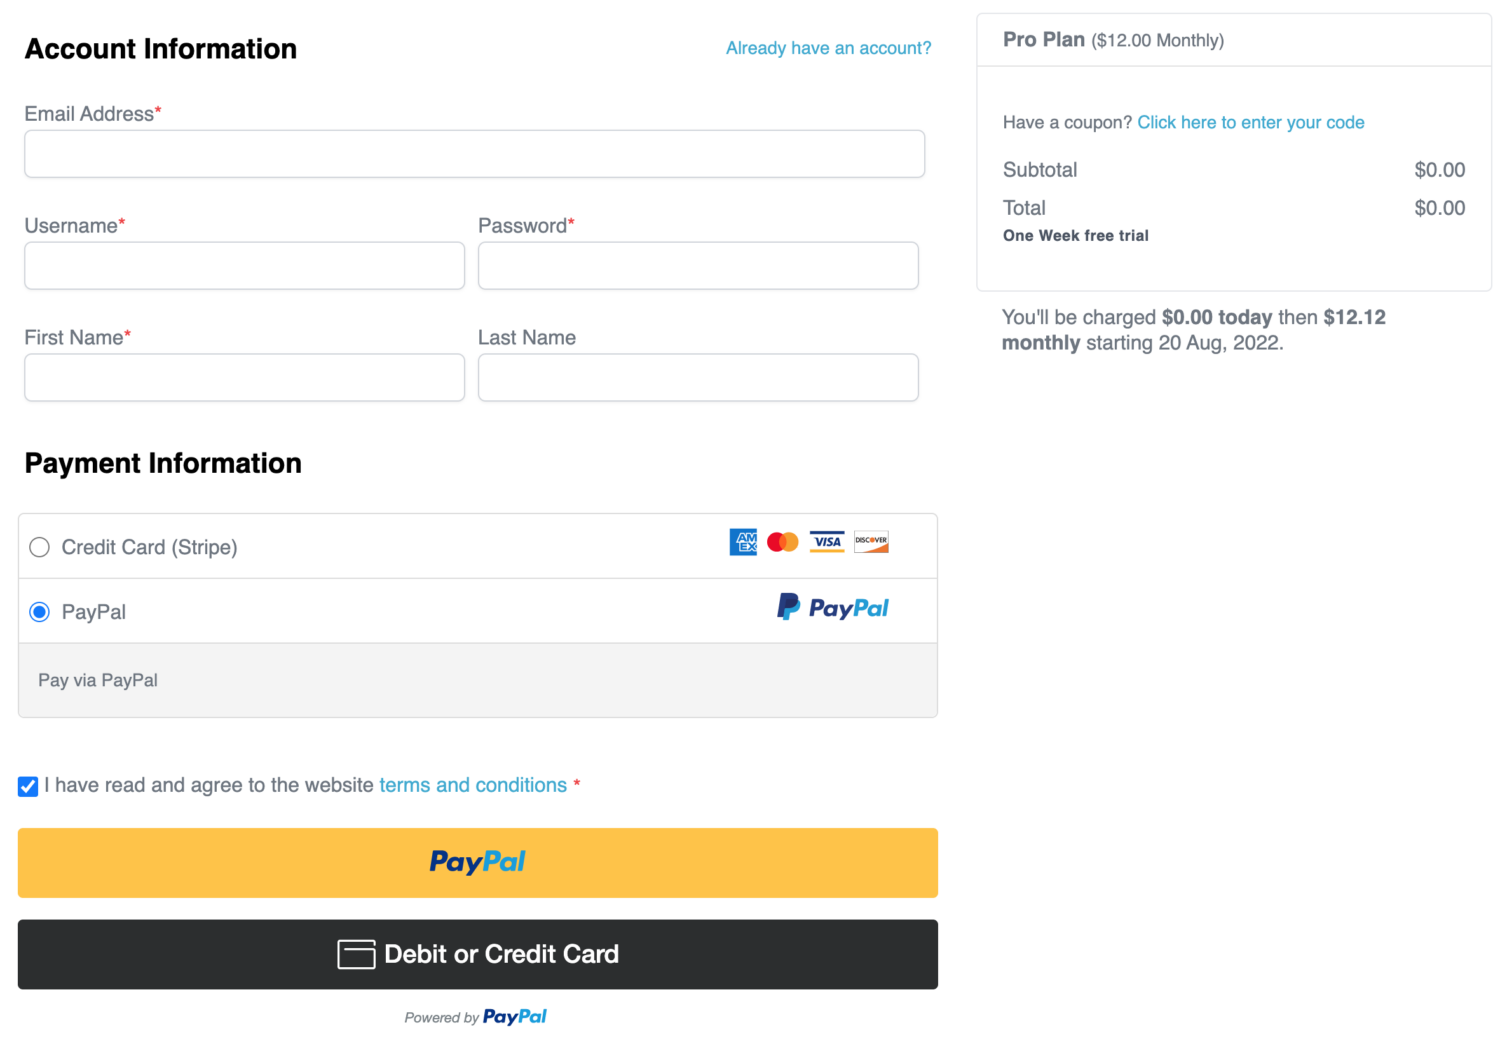
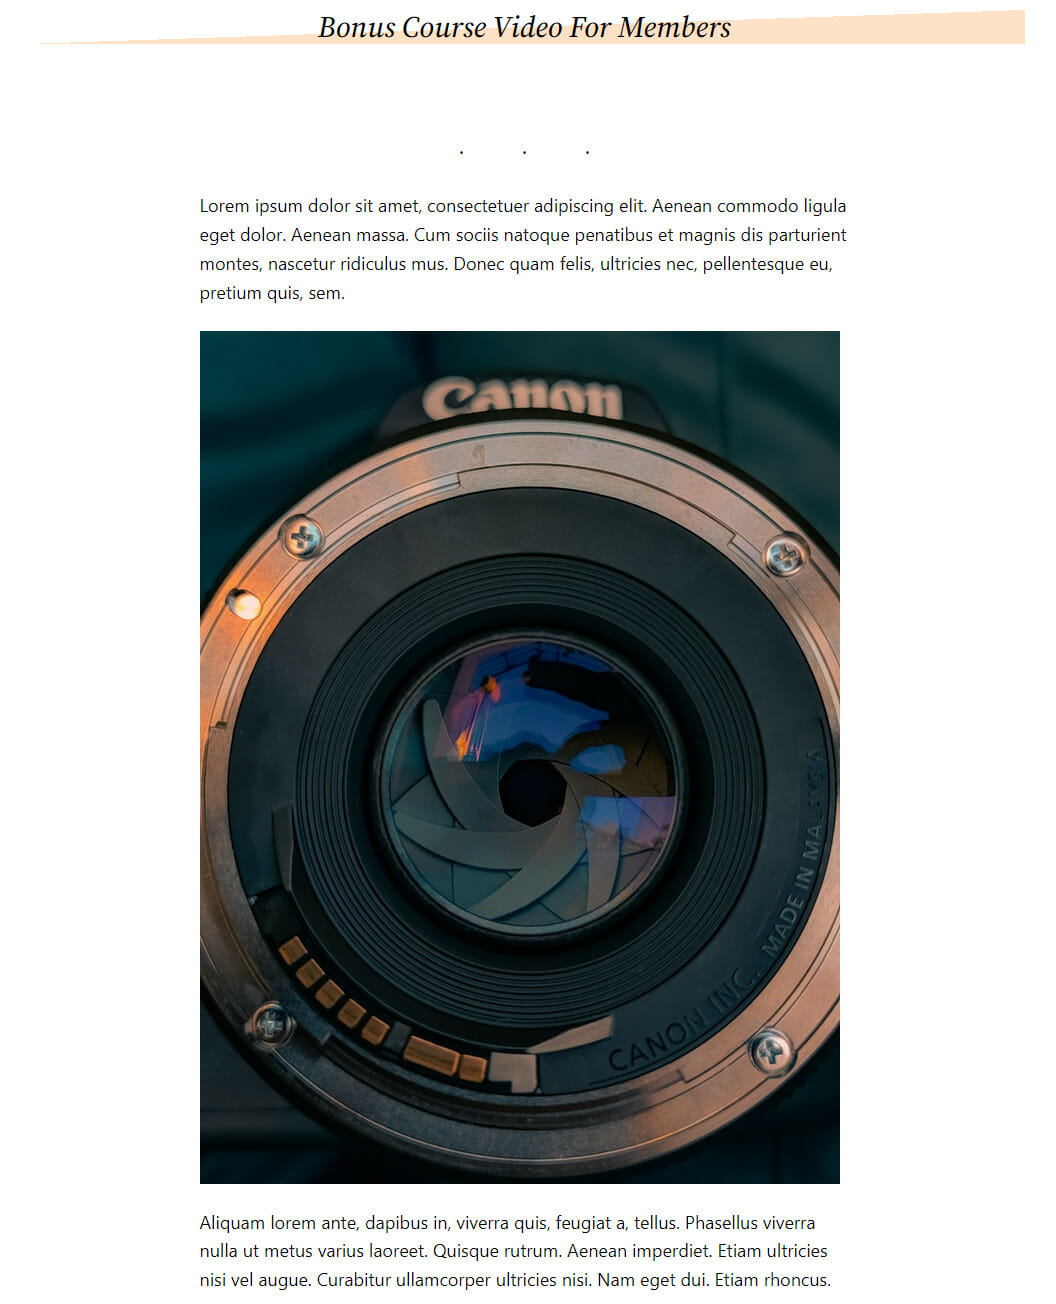
This way, only users subscribed to your membership plan can access premium content on your site.
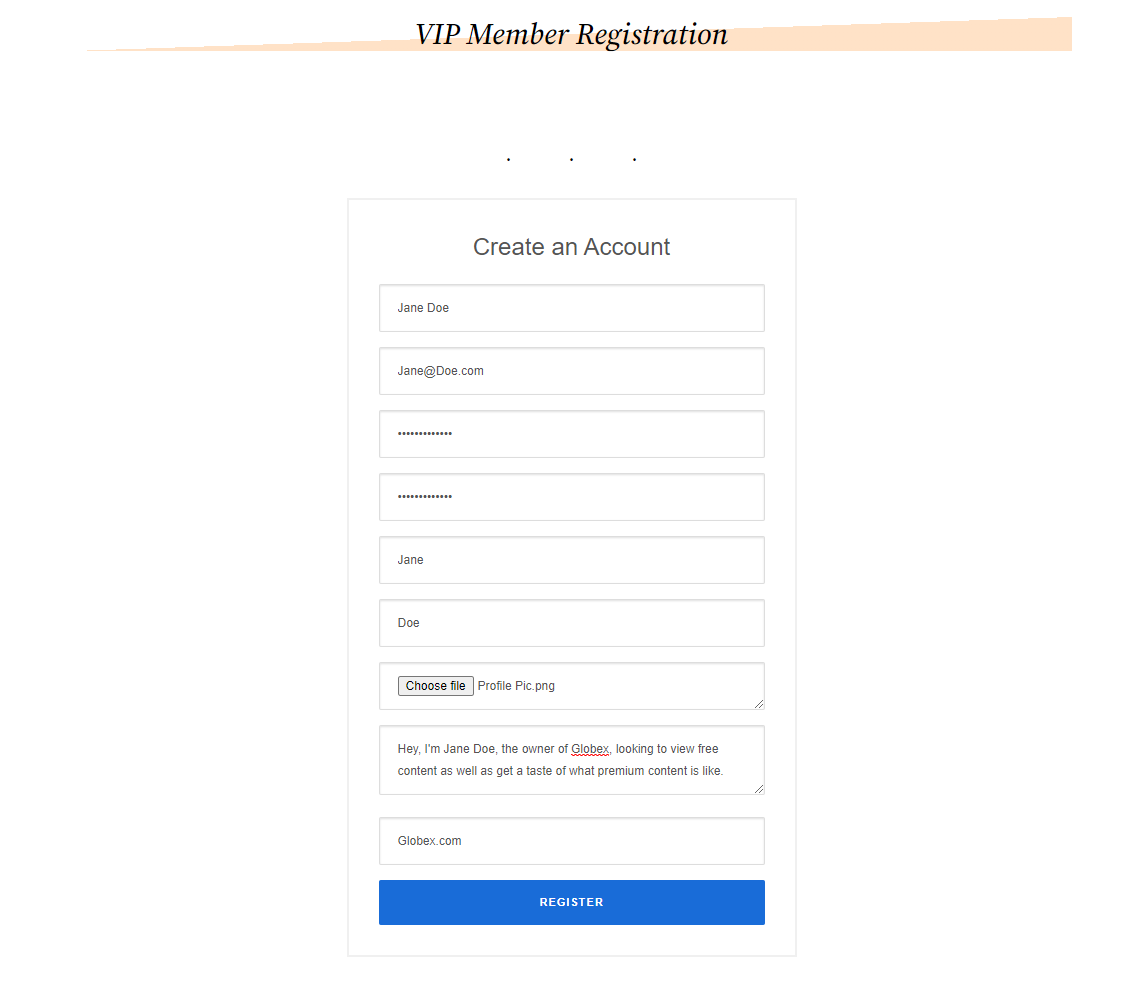
Creating easy-to-use registration and login pages also helps free users on your site easily register themselves and access the freemium content available to logged-in users only.

Conclusion
Converting free users to paying customers helps your business generate more revenue, increases business growth, and improves customer satisfaction. You can cater to a broader audience if your membership site facilitates free users who want a glimpse of premium content and are looking to pay extra for premium content.
However, creating a solid membership site is difficult, especially if this is your first time. You must use a reliable membership plugin like ProfilePress to convert free users to paying customers on your WordPress site.
Ready to start converting free users to paying customers? Get ProfilePress today!