How to Sell Services Online Using WordPress
Do you want to start selling services online on your WordPress website? Do you want to automate the process of invoicing your customers?
If you are selling a service, you know how time-consuming it can be to manage orders and send invoices. Selling your services on your website automates the entire process and saves you hours.
In this article, I’ll show you the easiest way to start selling your services online using your WordPress website.
Meaning of a Services
A service is “The action of helping or doing work for someone”. It is work you provide manually for a person or organization.
Selling services differs from selling products because you provide them directly to each customer. This may be face-to-face in person or online.
The critical point is that you (or your employees/contractors) will be personally involved in providing services. In other words, you’ll be a service provider. A service cannot be fully automated because if this happens, it becomes a product instead.
Why Charge for Services on Your Site?
Charging for services or products on your WordPress website has numerous benefits, including promoting cash flow, increasing revenue, and making your business more efficient.
Selling services on your WordPress site can be beneficial because:
- It removes manual invoice processes. Only around 63 percent of invoices are paid within 30 days. That means businesses must spend time chasing down payments — on top of the time spent managing invoice processes, to begin with. When you sell services online, you get the payment immediately through the methods you set up.
- It lets you sell services 24/7. When people can buy right from your website, the cash-flow machine works — even when you don’t. That means you can sell services at night or on the weekends without a single person in your office.
- It makes it easy to sell recurring services. For example, you can set up options for subscription-based services like maintenance plans.
- It streamlines payment handling. People can pay with their preferred methods online, and the money is deposited into their accounts automatically.
- It’s a familiar and convenient option for most customers. Many people have recently made purchases online with these systems so that the process will feel friendly and safe.
- It lets you capture valuable customer information. When people purchase via your website, you can capture useful customer information while making the payment. That can include an email address that lets you market future services to them.
The Easiest Way To Sell Your Services Online
If you’re looking to sell your products and services through your WordPress website, the WordPress plugin directory has many options available. However, many of these plugins have a steep learning curve and require technical knowledge to use effectively. That’s why we created ProfilePress – an all-in-one plugin for building membership websites that are incredibly easy to use.
With ProfilePress, you can sell your products and services on your WordPress website hassle-free.
In this article, I will guide you through the process of selling your services using WordPress. First, you need to download and install ProfilePress. Once you have completed the installation, proceed to the next step. However, if you prefer to continue reading without installing ProfilePress, I will still show you how easy it is to use.
How To Set Up Stripe As a Payment Method
Stripe is one of the supported payment methods in ProfilePress, which you can use to accept payments and sell your services online. Once you’ve installed ProfilePress, you’ll need to set up a payment method to start taking payments.
ProfilePress supports the following payment gateways: Stripe, PayPal, Razorpay, Paddle, Paystack, Direct Bank Transfer, Mollie.
Read the section below if you want to use PayPal for payments.
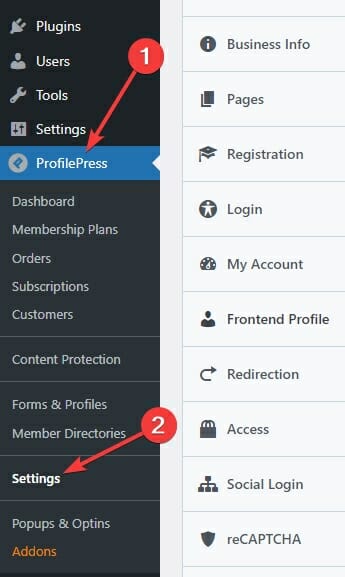
Log into your WordPress website’s dashboard. Then, navigate to the settings section of ProfilePress from the Sidebar:
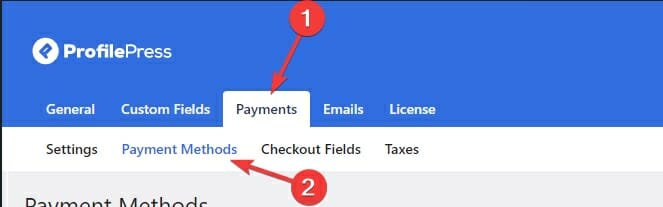
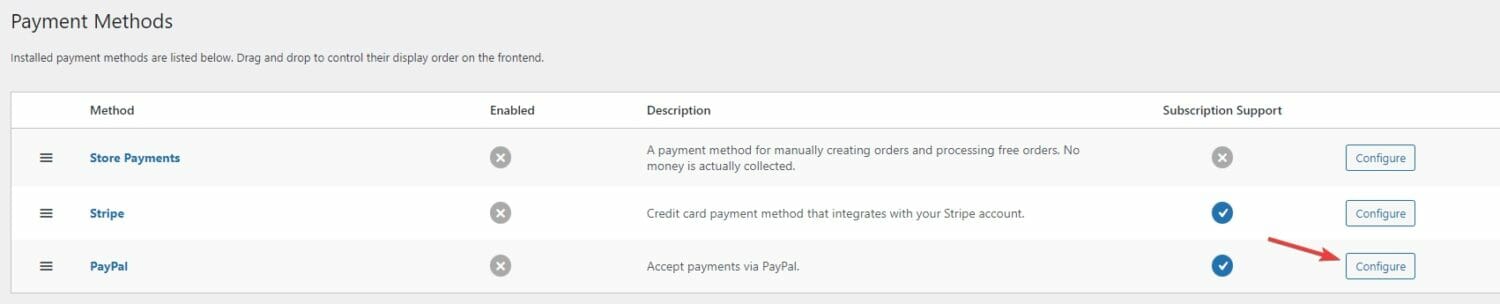
Now, click the Payments tab on the top, and open the Payment Methods sub-tab:
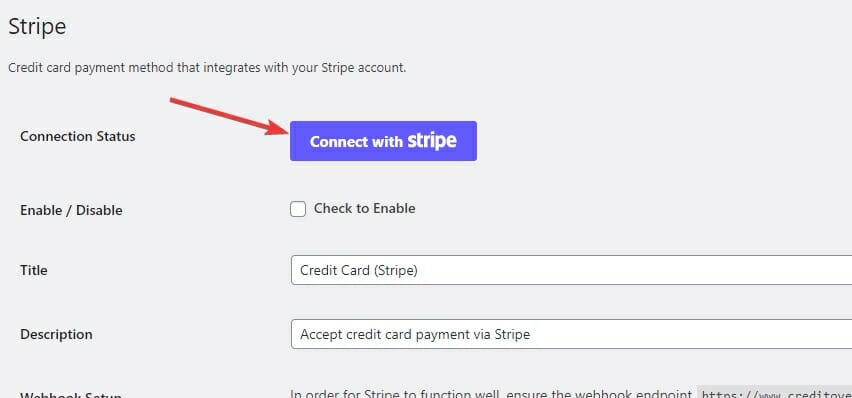
Click the Configure button next to Stripe:

You’ll now see the configuration screen for Stripe.
Click the Connect Stripe button to connect your Stripe account:
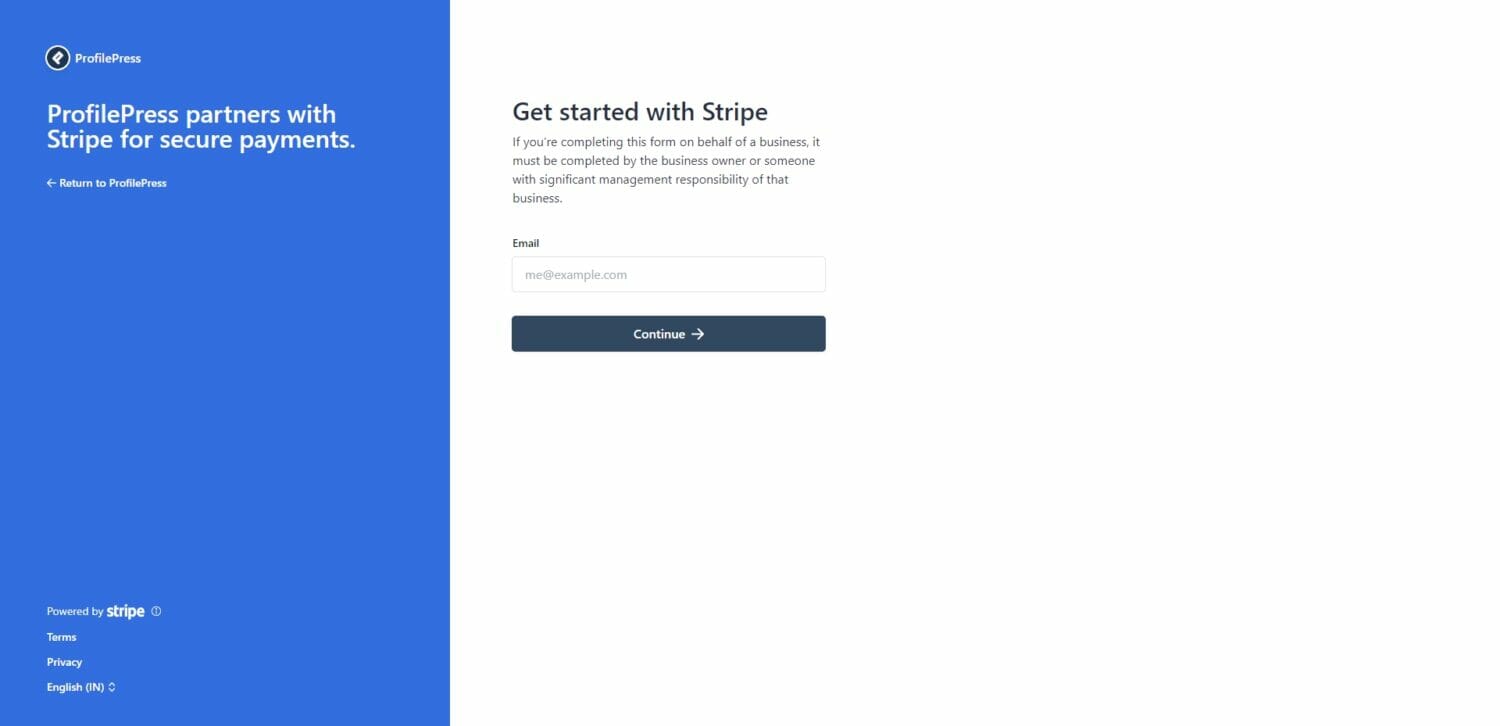
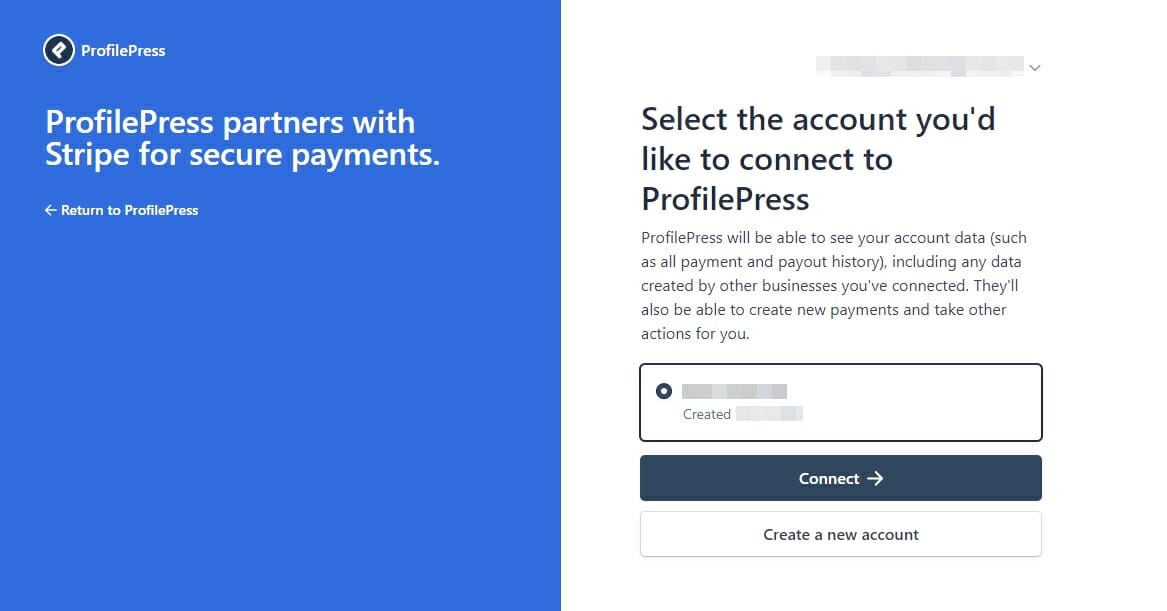
Next, log into the Stripe account you want to use:
Select the Stripe account that you wish to use and click the Connect button:
Your Stripe account is now connected to your website.
You should be redirected back to the ProfilePress configuration screen when you click the Connect button:
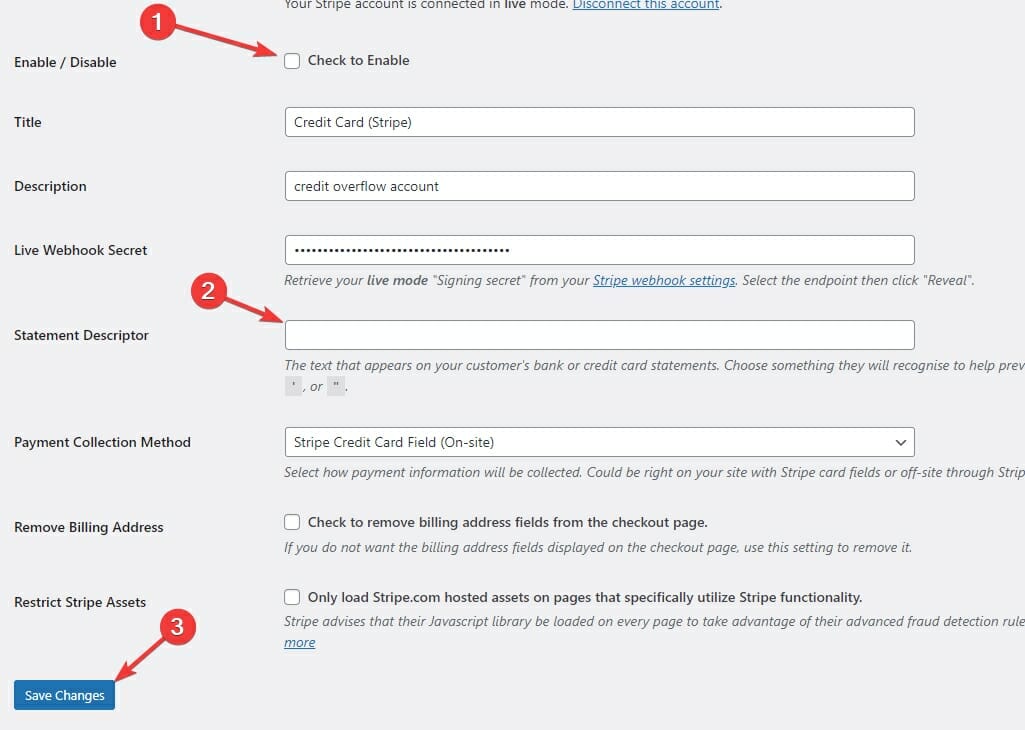
All you need to do now is enable this payment method, choose a Statement Descriptor, and click the Save Changes button.
That’s it! Your website is now ready to start accepting payments with Stripe.
How To Set Up PayPal As a Payment Method
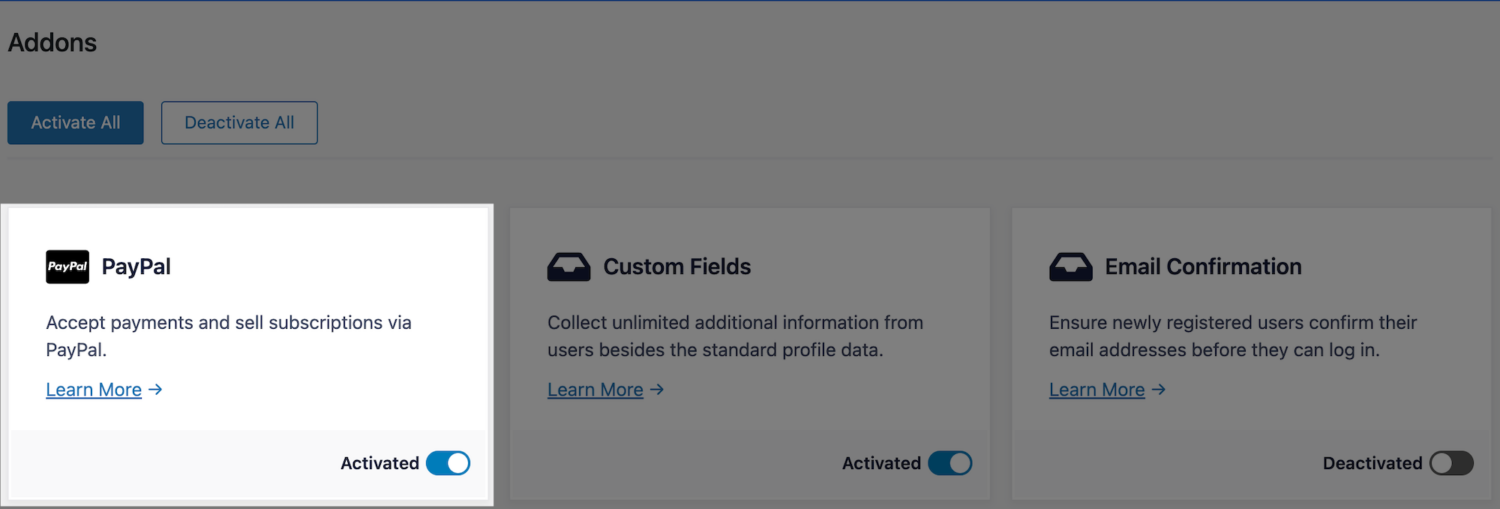
To start accepting PayPal payments on your website, you’ll need to enable the PayPal addon that comes with ProfilePress.
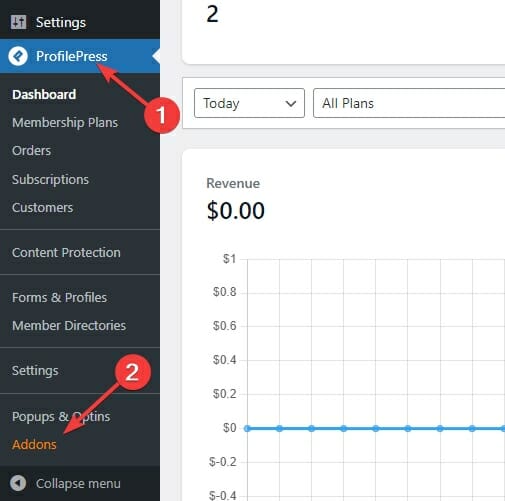
Navigate to the addons section of ProfilePress:
Click the radio button under the PayPal addon to enable it:
Now you’ll need to connect your PayPal account.
First, navigate to the Settings page under ProfilePress:
Now, navigate to the Payment Methods sub-tab under the Payments tab:
Finally, click the Configure button next to PayPal:
This will take you to the configuration page for PayPal:
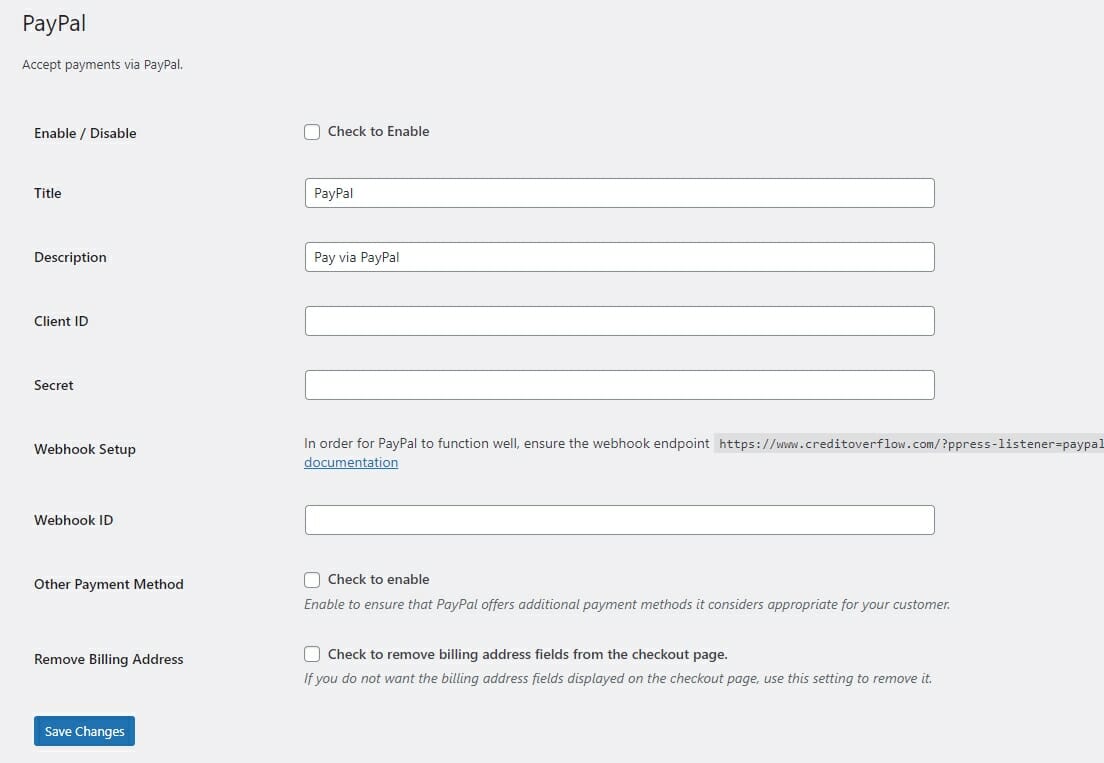
To get your Client ID and Secret, you’ll first need to log into the PayPal developer site:
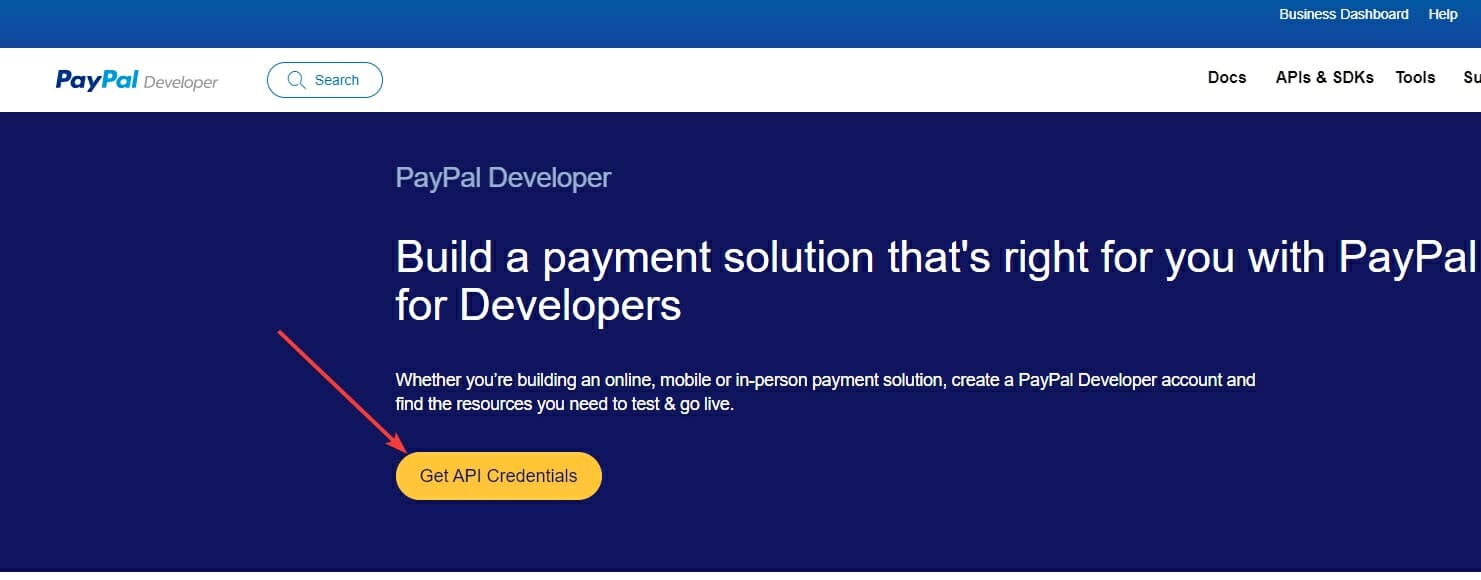
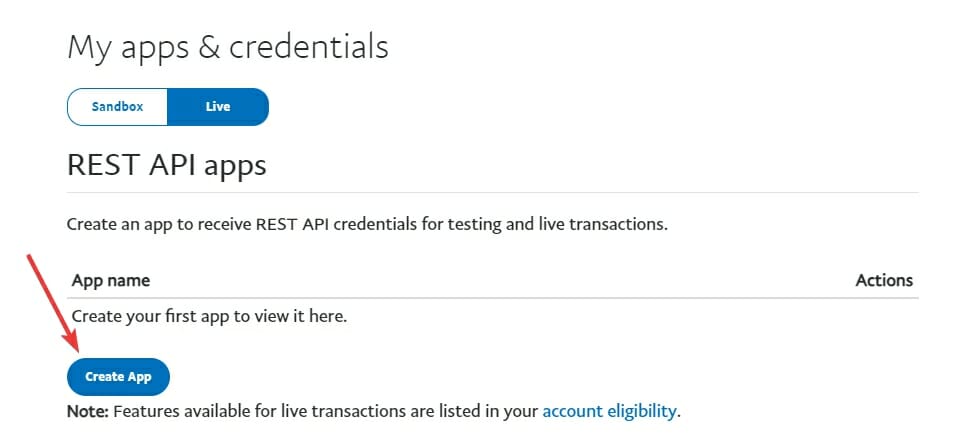
When you are logged into the developer site, click the Live tab button:
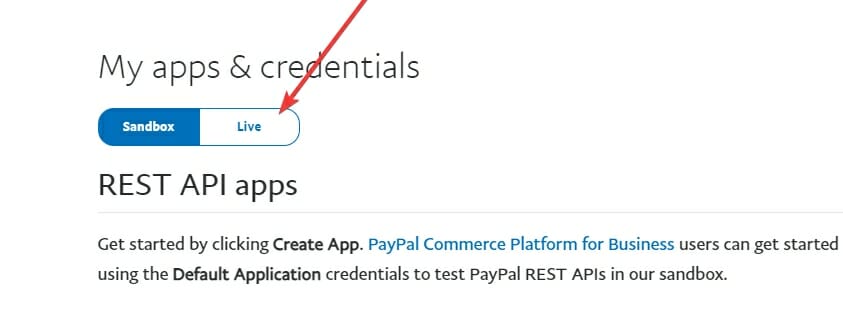
You’ll now be able to create a new app:
Enter a name for this app:
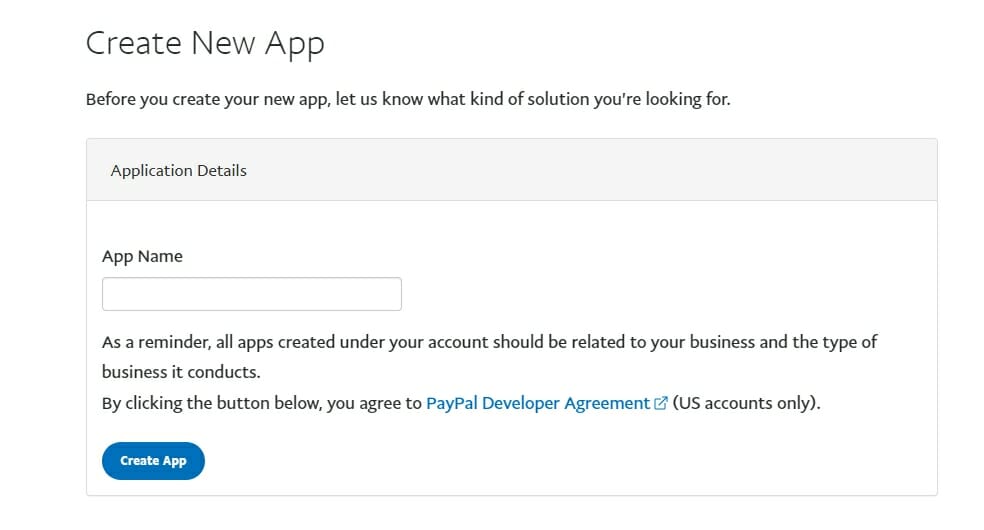
You can use your website’s name if you want.
When you click the Create App button, it will take you to your new app’s dashboard:
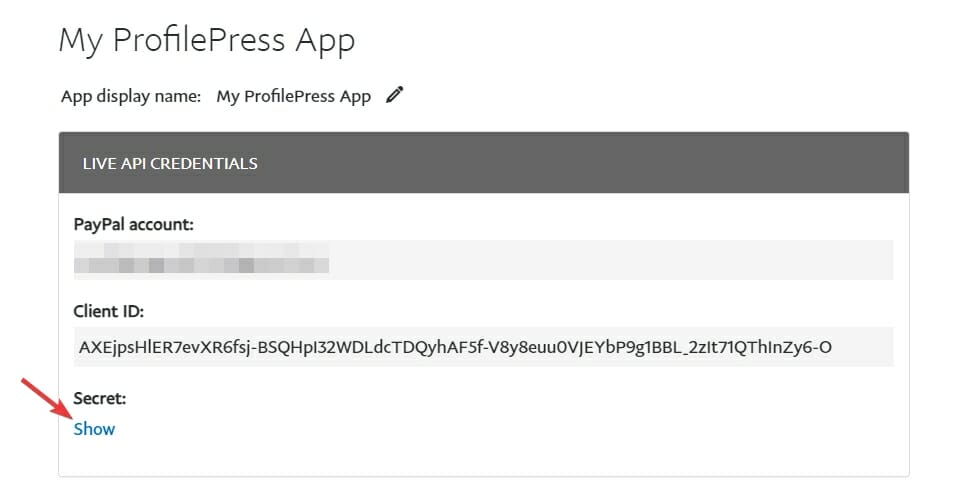
Click the show link under Secret to make it visible.
Now, copy both the Client ID and Secret.
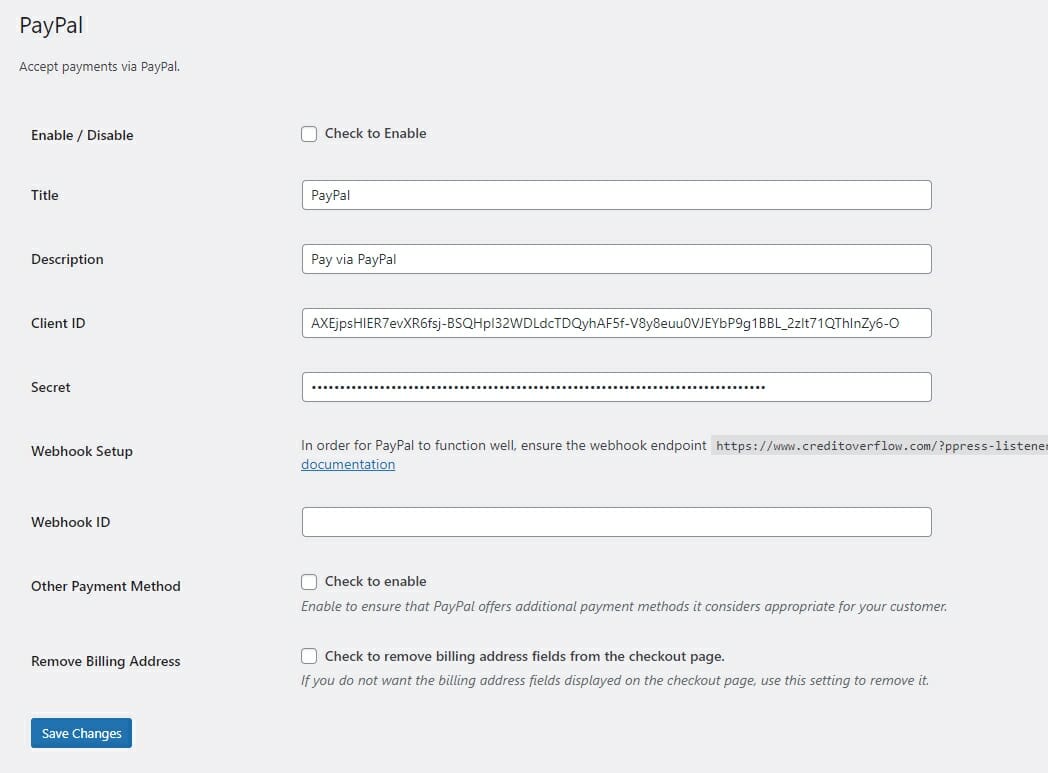
Then, paste them into the ProfilePress configuration screen from before:
Now, copy the Webhook URL that you see on this screen: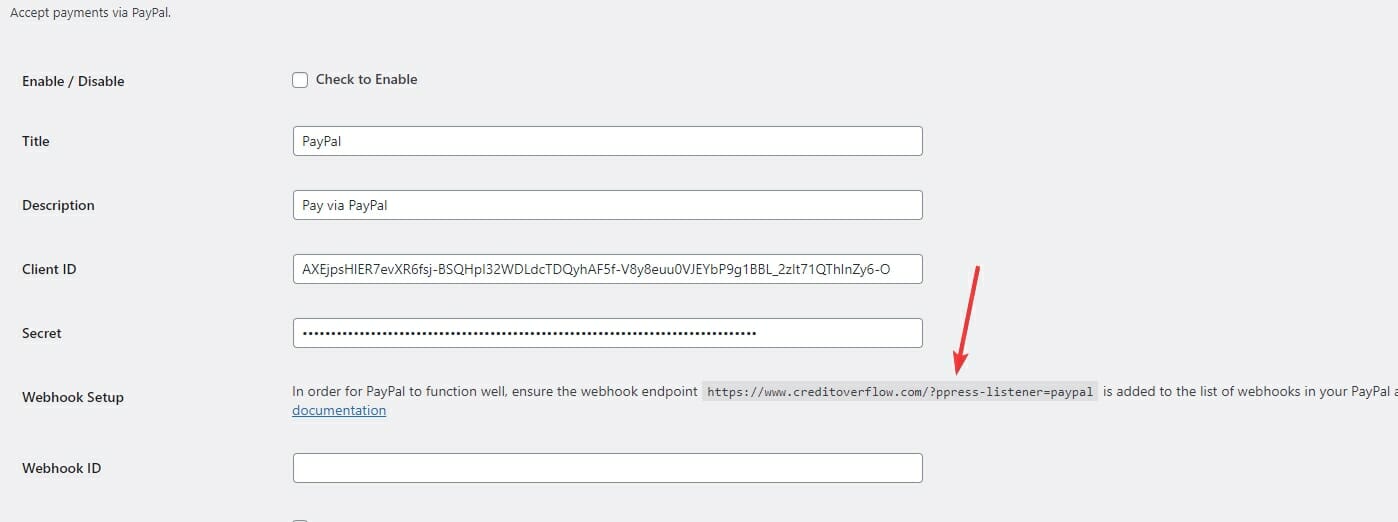
You’ll need this URL in a second.
Go back to your new PayPal app’s dashboard on the PayPal developer site.
Scroll down a little, and you’ll see a section for Webhooks. Click the Add Webhook button.
Now, enter the URL you copied into the Webhook field:
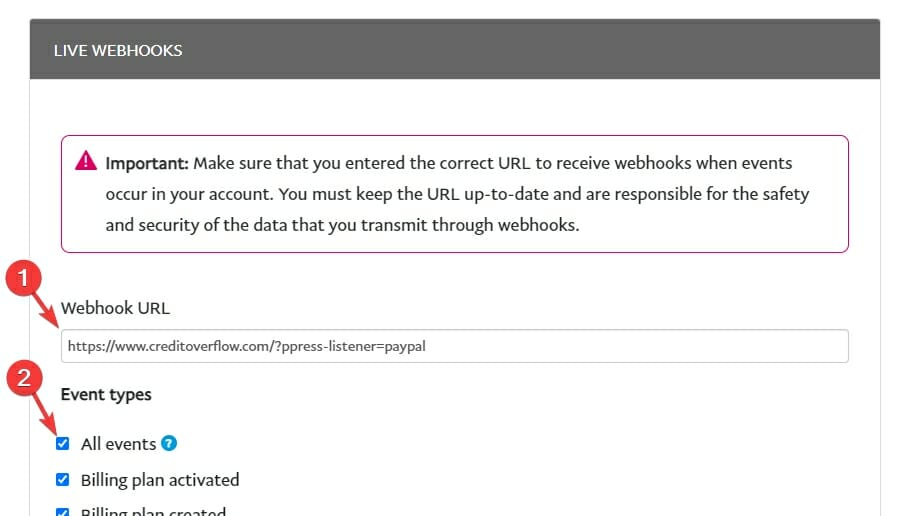
Next, click the All events checkbox, and then scroll down to click the Save button:

You’ll now see a Webhook ID:
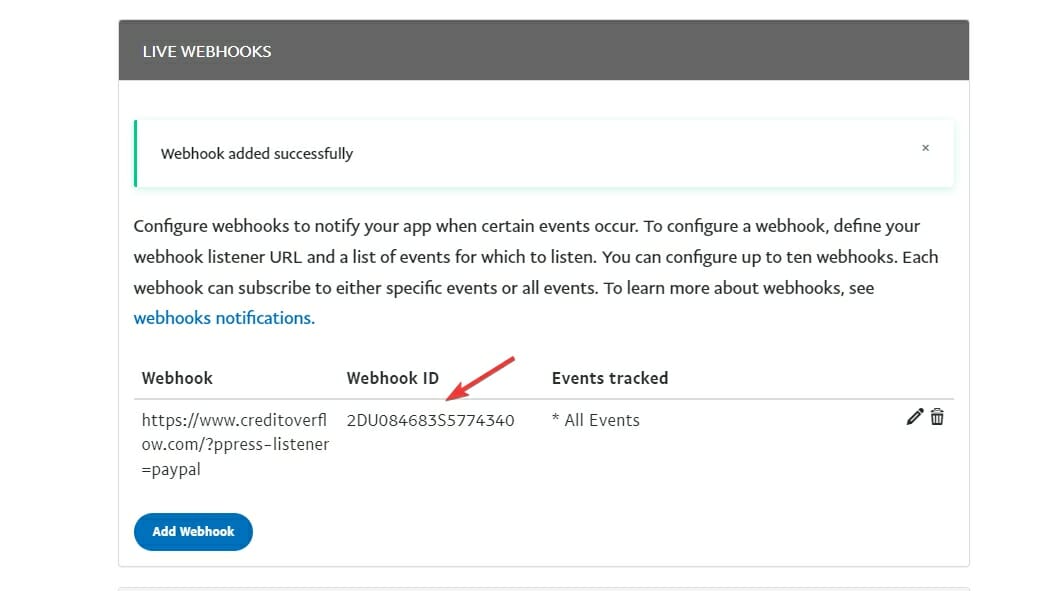
Copy it and paste it into the ProfilePress configuration page:
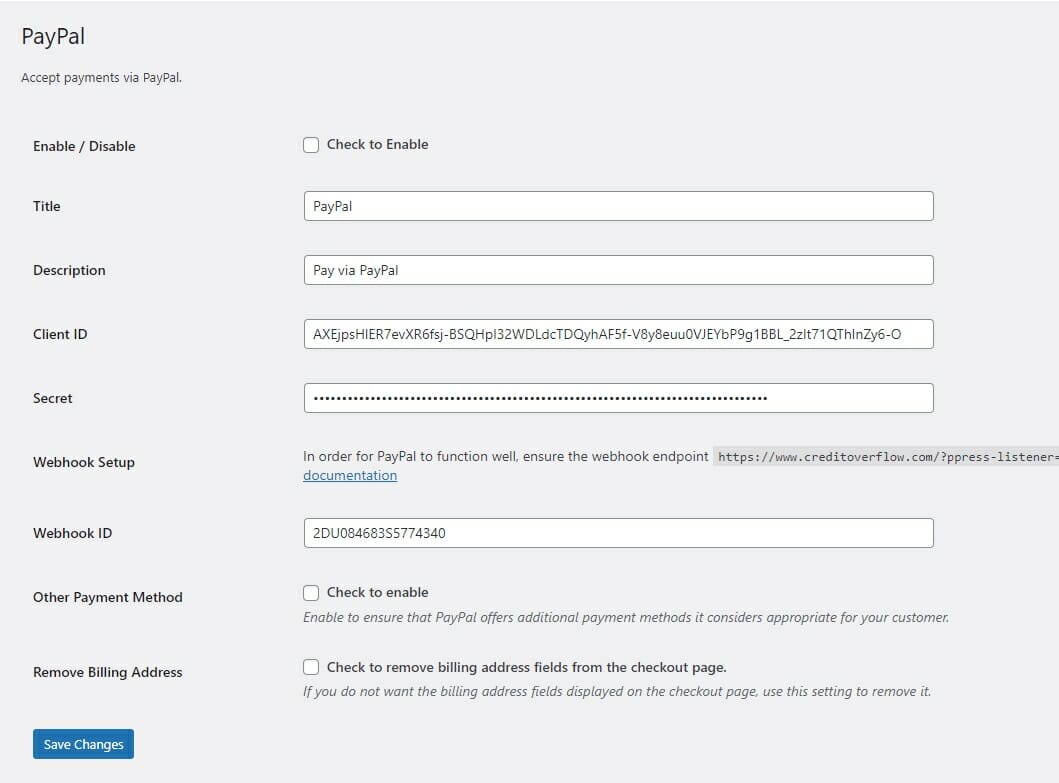
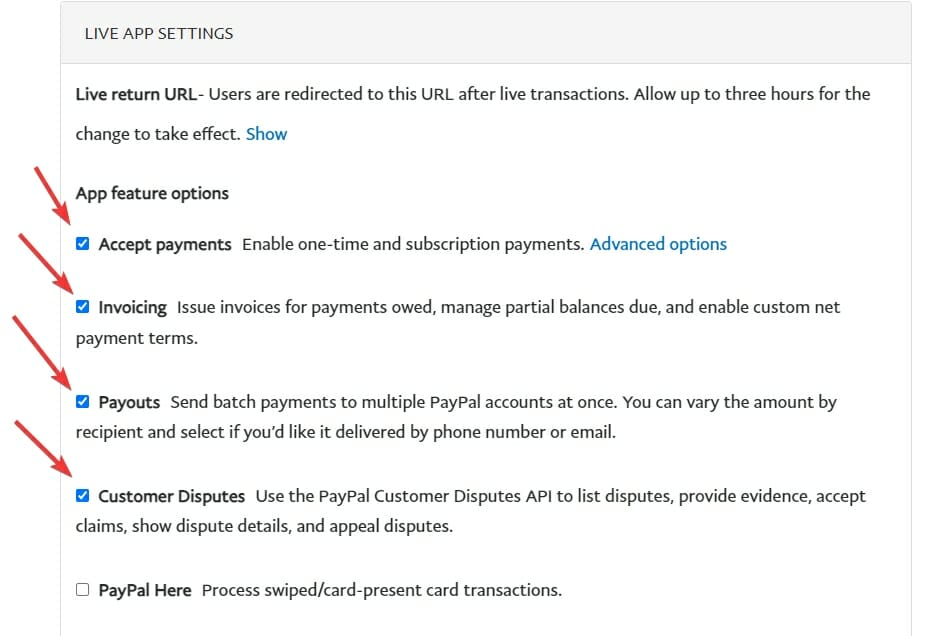
Now, go back to the settings page of your new app on the PayPal developer site. Scroll down a little until you see a section called Live App Settings.
Check all of the top four options:
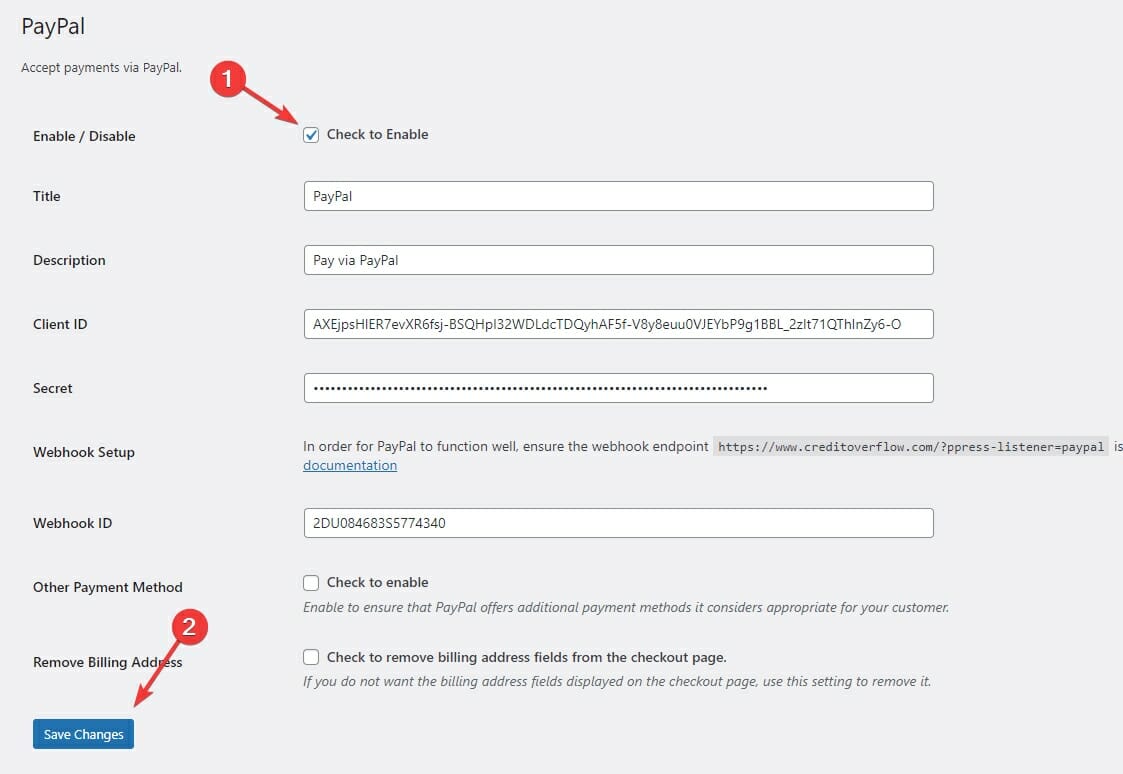
Finally, come back to the ProfilePress configuration screen.
Click the Enable checkbox to enable this new payment method, and then click the Save Changes button at the bottom:
How To Create Pricing Plans For Your Services
To start selling your services, you need to create your pricing plans first.
ProfilePress allows you to create recurring subscription plans and one-time payment plans for your services.
So, you can sell monthly, yearly, quarterly, or weekly subscriptions to your clients.
Or, you can sell one-time payment services, which your clients can reorder as many times as they want, whenever they want.
I’ll now show you how easy it is to set up both of these with ProfilePress:
How To Create a Plan for Selling Services
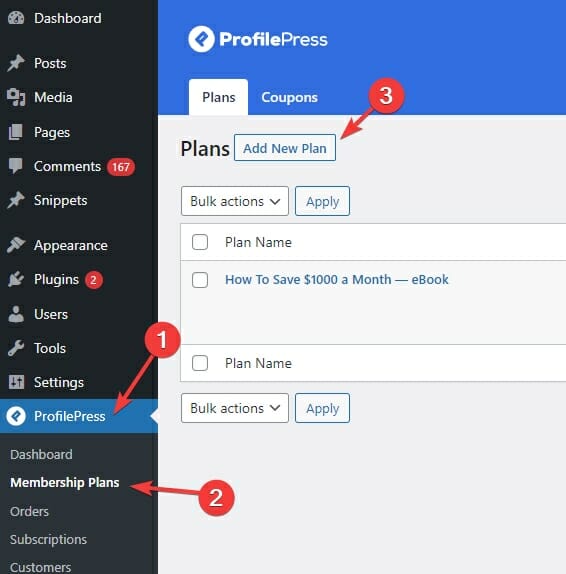
To sell your services on your WordPress site using ProfilePress, you need to first create a plan.
Navigate to the Membership Plans section of ProfilePress and click the Add New Plan button:
This will take you to the new plan configuration screen:
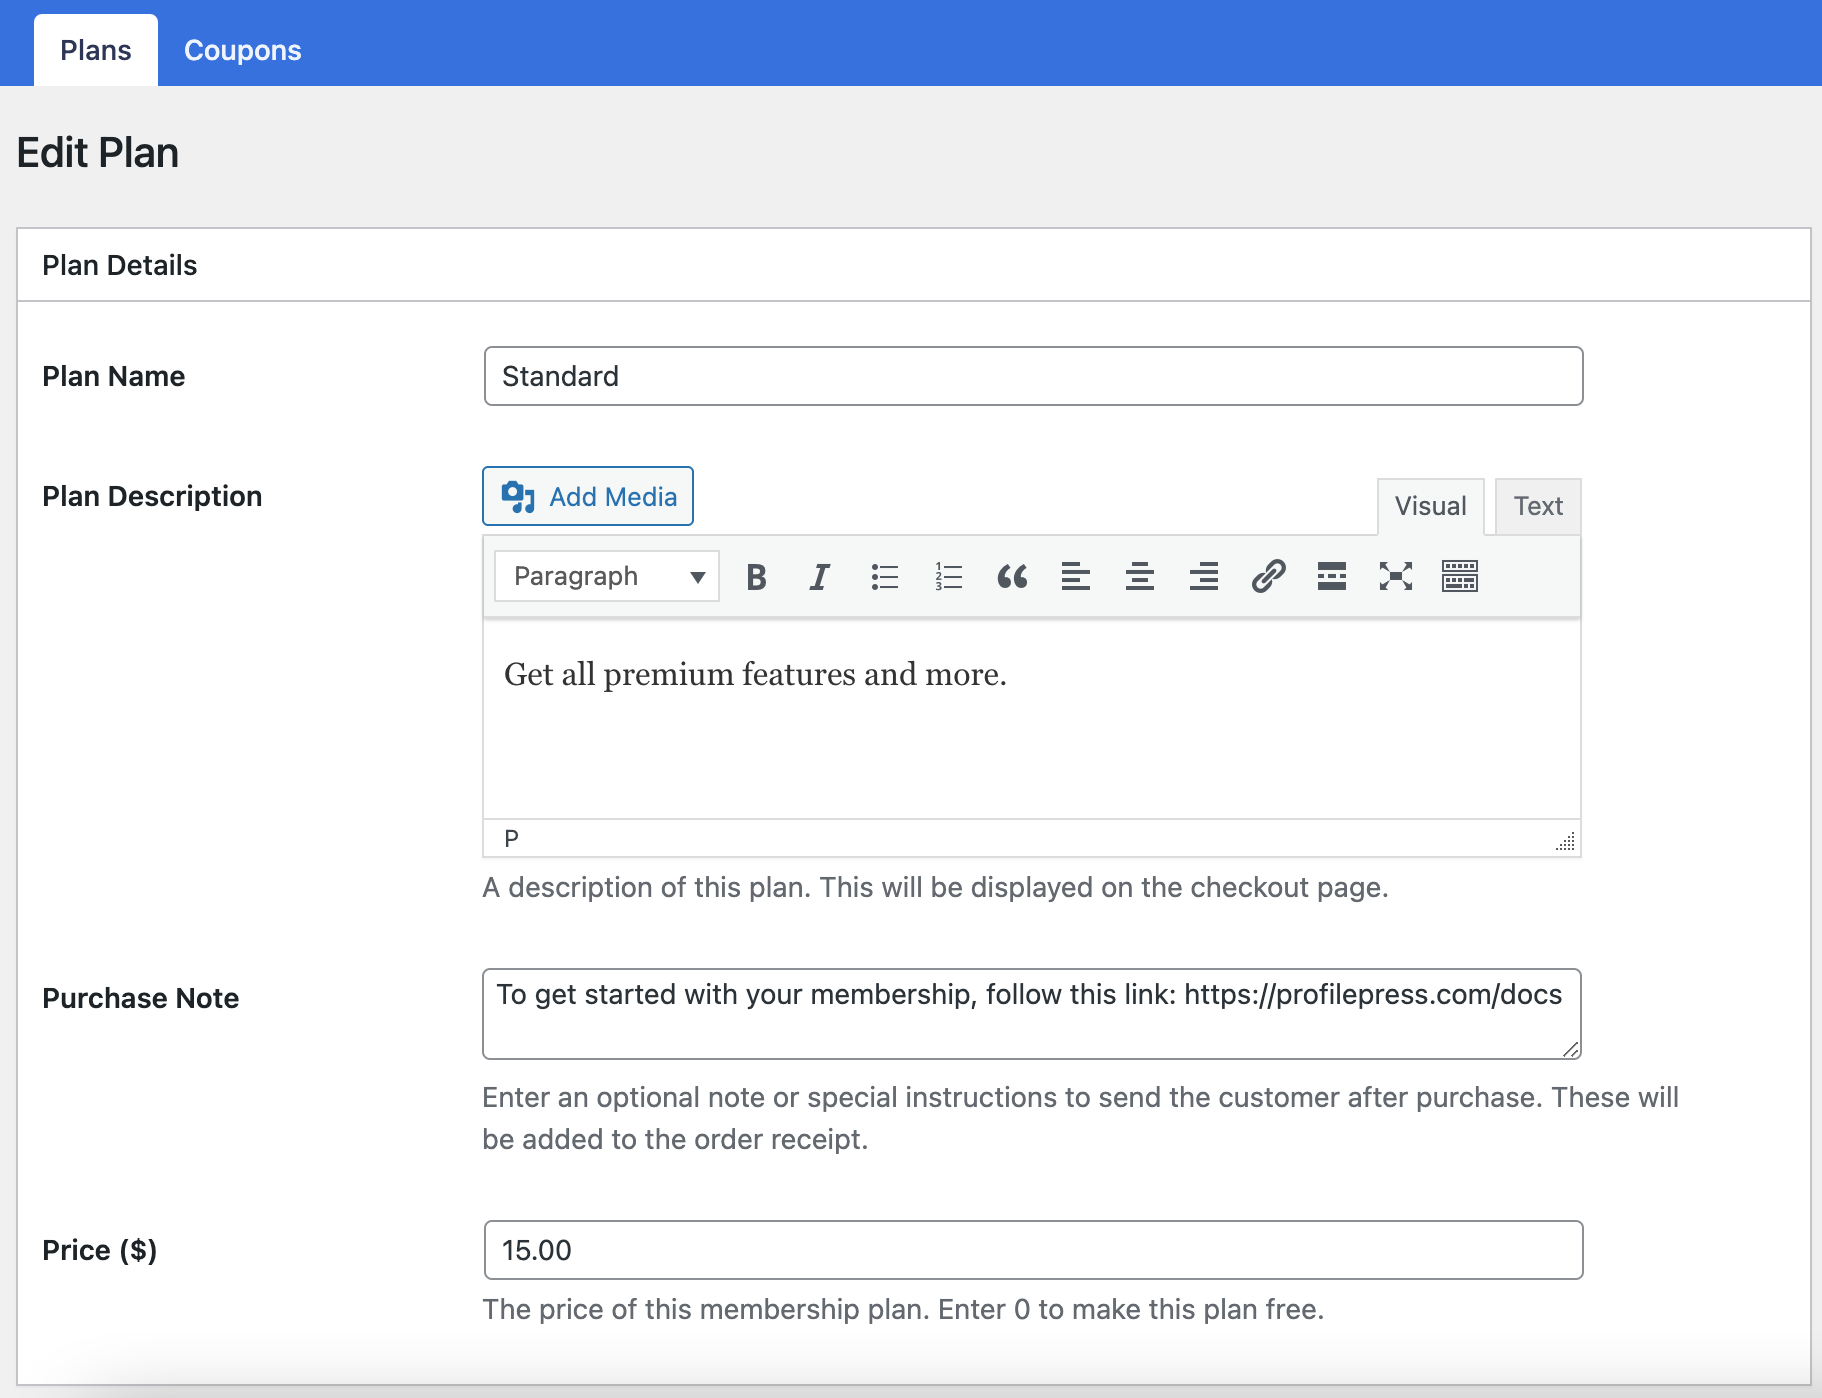
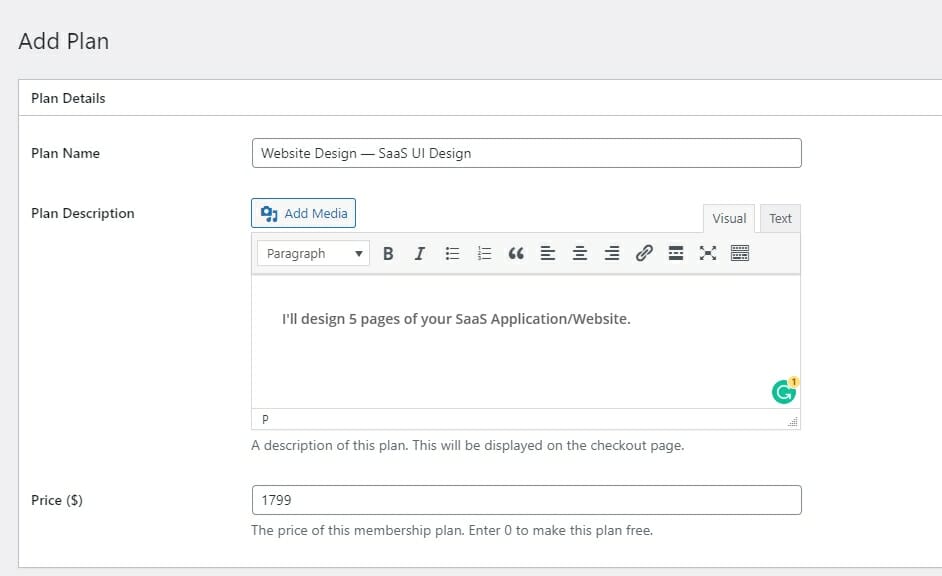
Here are the details you need to fill out first:
- Plan Name: This is the publicly visible name of the plan.
- Plan Description: This description will be displayed on the checkout page. So, describe what this plan offers as descriptive and straightforward as possible.
- Price: This is the price that your customers will be charged on a regular interval.
- Purchase Note: This is helpful in providing special instructions or details to your customers after their purchase. This can also be a thank you note, usage instructions, or a request for review.
Now, scroll down to the Subscription Settings to customize how this payment plan works:
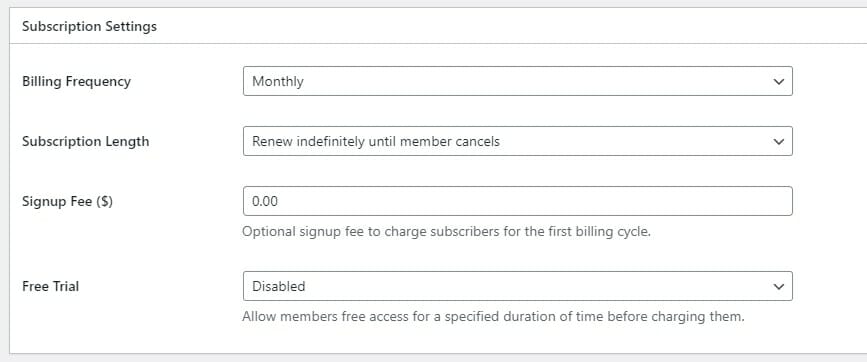
- Billing Frequency: How often do you want to charge your customers? If you select weekly, your customers will be charged every week.
- Subscription Length: This is how long the subscription will last. If you select the Fixed option, your customers will only be charged that number of times. This lets you create installment plans for your customers. Leave it be if you want your customers to be charged until they cancel.
- Sign-Up Fee: This allows you to charge your customers a one-time signup fee. This will be charged in addition to your plan’s price.
- Free Trial: Do you wish to offer a free trial for your service? Select a trial length from the drop-down. Your customers will only be charged after the trial period is over.
Once you’re done customizing your payment plan, click the Save Plan button to publish it and make it go live!
How To Create a One-Time Payment Plan
Navigate to the Membership Plans section of ProfilePress and click the Add New Plan button:
Now, enter a name, a description, and a price for this new payment plan:
Now, scroll down to the Subscription Settings section, and select one-time as billing frequency:

Finally, click the Save Plan button to publish this plan.
IMPORTANT: The Checkout Page
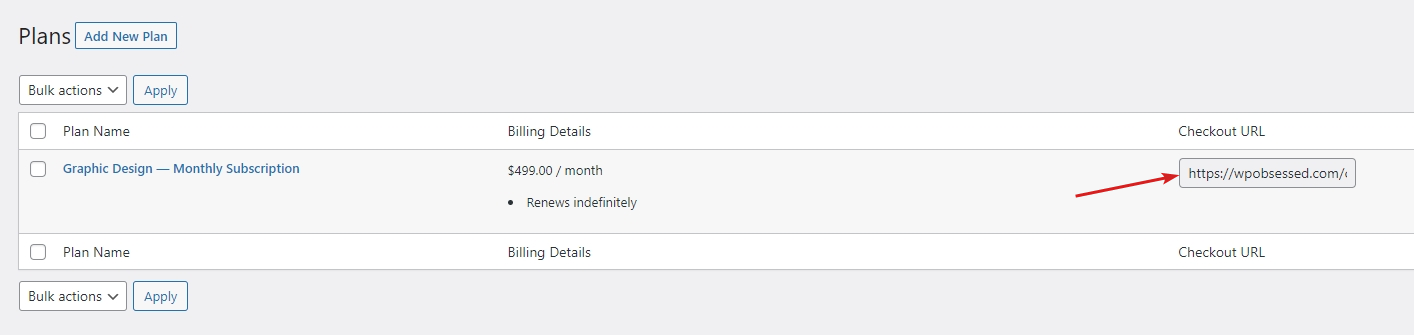
Once you’ve created and published a payment plan, ProfilePress will generate a checkout page for that plan. This is the page you will link to when you want to give your customers the option to checkout.
You can find the link to the checkout page of your payment plans from the Membership Plans section of ProfilePress:
If you open the link, you’ll see a checkout page that looks something like this:
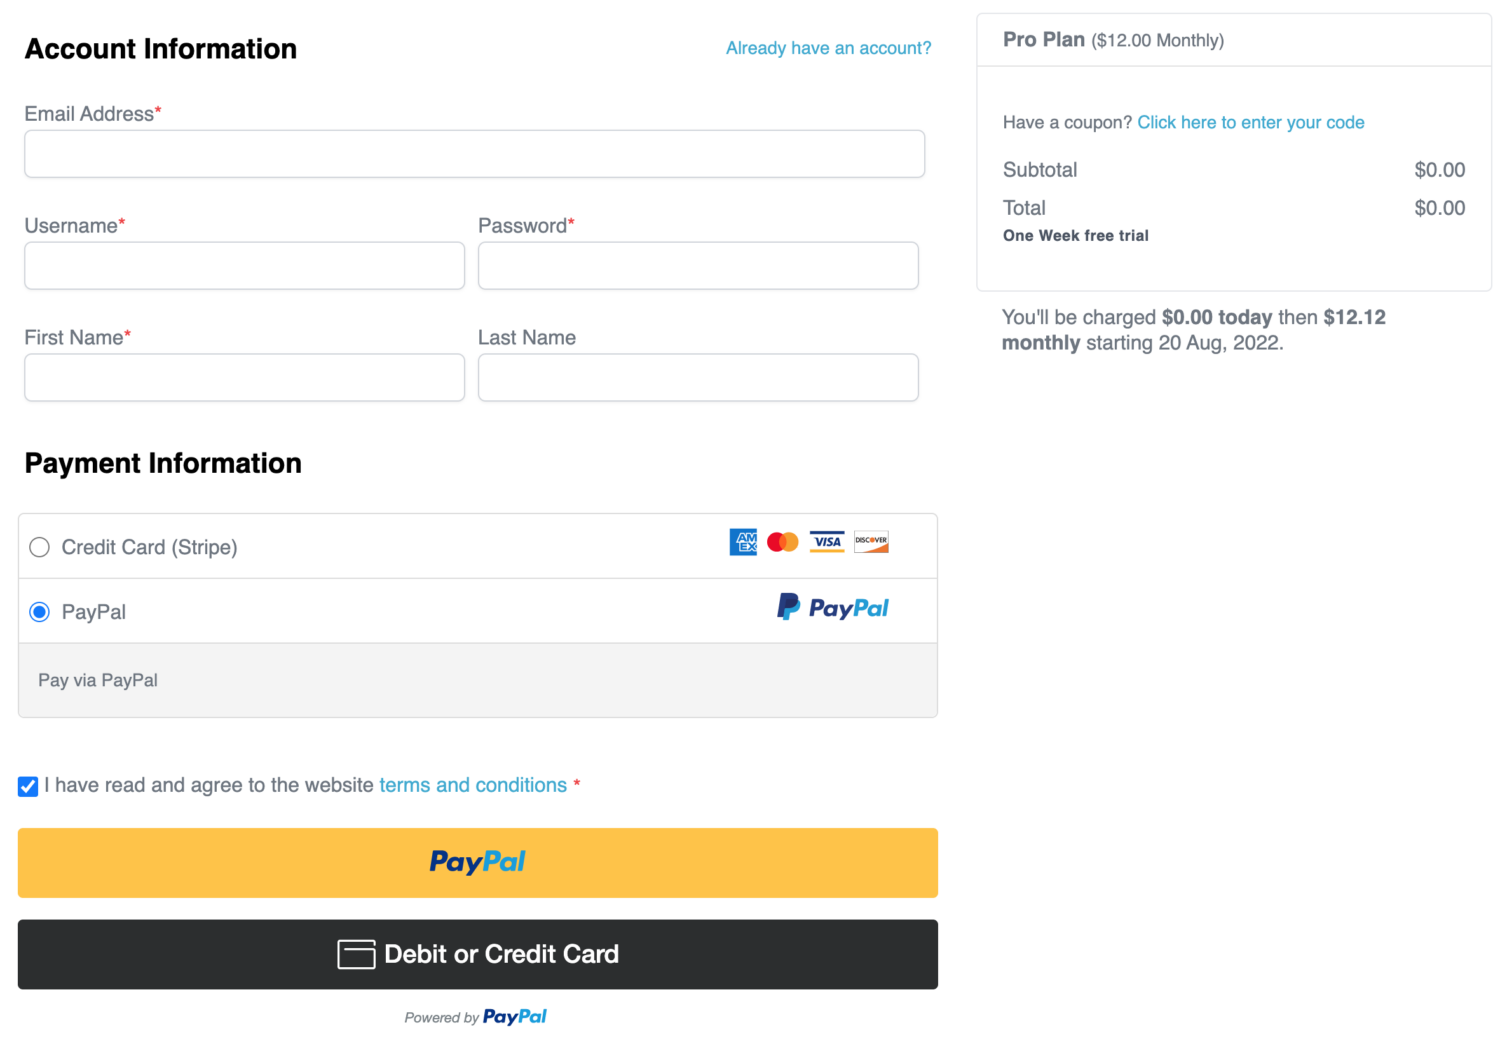
Whatever payment method you enable will be displayed as an option here.
You can send this link to your customer directly if you want. You can email it to them or share it on social media.
How To Manage Orders
When you receive a new order for your services, ProfilePress will send you an email to notify you.
If you want to see all your current orders, navigate to the Orders section of ProfilePress:
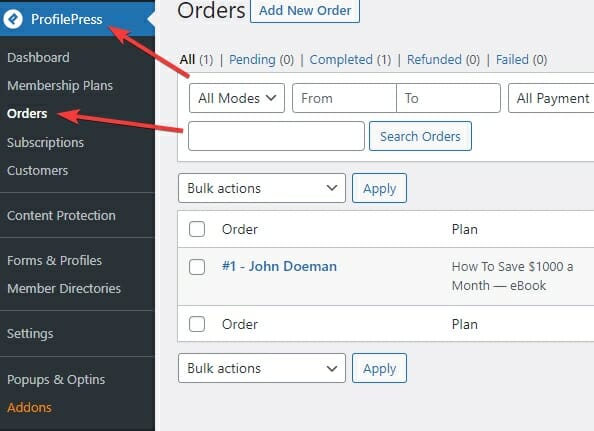
On this page, you can see all your orders at a glance:
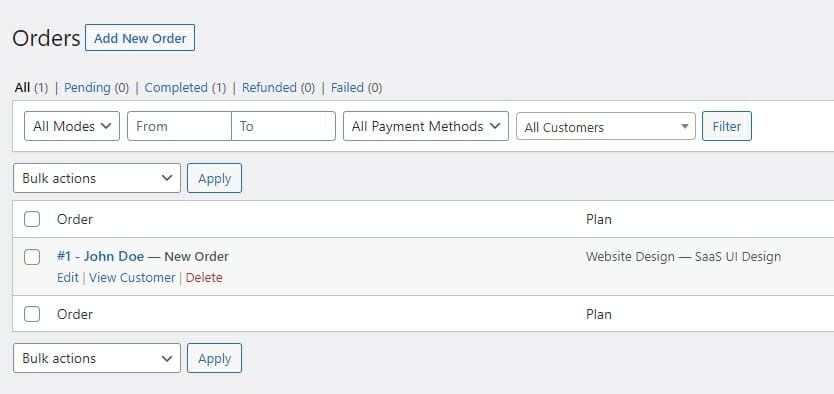
For every order, you can see its status, what plan the user bought, the customer’s name, payment method, the date the order was placed, etc.
If you want a detailed view of the order, click the Edit link that appears when you take your mouse over an order. It will take you to this page:
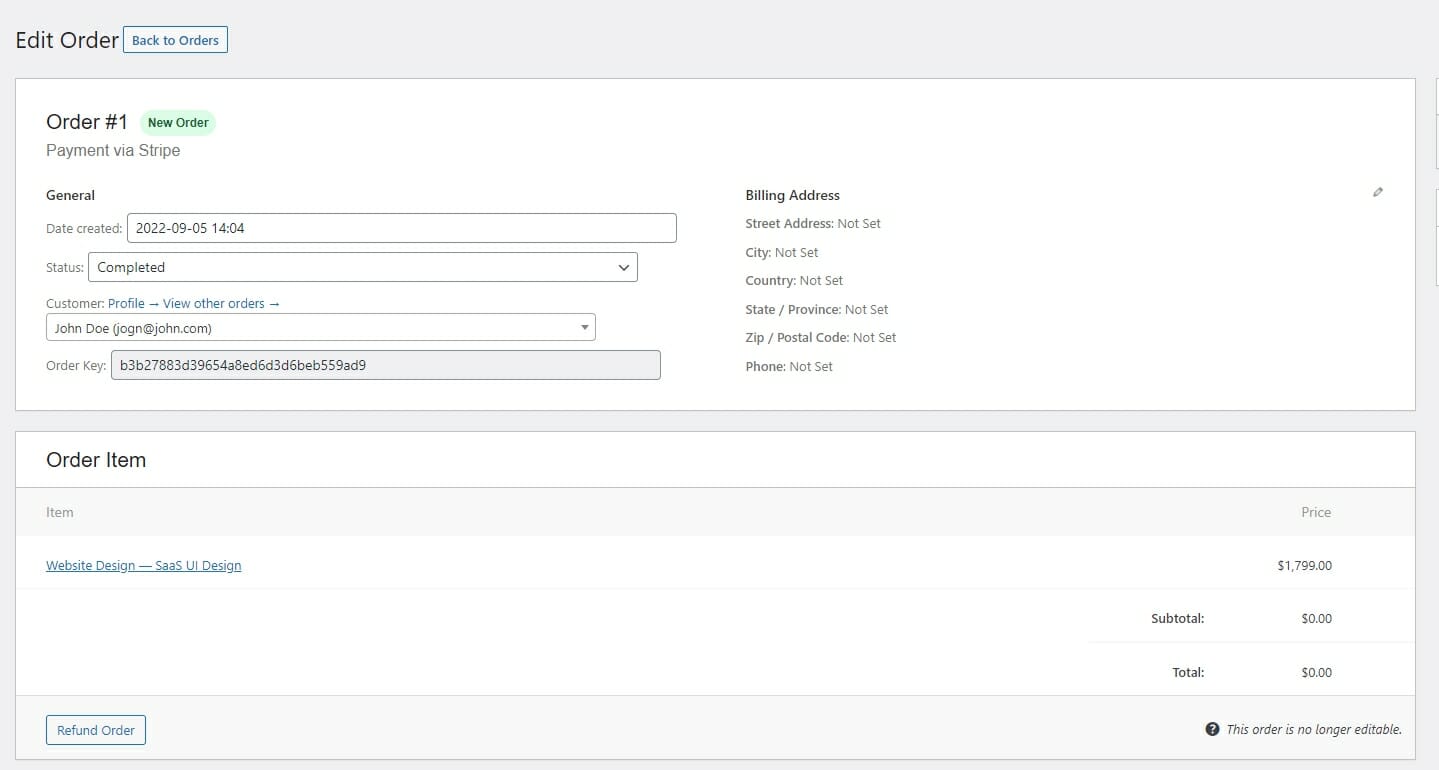
This page will show you all the details about the order, such as what products were bought, the customer’s address, order status, email, the order key, etc. You can use this page to manually change an order’s status when you complete an order.
There’s another link on the Orders page: View Customer. This link takes you to the Customer Details page:
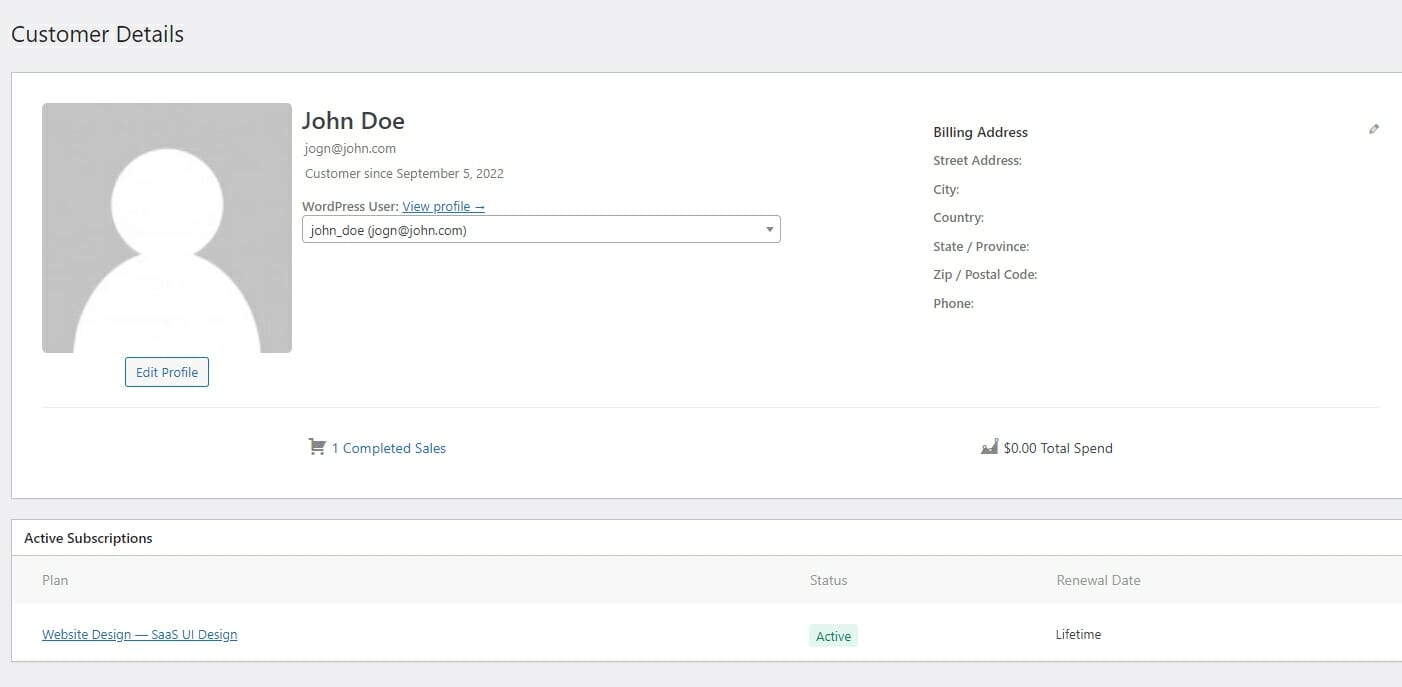
This page displays all the details about the customer stored on your servers. It tells you about their active subscriptions, orders, addresses, etc.
Use ProfilePress to Sell Services in WordPress
Selling your services online can offer significant benefits to your business by automating the invoicing process, increasing revenue, and improving overall efficiency.
With the ProfilePress e-commerce plugin, it has become easier than ever to sell your services through your WordPress website. By setting up payment methods such as Stripe or PayPal, you can start accepting payments and selling your services without any hassle.
Don’t wait any longer, start selling your services using WordPress website today!