How to Integrate Paystack with WordPress to Accept Payments
Do you want to integrate Paystack with WordPress so you can accept payments on your website?
Paystack is a digital payment platform that allows individuals and businesses in Africa to receive payments online.
Our Paystack addon lets you accept one-time and recurring payments via the different methods supported by Paystack on your WordPress site, including credit/debit cards, bank transfers, and USSD.
If you want to sell eBooks, courses, or paid memberships on your website, you can use ProfilePress. It’s a plugin that helps you build a membership website and sell your content to your users. With ProfilePress, you can set up payment options for your products, including one-time or recurring subscriptions. It’s an easy way to manage your sales and create a seamless customer experience.
In this article, you will learn how to integrate Paystack with WordPress to accept payments and sell digital products, subscriptions, and membership plans.
How to Accept Paystack Payments in WordPress
With ProfilePress and Paystack integration, you can do several things, such as:
- Sell courses and digital downloads that require a one-time payment
- Offer monthly subscriptions for your courses
- Sell monthly or yearly subscriptions for your gated content or membership site
This article will show you how to set up payment plans with ProfilePress. Once you learn how straightforward it is to create payment plans with this plugin, you can quickly sell a wide range of products on your website.
How To Set Up Paystack in WordPress
To begin integrating Paystack with your WordPress website, you need to install and activate the ProfilePress plugin on your WordPress site.
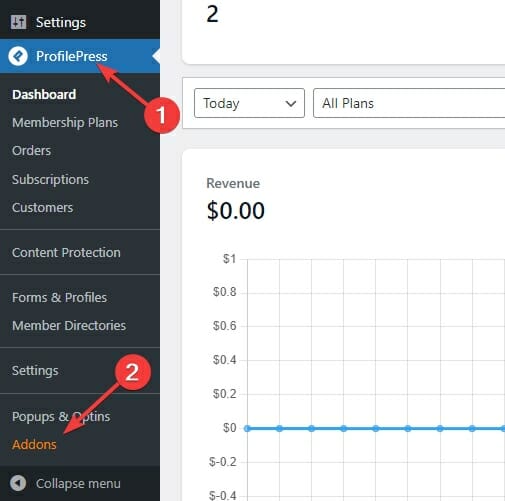
Next is to enable the Paystack addon by navigating to ProfilePress >> Addons.
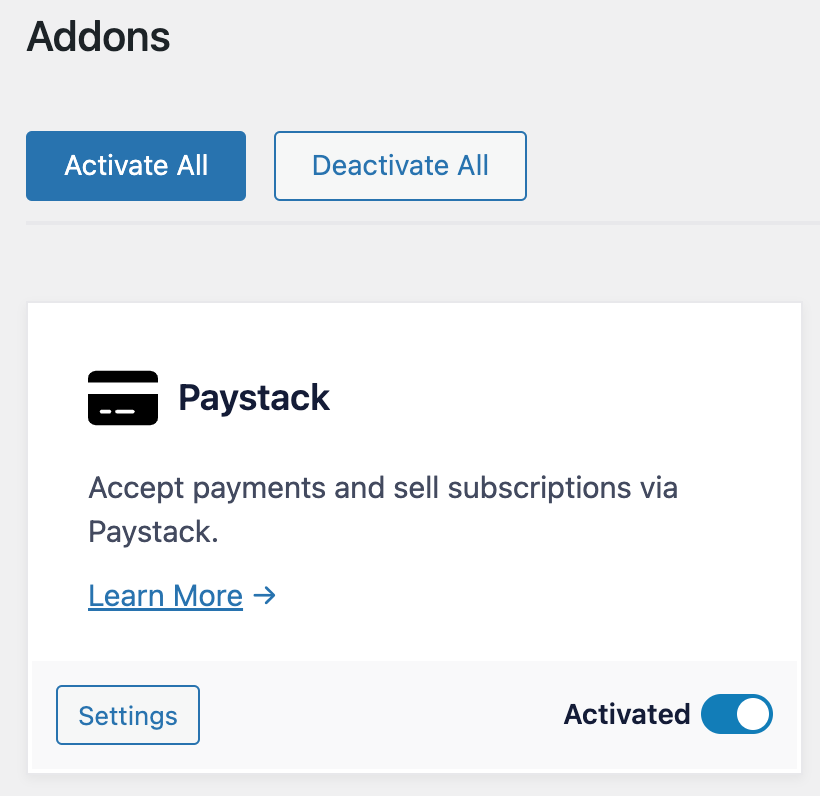
Now, enable Paystack payments:
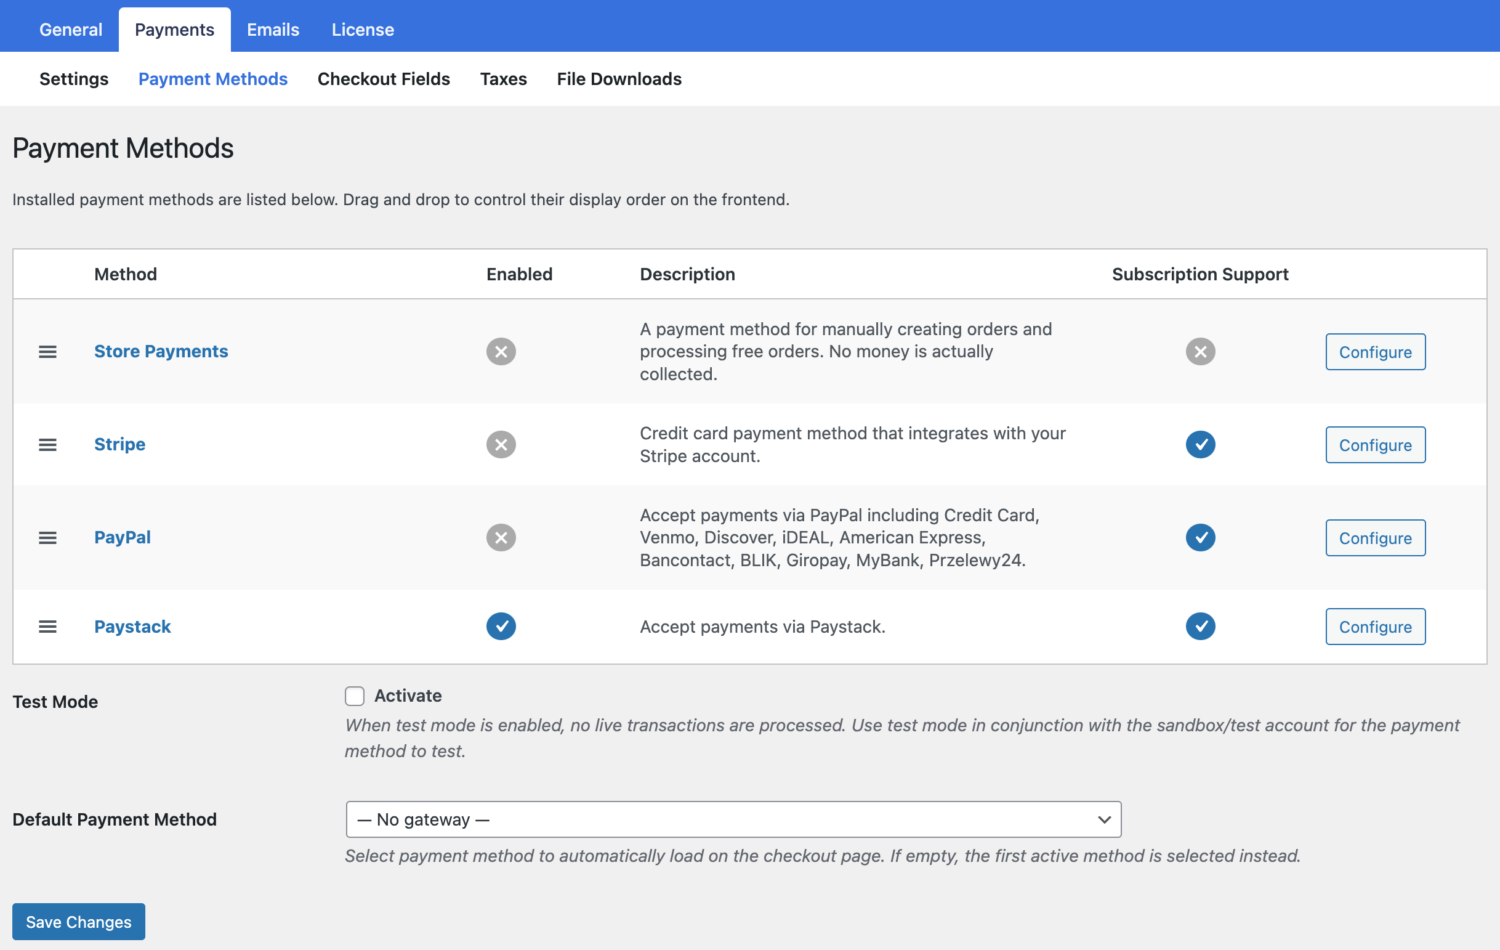
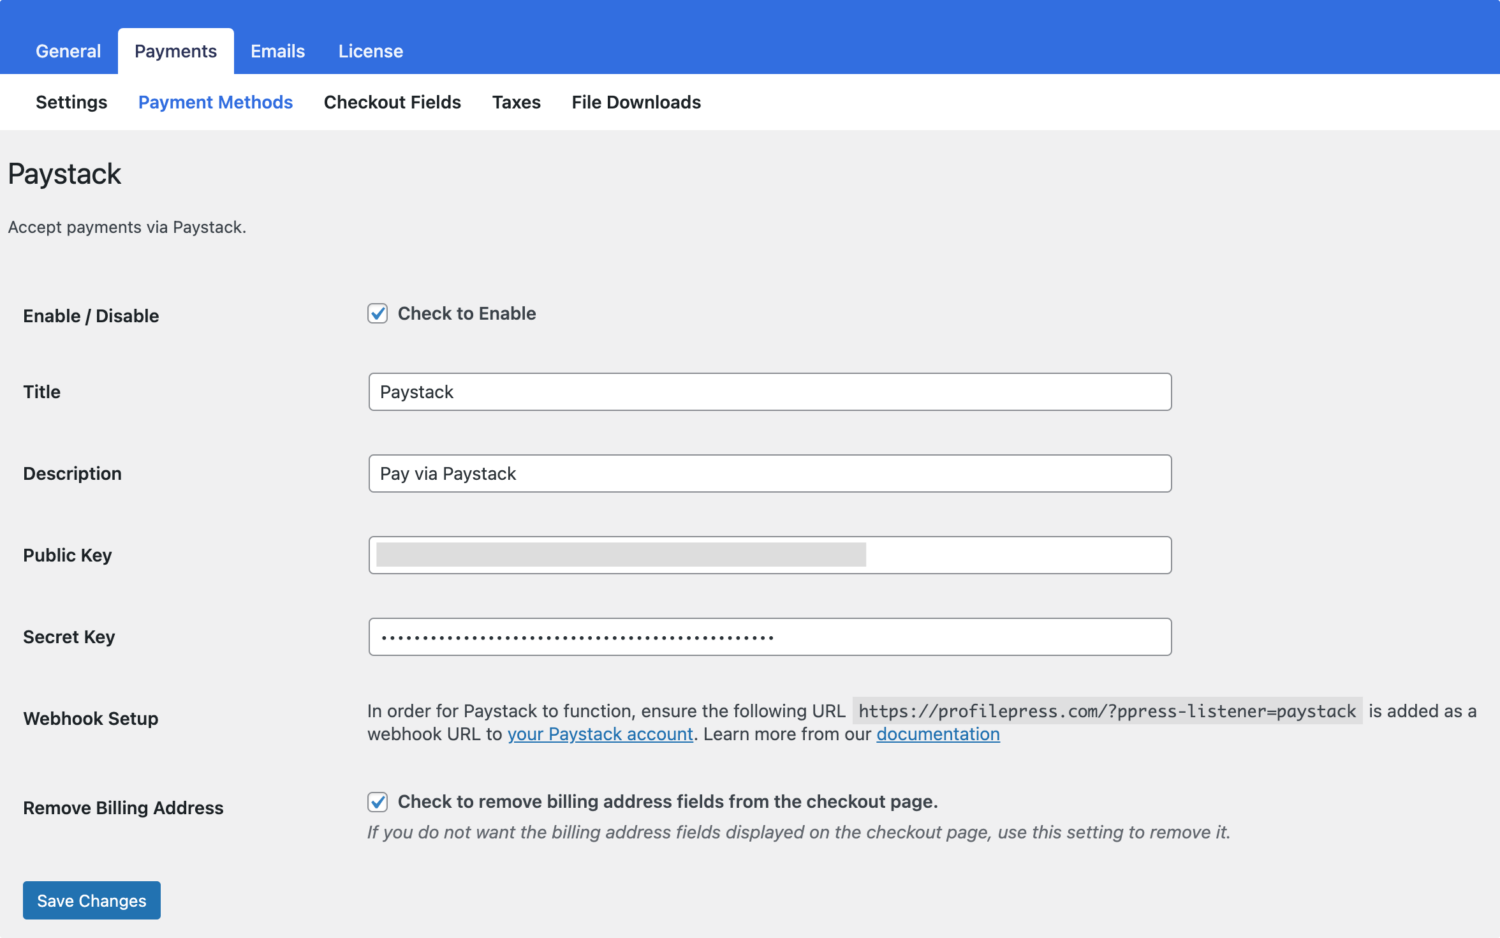
Next, go to ProfilePress > Settings > Payments >> Payment Methods and click the Configure button for Paystack.
If you want to test the setup before going live, ensure you activate “test mode” before proceeding with the setup.
ProfilePress requires your Paystack API keys and webhook setup in Paystack to start accepting payments in WordPress.
Finding Your API Keys
Log into your Paystack dashboard.
Go to Settings > API Keys & Webhooks from the menu on the left.
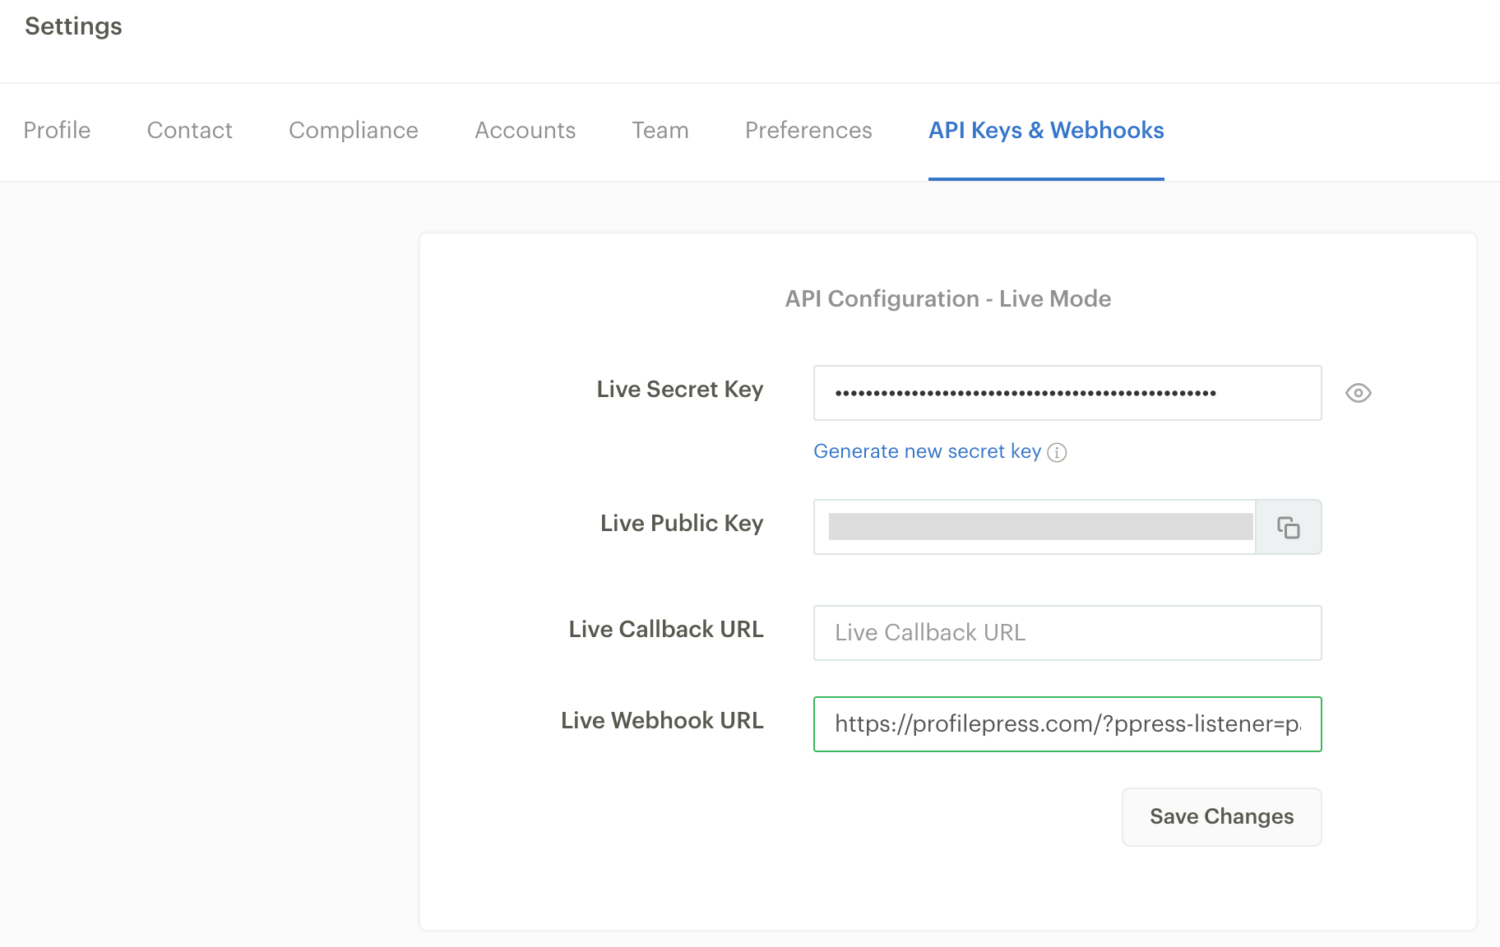
Copy and paste your Live Public Key and Secret Key or the Test Public Key and Secret Key (depending on whether you have test mode enabled in ProfilePress) into the appropriate Paystack settings in ProfilePress.
Webhooks
Webhooks are how ProfilePress communicates with Paystack. Follow the guide below to add the appropriate webhook endpoints in your Paystack application.
On the API Keys & Webhooks settings page in Paystack, enter your website webhook URL. You can get and copy the Webhook URL from the Webhook Setup section of the ProfilePress Paystack settings page, which is usually https://example.com/?ppress-listener=paystack.
That’s it! Your website can now accept Paystack payments.
How To Create Payment Plans For Your WordPress Website
To enable your audience to purchase your products, you must create some payment plans first.
How To Create One-Time Payment Plans
One-time payment plans are for products such as eBooks that only require a single payment.
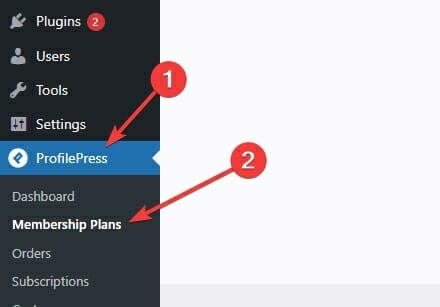
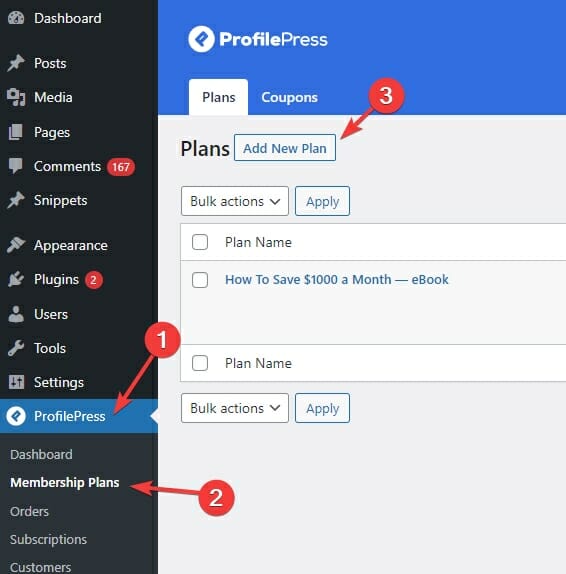
To create your first one-time payment plan, navigate to the Membership Plans section under ProfilePress:
Now click the Add New Plan button to create a new plan. This will take you to the Add Plan page:
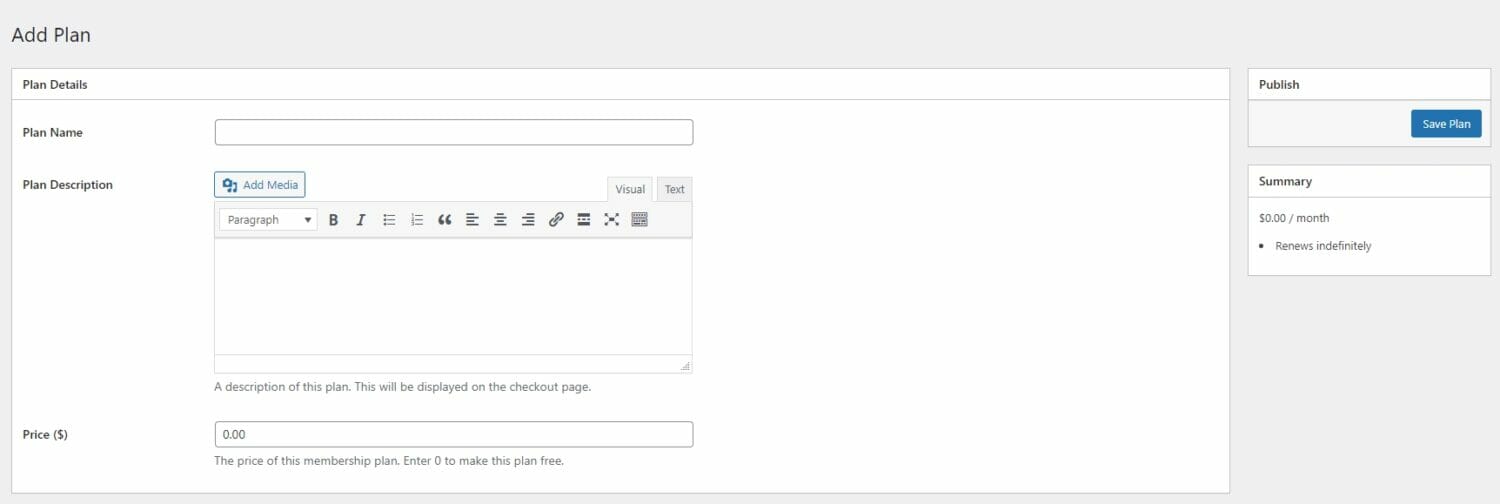
Enter a name, description, and price for this payment plan:
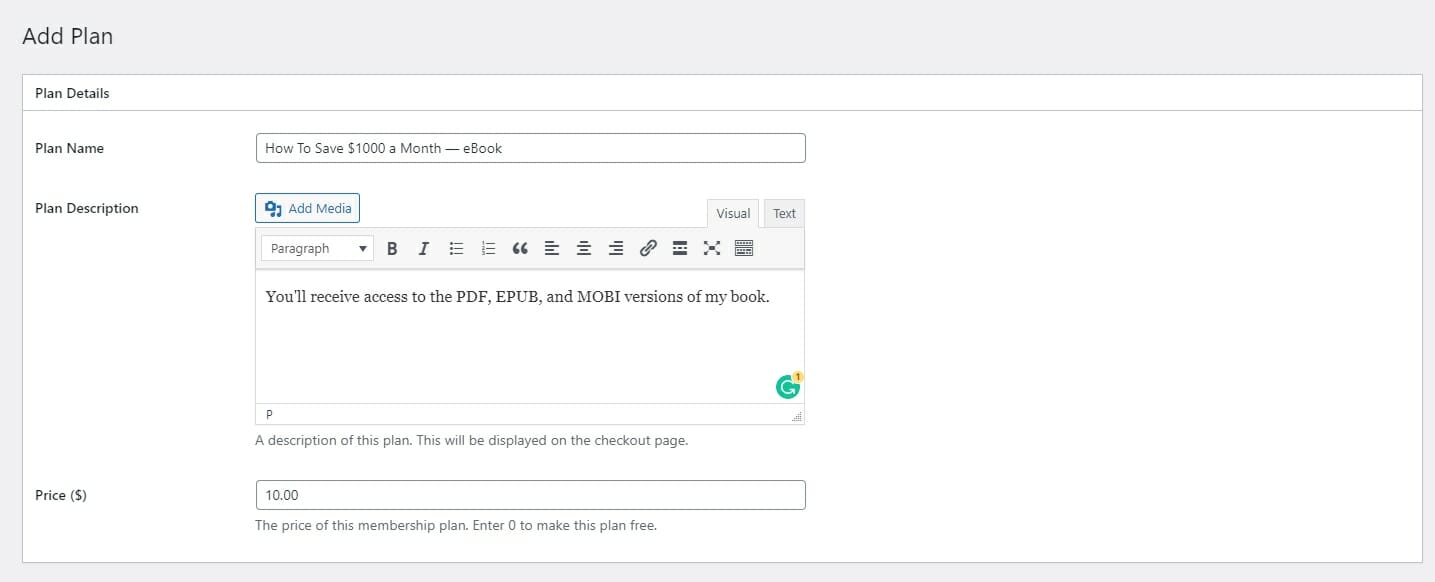
Make sure your description is clear and explains what this plan offers. It will be displayed on the checkout page for this plan.
Once you’re done setting up your plan’s details, scroll down to the Subscription settings section. Then select One-time purchase as the Billing Frequency:
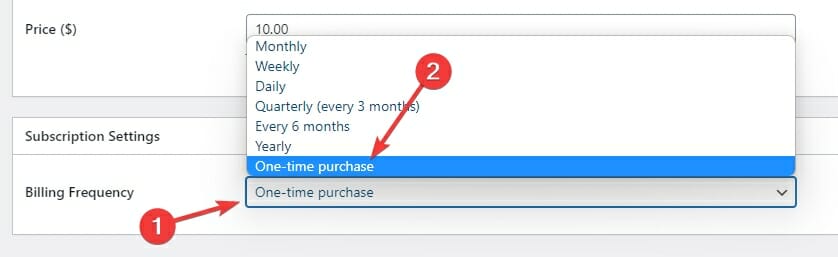
Now, click the Save Plan button to publish this plan.
How To Create a Recurring Payment Plan
A Recurring Payment plan allows you to create a subscription that gets charged regularly. If you want to make a monthly membership to your premium content, you’ll want to create a Recurring Payment Plan.
Navigate to the Membership Plans section of ProfilePress, then click the Add New Plan button to create a new plan:
Enter a name, description, and price for this new plan:
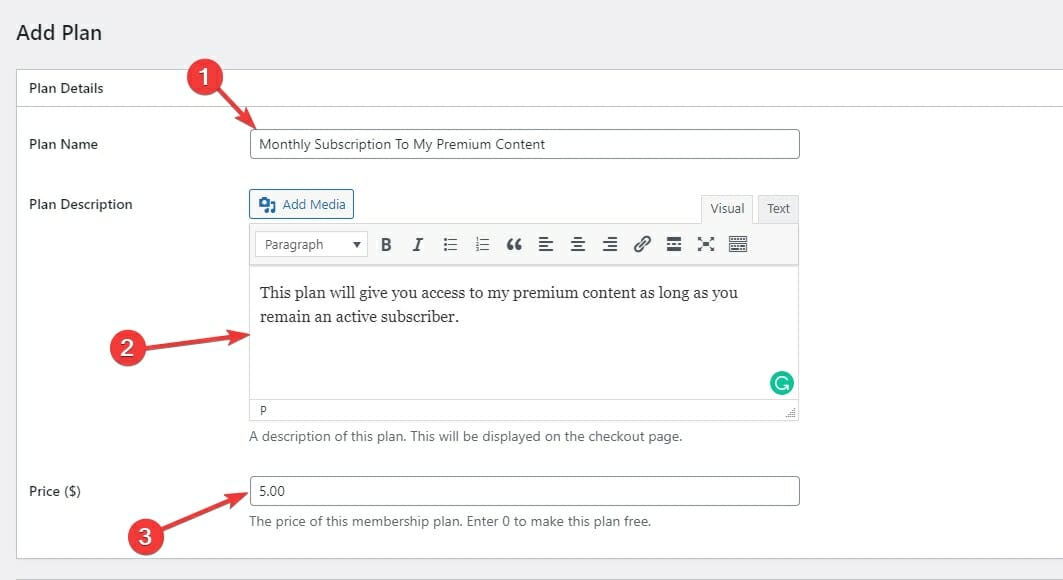
Remember, this will be a recurring plan, so explain that in the description.
Once you’re done customizing your plan’s details, scroll down to the bottom of the page to the Subscription Settings section:
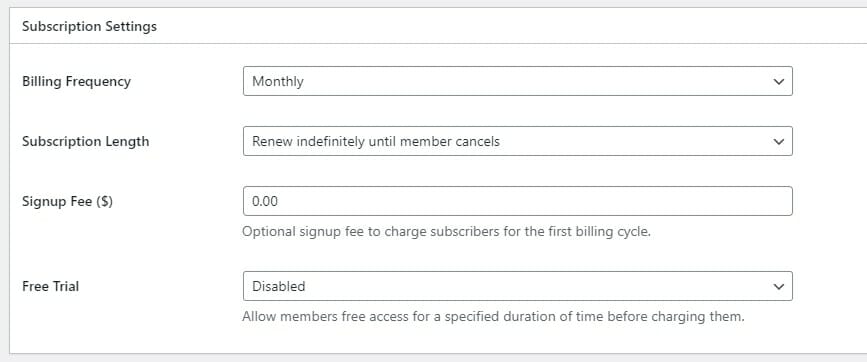
- Billing Frequency: This is how often your customers will be charged. To create an annual membership where customers are charged every 12 months, you’d select Annually.
- Subscription Length: This lets you create plans that allow your customers to pay you in installments. If you select a fixed number of charges, your customers will only be charged that many times. Leave it at Renew indefinitely to create a plan that charges your customers until they manually cancel.
- Sign-Up Fee: This lets you charge your customers a one-time fee when they purchase this plan. Think of it like a “setup fee.”
- Free Trial: This lets you offer a free trial to your customers before they are finally charged. If you choose seven days, your customers won’t be charged in the first seven days. They won’t be charged if they cancel their subscription before the trial ends.
Once you are done customizing the settings, click the Save Plan button to publish this plan.
IMPORTANT: Giving Users The Option To Checkout
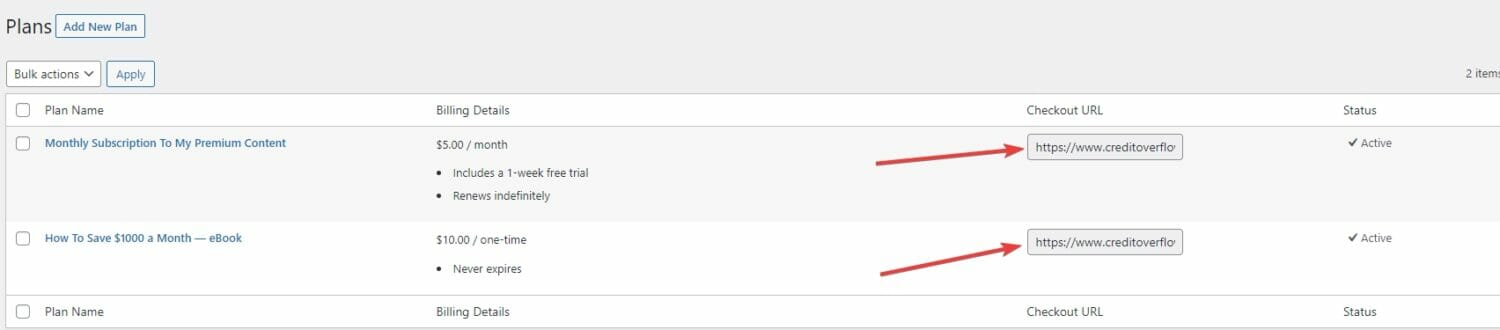
When you create a new plan, ProfilePress generates a checkout URL. This is the page you’ll send your website visitors to let them purchase a plan. These pages are hidden and won’t be visible to your users unless you manually link to them.
To get the checkout links for plans you just created, navigate to the Membership Plans section of ProfilePress:
This is where you’ll see the links to the checkout pages of your payment plans:
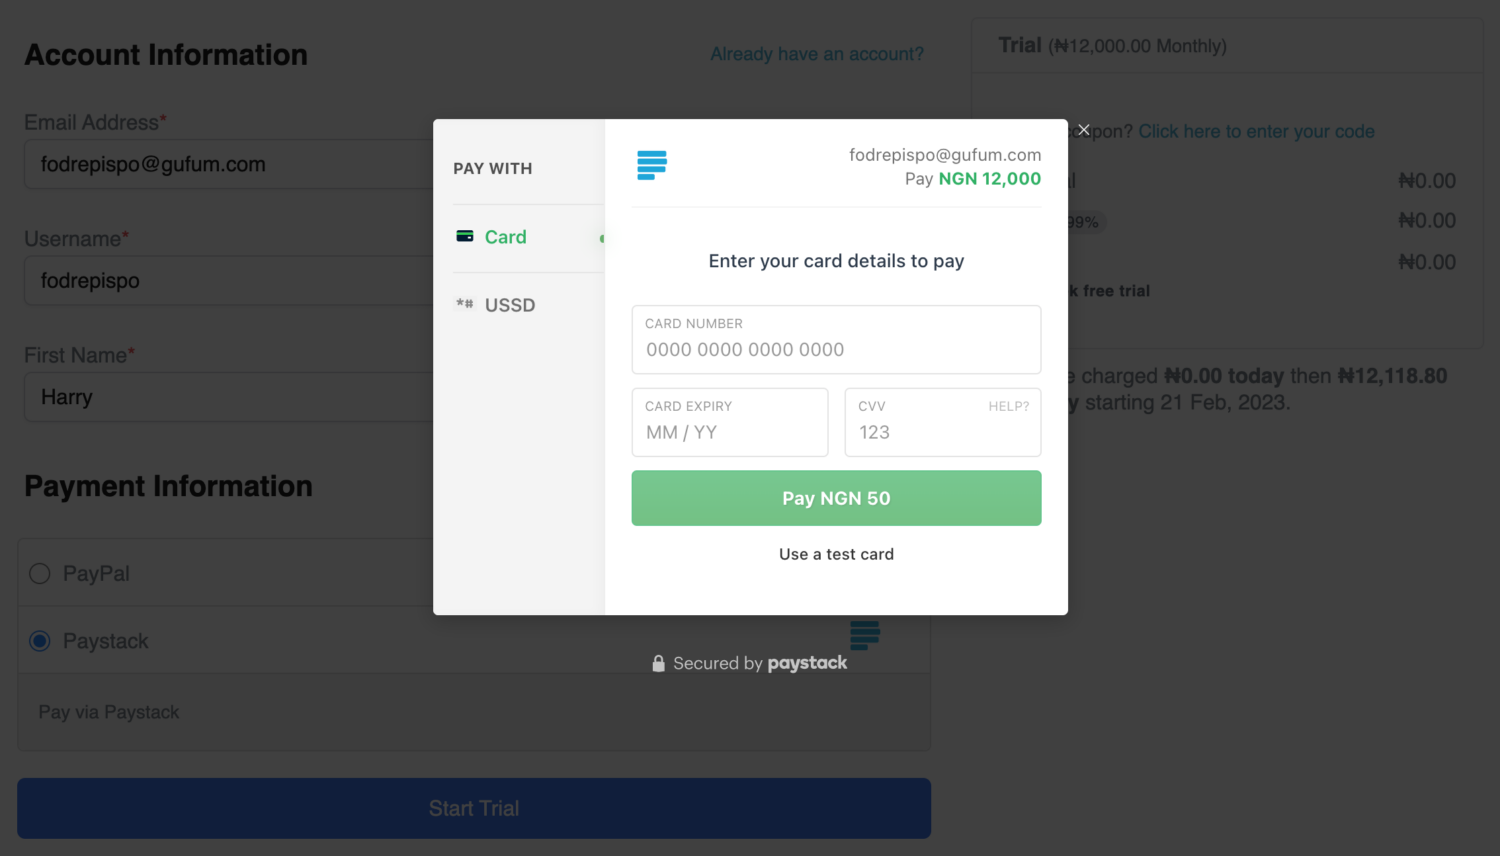
If you open any of the links, you’ll see this page:
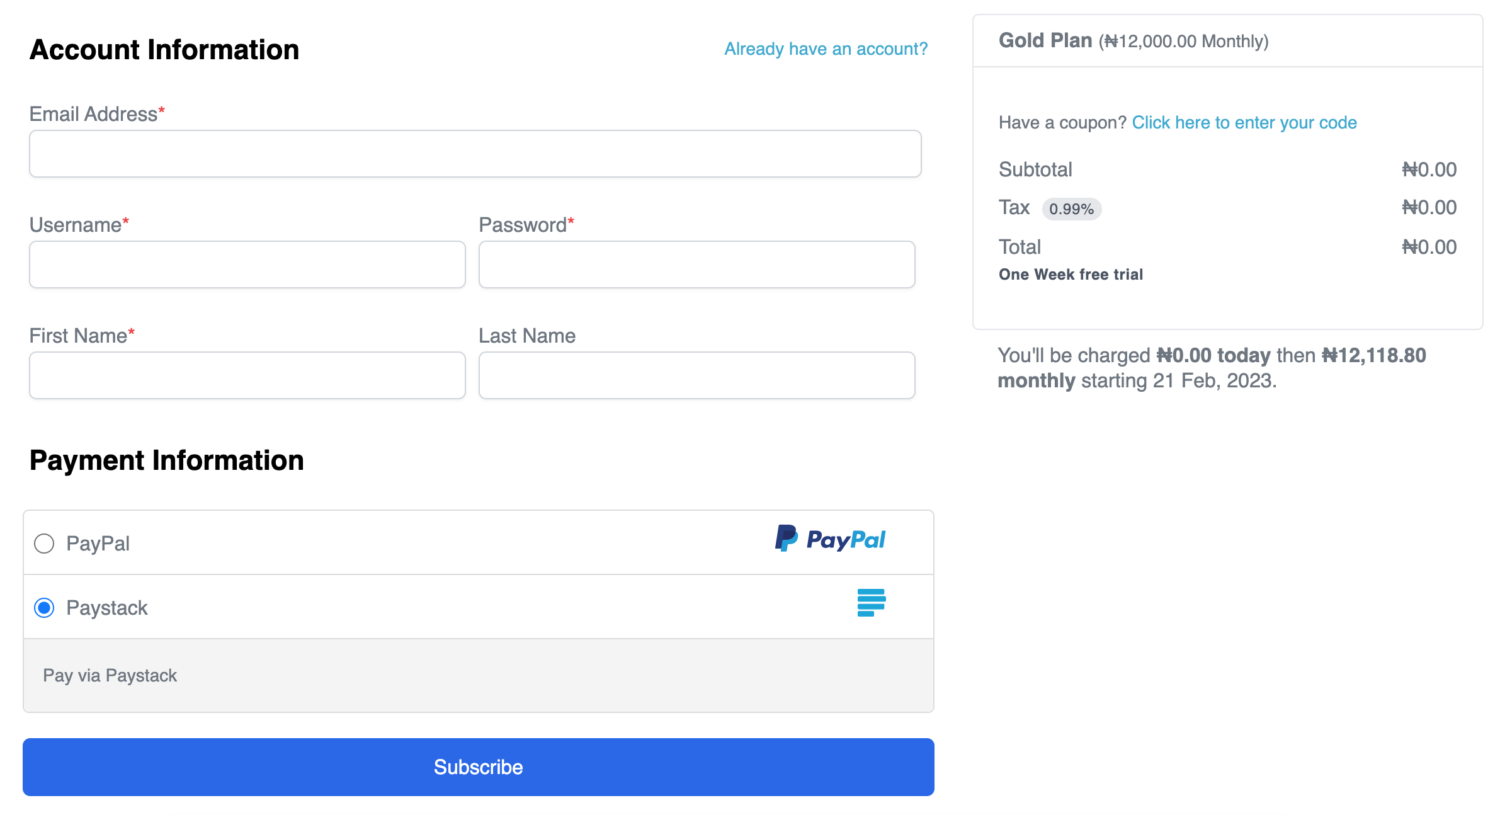
This page will let your customers checkout using Paystack. Link to this page from your pricing and product pages to allow your users to check out via Paystack in WordPress.
How To Customize Payment Emails
ProfilePress emails your customers for many different events, including when they place an order.
You can customize all these emails by going to the Emails tab under the Settings section of ProfilePress:
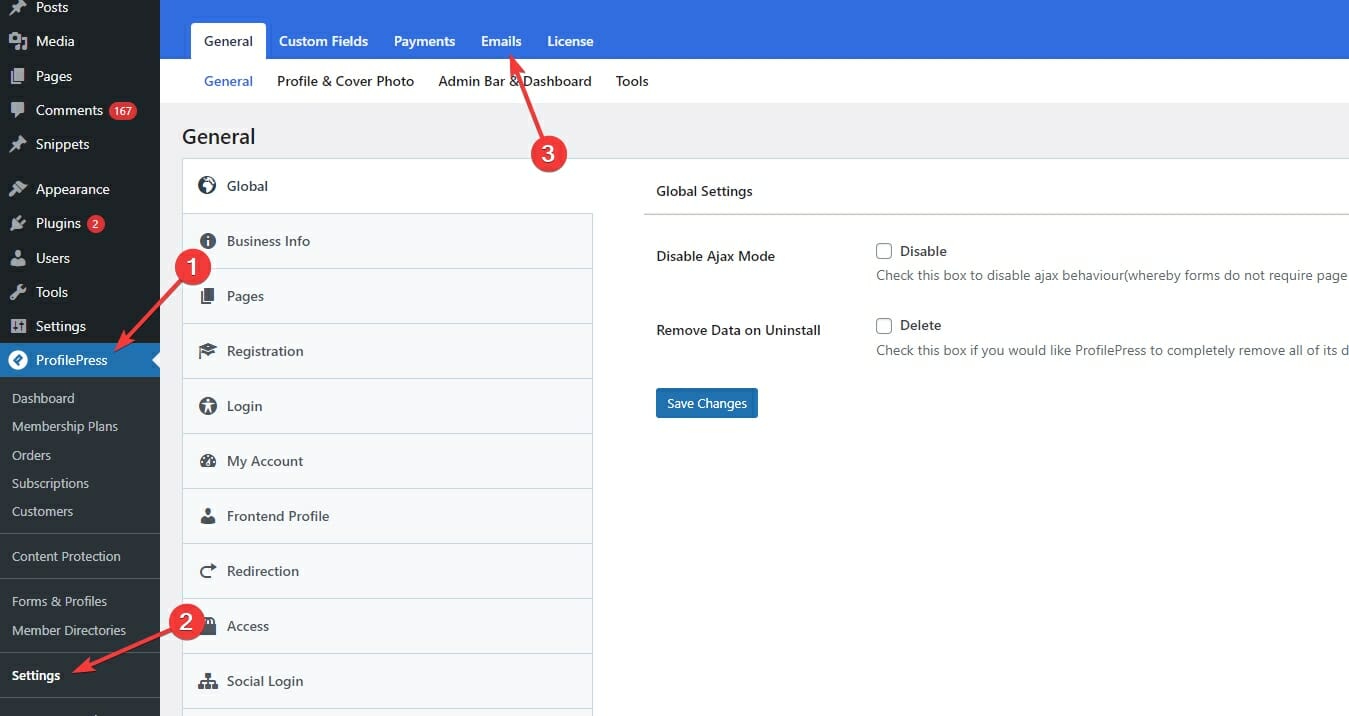
This is where you will see four different tabs that allow you to customize all the emails sent.
The first tab, Account, lets you customize these emails:
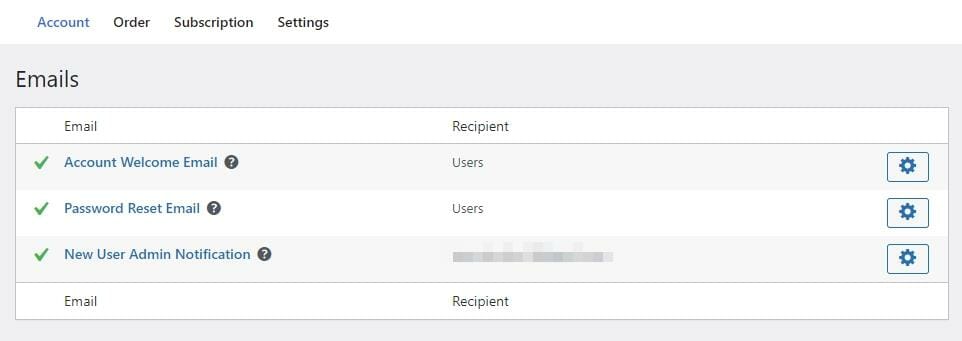
- Account Welcome Email: The welcome email is sent to your users when they signup for your WordPress site.
- Password Reset Email: This email is sent when someone uses the “Forgot your password?” link on the login page. It contains the password reset link.
- New User Admin Notification: You receive this email whenever a new user registers on your website.
To customize an email, click the customize button (gear icon) next to them:
![]()
The first option you’ll see now lets you enable or disable the email you’re editing:
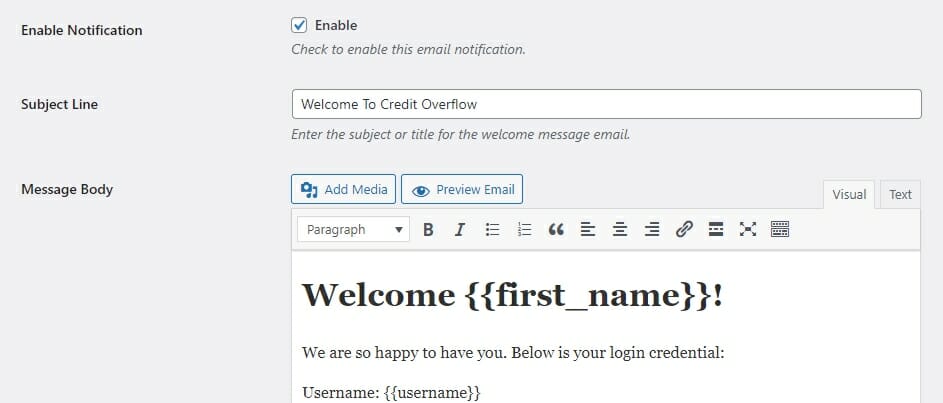
This page allows you to customize the Subject Line and the Message Body (Email Content) for the current email.
You can use any of these available placeholders in your subject line or your message body:

These placeholders will be replaced with their real values when they are sent. So, {{first_name}} will become John if the user’s name is John.
Scroll down and click the Save Changes button to save your customizations…
Now, let’s go through the other three tabs one by one:
Orders Tab
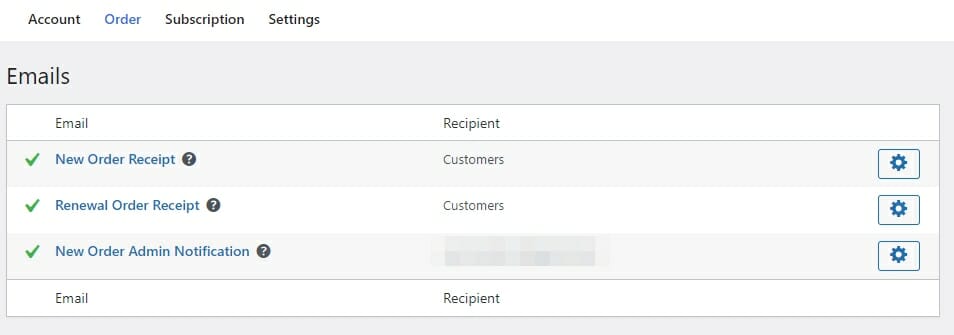
- New Order Receipt: This email is sent to your customers when they place a new order. It contains an invoice and a summary of what they bought.
- Renewal Order Receipt: This email is sent when a subscription product gets renewed automatically.
- New Order Admin Notification: This is the email you’ll receive when someone places a new order on your website.
Subscription Tab
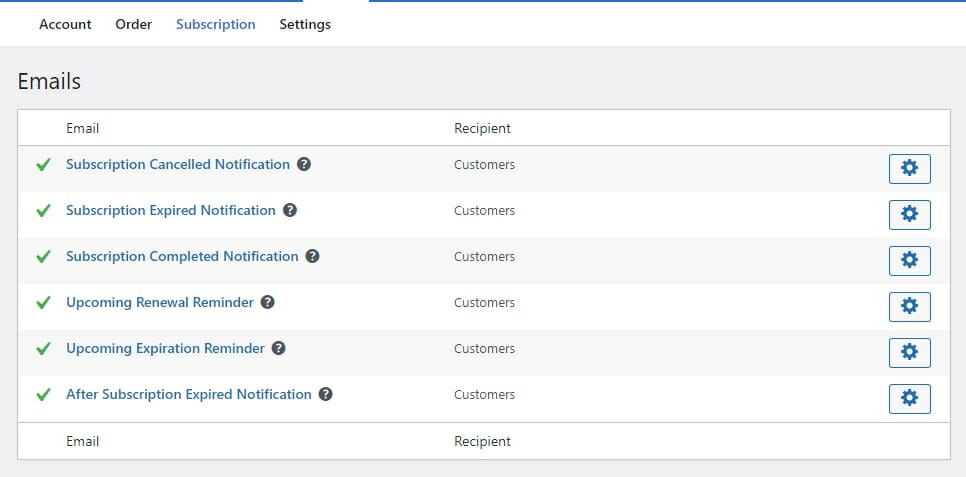
- Subscription Cancelled Notification: A confirmation email is sent to your customers when they cancel their subscriptions.
- Subscription Expired Notification: Sent when a customer’s subscription has expired and needs to be renewed manually.
- Subscription Completed Notification: This email is sent when a customer has paid the last installment of the payment plan. Only sent if you limit the number of payments for a subscription.
- Upcoming Renewal Reminder: Reminds the user that their card will be charged soon.
- Upcoming Expiration Reminder: Reminds the user that their subscription is about to expire.
- After Subscription Expired Notification: Sent when the customer’s subscription has expired.
Settings Tab
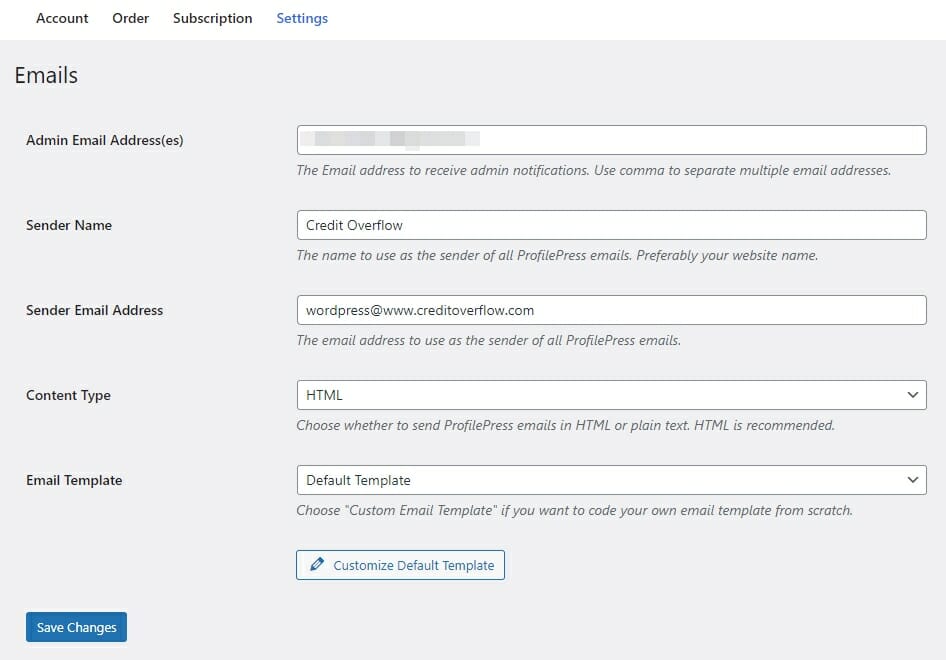
This page houses all the settings for the emails that are sent:
- Admin Email Address: This is where Admin email notifications are sent.
- Sender Name: The name of your website or your name. It will be used when sending emails.
- Sender Email Address: The email address from which the emails will be sent.
- Content-Type: Do you want to send plan-text emails or HTML? If you don’t know the difference, leave it be.
- Email Template: Do you want to use a custom email template? Choose custom here.
- Customize Default Template button: This button will take you to the editor that lets you customize the default email template design and layout.
How To Create Coupons For Your Payment Plans
If you are putting out a sale, you’ll want to create a discount coupon code for your payment plans.
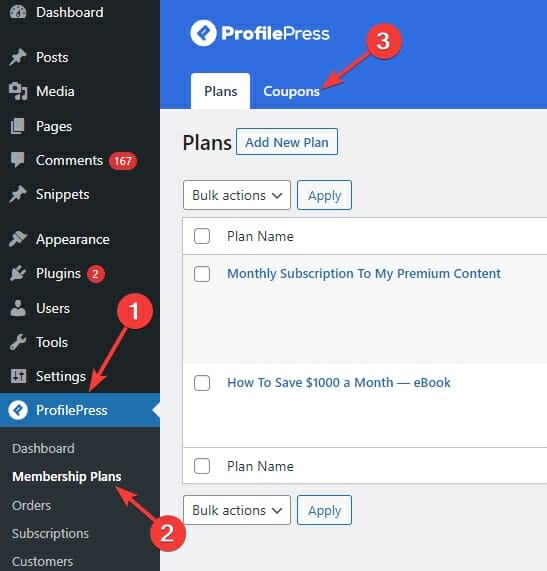
Visit the Coupons tab under the Membership Plans section of ProfilePress:
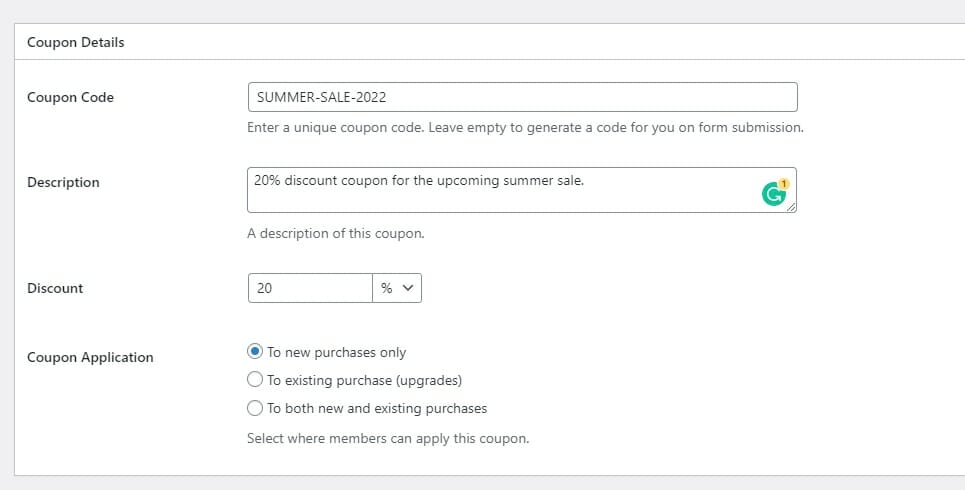
Then, click the Add New Coupon button. You’ll see this page:
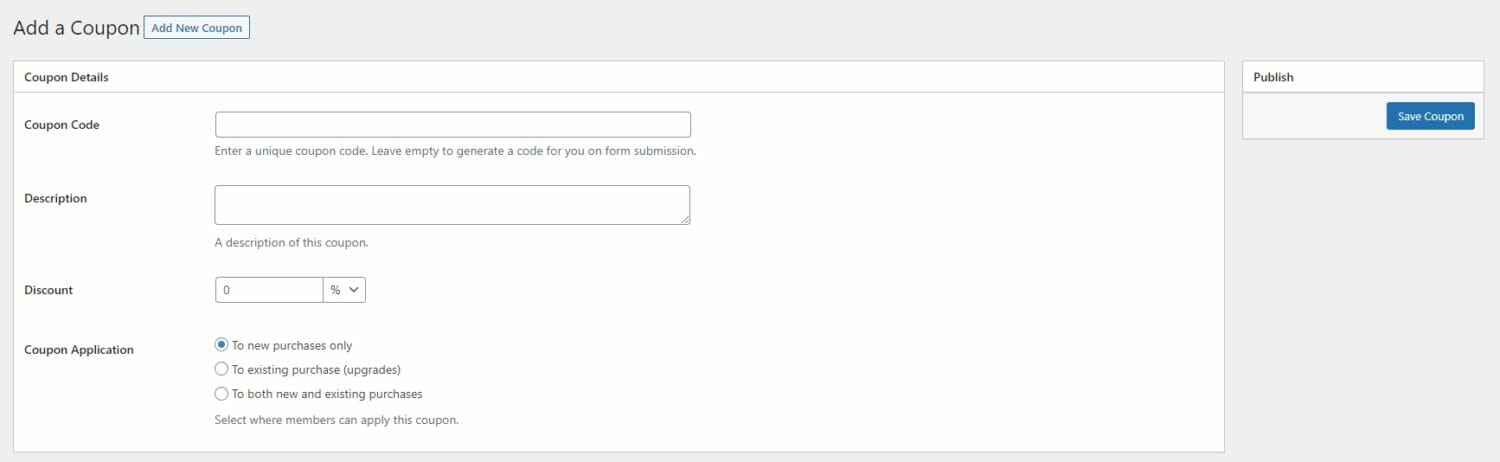
Here’s what the fields do:
- Coupon Code: The coupon code your users will enter on the checkout page to avail of the discount.
- Description: Describe the coupon code.
- Discount: Select a fixed amount or a percentage if you’re running a site-wide sale.
- Coupon Application: Who’s allowed to use this coupon?
Once you’ve filled in the essential details for the coupon, scroll down to the Redemption Settings section:
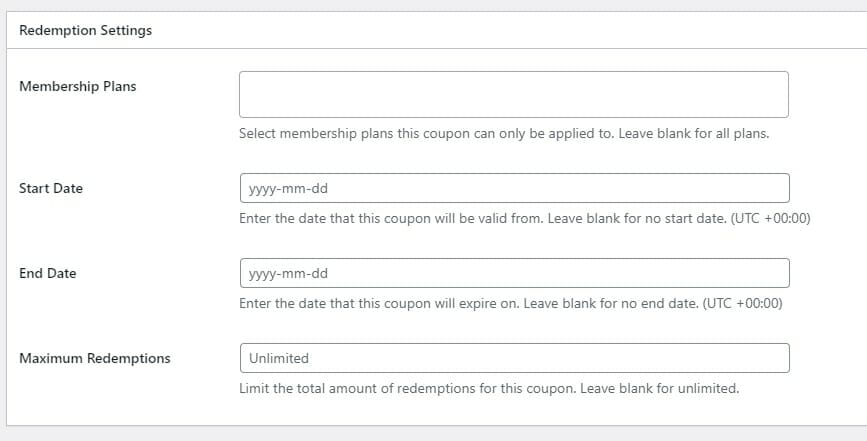
- Membership Plans: Type the name and select the plans you want this coupon to apply.
- Start Date: When does this coupon start working?
- End Date: When does this coupon stop working?
- Maximum Redemptions: How many times total can this coupon be redeemed?
Click the Save button to publish this coupon. It would go live right away if you left the start date blank or on the start date that you entered.
How To Manage Orders
To manage your website’s orders, visit the Orders section of ProfilePress:
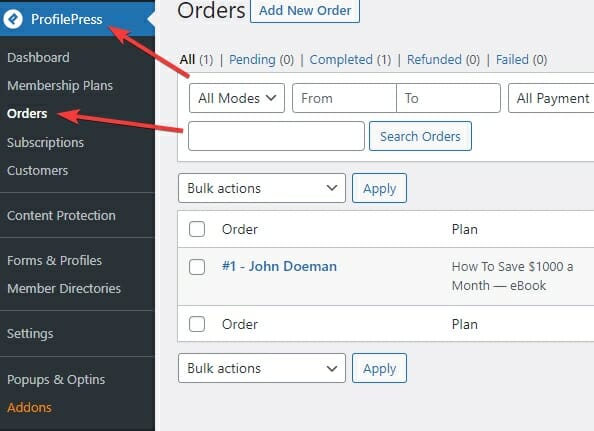
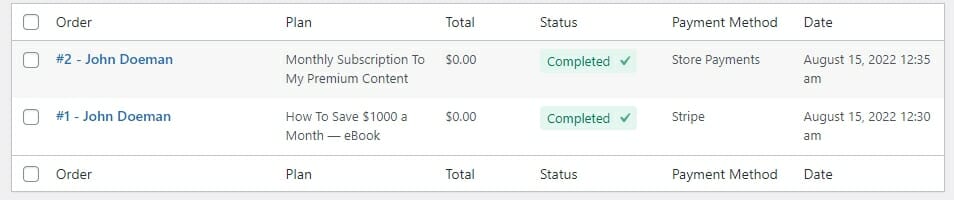
This is where you can see all the orders that have been placed:
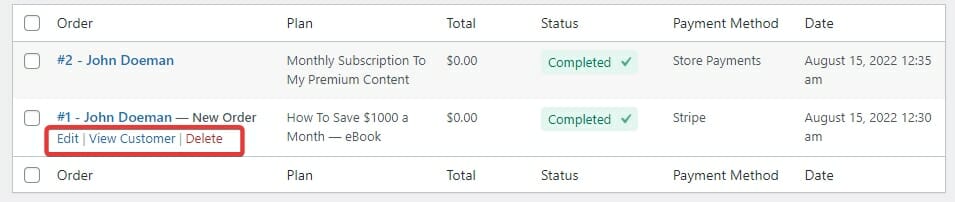
To make changes to an order, take your mouse over it, and you’ll see the actions available to you under its name:
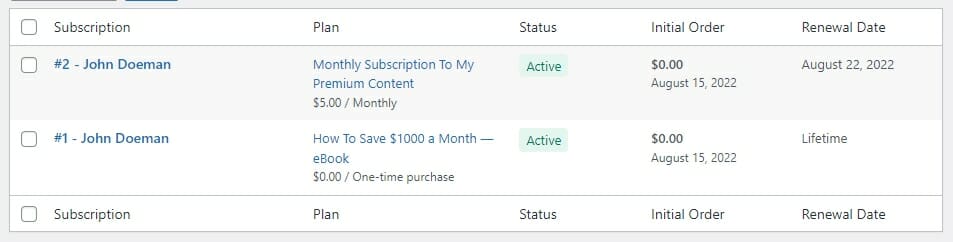
How To Manage Subscriptions
To manage your website’s subscriptions, navigate to the Subscriptions section of ProfilePress. It’s right under the Orders section from above.
On this page, you’ll see all the current subscriptions on your website:
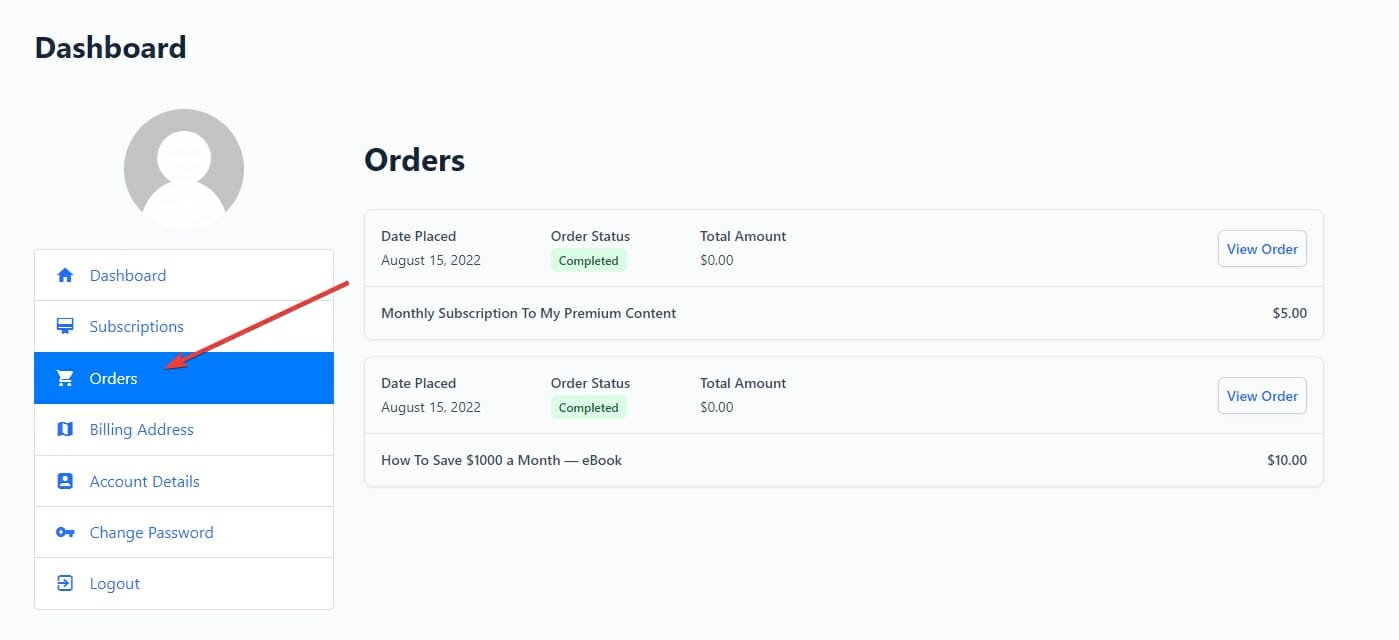
Order Management and My Account Page
To allow your website’s customers to manage their accounts and their active orders and subscriptions, you’ll need to set up the My Account page on your website. Read this quick tutorial on how to set it up.
Once you set up the My Account page, your users will see this page when they log into your website. They can manage their orders from the Orders section of this page:
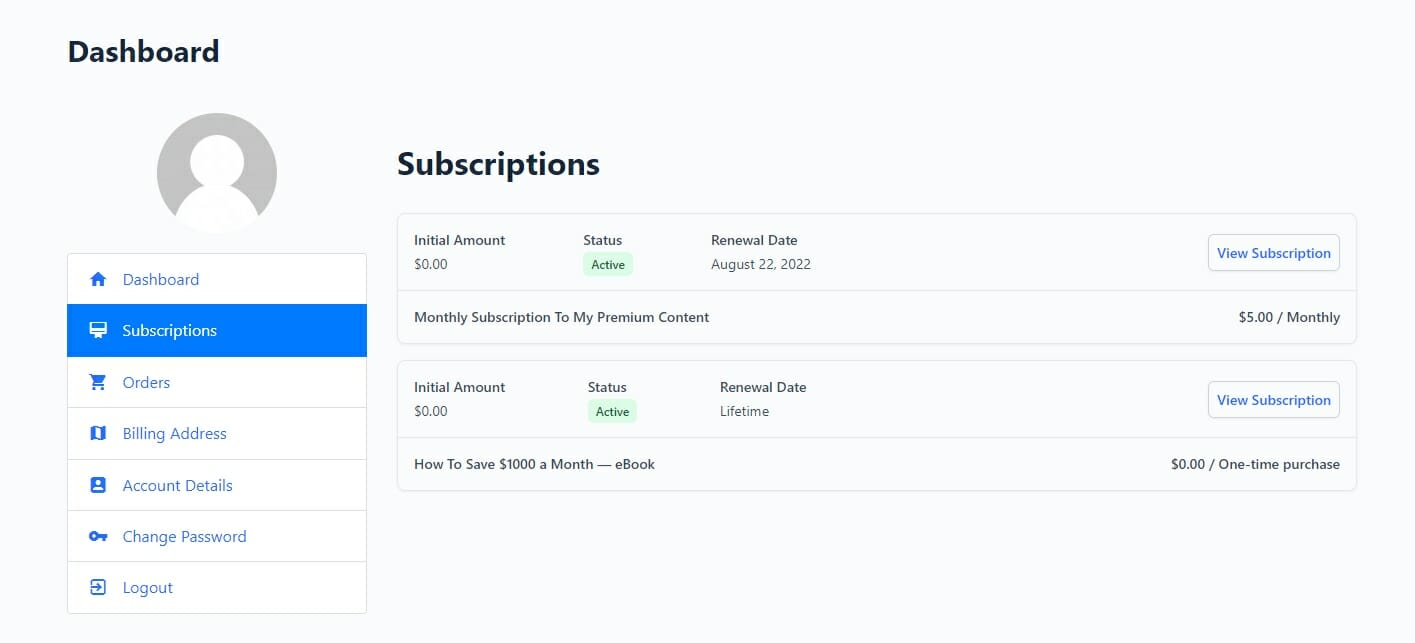
And they can manage their subscriptions from the Subscriptions section of this page:
Start Accepting Paystack Payments in WordPress Today
If you’re considering taking Paystack payments on your WordPress website, you need ProfilePress. It’s the easiest way to start accepting payments on your WordPress website via Paystack. Whether you want to sell access to a course or an ebook or build a paid membership site, this ProfilePress has all the features you’ll need.
Ready to create a WordPress membership site? Get ProfilePress today!