WooCommerce Admin User Approval: Accept or Reject New Registrations
Do you want to be able to approve or reject new users on a case-by-case basis? You might want to do it if you run a membership website. Or maybe you want more refined control over who can and cannot buy your products.
In this article, I will show you how you can add user moderation to your WooCommerce website. Your new users must be approved before they can log into their accounts.
Create a New Registration Form and Login Form
To moderate user registration on your website, you need ProfilePress. It will allow you to approve or reject new user registrations on a case-by-case basis.
The registration form WordPress and WooCommerce offer are basic. If you want better control over your website’s registration process, you will need to create a new Registration and Login form for your website using this plugin.
The most important reason you should create new Registration and Login forms is that they let you add additional fields. So you can go beyond the basic username, password, and email fields that WordPress has to offer by default.
Here are the steps you need to follow:
Step 1: Enable The WooCommerce Addon
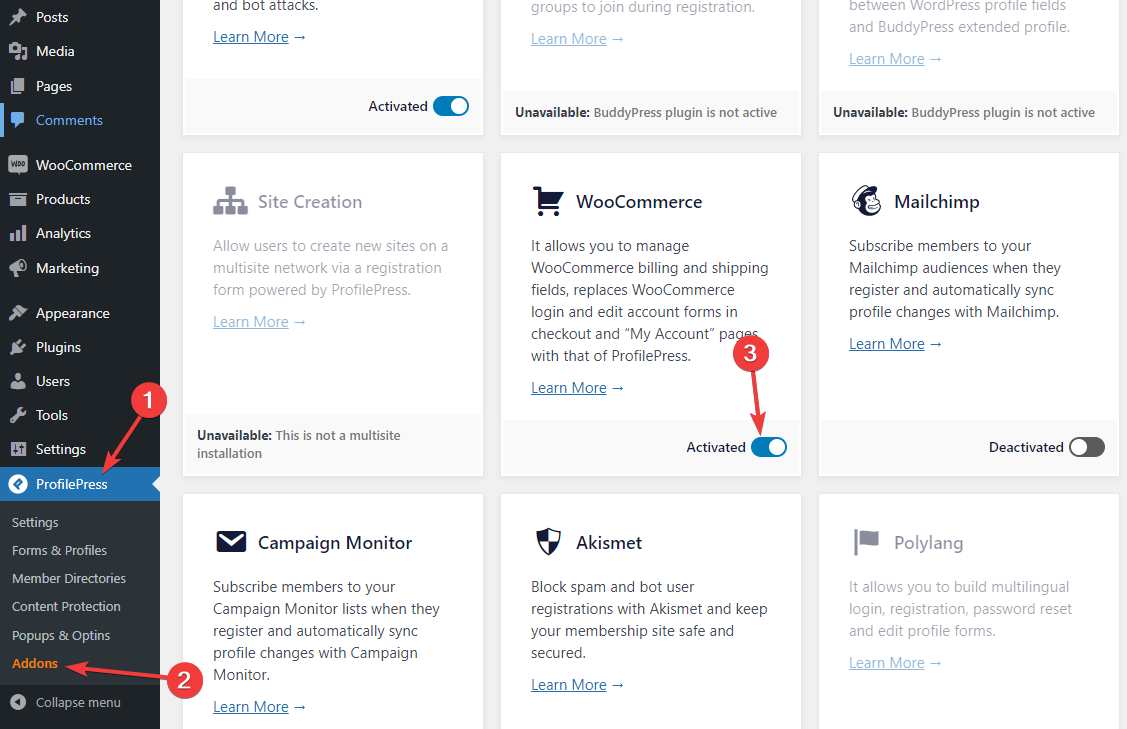
Once you install ProfilePress, you’ll need to activate the WooCommerce addon if you want to replace the default Registration and Login forms that come with WooCommerce.
Navigate to the Addons section of ProfilePress in your WordPress admin dashboard.
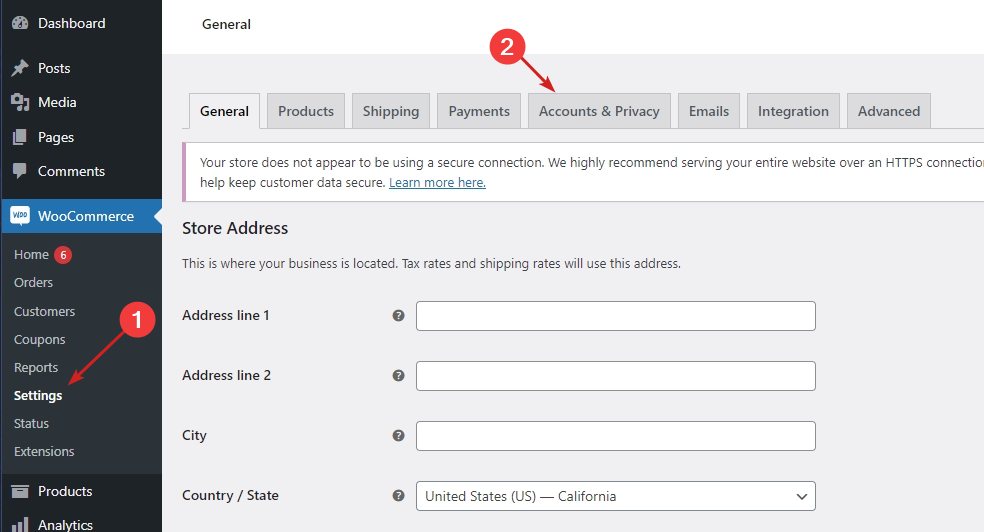
If you haven’t already enabled it, you need to allow your customers to create an account from the My Account page. To enable this option, first navigate to WooCommerce Settings:
Step 2: Enable User Registration
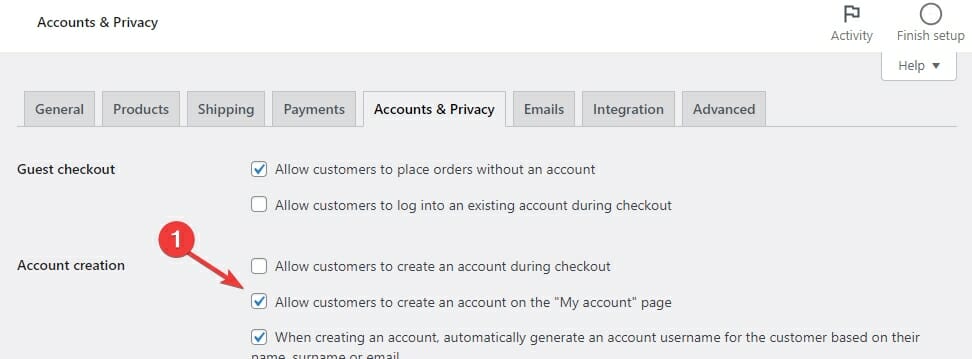
Now, enable the “Allow customers to create an account on the My Account page” option:
You will also need to enable the “Anyone can register” option from the Settings:
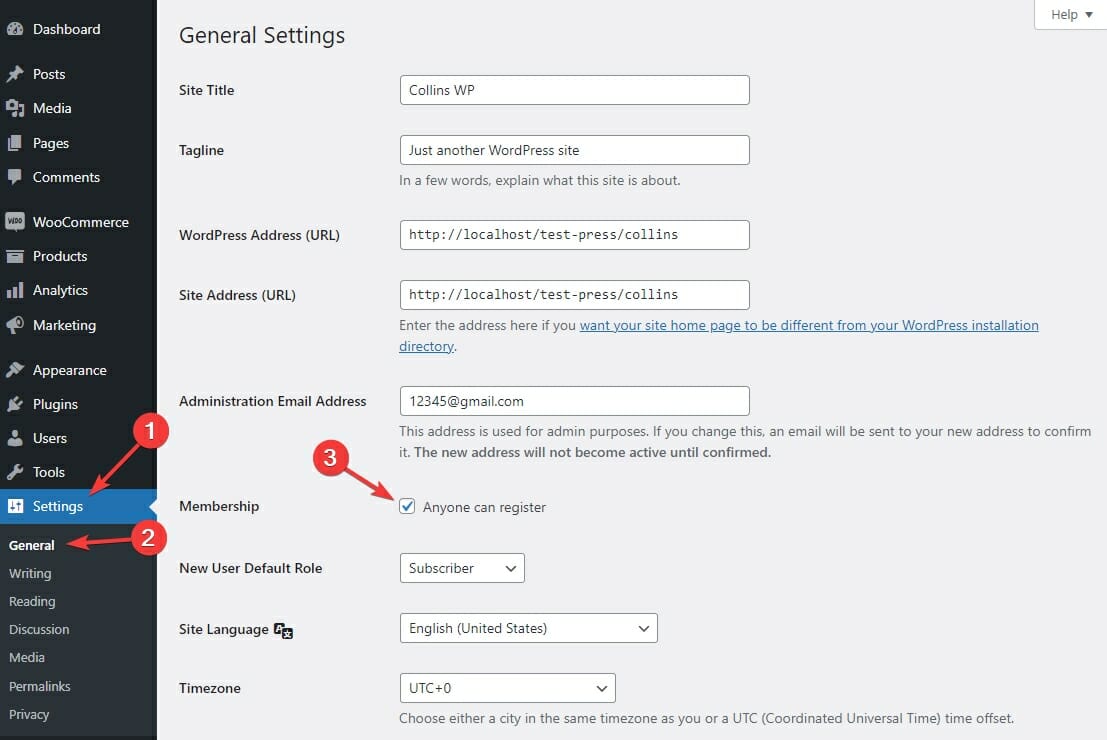
Click the Save Changes button at the bottom of the page after enabling that option.
Step 3: Create The New Registration Form
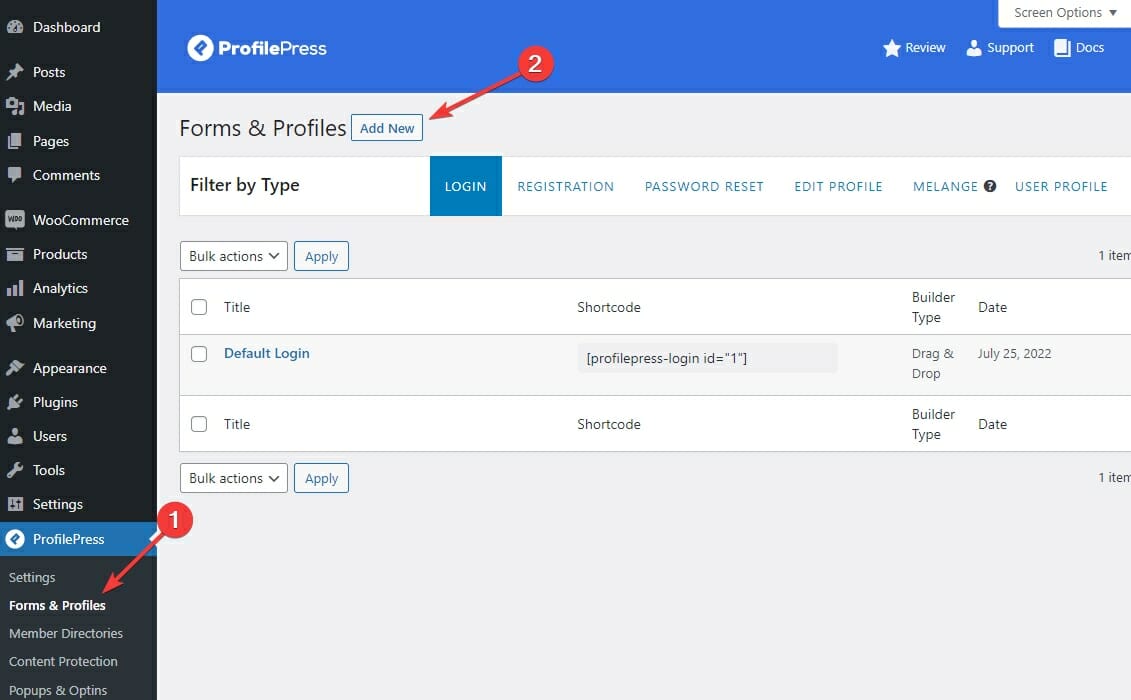
To create the new registration form, navigate to the Forms & Profiles section of ProfilePress, and click the Add New button:
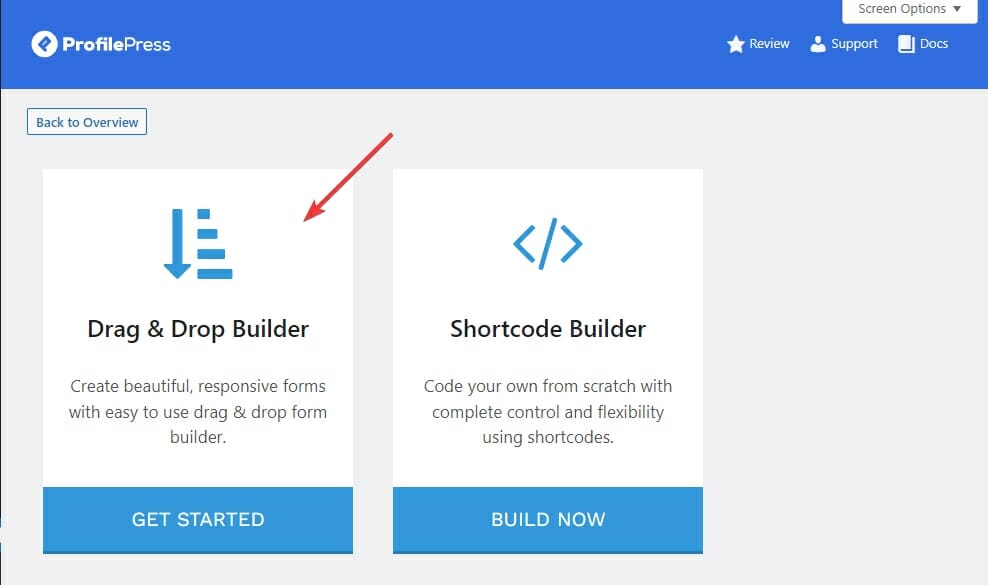
Now select Drag and Drop builder to start building the new Form:
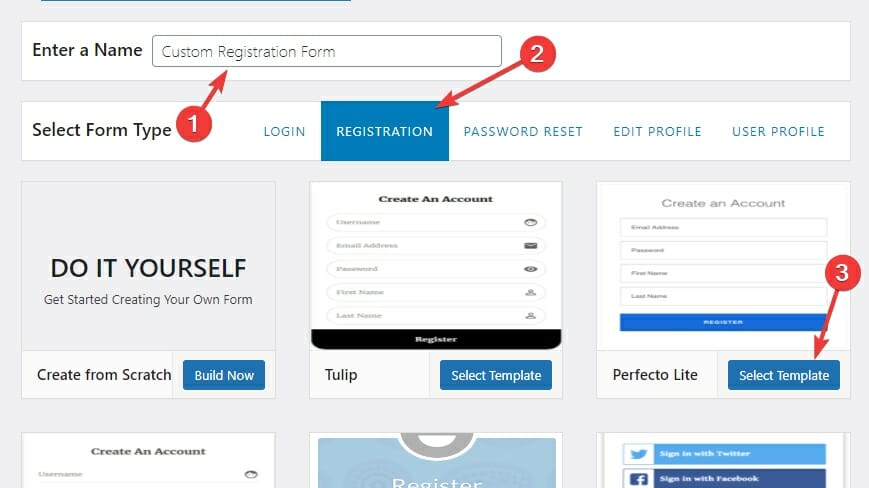
Enter a name for your new Form, then select Registration as Form Type, and select a form template:
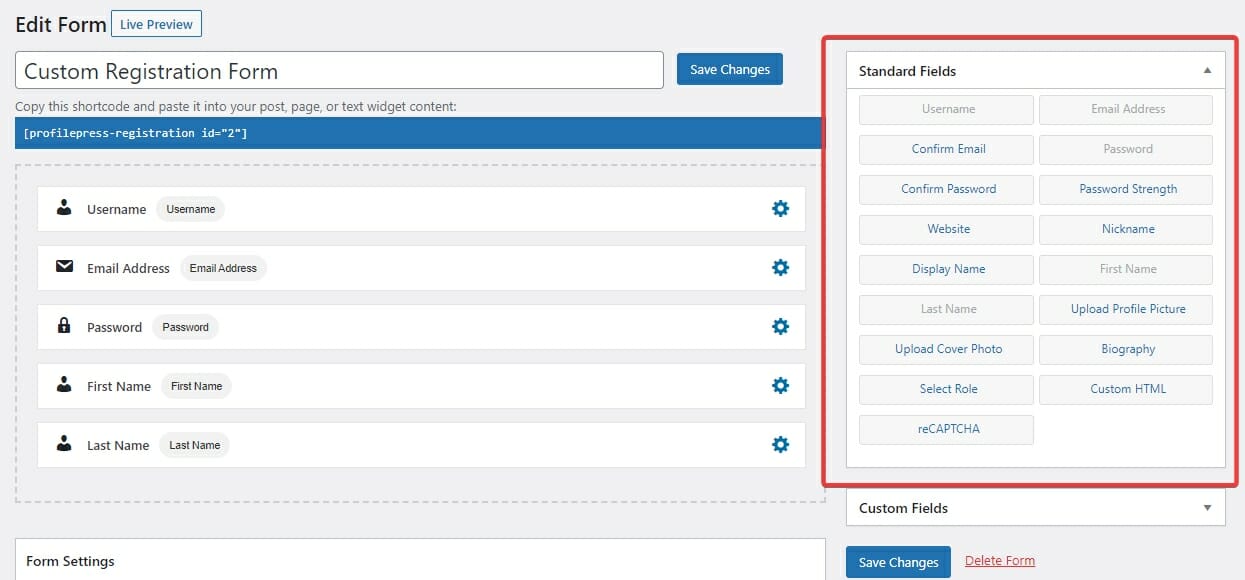
You’ll now see the form builder page. This is where you can customize the look and feel of your Form:
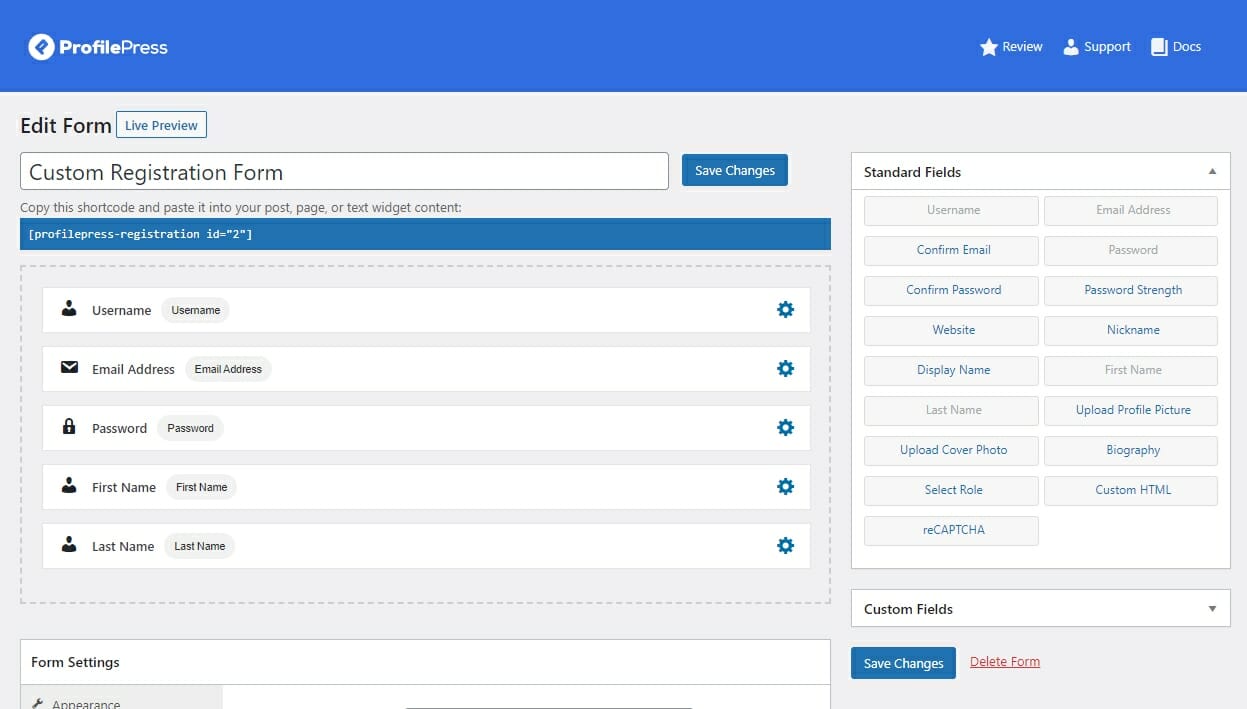
If you want to remove a field, take your mouse over it and click the delete button that appears on its side.
If you want to add a new field, click any of the fields you see on the right side of your screen:
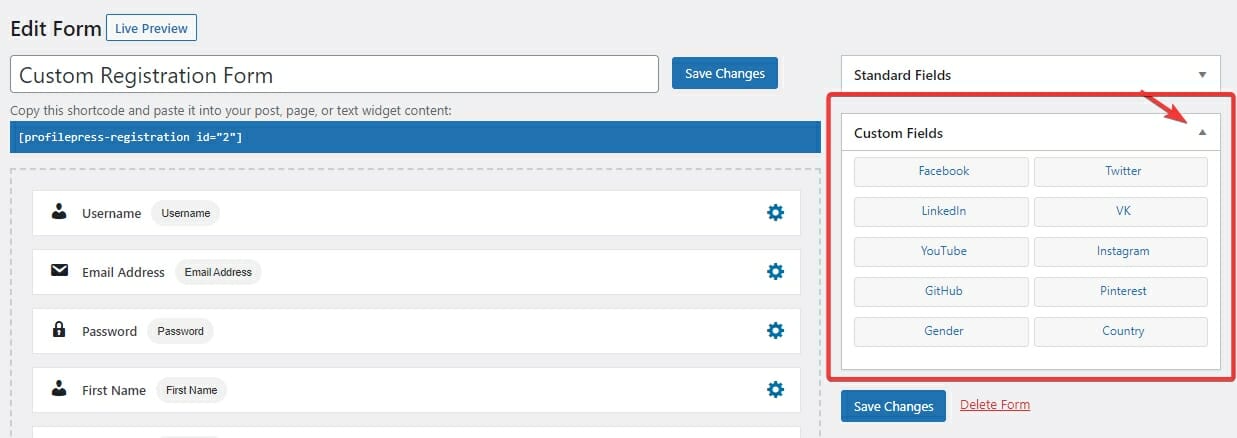
You can also add custom fields such as Gender and Country. You can add them from the Custom Fields section of the right Sidebar. First, click the drop-down button at the top of the Custom Fields section, and then select the field you want to add:
Finally, you can customize your forms look and feel from the Colors section at the bottom of the page:
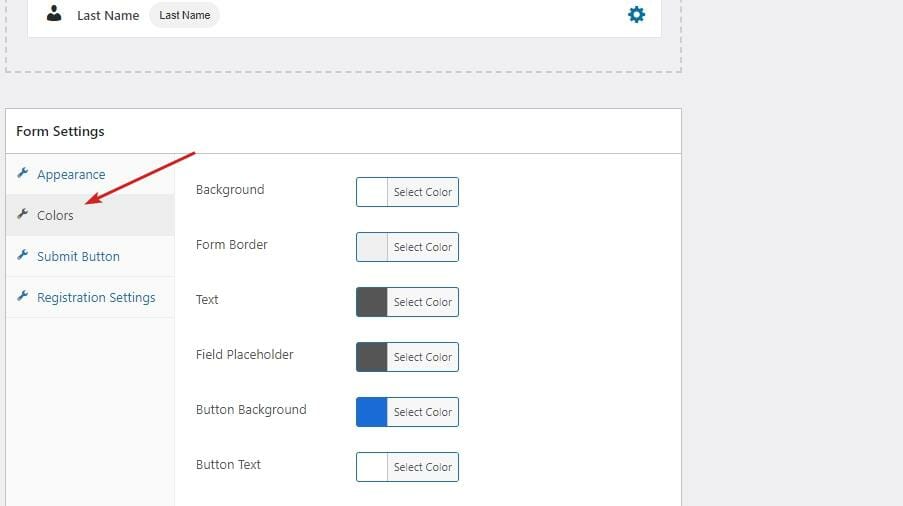
Here you can change the color scheme to match your website.
When you are done customizing the colors, go to the Registration Settings section:
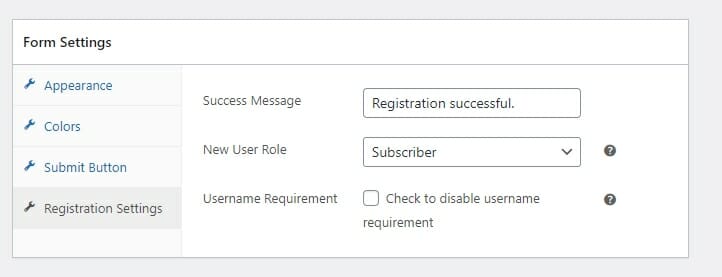
This is where you can select what role should be given to anyone who registers on your website. You might want to select Customer for your store, or you can leave it at Subscriber for now.
And this is where you can disable the username requirement. You can disable that requirement if you don’t want to ask your subscribers to choose a username. You can also remove the username field from the Form afterward.
Once you are done customizing your Form, click the Save Changes button.
Step 4: Enable WooCommerce Billing & Shipping Fields (Optional)
If you want to add WooCommerce billing and shipping fields to your registration form, you’ll need to enable those custom fields.
To enable those fields, go to the Custom Fields tab of the ProfilePress settings page:
Now, click the Import WooCommerce fields setting:
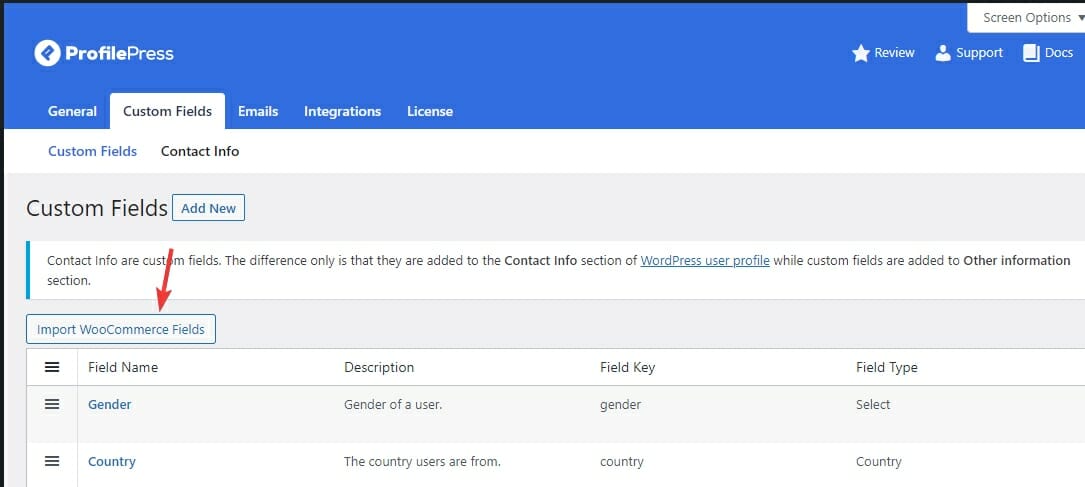
You can also add your custom fields here if you want by clicking the Add New button.
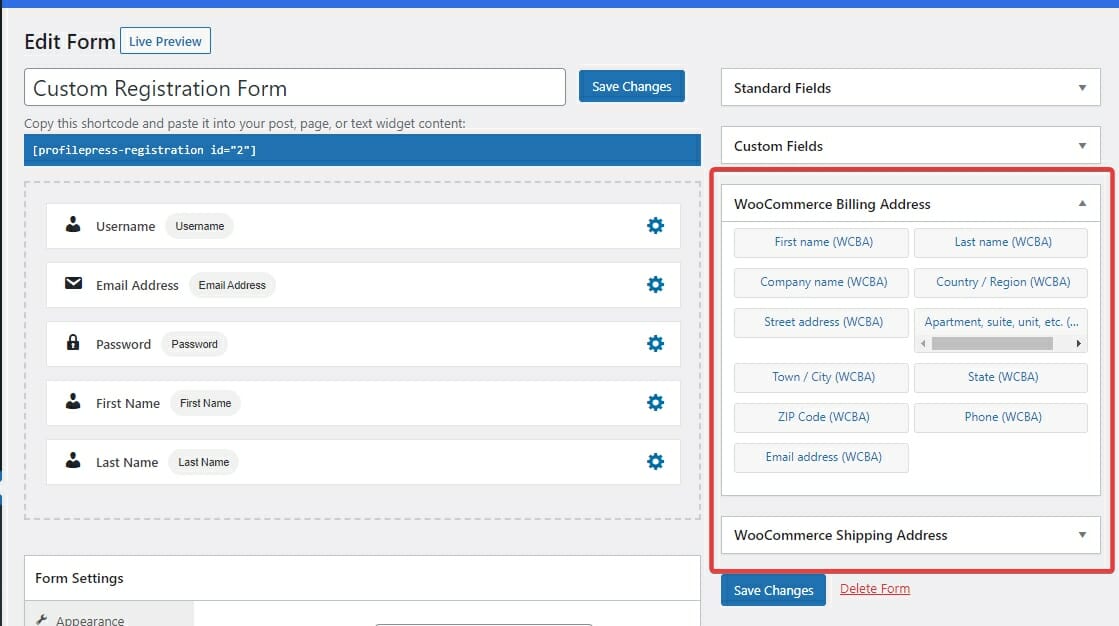
Once the WooCommerce fields are imported, billing and shipping fields will become available in the Sidebar of the Form Builder:
Step 5: Create a New Page For The Registration Form
To display the Form we just created, you’ll need to create a new page and add the Form’s shortcode.
Your new Registration Form’s shortcode is displayed right under its name on the form editor page:
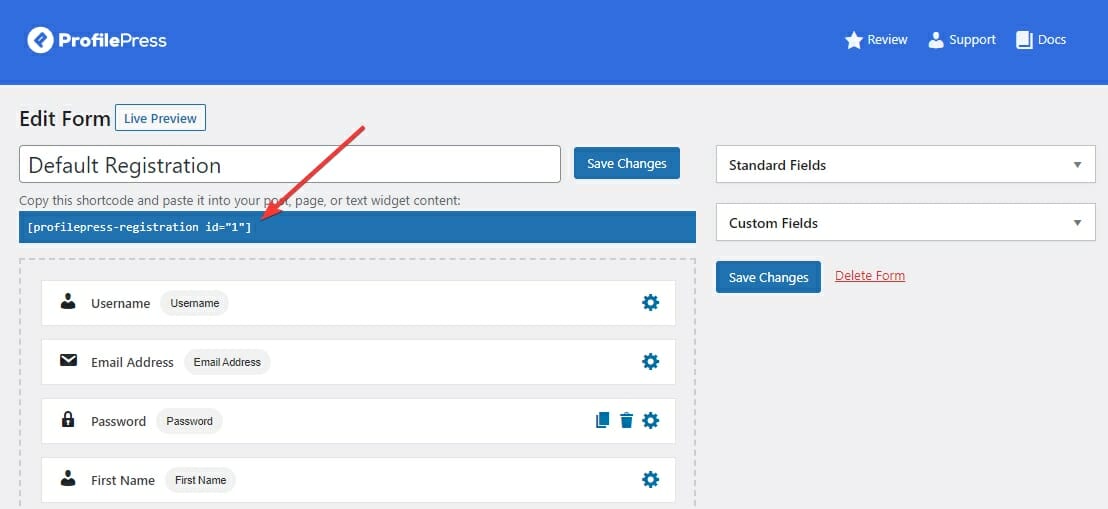
Copy the shortcode you see.
Now, add it to the content of a new page:
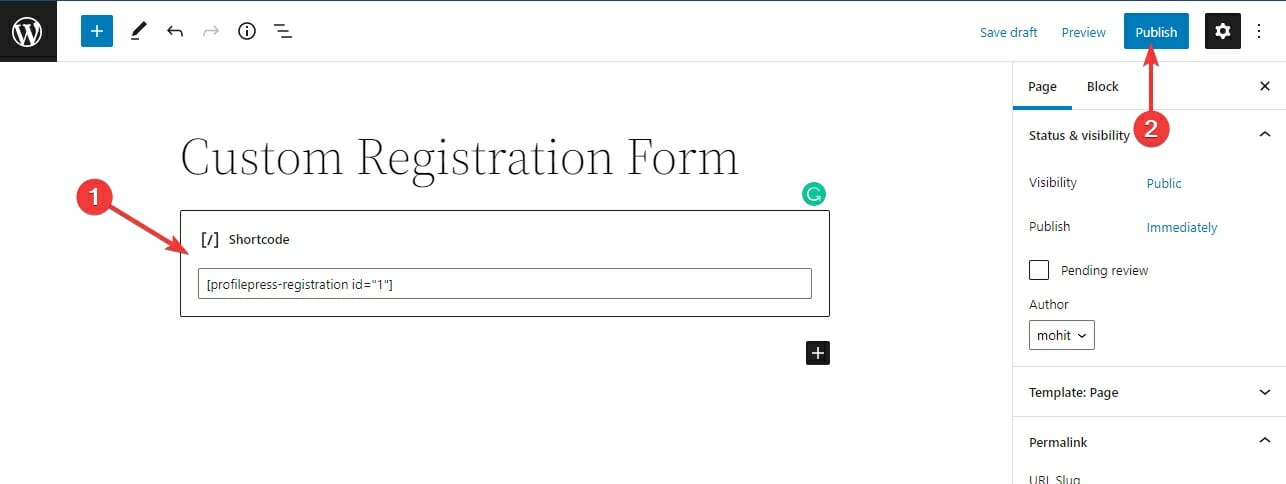
Finally, click the Publish button to publish this page.
This page isn’t active yet. We’ll activate it in a later step along with the new Login Form we’ll create in the next step.
Step 6: Create The Custom Login Form
The steps for creating a new login form are the same as creating a Registration form.
The most significant difference is that this time you’ve to select Login as the Form Type.
Click the Add New button on the Forms & Profiles page of ProfilePress Settings. Then enter a name for this new Form, and then select a Login Form template:

This will take you to the form builder:
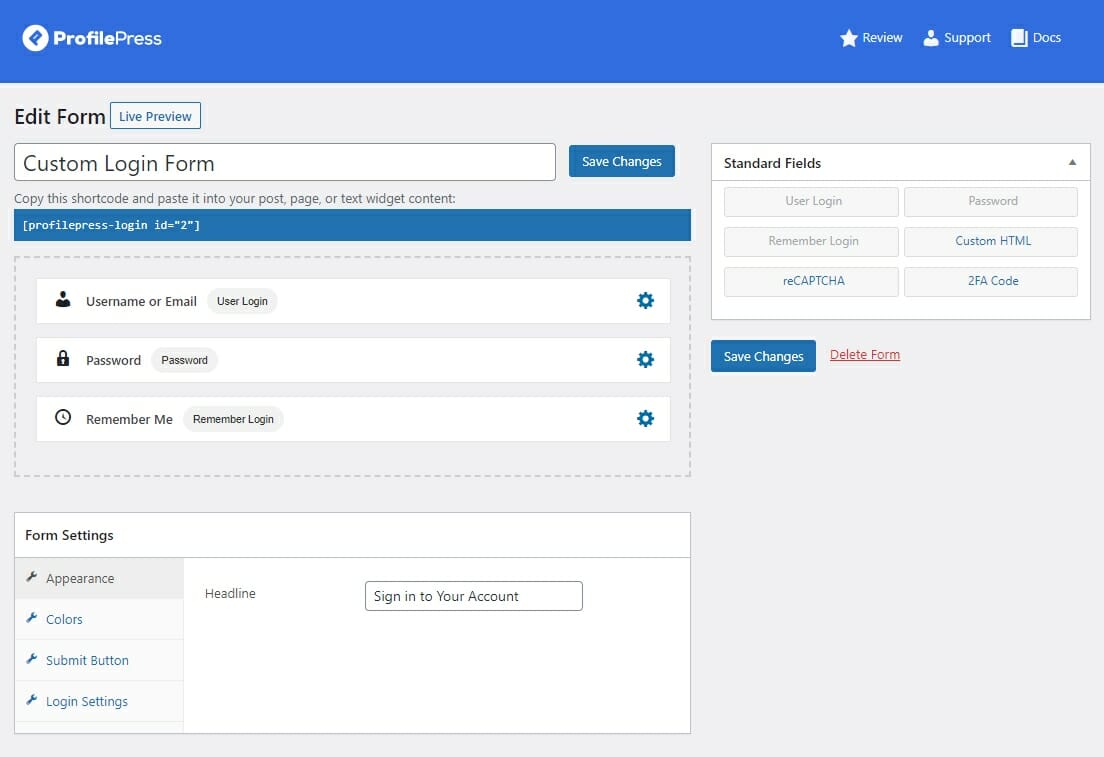
Customize the Form to your liking, and then click the Save Changes button to save the Form.
Now, copy the shortcode for this new Login Form, and create a new page with it in the content:
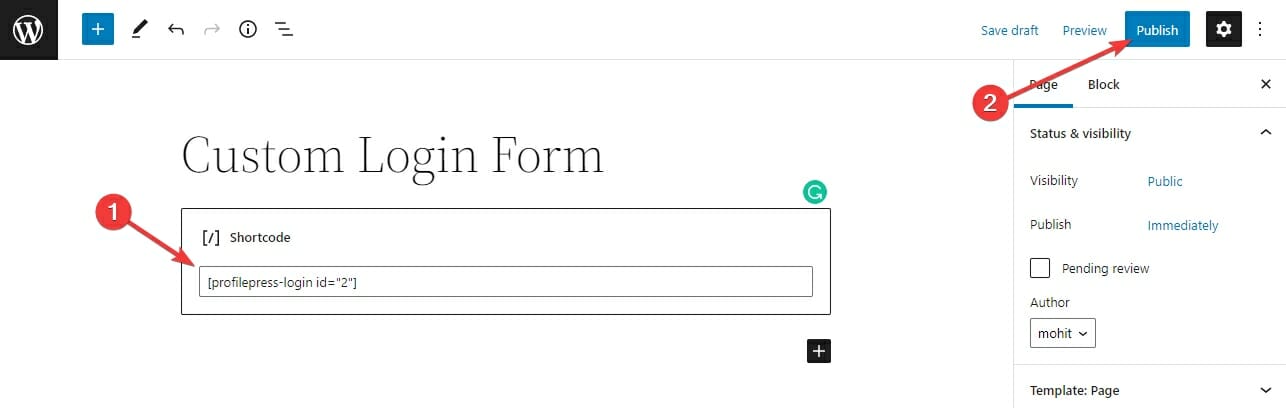
Finally, click the publish button to publish this new Login form.
Step 7: Activate The New Registration and Login Pages
Now that we’ve created new registration and login pages, we need to activate them.
To do this, visit the ProfilePress Settings page.
Now select the new pages you created in the Login Page and Registration Page drop-downs:
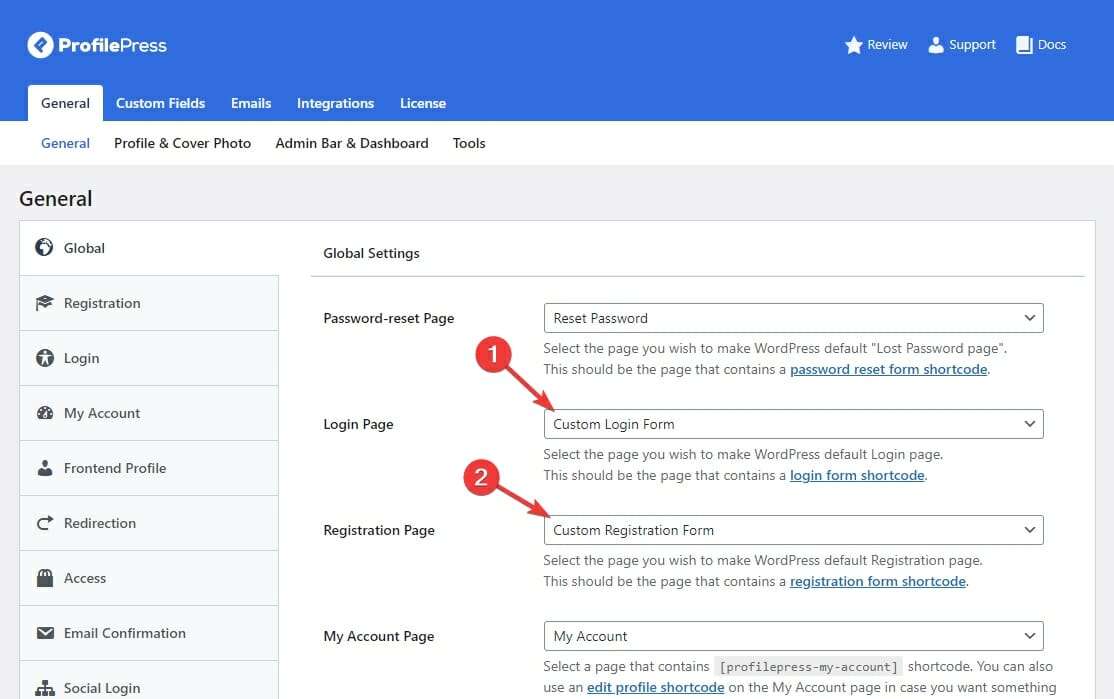
These are the two pages you added the shortcodes for the new Login Form and the new Registration Form.
Once you select these new pages, click the Save Changes button to activate these pages.
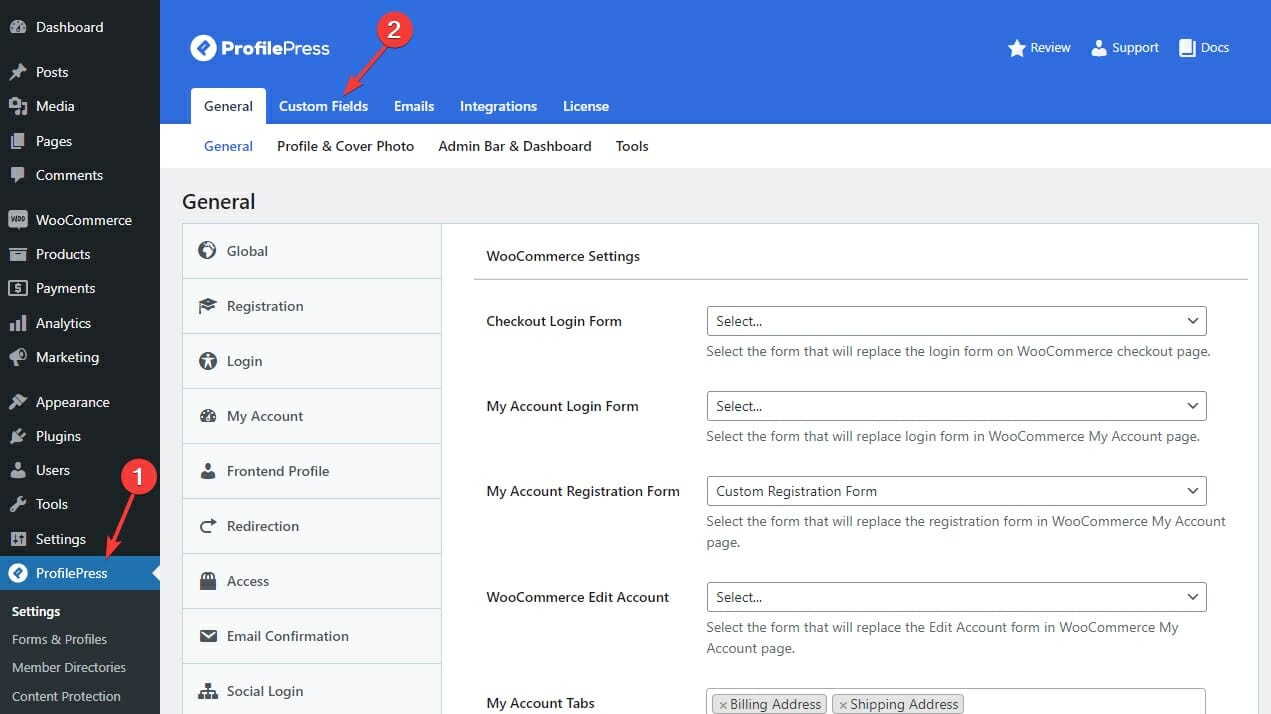
Finally, navigate to the WooCommerce section at the bottom:
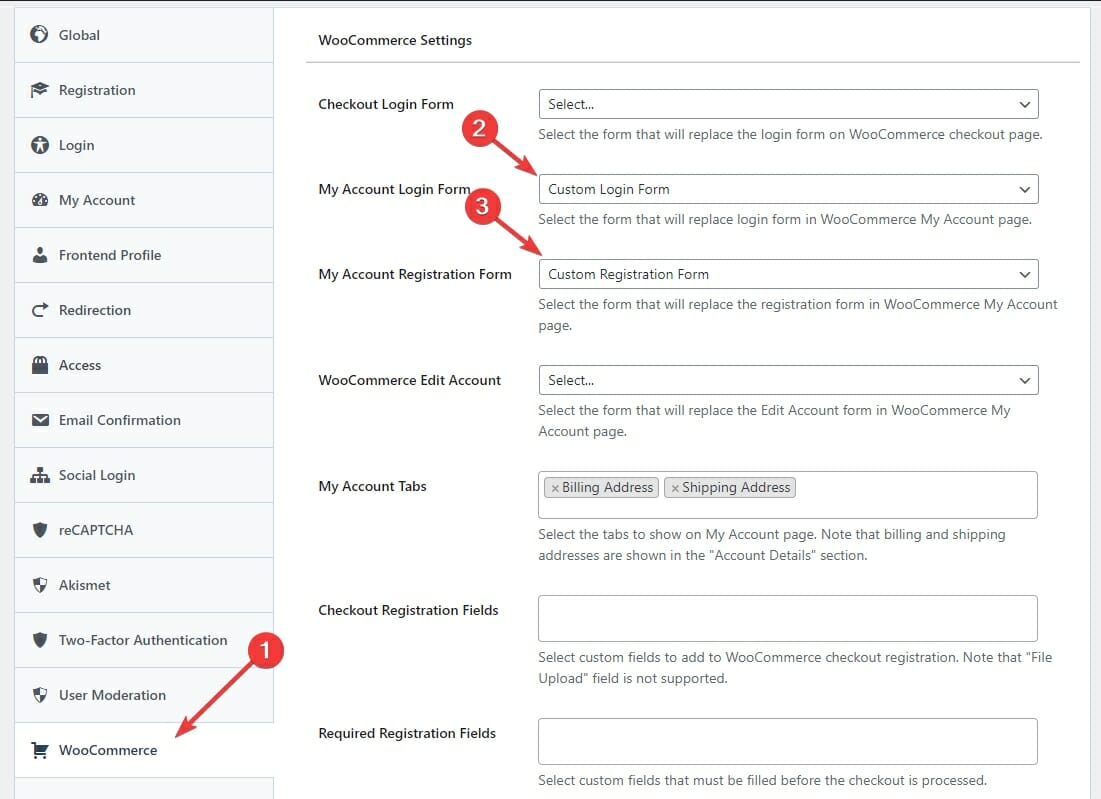
Select the custom registration and Login forms you created as the new My Account Login and Registration Form. Doing this will replace the default WooCommerce Registration and Login pages with your new custom ones.
Click the Save Changes button at the bottom when you are done!
Enable User Moderation
Now that you created new Registration and Login forms, you can enable User Moderation in ProfilePress.
It is straightforward.
You need to enable the User Moderation addon that comes bundled with ProfilePress:
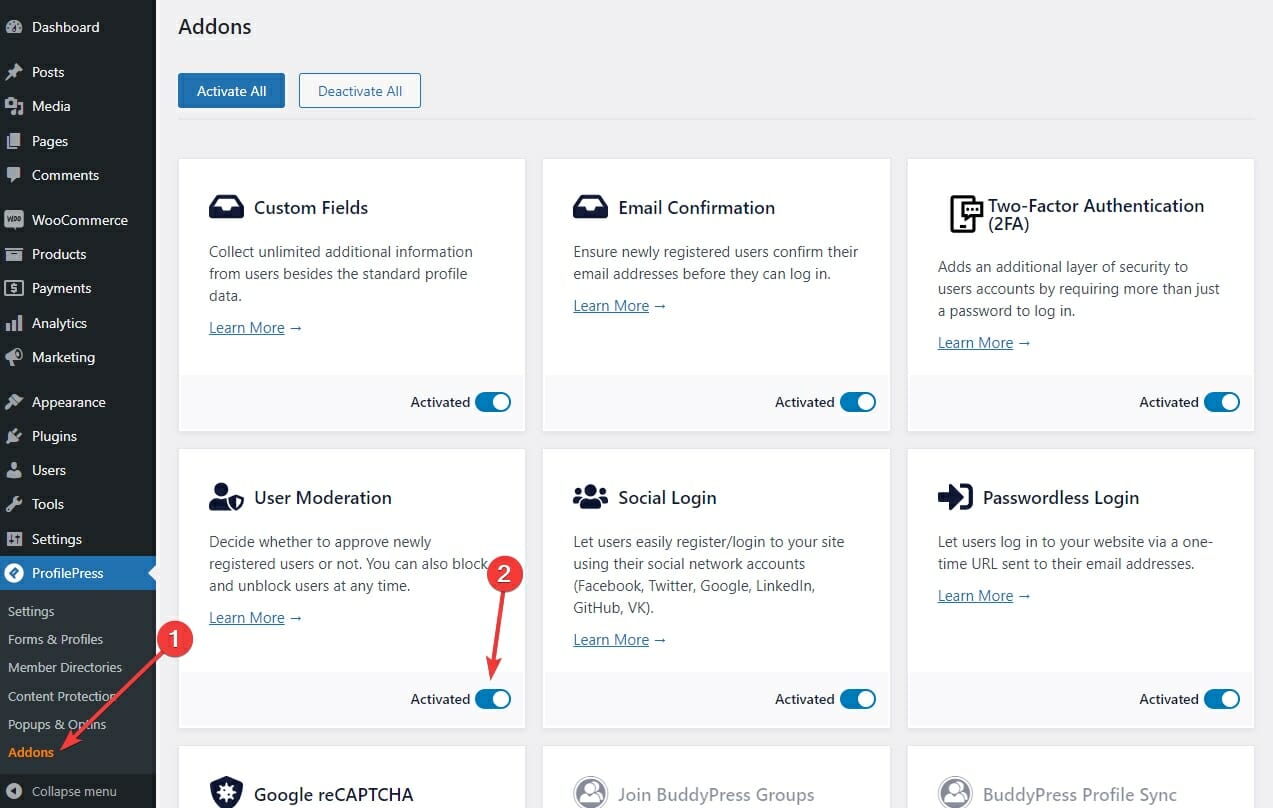
This ProfilePress addon lets you approve or reject new users on a case-by-case basis.
How To Approve or Reject New Users
Once you have enabled the User Moderation addon, every time someone signs up for your website, you’ll see this notification in your WordPress Admin dashboard:
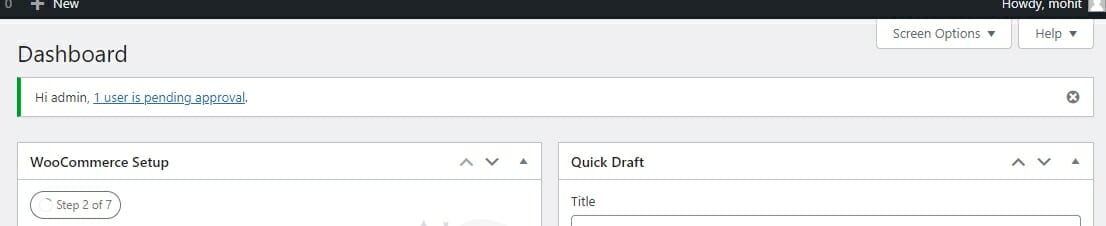
This notification will show you how many users are still pending approval.
Clicking the link in the notification will take you to this page:
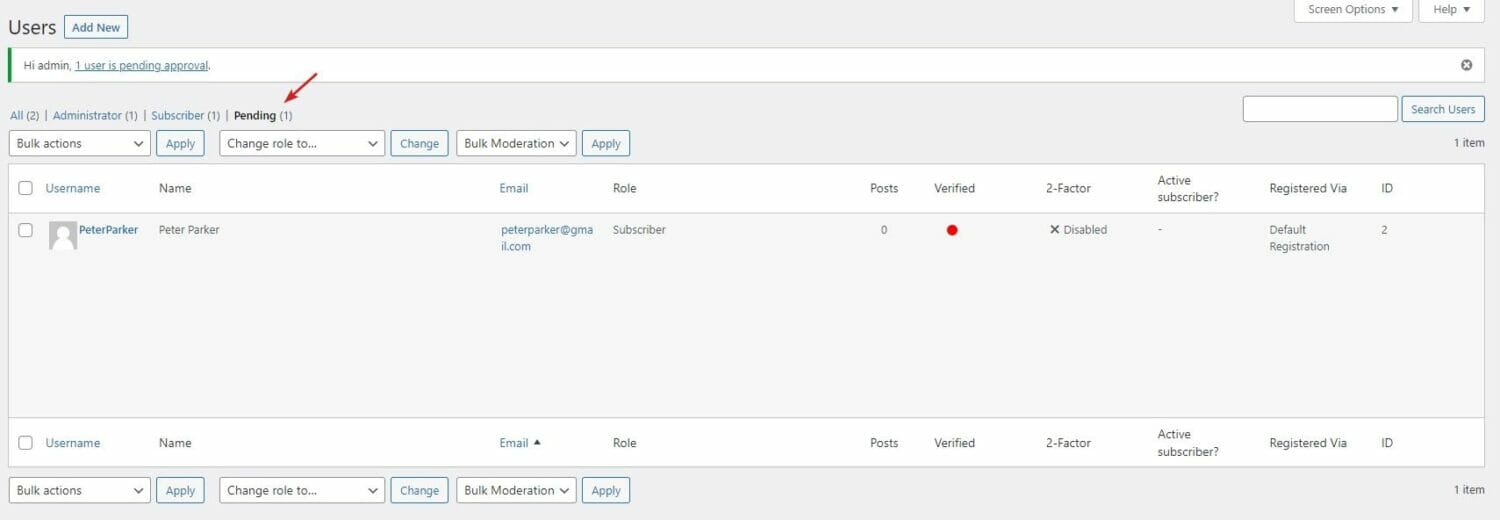
You can also open this page by going to the Users page from the Sidebar and selecting Pending from the top.
This is where you can approve or reject new users.
Take your mouse over the new user’s name, and you’ll see a bunch of actions you can take for this particular user:
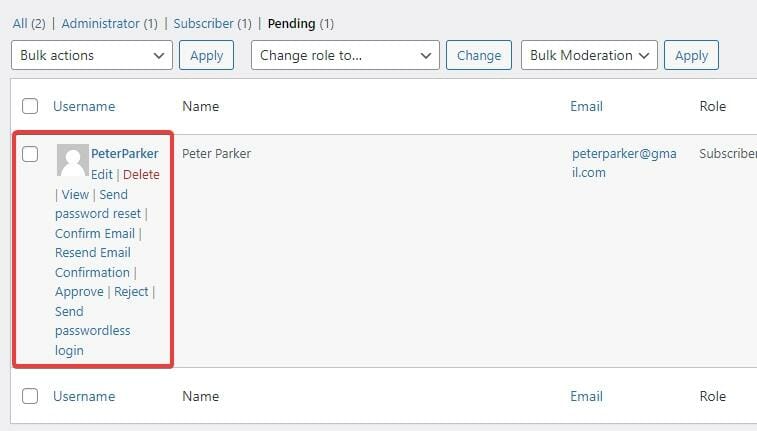
The options include:
- Send Password Reset: This link will send a password reset email to this user’s email address. They can reset their password by following the link they receive in the email.
- Confirm Email: If the user hasn’t confirmed their account from the confirmation email, you can manually confirm their account by clicking this link.
- Resend Email Confirmation: Send them the account confirmation link via email.
- Approve: Approve this user’s account. They will receive an approval email as soon as you approve their account. You can customize this email.
- Reject: Reject this user’s account. They will receive a rejection email when you do.
- Send Passwordless Login: Send the user an email with a link letting them log into their account without entering their password. Clicking the link will log them into their account.
How To Customize The Error Messages
When someone whose account has been rejected tries logging into your website, this is the error message they will see:
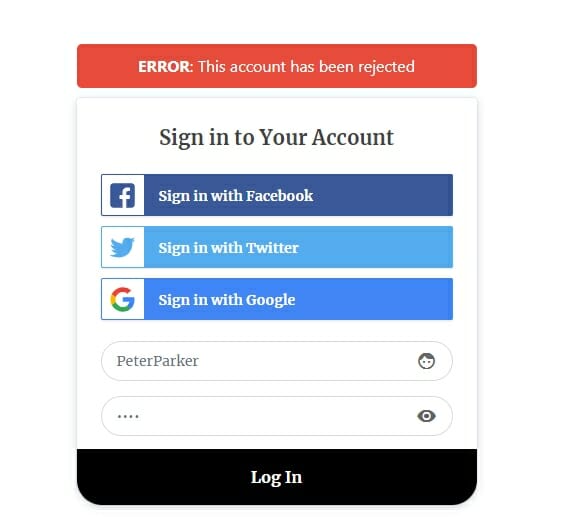
You can customize the error messages users see when they try to log into your website from ProfilePress Settings.
Go to ProfilePress Settings and select the User Moderation section:
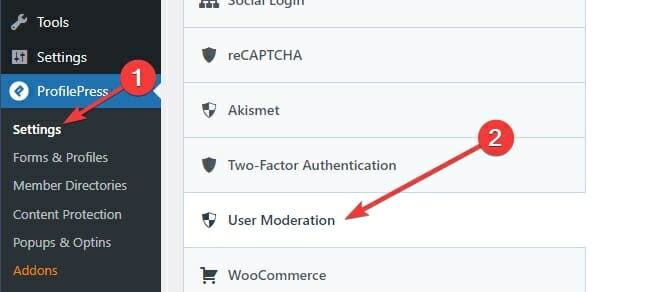
On this page, you can customize the error messages based on the user’s status:
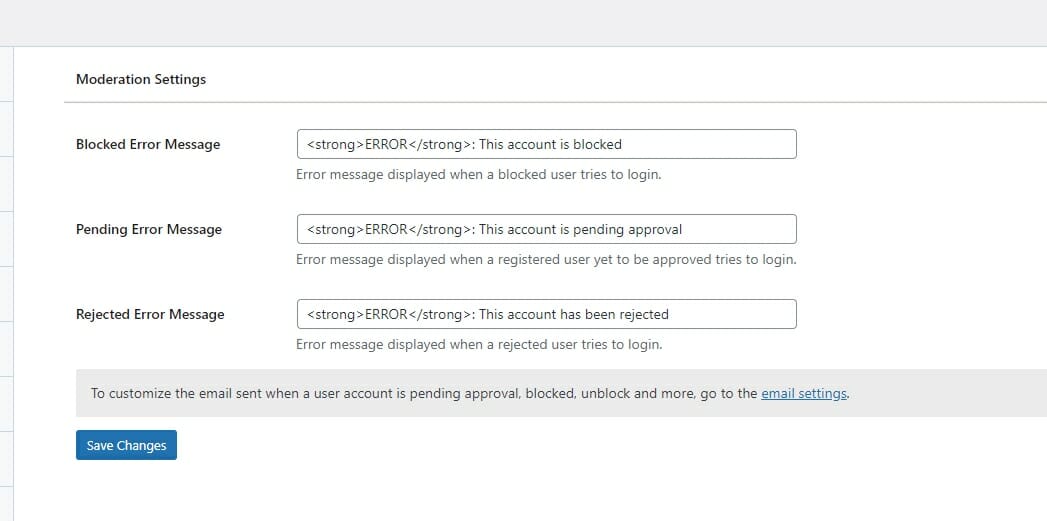
These are the messages people will see when they try to log into your website based on their account’s status.
Once you have customized your messages, click the Save Changes button.
How To Customize The User Moderation Emails
If you want to customize the emails that your users will receive based on their account’s status, go to the Emails tab of the ProfilePress Settings page:
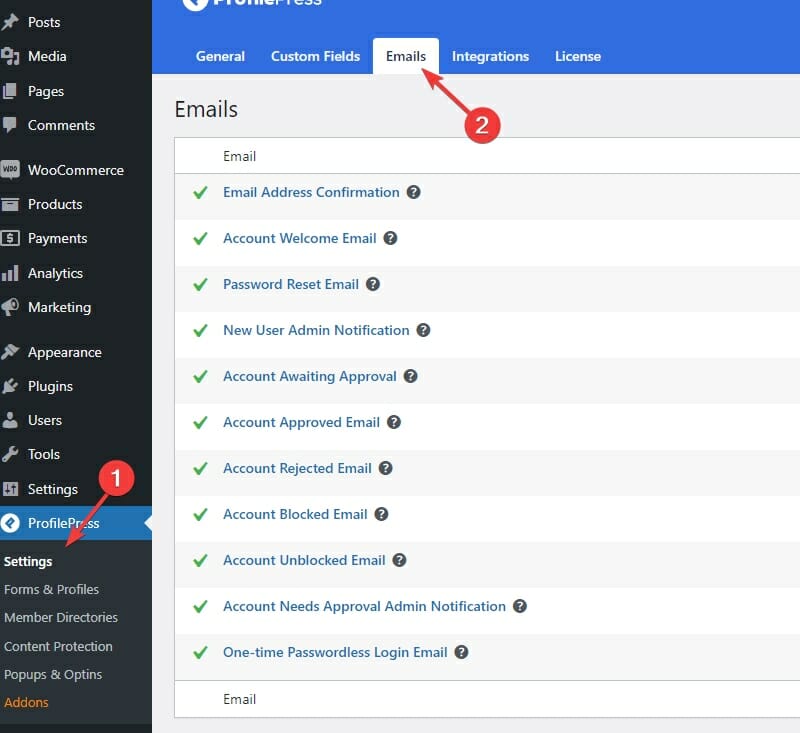
Click the name of the email to customize it:
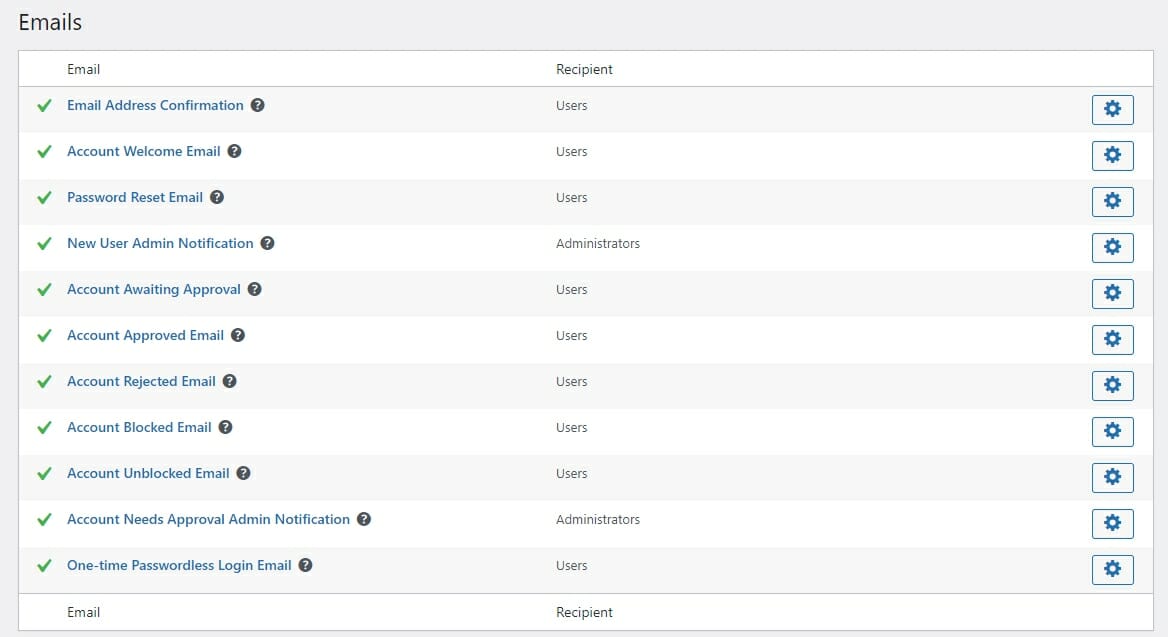
When you click an email or the Gear icon at the end of it, you’ll see this page:
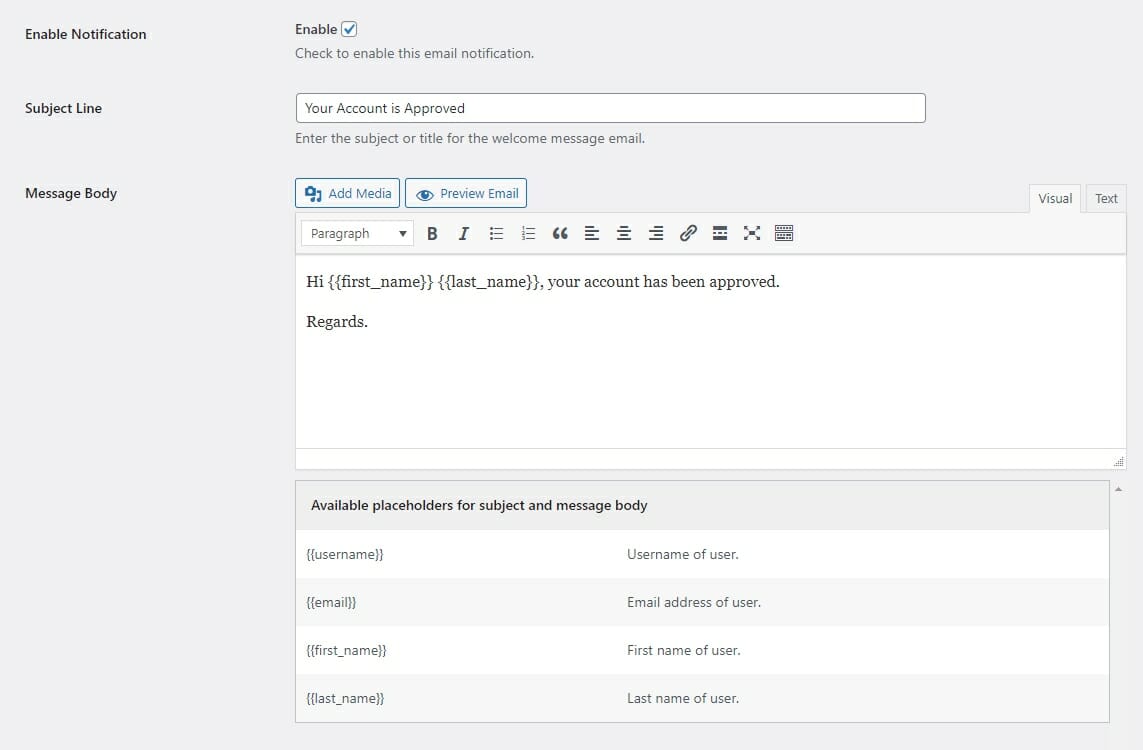
You can customize the email’s subject line and message body here.
If you don’t want your website to send this email to the user, you can disable it by unchecking the Enable checkbox on top. You can disable any of the emails you want.
If you want to personalize the email subject or body, use the placeholders you see at the bottom of the editor page:

If you put {{first_name}} somewhere in the Subject line, it will be replaced with the User’s First Name when the email gets sent.
Once you are done editing the email, click the Save Changes button at the bottom of the page.
You can customize the sender details at the bottom of the Emails tab of the ProfilePress Settings page:
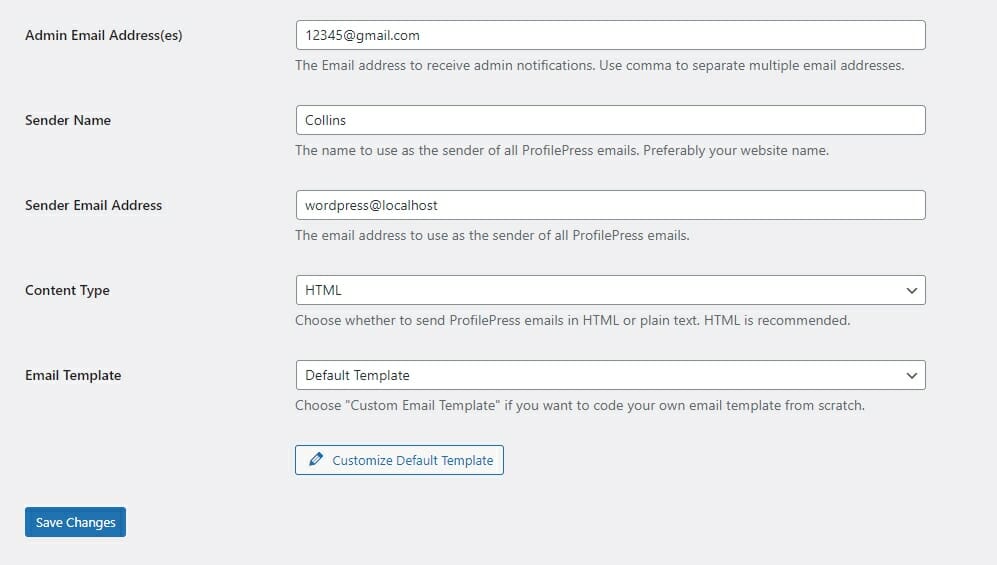
You can customize this page’s sender name, email address, and other details.
Conclusion
If you want to be able to approve or reject new user registrations on your WooCommerce website, you need ProfilePress. It allows you to enable User Moderation on your WordPress website.
ProfilePress is the best WooCommerce user registration and admin approval plugin. It lets you customize all aspects of the process and makes it easy to moderate new user registrations.
It also has content locking features that let you create members-only sections on your WooCommerce website.