How to Sell Audio Files & Sound Effects Online With WordPress
Are you an artist who wants to sell your music online but don’t know where to start?
Or are you someone who wants to start selling sound effects?
There are a lot of different types of audio files you can sell online. There are multimillion-dollar businesses that are built on top of this business model.
In this article, I’ll first share why it’s a lucrative business model. Then, I’ll show you how you can get started today in less than 20 minutes.
Why Sell Audio Files & Sound Effects Online
You can sell them on your website if you know how to produce music, sound effects, audiobooks, or any other type of audio file. This can not only result in a lucrative side income, but it also has the potential to become a full-blown million-dollar business.
If you know how to produce sound effects, you’re in luck because businesses need sound effects for their content. It might be as simple as some sound effects for a conference slideshow presentation. Or they might need one for a video they want to put on their hiring page.
You can also sell other audio files, such as music, audiobooks, and podcasts.
The most significant benefit of this business model is that once you produce the product, there’s no need for maintenance. Once you produce a sound effect, you probably will never need to update it. Not only that, there’s no cost for selling the product. Once you create it, all you need to do is make a simple copy of the original. Your profit margins can be as high as 95% in this business if you do it right.
The best example of selling audio files online comes from one of my favourite podcast creators Dan Carlin. His podcast Hardcore History’s latest episodes are available for free:
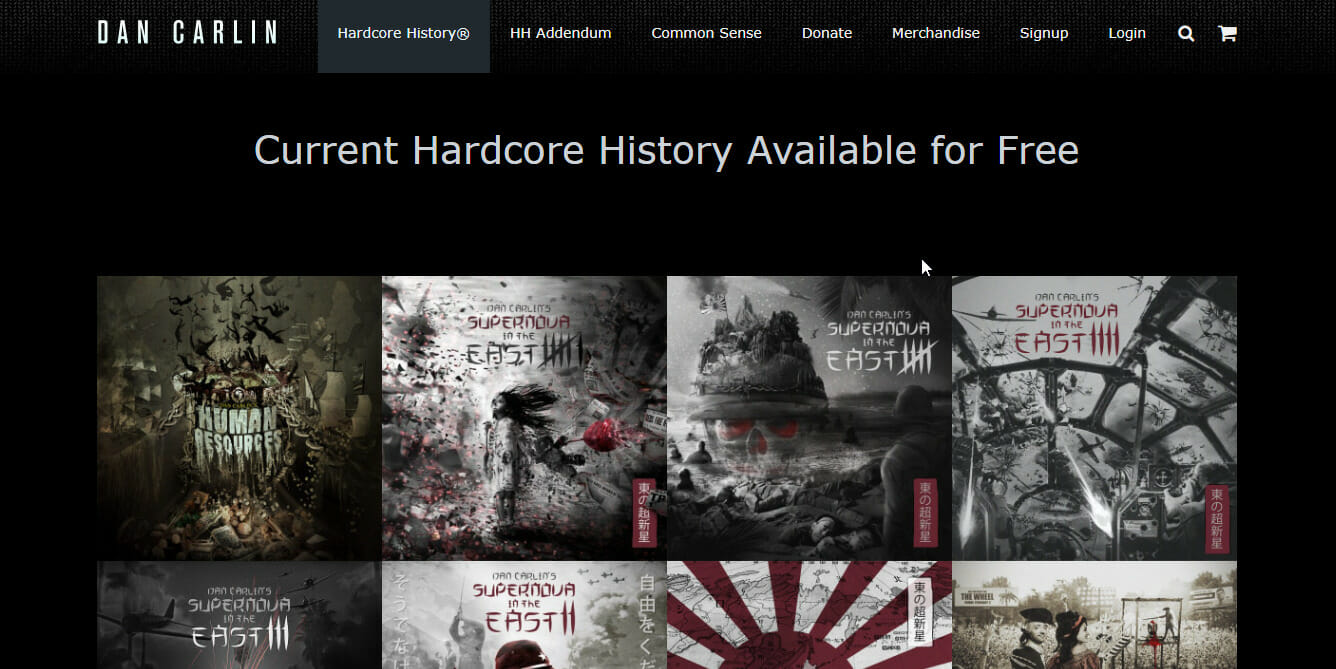
But if you want to listen to any of the older episodes, you’ll need to purchase them:
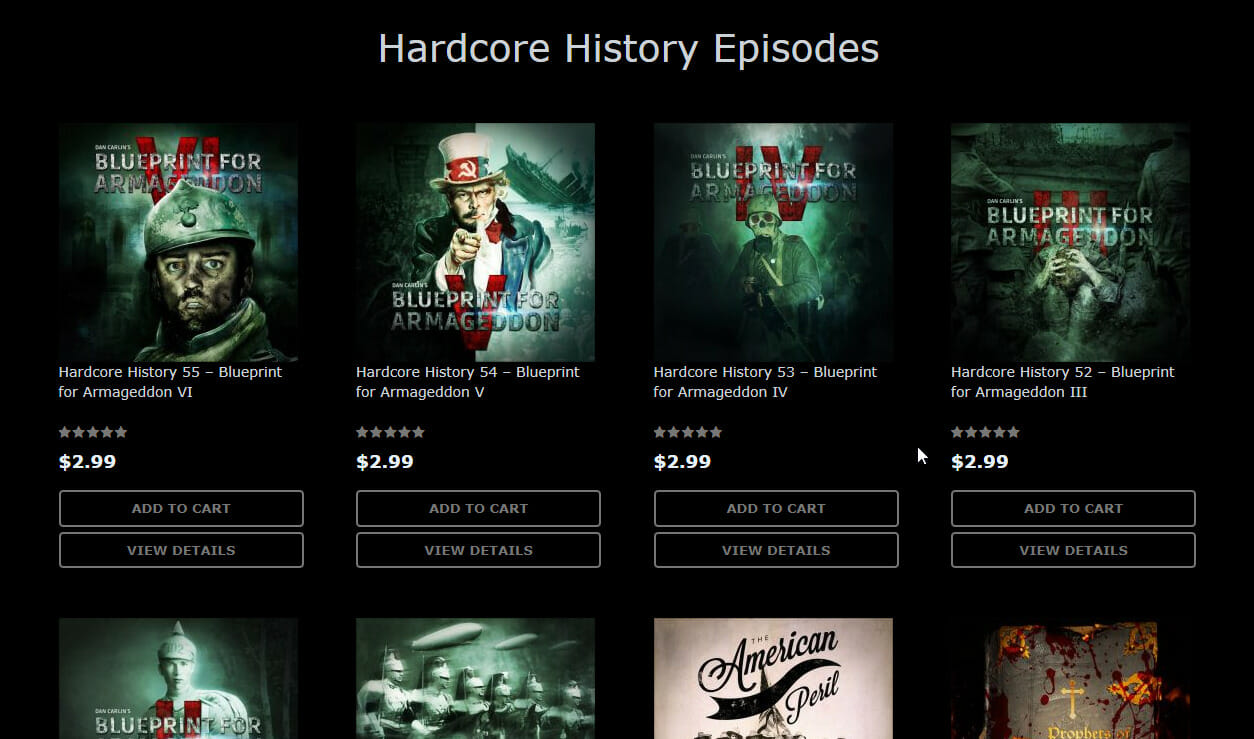
Dan Carlin sells individual episodes, but that’s not the only way to do it. You can also create a monthly subscription that gives your customers access to all or some of your content. You can even create multiple pricing tiers for access to your content.
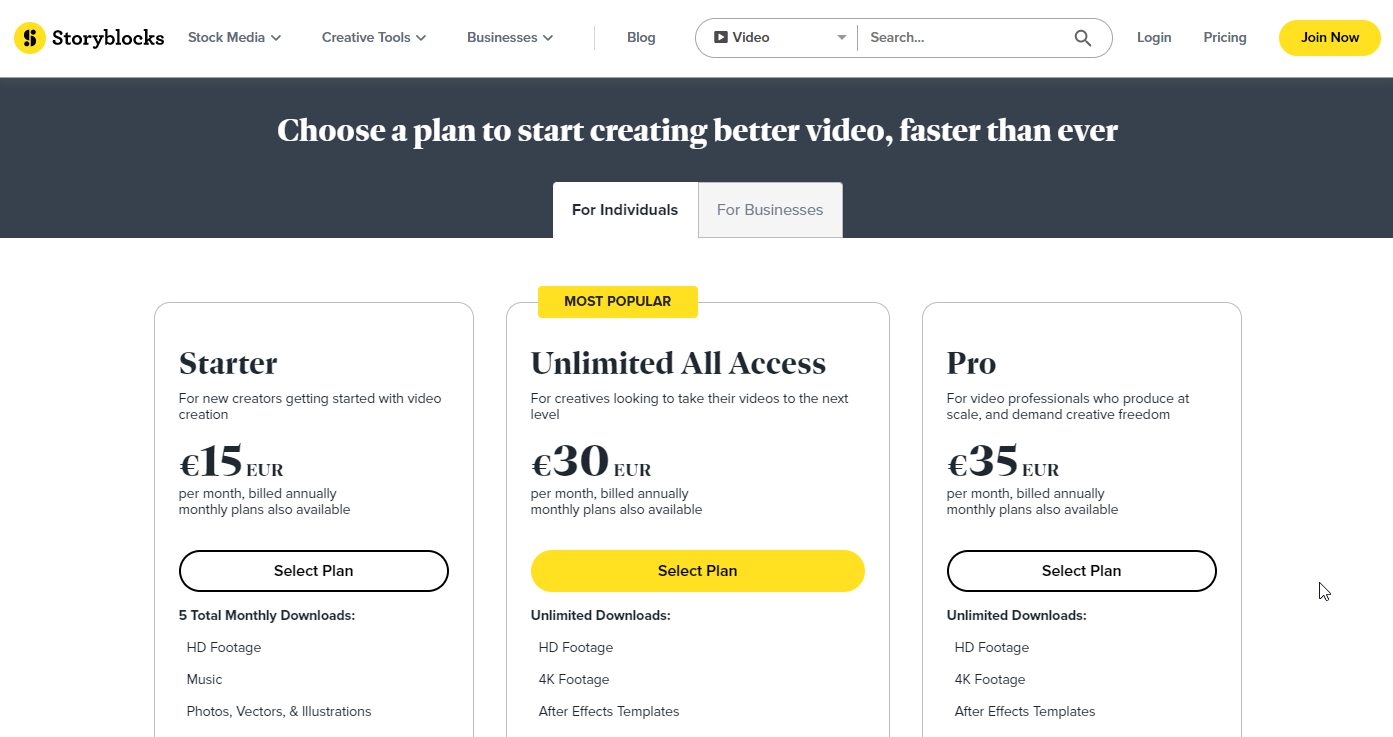
This is exactly what sites like StoryBlock do. They sell you a subscription that lets you download royalty-free music, sound effects, and videos:
This guide will show you how to sell individual audio files and recurring subscriptions easily. How To Create Audio Files and Sound Effects That People Will Want To Buy
Step 1: Decide what you want to sell
There are many different types of audio files you could sell on your website. Here are some of them:
- Audiobooks: An audiobook is just an audio narration of a book.
- Music: You can sell all kinds of music. You can sell music directly to consumers if you’re an artist. You can sell music creators can use as background music to their b-roll. Selling music that is designed to be used in videos is a great business to be in. You might one day find that your music is being used in a TV show or a commercial.
- Podcasts: You don’t have to become the next Joe Rogan… You can create a podcast on any topic you want. You can then sell these podcasts as a premium series on your website. For example, Dan Carlin does this with his Hardcore History podcast. You can listen to some of his latest episodes, but you need to buy his older episodes if you want to listen to them.
- Sound Effects: Video creators need sound effects for their videos. Sometimes it’s just the sound of a door opening for a horror video; other times, it’s a funny sound. And do you know who else needs sound effects? Video game creators. A video game is nothing without good sound effects. Selling sound effects can become a full-time business if you do it right.
- Other Audio Files: You can sell other audio files, too, such as ASMR, guided meditations, self-hypnosis (yeah, that’s a thing!), nature sounds, sleep sounds, and brown noise. You can sell anything you want! Anything legal!
Step 2: Figure out who you want to sell to.
This step is crucial. You need to know who exactly you’re selling to before you start creating your product. This will help you make the right decisions when you start working on your audio files.
To figure this out, ask yourself some questions such as:
- What type of customer would I have the most fun creating sounds for?
- Would this type of customer prefer monthly subscriptions or one-off purchases?
Through some simple questioning, you may find that you’d enjoy creating music for content creators. Or a premium monthly subscription to an interview-based podcast for fellow real estate agents.
Step 3: Find out what people are already buying.
Creating something and then looking for buyers is a recipe for disaster. You never want to do that. The easiest way to start making money on the internet is to figure out what’s working for other businesses and create something similar or better.
Don’t worry about your products being similar to what everyone else is selling. That’s just how business works. Your goal shouldn’t be to create the next billion-dollar market-disrupting product. Instead, your goal should be to figure out what your customers are already buying, create something similar, and then improve on it incrementally with time.
How to find out what people are already buying?
You already figured out who you want to sell to in the last step. Now, you need to infiltrate websites where you can gather information about what your customers are buying.
Just go wherever your customers are and look at what’s popular. In case of a podcast, go to Apple Podcasts, Spotify, or your favourite podcast app, and look for the popular podcasts section. Most podcast apps let you find popular podcasts by category. Choose the category you want to start a podcast in and see what people are listening to in that category.
If you are going to sell sound effects, take a look at websites such as Envato Elements or StoryBlocks to find out what type of sound effects sells the most. These two sites are also great for research if you consider selling music to content creators.
Step 4: Make sure your audio is as close to perfect as possible.
I don’t mean to stifle you with the word perfect. But if there’s one thing people on the internet hate more than anything else, it is terrible audio quality. You could post a high-budget, award-winning documentary on YouTube, but if the sound isn’t right, people will eat you alive in the comments.
But that doesn’t mean that producing quality audio is difficult. You only need two things: high-quality equipment and a quiet room.
Get Some High-Quality Equipment
Before you start recording your audio files, I recommend buying the best microphone you can afford. This doesn’t mean you need to rack up a huge credit card bill. Instead, go for something that has good reviews on YouTube.
Popular content creators create review videos for microphones all the time. Find one that is within your budget and has excellent reviews. In addition, there are dozens of new microphones coming out every month. That’s why I recommend looking for microphone reviews on YouTube.
You don’t need to rob a bank to buy a good microphone. There are plenty of microphones for every budget. You can find great microphones for under $100.
Record In a Quiet Room
Even if you have bought the best microphone money can buy, you’ll need to record your audio in the quietest room in your house. The more sounds the microphone picks up, the worse your audio file will sound, even after you clean it up with audio recording software.
Although these two things should help you get started, recording audio is a vast topic. There could be a college course on the topic. Oh, wait, there is! It’s called Audio Engineering.
Look, it will not sound very pleasant the first time you record some audio. You’ll hate the sound of your voice. But after a couple of tries, you’ll figure it out. And don’t worry; there are many tutorials on YouTube on how to master this art!
How To Start Selling Audio Files & Sound Effects with WordPress
WordPress is fantastic, but it lacks a lot of features. One such feature is eCommerce. If you want to sell anything using WordPress, you’re looking at a world of pain. Most WordPress plugins that allow you to sell online are too complicated and take months to learn. If you choose a plugin like WooCommerce, you will be banging your head against a wall, trying to figure out how to make it work the way you want it to.
This is why we made ProfilePress. It’s the best all-in-one WordPress plugin for selling digital products and building membership sites. It only takes a couple of minutes to set up. If you follow this guide, you will be selling audio files on your website in no time.
First, download and install ProfilePress.
Once you’re done, decide whether you want to sell individual audio files or recurring subscriptions. You can, of course, do both simultaneously.
How To Sell Individual Audio Files
Selling individual digital downloads with ProfilePress is easy. All you have to do is create a new one-time plan. Let me show you how easy it is.
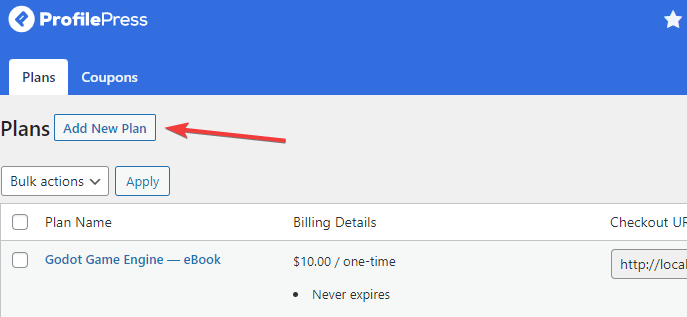
First, navigate to the membership plans section under ProfilePress:
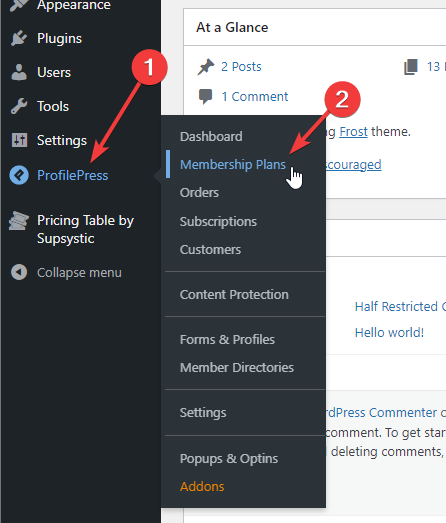
Then, click the Add New Plan button:
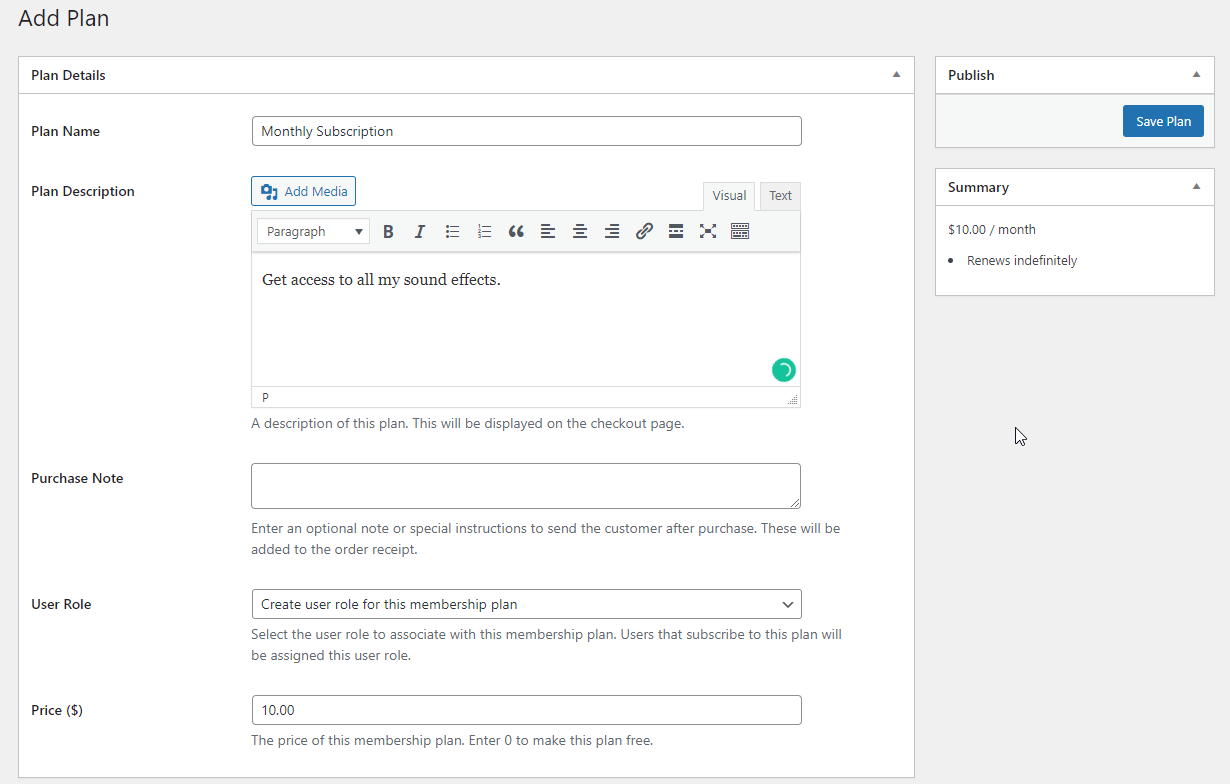
Now, fill out the details of the audio file you’re going to sell:
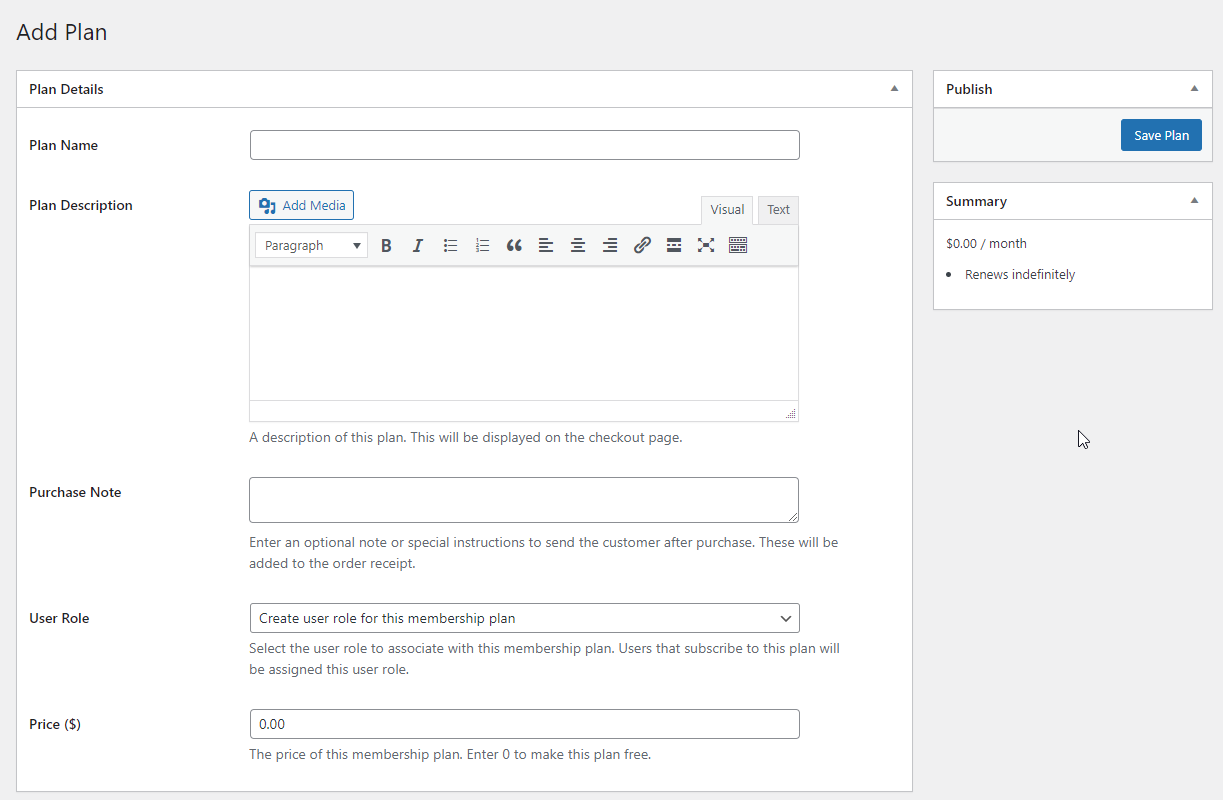
Here’s what the options do:
- Plan Name: The name of the file you’re selling. This name will be displayed on the checkout page.
- Plan Description: Offer a detailed description of what this file is. This description will be displayed on the checkout page.
- Purchase Note: This note will be emailed to your customers when they buy this plan (product).
- User Role: Leave this option alone to create a new role. Otherwise, you can select any other role from the dropdown. This role will be given to new customers when they purchase this product. This option lets you use the same role for multiple plans. It is helpful in cases where more than one plan offers the same features. For example, monthly, quarterly, and annual plans. Leave this option alone if you don’t know what user roles are. 🙂
- Price: The price of this product.
Now scroll down to the subscription settings section and select one-time purchase:
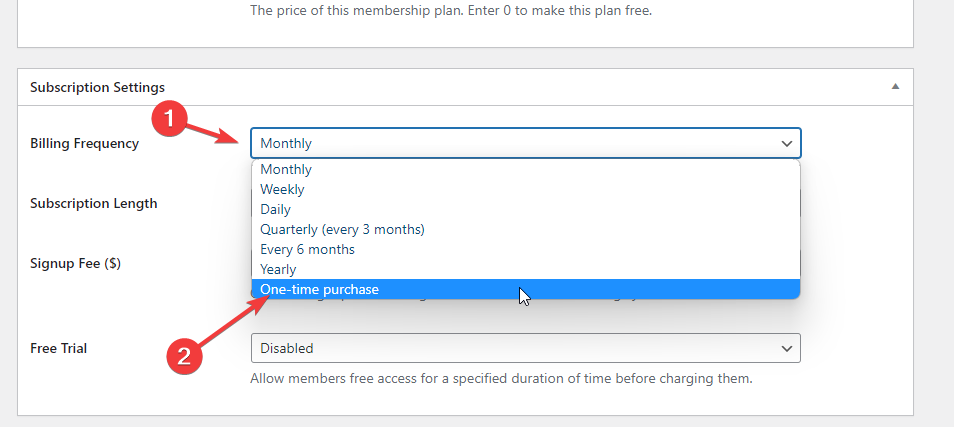
This will make this a one-time payment plan. This is for when you want to sell individual files without a recurring subscription.
Finally, enter let’s go over the Downloads & Integrations section:
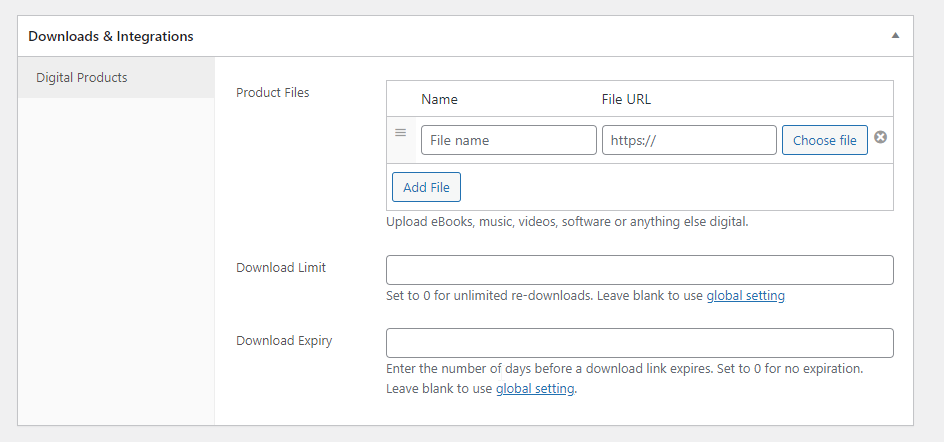
- Product Files: You can upload as many files as you want. Click the Choose File button to upload a file from your computer. Alternatively, you can enter a file name and the URL of the file. Click the Add File button to add more than one file. The file name you choose here will be displayed to the user, so be descriptive.
- Download Limit (optional): Do you want to limit the times a customer can re-download the file?
- Download Expiry (optional): This is the number of days after a download link expires.
That’s it; now click the Save Plan button on the top right to publish this product.
Navigate to the Membership Plans section of ProfilePress to find the checkout link for this new product that you created:

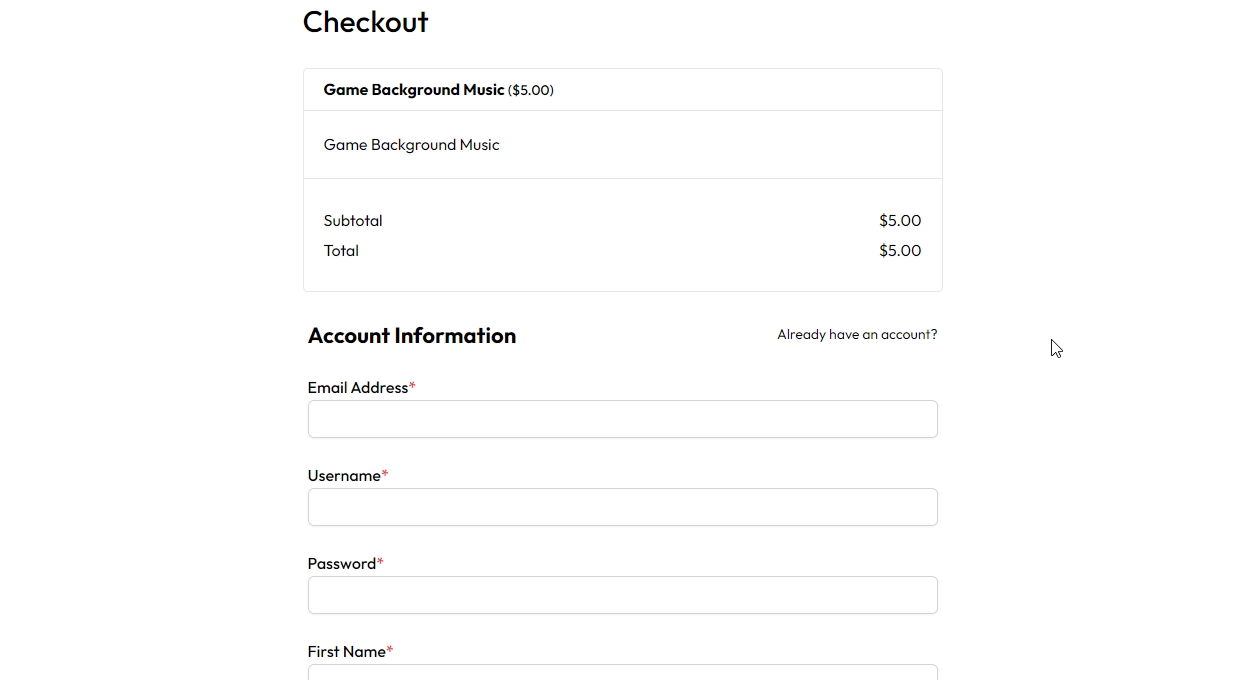
Try opening this link in an incognito browser window to see what the checkout page will look like to your website visitors.
You’ll see a checkout page that looks something like this:
How To Create Monthly and Annual Subscription Plans
ProfilePress makes it easy to sell monthly and annual recurring subscriptions.
If you have a lot of audio files you want to sell, then selling recurring subscriptions makes a lot of sense.
This is what sites like StoryBlocks do:
To create a recurring subscription, navigate to the Membership Plans section under ProfilePress and click the Add New Plan button.
Now, enter a name, description, and price for this recurring plan:
Remember, the price you enter will be charged regularly.
Scroll down and select a Billing Frequency:
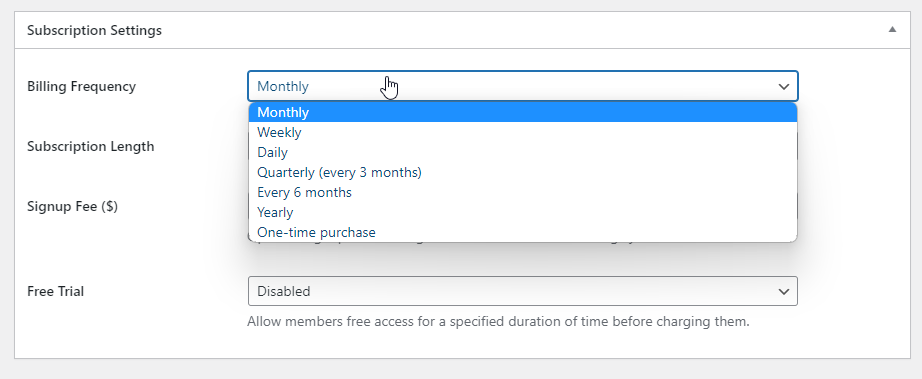
Select Annual to create a subscription that charges your customers yearly, or Monthly to create a monthly subscription.
Then, let’s go over the other three options:
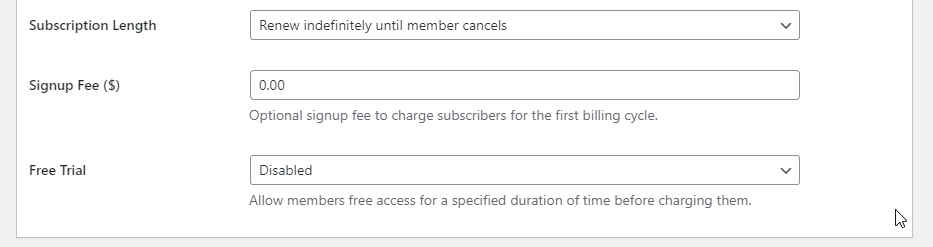
- Subscription Length: By default, the subscription will charge your user indefinitely until they cancel. You can choose to charge them a fixed number of payments. This is helpful if you want to create an instalment plan.
- Sign-Up Fee: If you want to charge an additional fee for signing up for this plan, enter an amount here. This amount will be charged when the user first subscribes to this plan.
- Free Trial: ProfilePress allows you to offer a free trial. If you select a free trial period from the dropdown, your customers won’t be charged until the trial period is over.
Once done, click the Save Plan button on the top right.
How To Restrict Access To Your Content Based on Subscription Plans
Now that you have created a couple of recurring-payment-based subscription plans, you’ll need to restrict access to the download pages of your audio files.
First, you’ll have to create a new post for every audio file you want to make available in this subscription plan. It’s straightforward. Just create a new post, and then add a File block to the page:
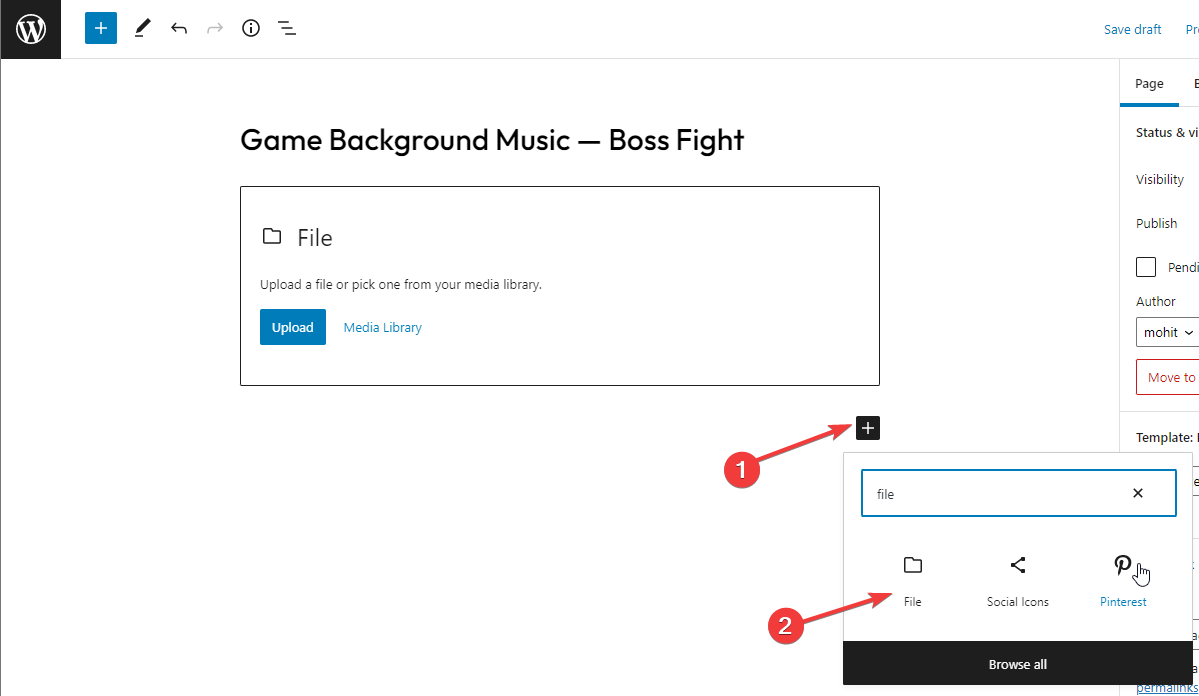
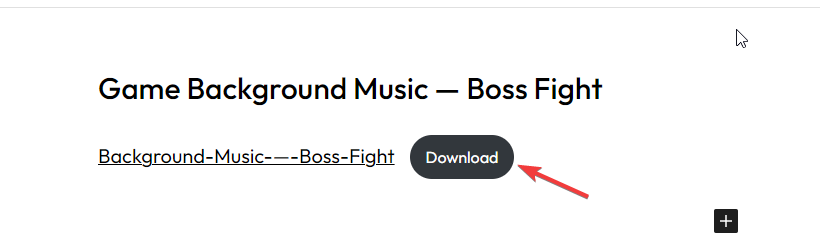
This will allow you to upload a file using the Upload button. It’ll then create a download button for the audio file:
You can either create individual posts for every audio file. Or you can create one page and upload all the files to it. Creating separate pages might take more time, but it’ll give you more control over what plan offers access to what post.
Once you’ve created posts for all your audio files, create a new category:
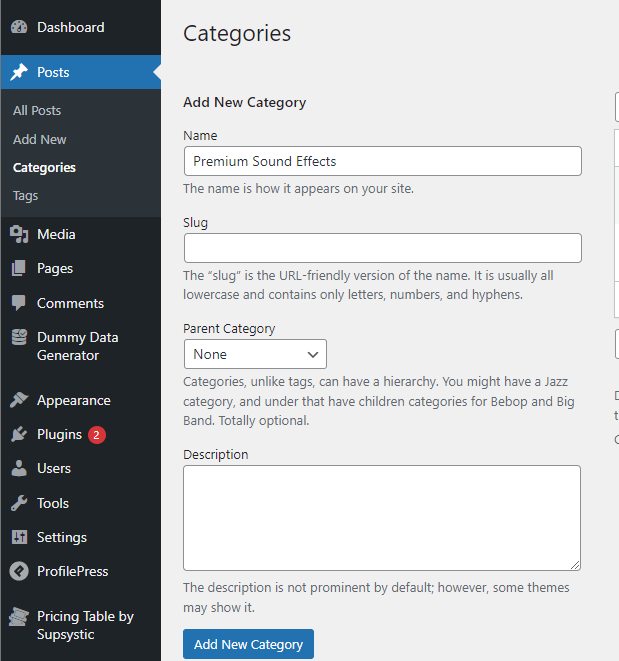
You can call it Premium Audio or whatever else you want.
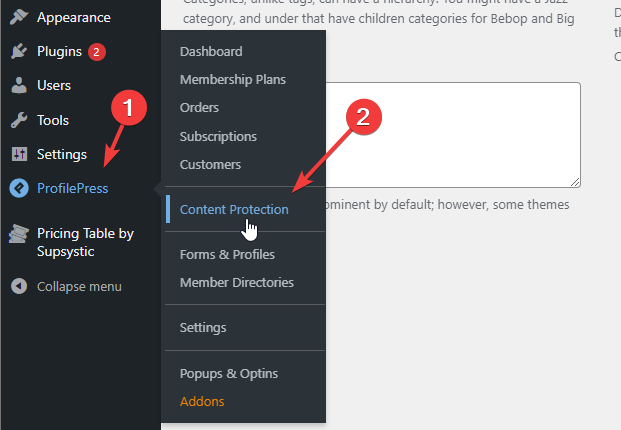
Now, navigate to the Content Protection section under ProfilePress:
Click the Add New Protection plan button to create a new protection plan. You’ll see this page:
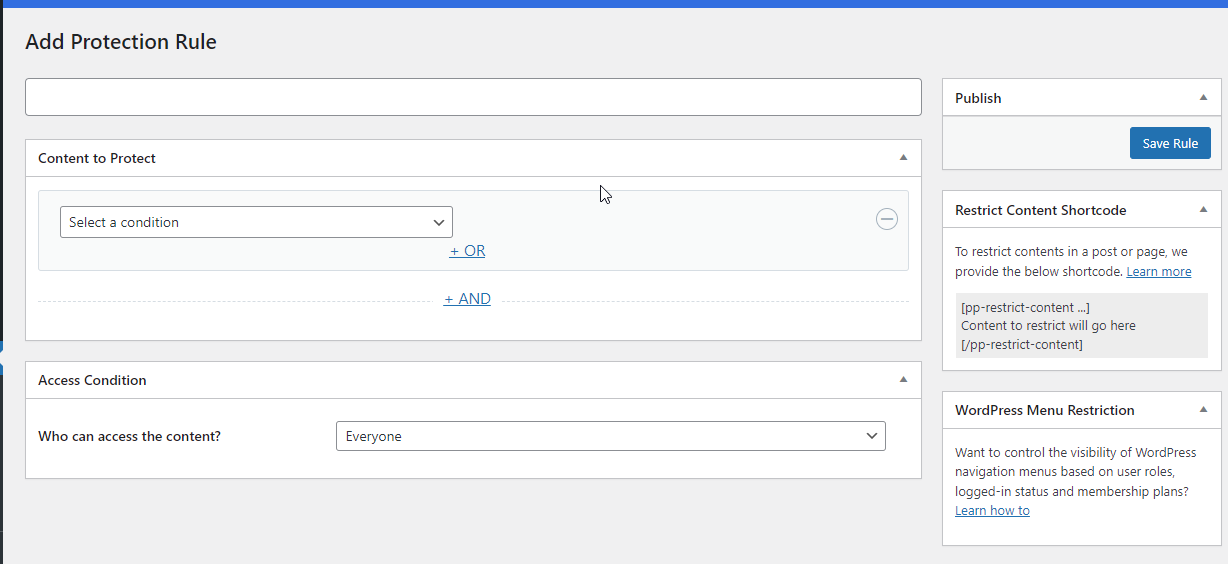
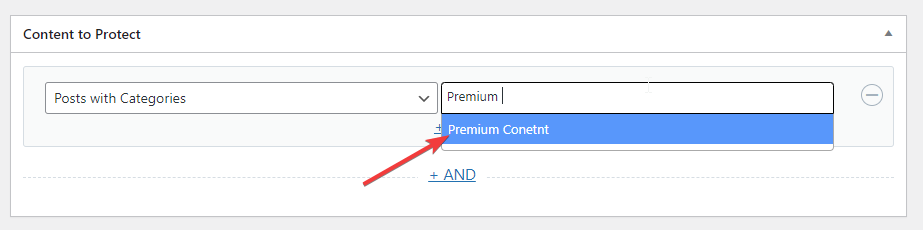
First, click the Select a condition dropdown and connect Posts with Categories.
Now, enter the name of the ‘premium content’ category you created:
Then, scroll down, and you’ll see the Access Condition section.
Now, select Logged In Users from the dropdown:

Now, enter the name of the plans you want to allow access to your premium content:
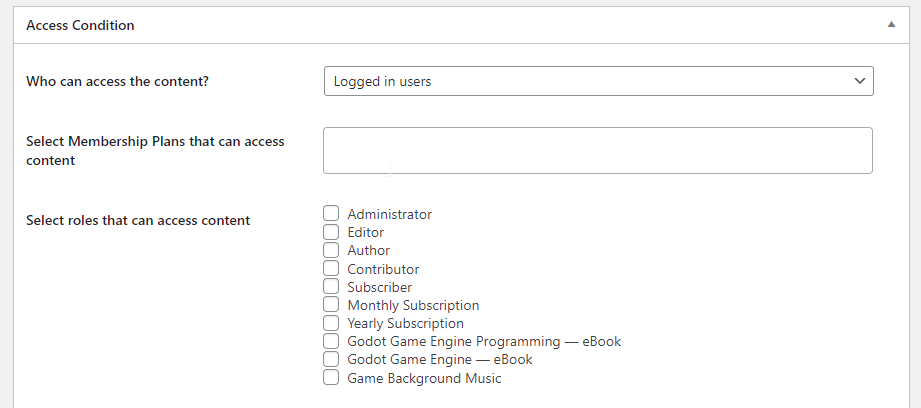
You can also select the roles that are associated with the membership plans. Either way is acceptable!
Now, enter a name for this plan and click the Save Rule button to publish this content restriction rule:
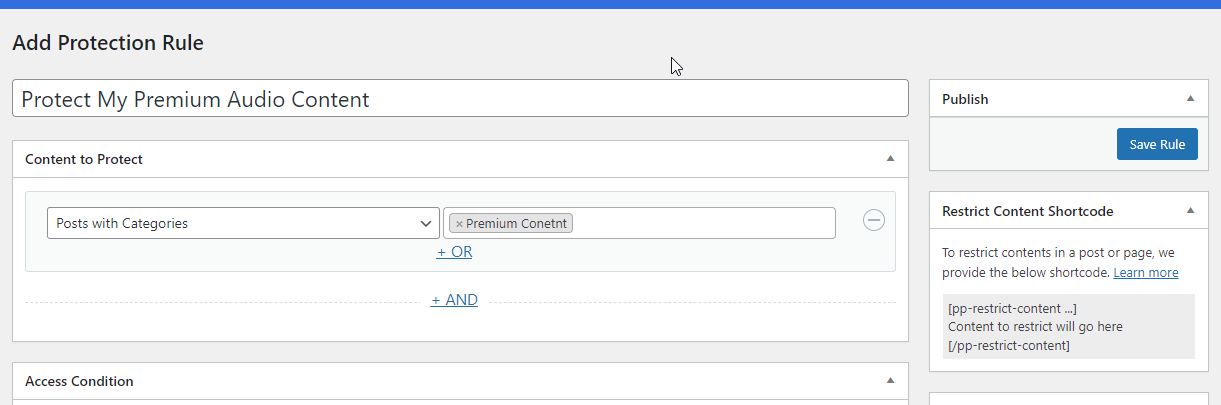
Now, only users who have purchased the membership plans you selected will be able to access posts with the Premium Content category.
See also:
- How to Restrict Visibility of Beaver Builder Contents
- WordPress Navigation Menu Restriction & Visibility Control
- How to Restrict Visibility of Elementor Contents in WordPress
- Restrict Access & Visibility of Contents in WordPress Block Editor
- WordPress Content Restriction Shortcodes
- How to Restrict Access to Entire WordPress Site
Conclusion
If you want to start selling audio files online, nothing is stopping you! ProfilePress makes it as easy as creating a Facebook account. You don’t need any technical knowledge, and you also don’t need any coding knowledge. If you can Google stuff, you can start selling online with ProfilePress.
So, what are you waiting for? Get started today!