How to Create a Razorpay WordPress Registration Form
If you’re managing a membership or subscription-based website using WordPress, you’ll need users to register and subscribe to a payment plan.
Unfortunately, by default, WordPress doesn’t provide payment collection or complete control over registration. This can be a problem for subscription sites that require users to register when subscribing to a payment plan.
To help, we’ve created a guide to creating a WordPress registration form and checkout page that allows users to pay with Razorpay during registration.
Setting up a Razorpay registration form
ProfilePress offers an all-in-one solution for creating a full-fledged membership sites. It is one of the best Razorpay WordPress plugins for accepting payments.
It automatically creates important membership pages using shortcodes, lets you set up membership plans, and integrates popular payment methods so users can make payments using some of the most popular payment gateways, such as Stripe, PayPal, Razorpay, Paddle, Paystack, Direct Bank Transfer, Mollie.
ProfilePress Razorpay Checkout addon makes it easy to connect your Razorpay account to your WordPress membership site. This way, your website visitors can make payments after completing a user registration form with Razorpay using Credit/Debit cards, Netbanking, UPI, and Wallets with Razorpay from Indian customers on your WordPress sites.
Creating a Razorpay WordPress registration form
Here, we’ll cover the steps you need to follow to create a WordPress registration form with Razorpay using our ProfilePress plugin.
For this, you’ll need a WordPress site and the ProfilePress plugin to create membership plans, connect your Razorpay account with your membership site, and let logged-in users make payments for subscriptions using Razorpay.
Step #1: Install and activate the ProfilePress plugin
Get the ProfilePress plugin and install it on your WordPress site. To do this, navigate to Plugins → Add New and upload the plugin’s ZIP file to your WordPress site.
Once you click the Install Now button, the plugin will automatically be installed on your site. Activate the plugin once it’s installed.
Next, validate the license key given to you at the time of purchase. To do this, navigate to ProfilePress → Settings and click on the License tab.
Enter your license key in the text field and click the Activate License button to continue.
Step #2: Create a custom registration form
Once the ProfilePress plugin is installed and activated on your WordPress site, you can create a custom registration form. To start, navigate to ProfilePress → Forms & Profiles and click the Add New button.
Click on the Drag & Drop Builder to continue. You can also use the Shortcode Builder if you are an advanced user.
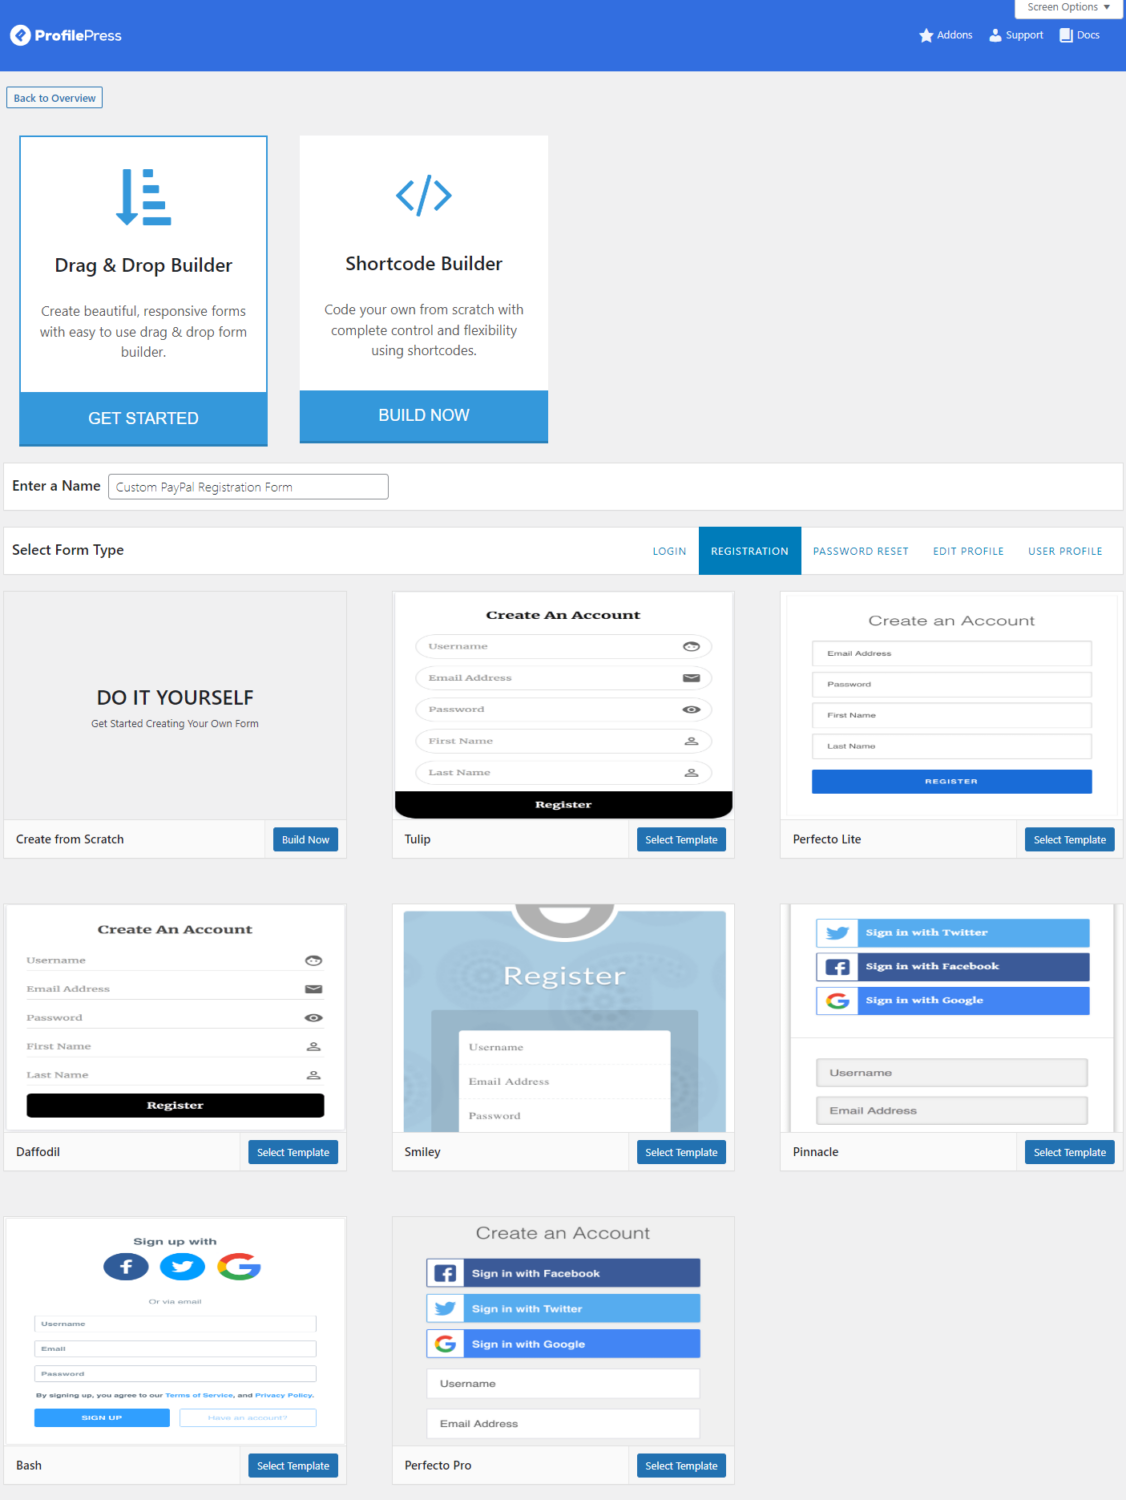
Now, give your registration form a title and select Registration using the Select Form Type section.
ProfilePress lets you create registration forms using a pre-designed template that you can edit or create a custom registration form from scratch. For demonstration purposes, we’ve decided to use the Smiley template. Click on the Select Template button to continue.
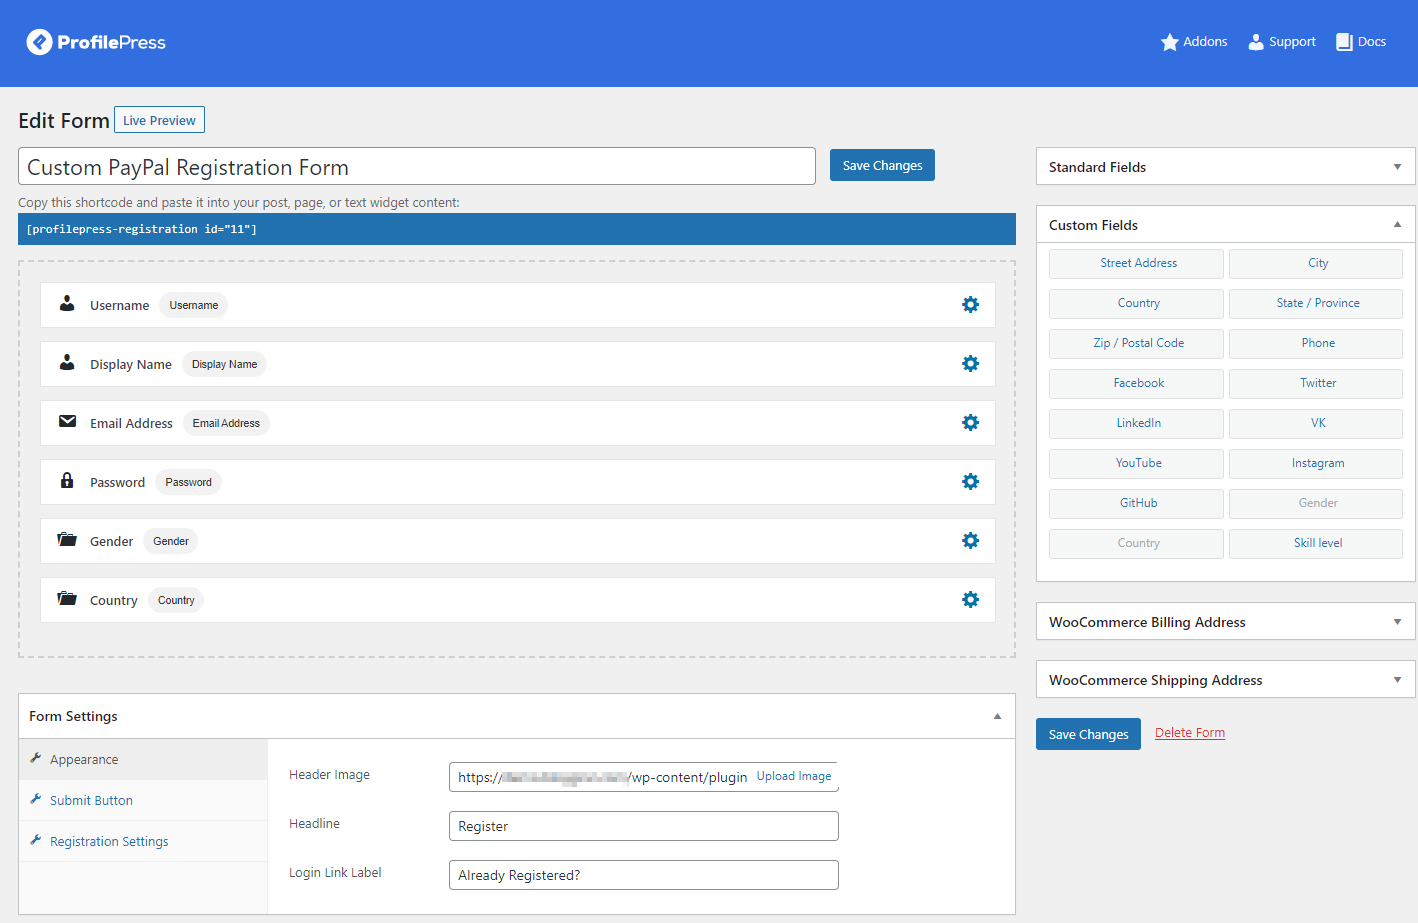
This will automatically redirect you to the form edit page. This is where you can start adding or removing fields from your registration form. ProfilePress offers a wide range of standard and custom fields you can drag and drop into your custom registration form.
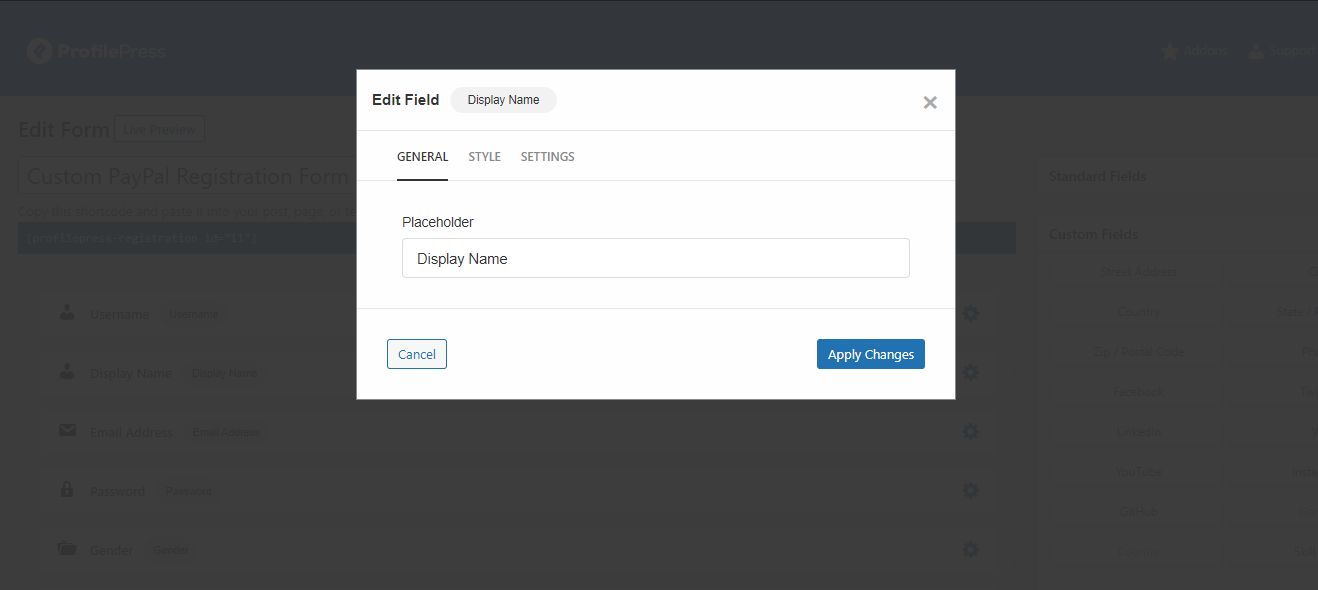
You can edit the default fields to make them look more exciting or relevant to your audience by clicking the little settings icon next to each field. For instance, you can rename the “Display Name” field to “Nickname” to make it more user-friendly.
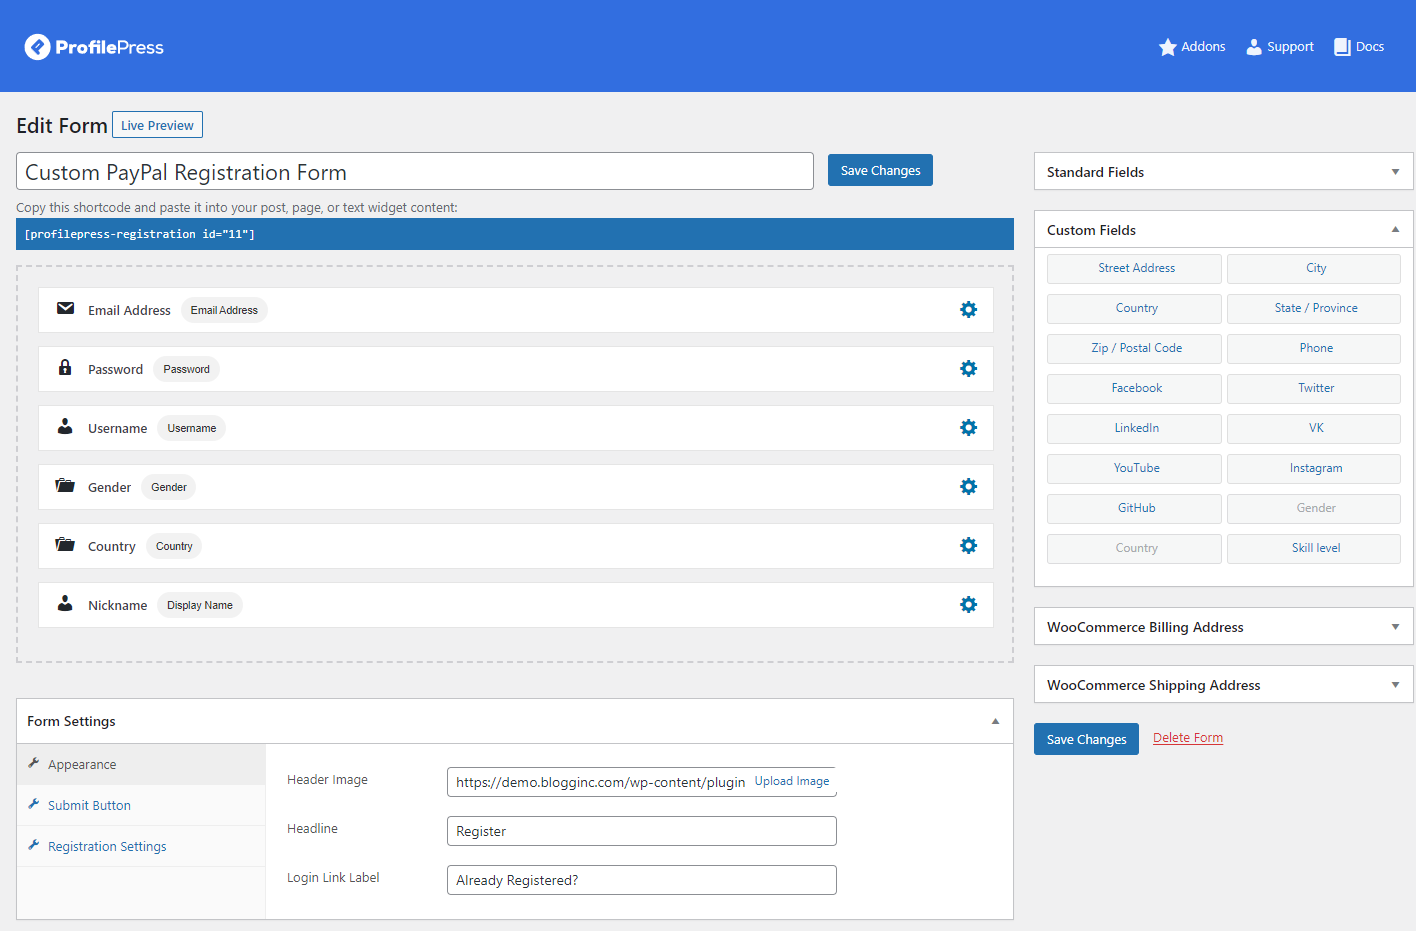
The great thing about ProfilePress is that it makes it very easy to change the layout of your custom registration form by simply dragging and dropping fields into whatever order you want. This lets you improve the user experience on your WordPress site and makes it easier for new users to sign-up for a membership plan.
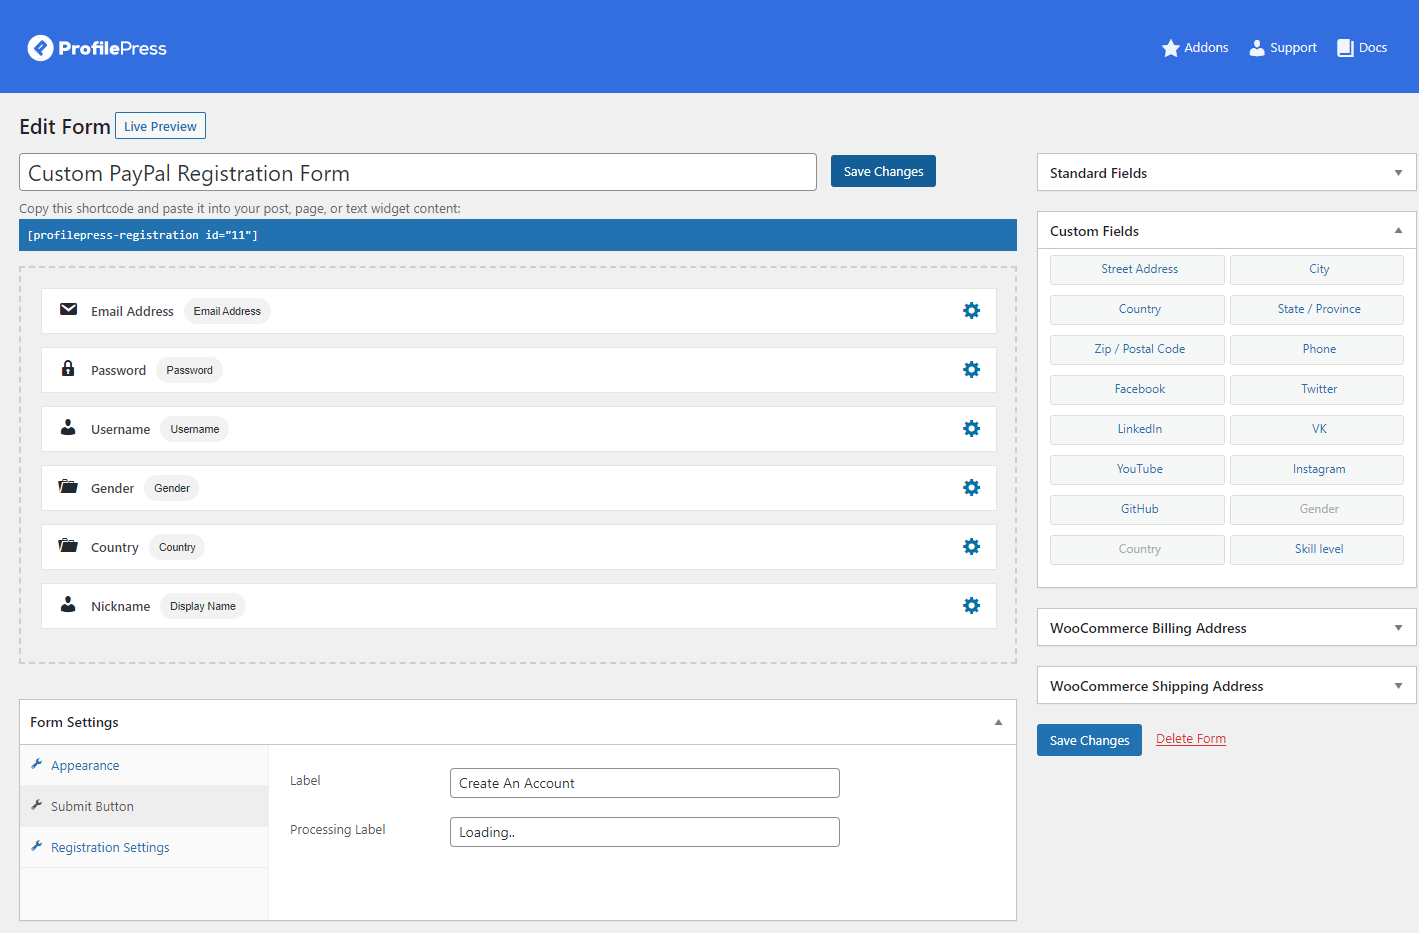
In addition, using the Form Settings meta box below, you can change the appearance of your registration form. For example, you can add custom labels to the Submit button to change the call to action to something more actionable, like Join Now.
Once you’re ready, click on the Save Changes button to continue. Also, remember to copy the form’s shortcode to your clipboard.
Step #3: Set up your Razorpay account
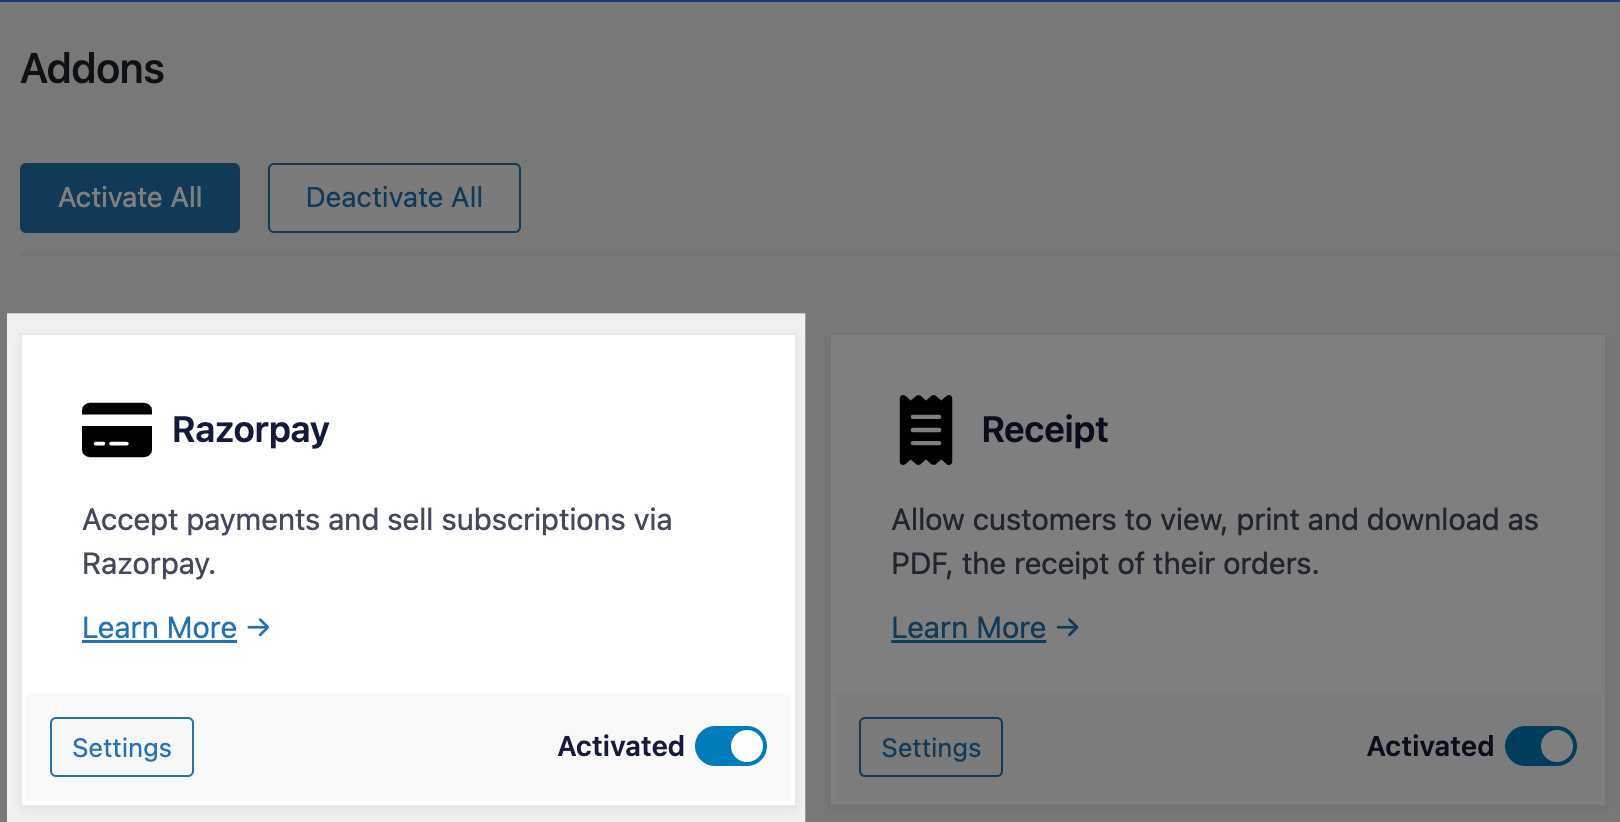
To accept payments with Razorpay on your WordPress site, integrate your Razorpay account using the plugin’s settings. For this, you must first go to ProfilePress >> Addons and ensure the Razorpay addon is activated.
Next, navigate to ProfilePress → Settings and click on the Payments tab from the top.
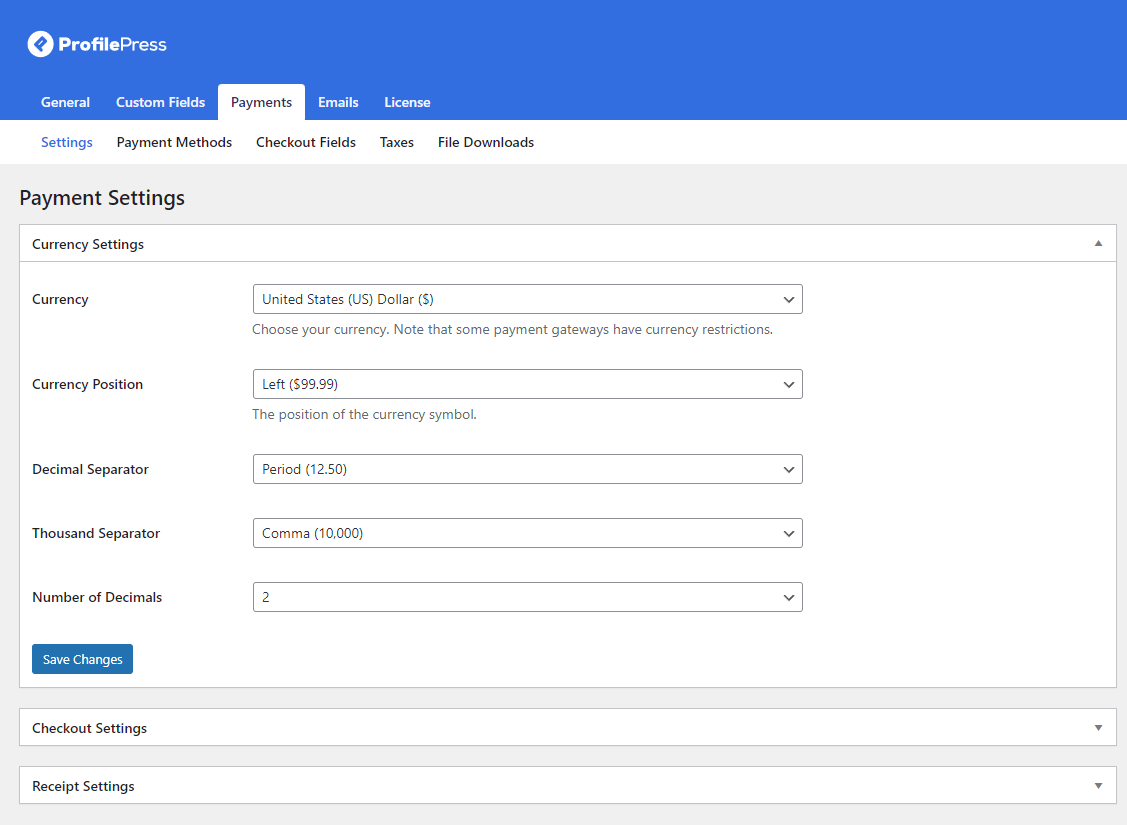
From here, you can set basic currency settings for users to make payments on your WordPress site. Configure the settings and click the Payment Methods link option from the top to set up a Razorpay account.
Next, go to ProfilePress > Settings > Payments >> Payment Methods
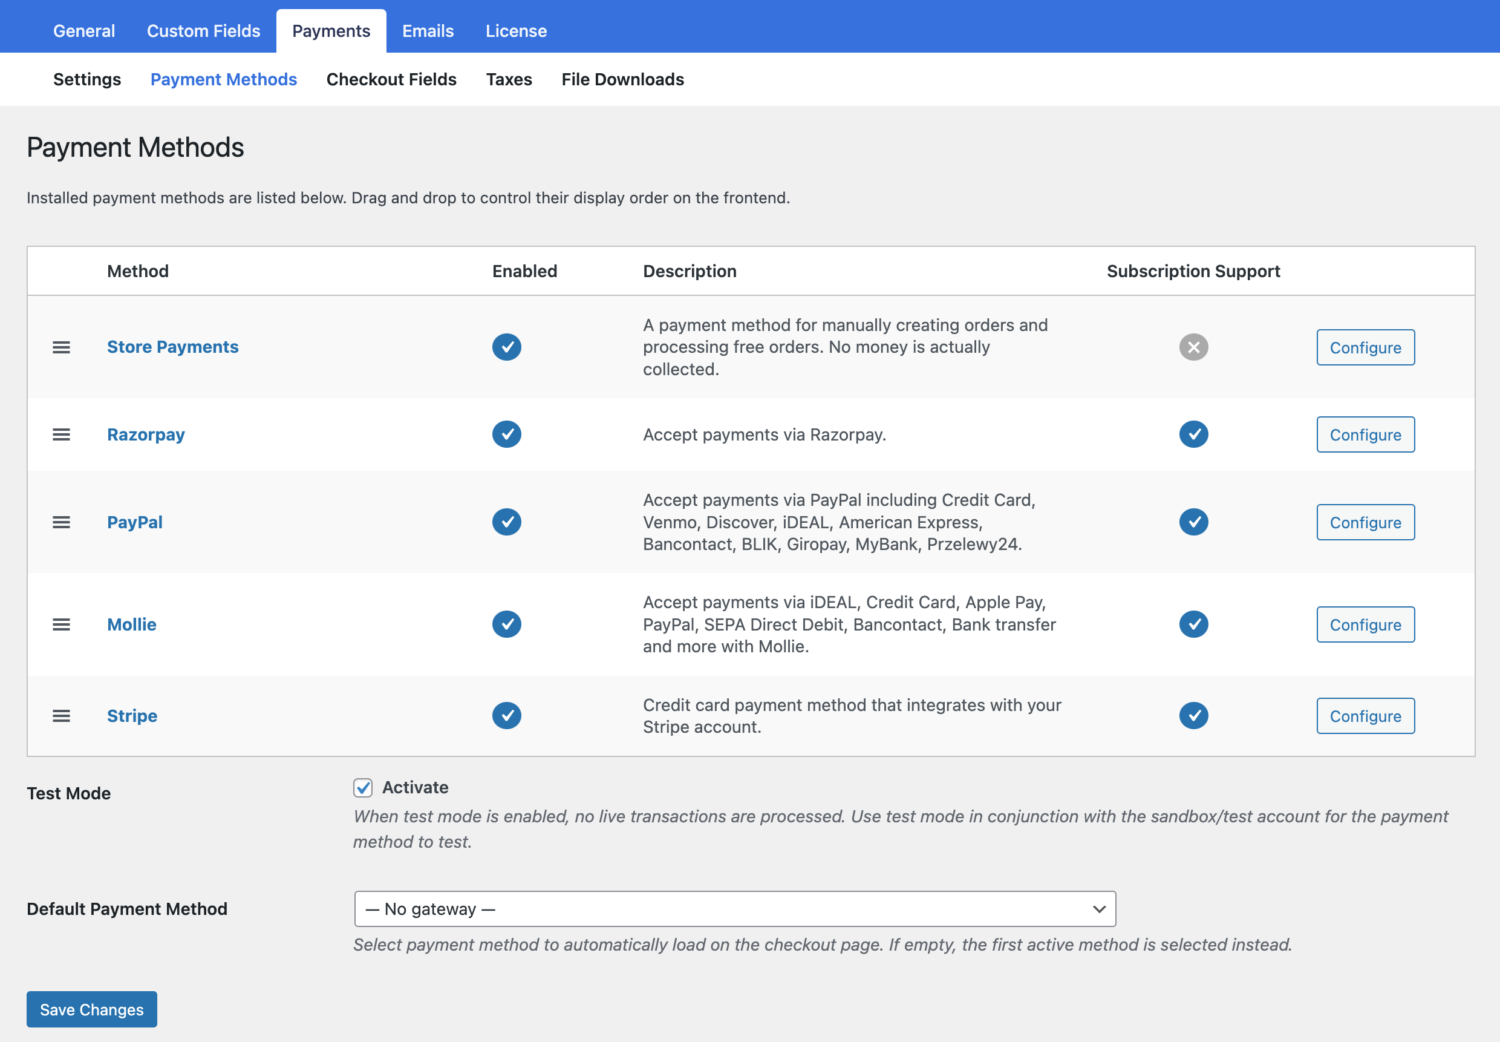
Click the Configure button next to the Razorpay payment method.
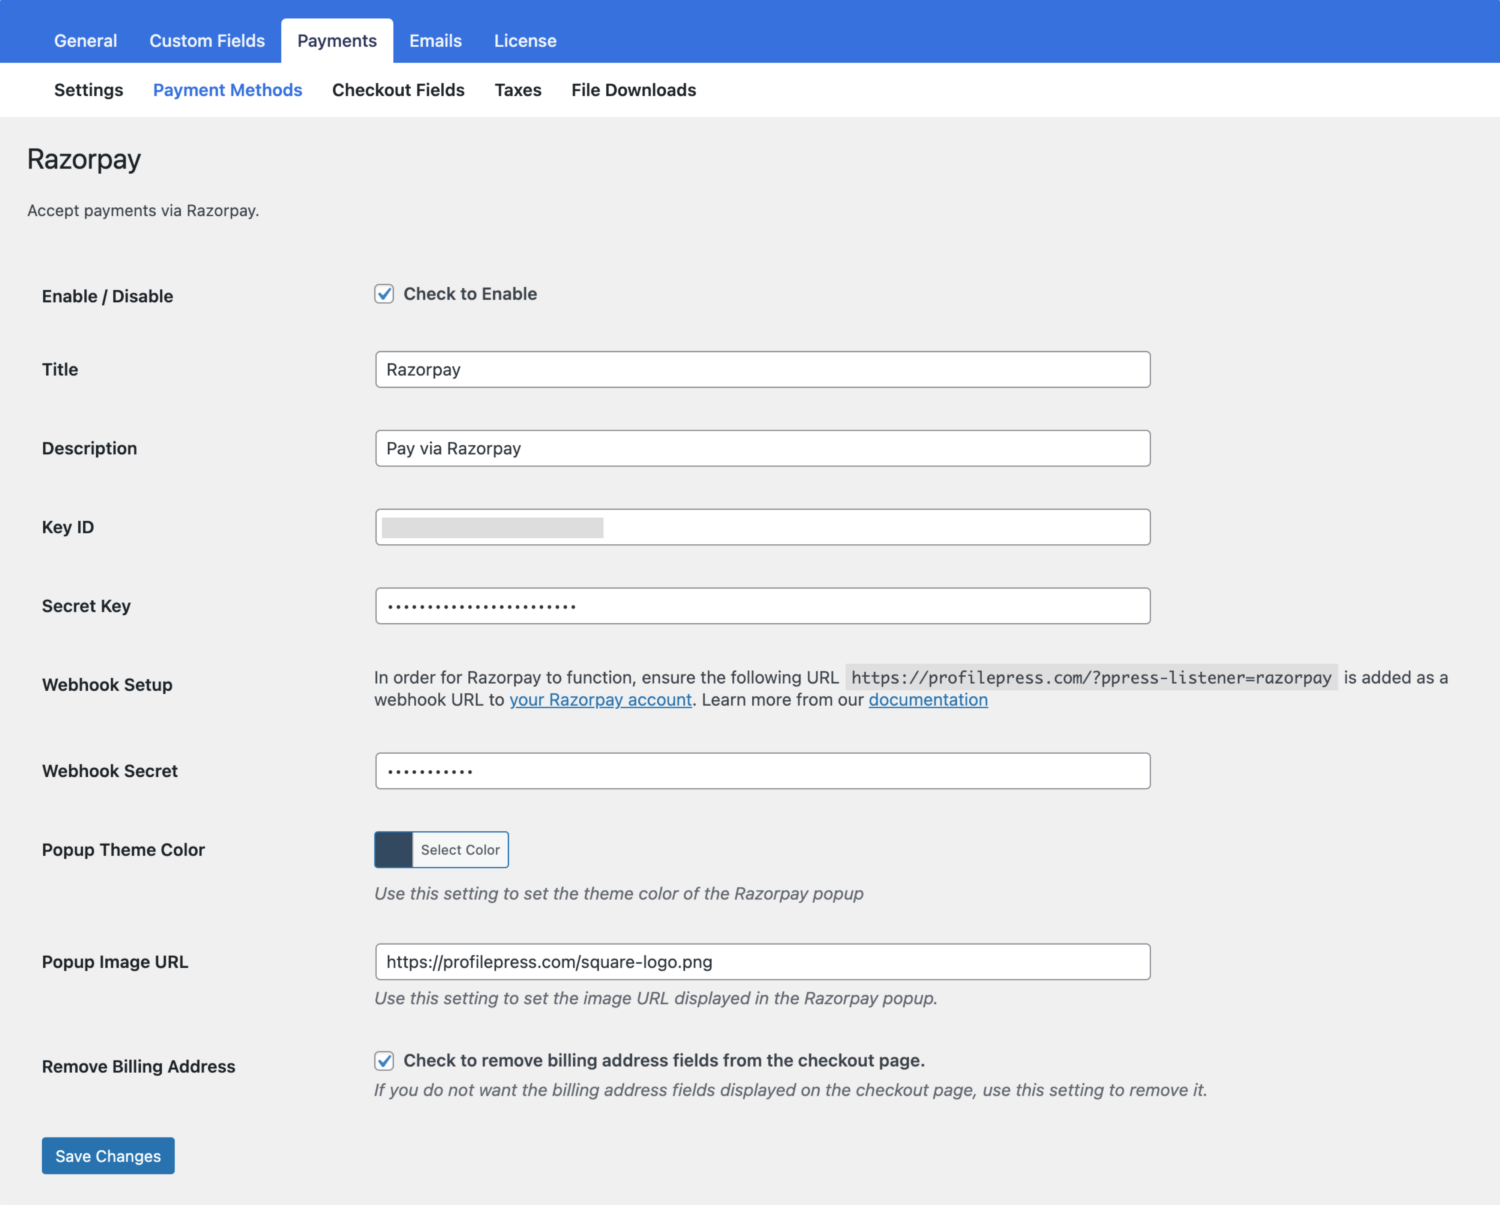
You can enable the Razorpay payment method via the Enable / Disable checkbox.
ProfilePress requires your Razorpay API keys and webhook setup in Razorpay to start accepting payments. You can also set the theme color and image/logo in the Razorpay popup checkout. Learn more about setting up the Razorpay integration.
Once you’re done, make sure to click on the Save Changes button to continue.
Step #4: Set up Membership plans & Restrict membership content
Now, with a Razorpay account integrated into your WordPress site, you can let users pay for a membership plan via Razorpay after they create an account using the custom registration form.
To quickly set up a membership plan using ProfilePress, navigate to ProfilePress → Membership Plans and click the Add New button.

After giving your membership plan a name, description, and price, you can use the Subscription Settings meta box to define your membership plan’s duration.
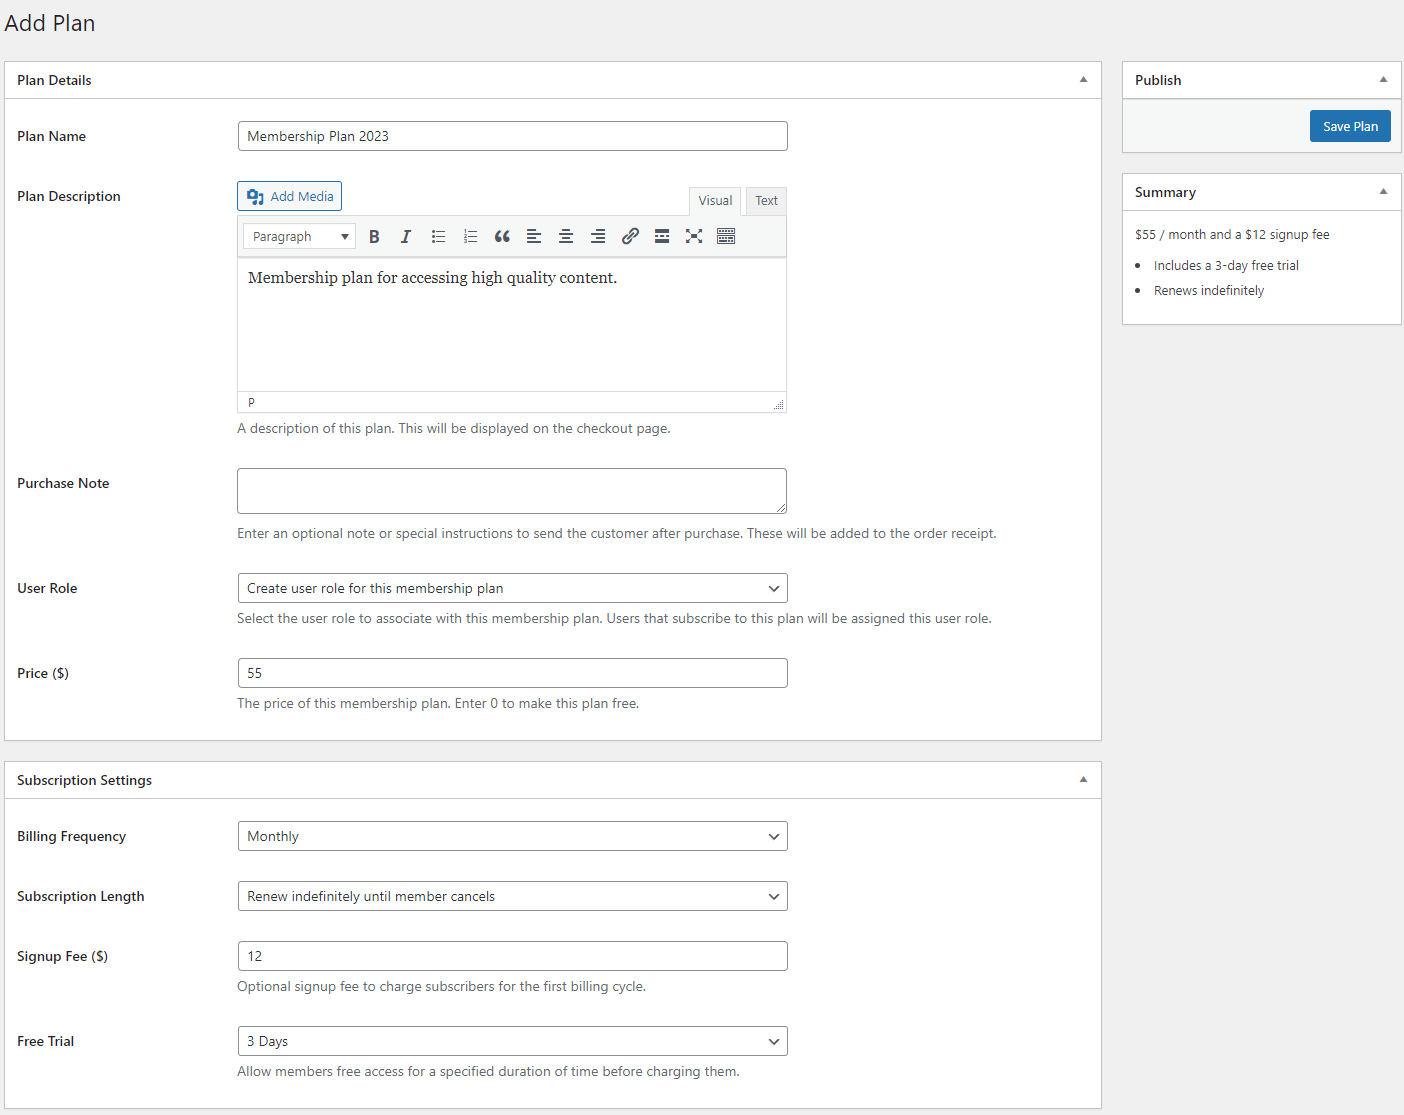
The Billing Frequency dropdown menu lets you decide the length of your membership plan. For instance, you can create a monthly membership plan or charge customers a one-time fee.
In addition to setting a Signup Fee, users can try out the membership plan using the Free Trial dropdown field. Once you’re done, click the Save Changes button to continue.
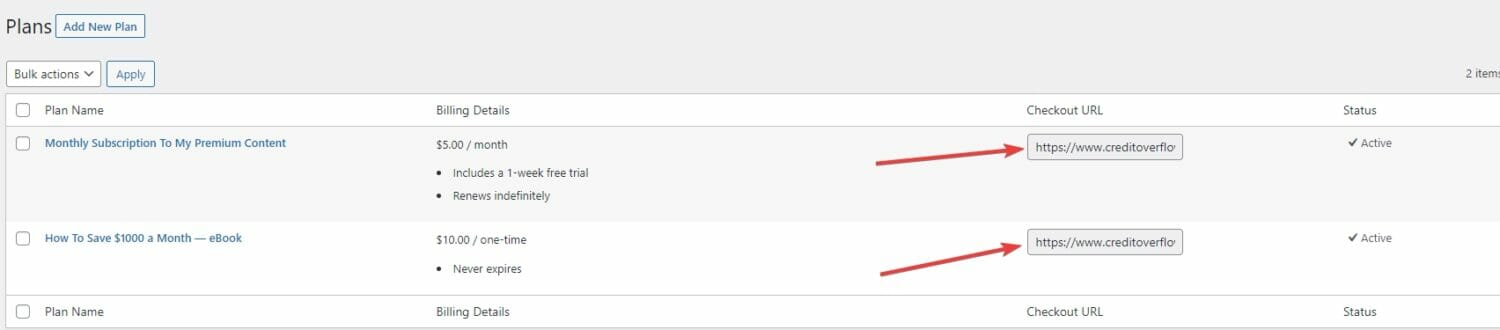
After saving your changes, a checkout URL for the plan will be generated. Please take note of the URL, as we will need it later.
We want to reiterate that the ease of creating checkout URLs to collect payment in ProfilePress is why it is the best Razorpay WordPress plugin.
We can start creating a content restriction rule that only allows registered members to access premium content on your WordPress site. This way, users who haven’t subscribed to the membership plan will need to purchase it via Razorpay after creating an account using the registration form.
To create a content restriction rule, navigate to ProfilePress → Content Protection and click the Add a Protection Rule button.
Once you specify the Title, you can use the Content to Protect meta box to select the content restricted to members only on your WordPress site.
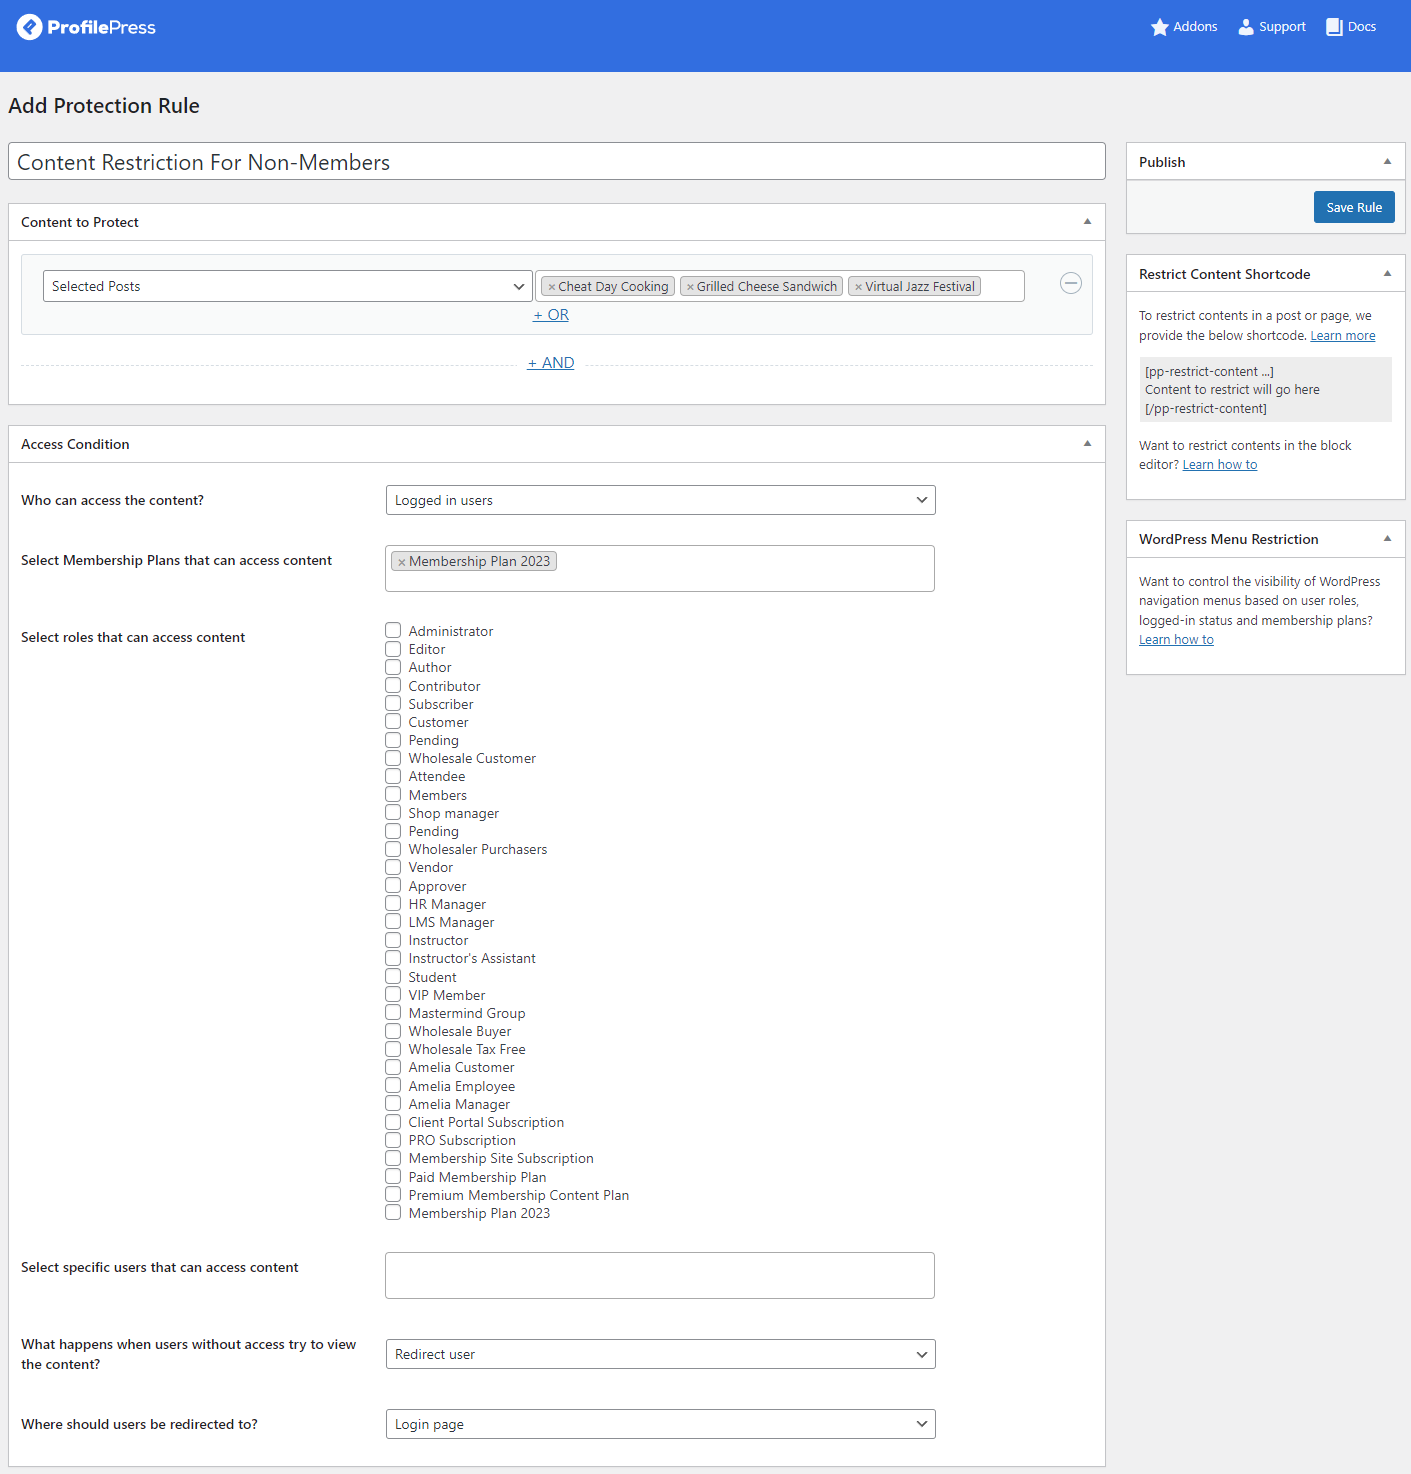
For example, select the Selected Posts or Selected Pages option and specify the posts or pages with members-only content. Once that’s done, use the Who can access the content? dropdown menu under the Access Condition meta box to select Logged in users.
Now, use the Select Membership Plans to access the content field to select the membership plan we created earlier. In addition, you can specify what happens to unauthorized users when they try to access members-only pages on your WordPress site using the “What happens when users without access try to view the content?” field at the bottom.
Once you’re ready, click on the Save Rule button to continue.
Step #5: Let users make payments after they register on your WordPress site
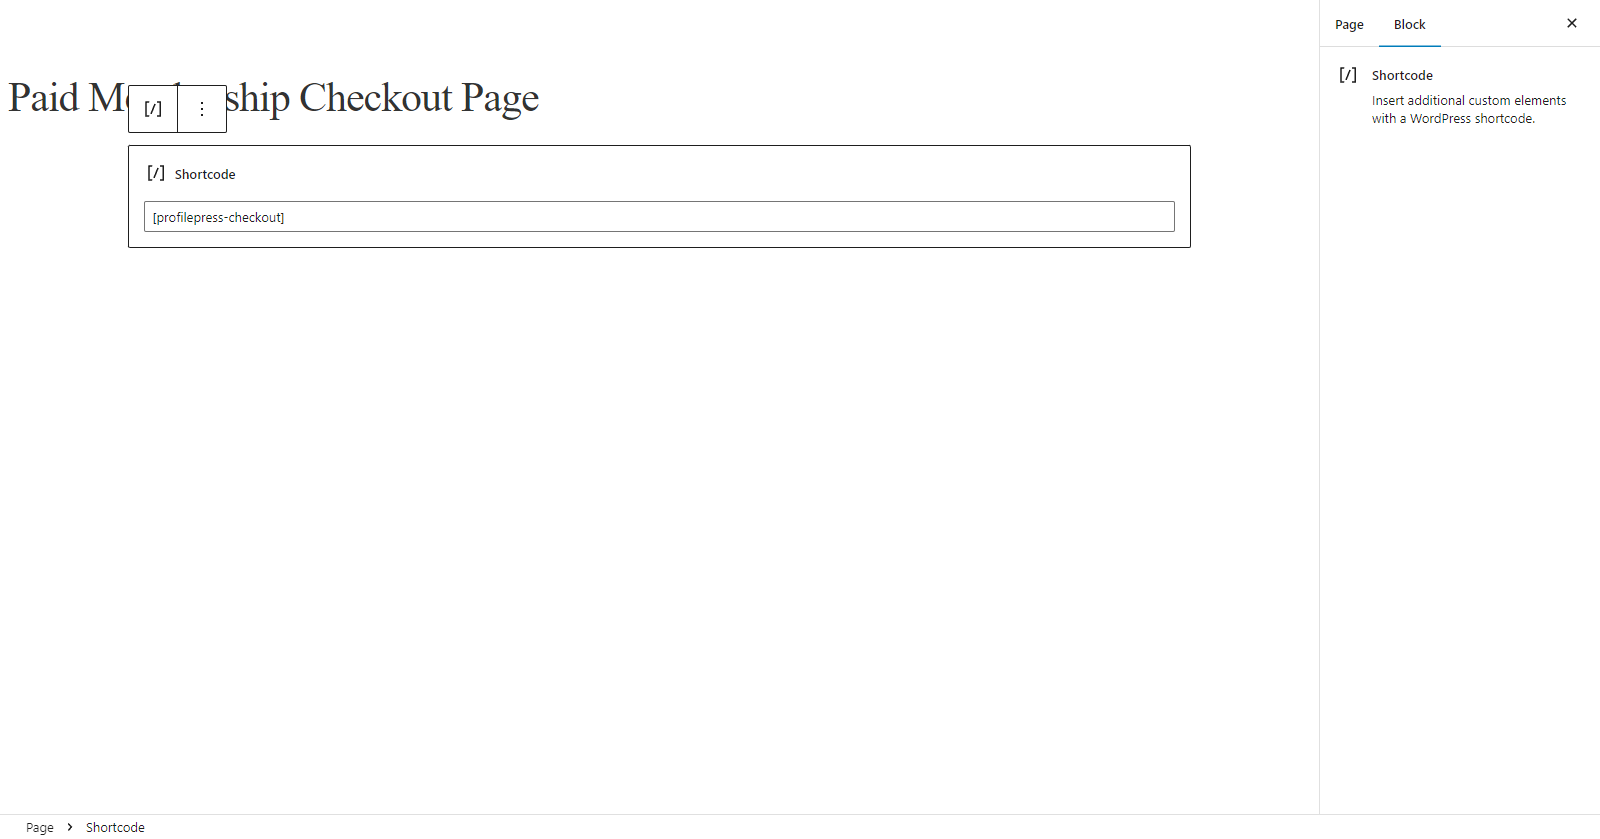
The great thing about ProfilePress is that it automatically creates an optimized checkout page for your WordPress site. All you need to do is save the checkout shortcode on the page to make your checkout.
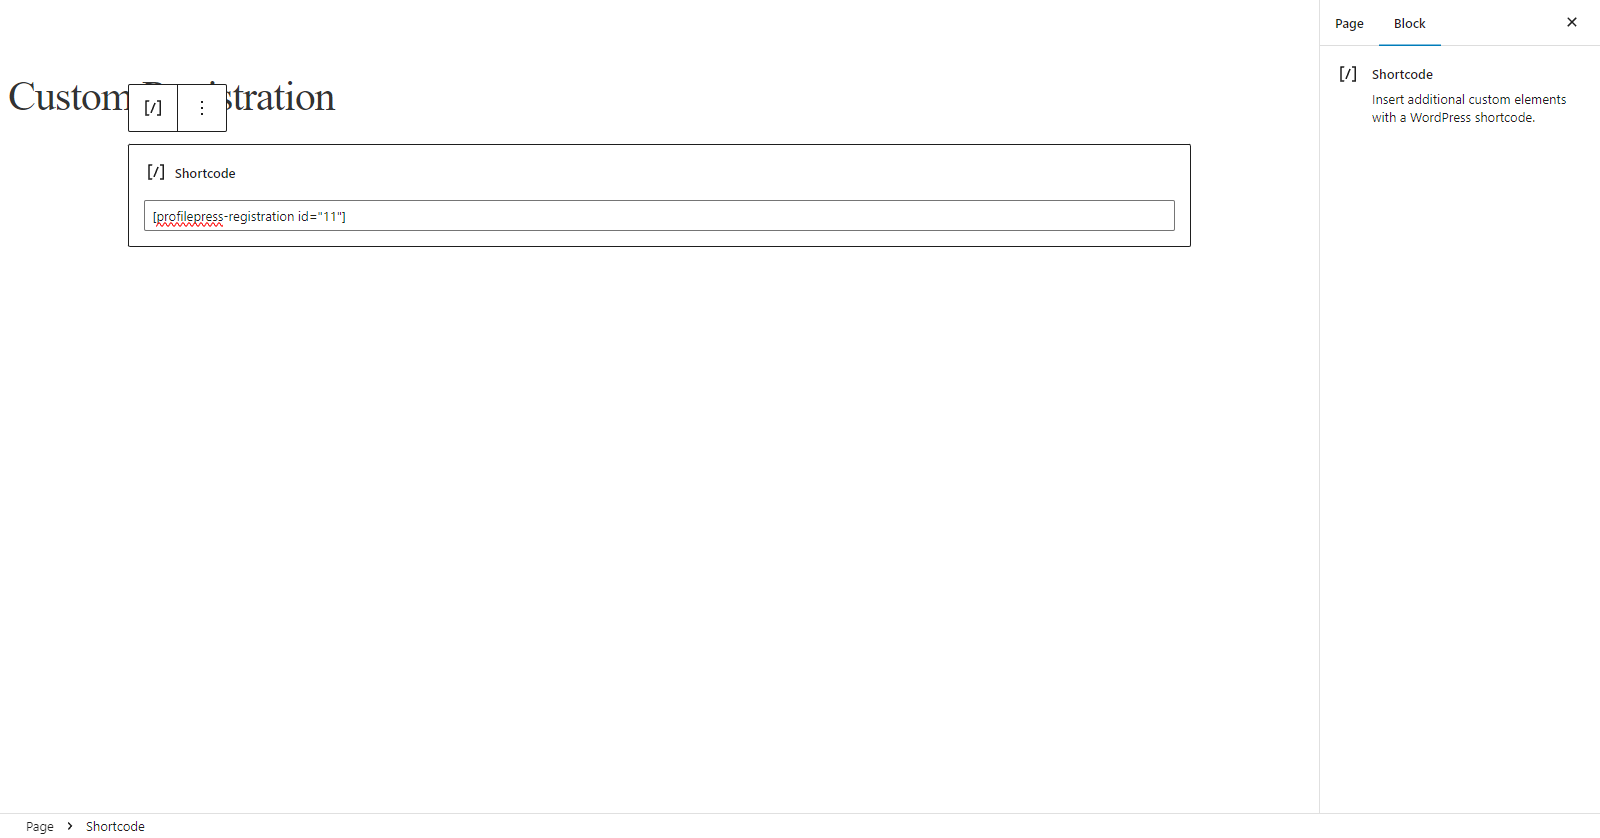
Similarly, you must create a new registration page with the custom registration form shortcode we copied earlier.
Now, navigate to ProfilePress → Settings and click on the Pages section under the General tab.
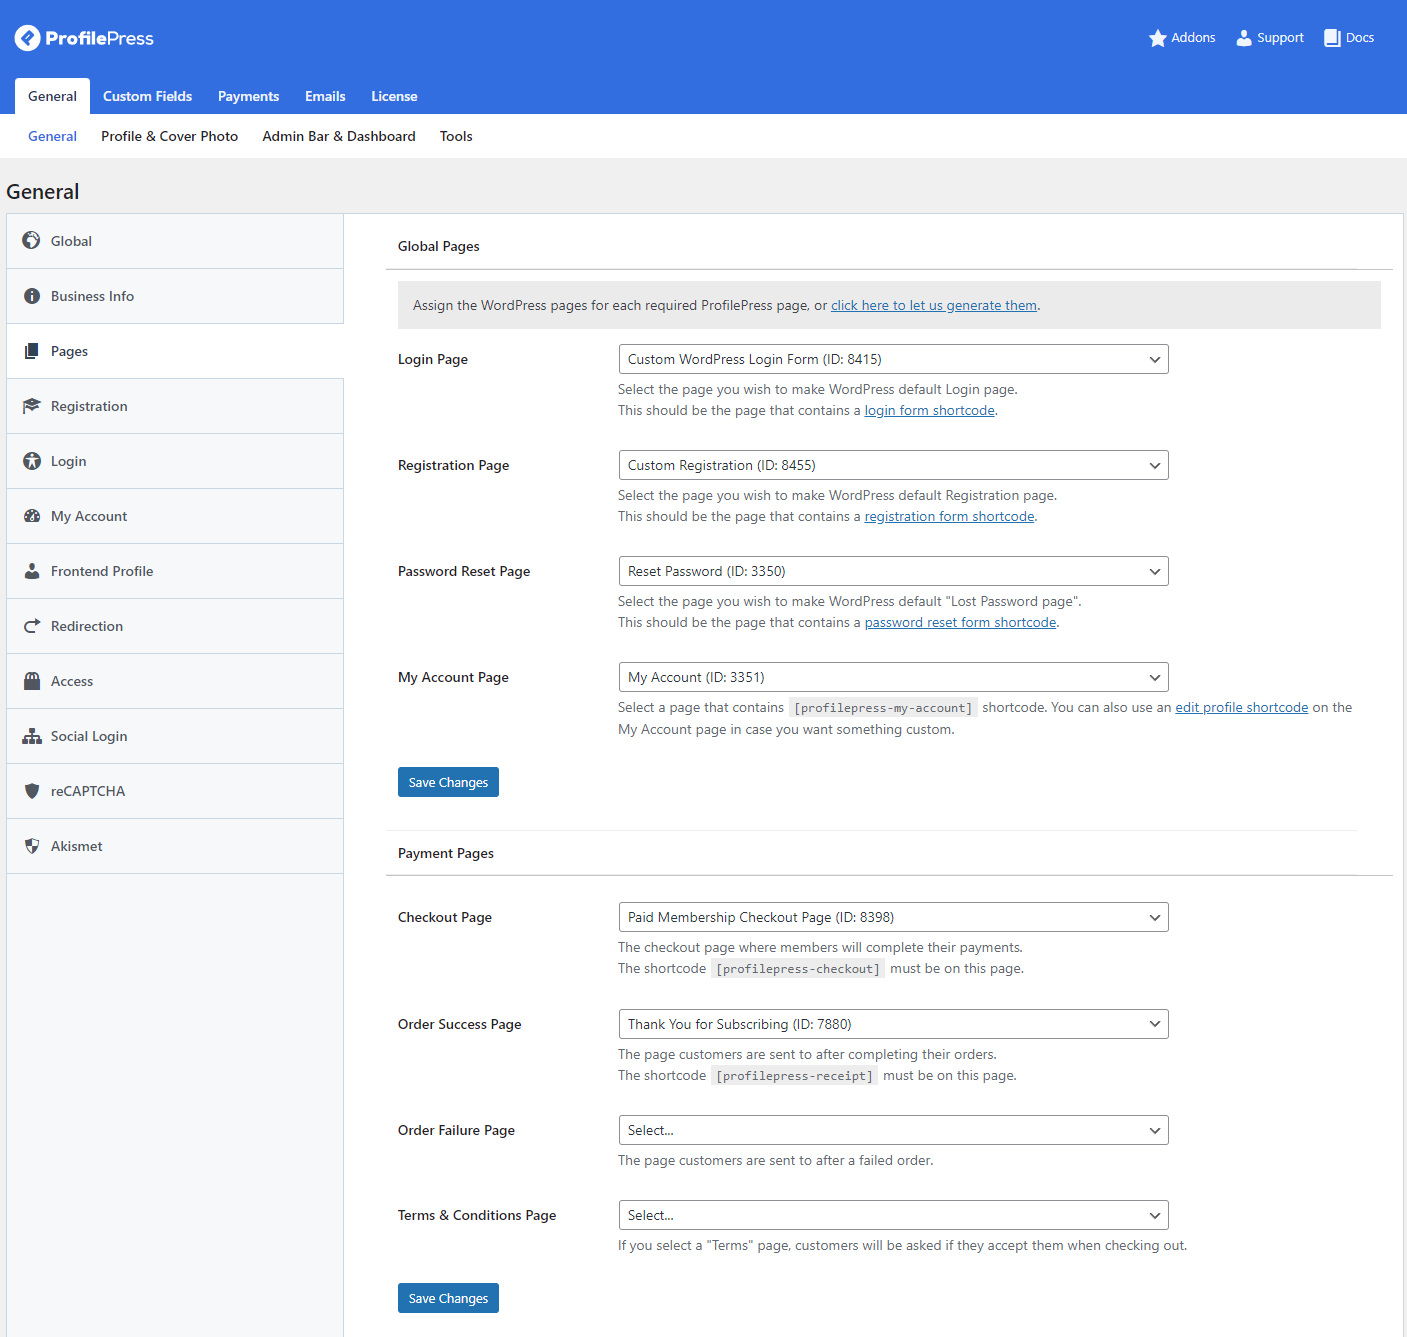
Using the Registration Page field, select the page that has the custom form shortcode. For the checkout page, use the Checkout Page dropdown menu to select the page with the ProfilePress checkout shortcode. Once you’re ready, click on the Save Changes button to continue.
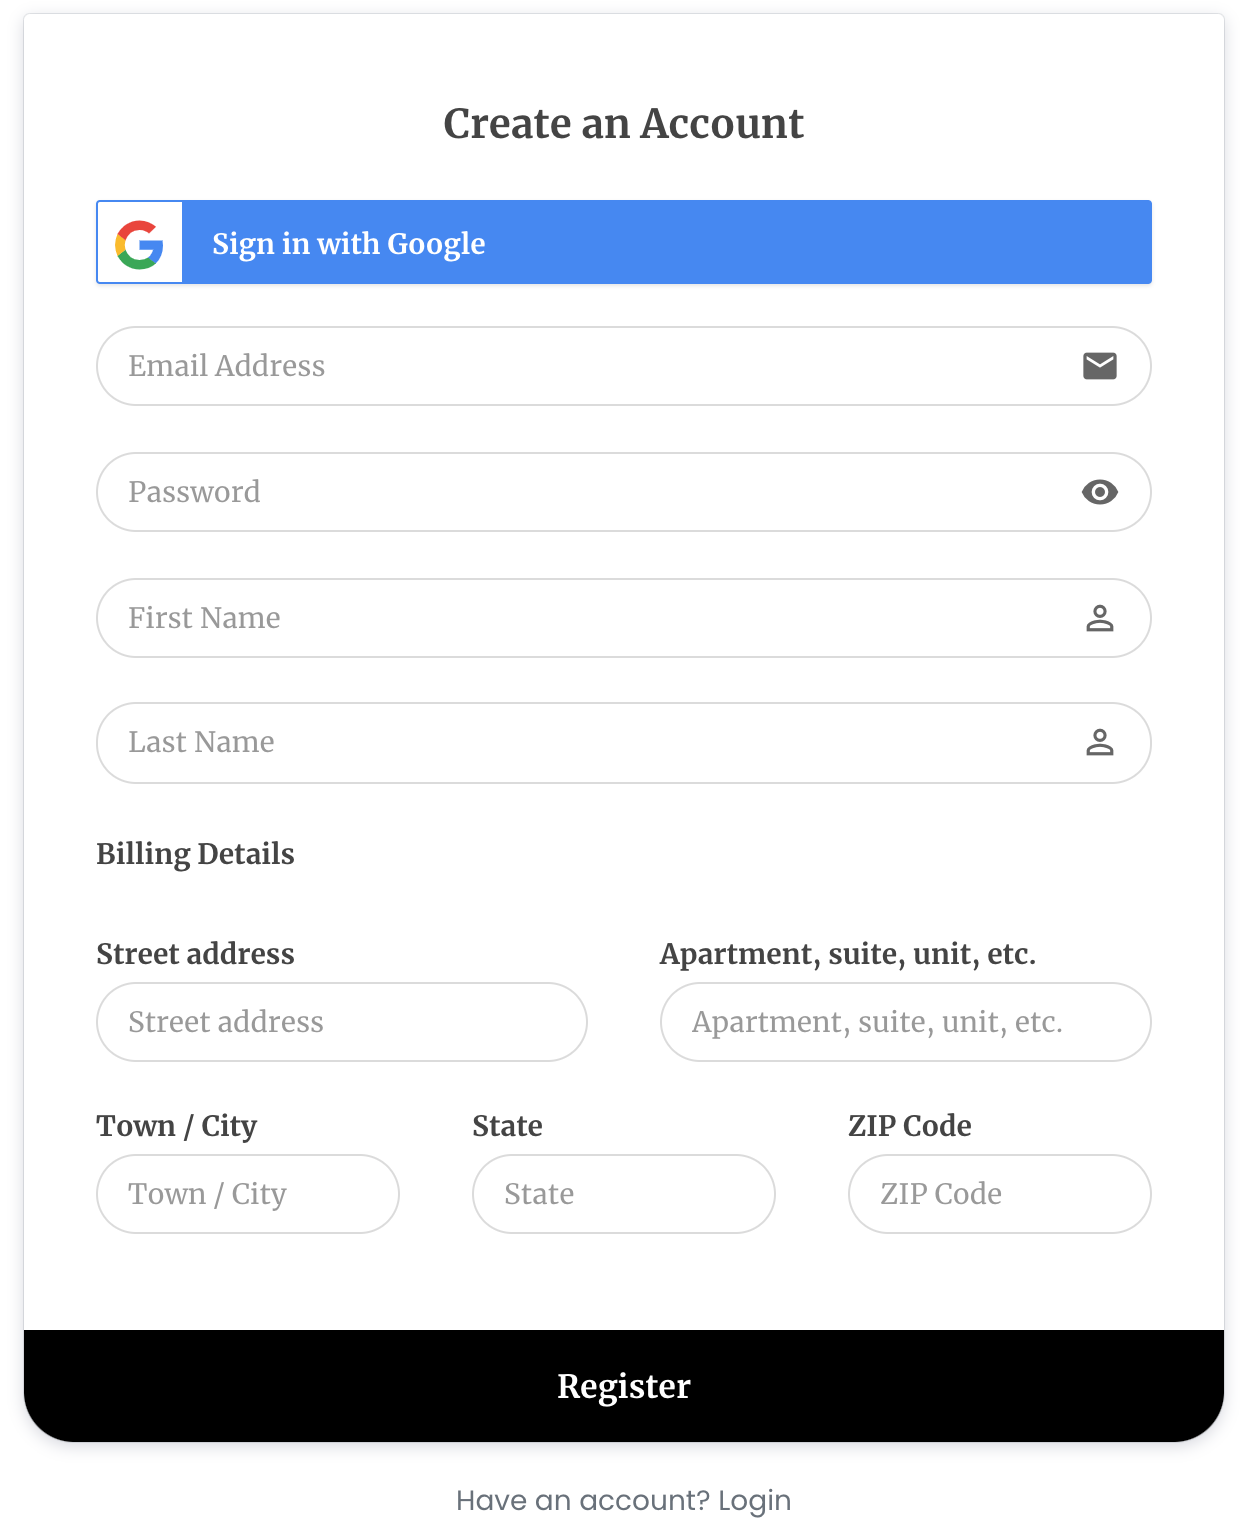
When visitors visit the registration page, they will see the registration form they can use to sign up for your WordPress site.
After registration, we need to automatically redirect them to the checkout page where they can purchase or subscribe to the membership we created earlier via Razorpay. To do this, we need to modify the registration form shortcode to include the membership plan checkout URL as shown below, where https://xyz.com/checkout/?plan=1 is the checkout URL of the membership plan.
[profilepress-registration id="3" redirect="https://xyz.com/checkout/?plan=1"]Below is a membership plan checkout page with the Razorpay checkout option.
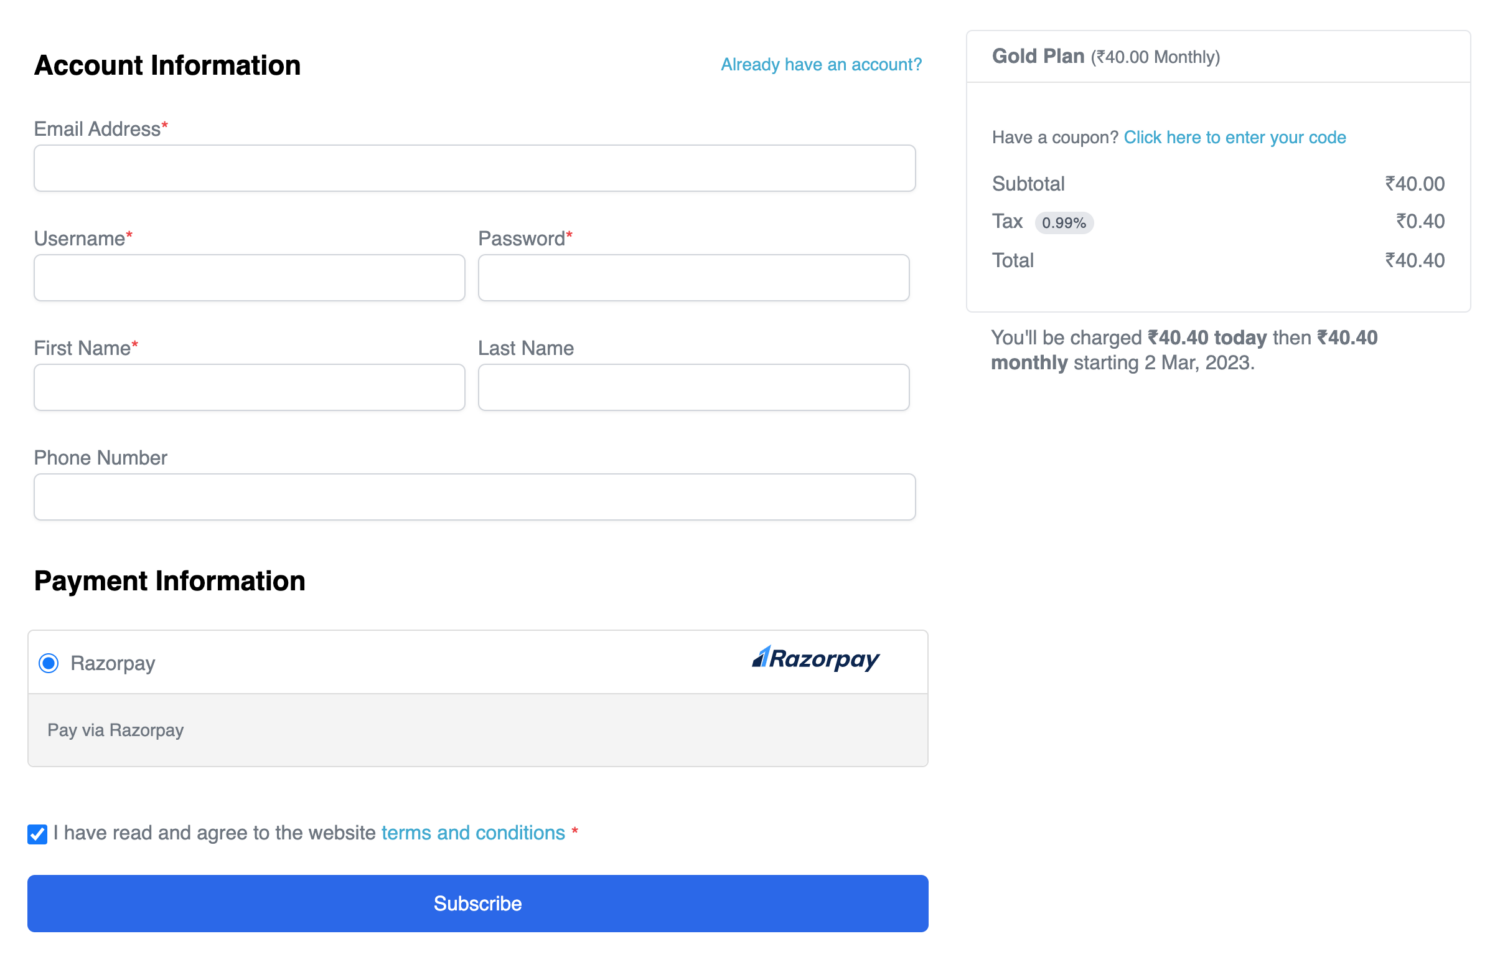
You can skip the section to create a custom registration form and use the membership checkout page as your registration form because if a user without an account on your site visits the checkout page, an account will be created for them during checkout.
Conclusion
Creating a WordPress registration form with Razorpay is easy with a plugin like ProfilePress.
The Razorpay WordPress plugin is designed to do most of the heavy lifting when setting up a full-fledged membership site. All you need to do is create content restriction rules and subscription plans.
Once that’s done, set up your Razorpay account with your WordPress site. Within a few minutes, you can let users subscribe to your membership plans using Razorpay during registration for your WordPress membership site.
Ready to start creating a WordPress registration form with Razorpay? Get ProfilePress today!