How to Create WordPress Registration Forms With Payment Options
Want to create a registration form with payment options on your WordPress website?
Enabling customers to register while making a purchase is a great idea. It’s a great way to collect customer information and use it to build an email list and grow your revenue collection.
In this article, we will show you how to create a form that has registration fields along with a payment option.
Let’s get started with the tutorial.
Create WordPress Registration Form With Payments Option
Instead of creating a registration form, we will show you how to create a checkout form because a checkout form can have both registration and payment options.
To create a checkout form, you need a powerful form-building plugin. For this tutorial, we will use ProfilePress. It will help you create a checkout form and add custom fields of your choice. The plugin will also help you create custom user profiles, and my account pages, among other things.
Let’s dive in.
1. Install ProfilePress & Create Checkout Page
Install and activate the ProfilePress plugin on your WordPress website.
You will be prompted to create pages necessary for the plugin to function correctly. All you need to do is hit the Create Pages button, which will create the checkout page along with several other pages like the order success page, order failure page, etc.

If you wish to add more fields to the checkout form, ProfilePress will help you do just that.
2. Add Custom Fields to the Form
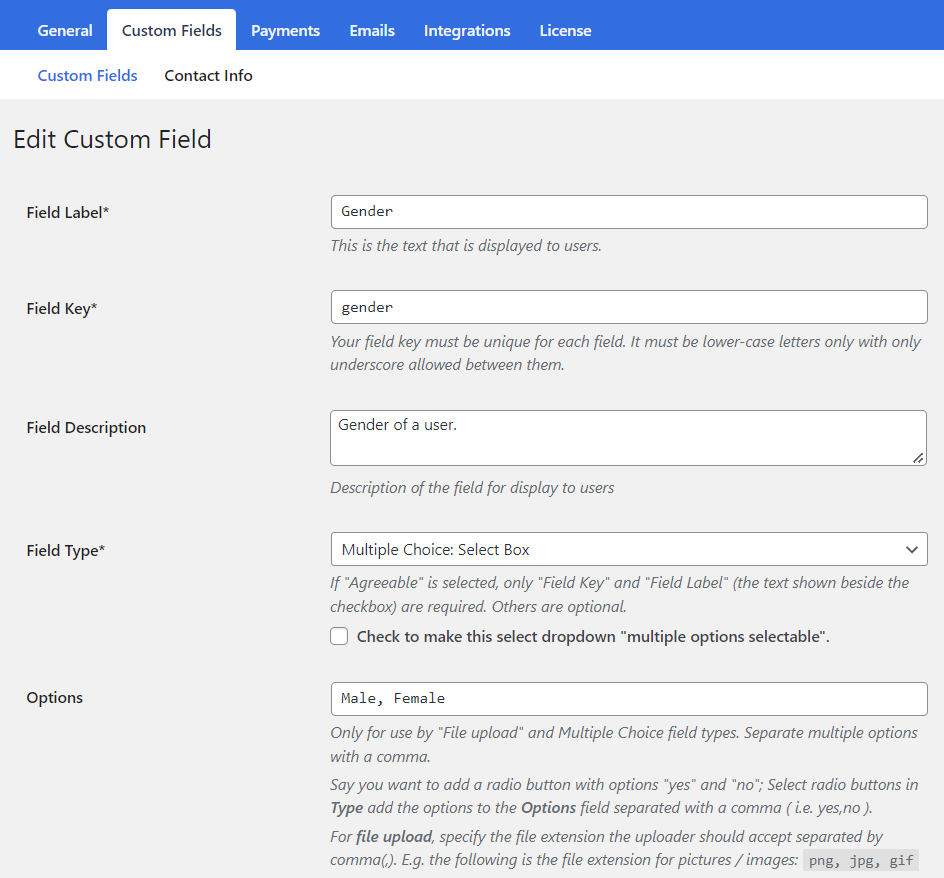
You will need to create custom fields and add them to the checkout form.
To create new custom fields, go to the ProfilePress options on your admin menu and navigate to Settings > Custom Fields.
Then click the Add New button and add a label, key, field description, and field type.
Save all changes.
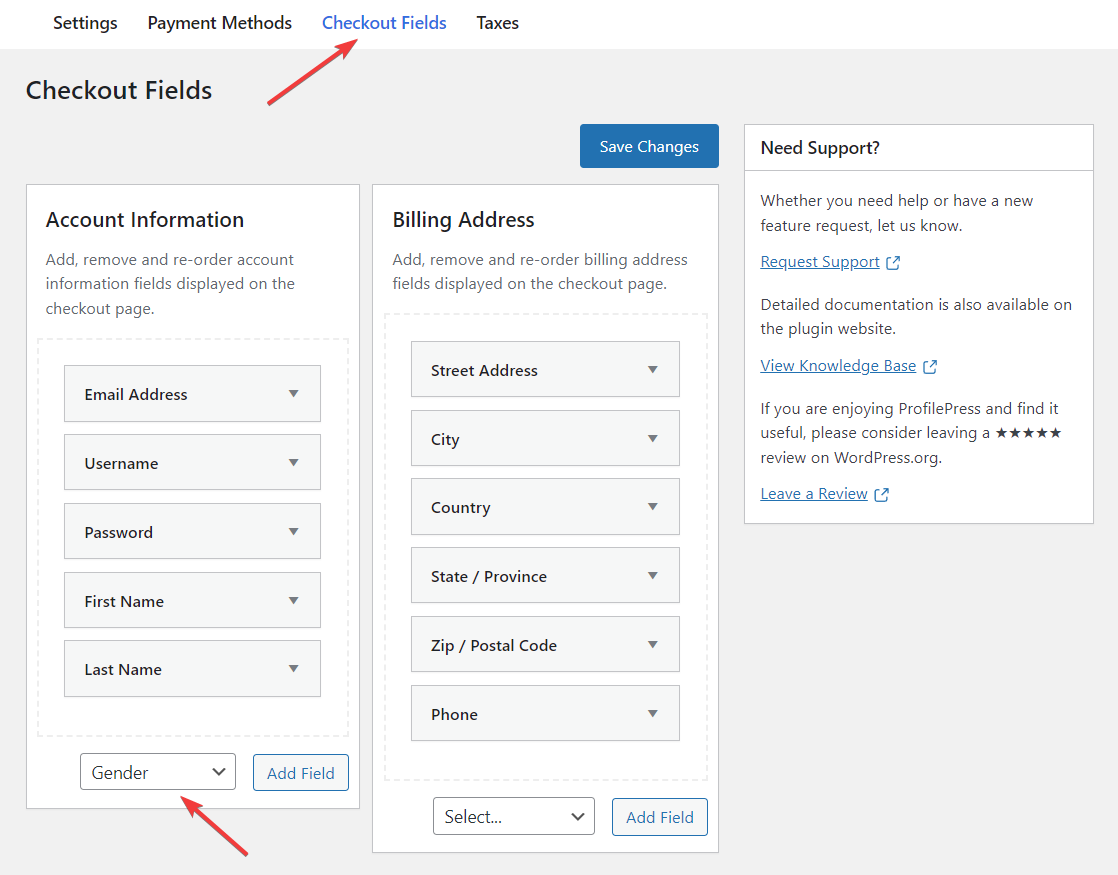
Next, to add the custom fields to the checkout form, go to ProfilePress > Settings > Payments > Checkout Fields. On the next page, you have these two options: Account Information and Billing Address.
First, decide where you want to add the custom fields. Then choose the field from the dropdown menu and hit the Add Field button. The new custom fields should be added to your checkout form.
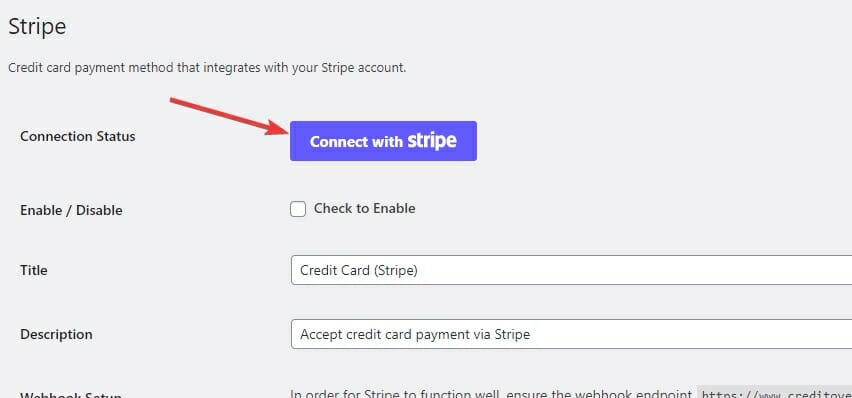
3. Set Payment Methods
ProfilePress supports major gateways, including Stripe, PayPal, Razorpay, Paddle, Paystack, Direct Bank Transfer, Mollie. To enable payment collection, go to ProfilePress > Settings > Payments > Payment Methods.
Select the payment method and connect to your account.
2. Create Membership Plans
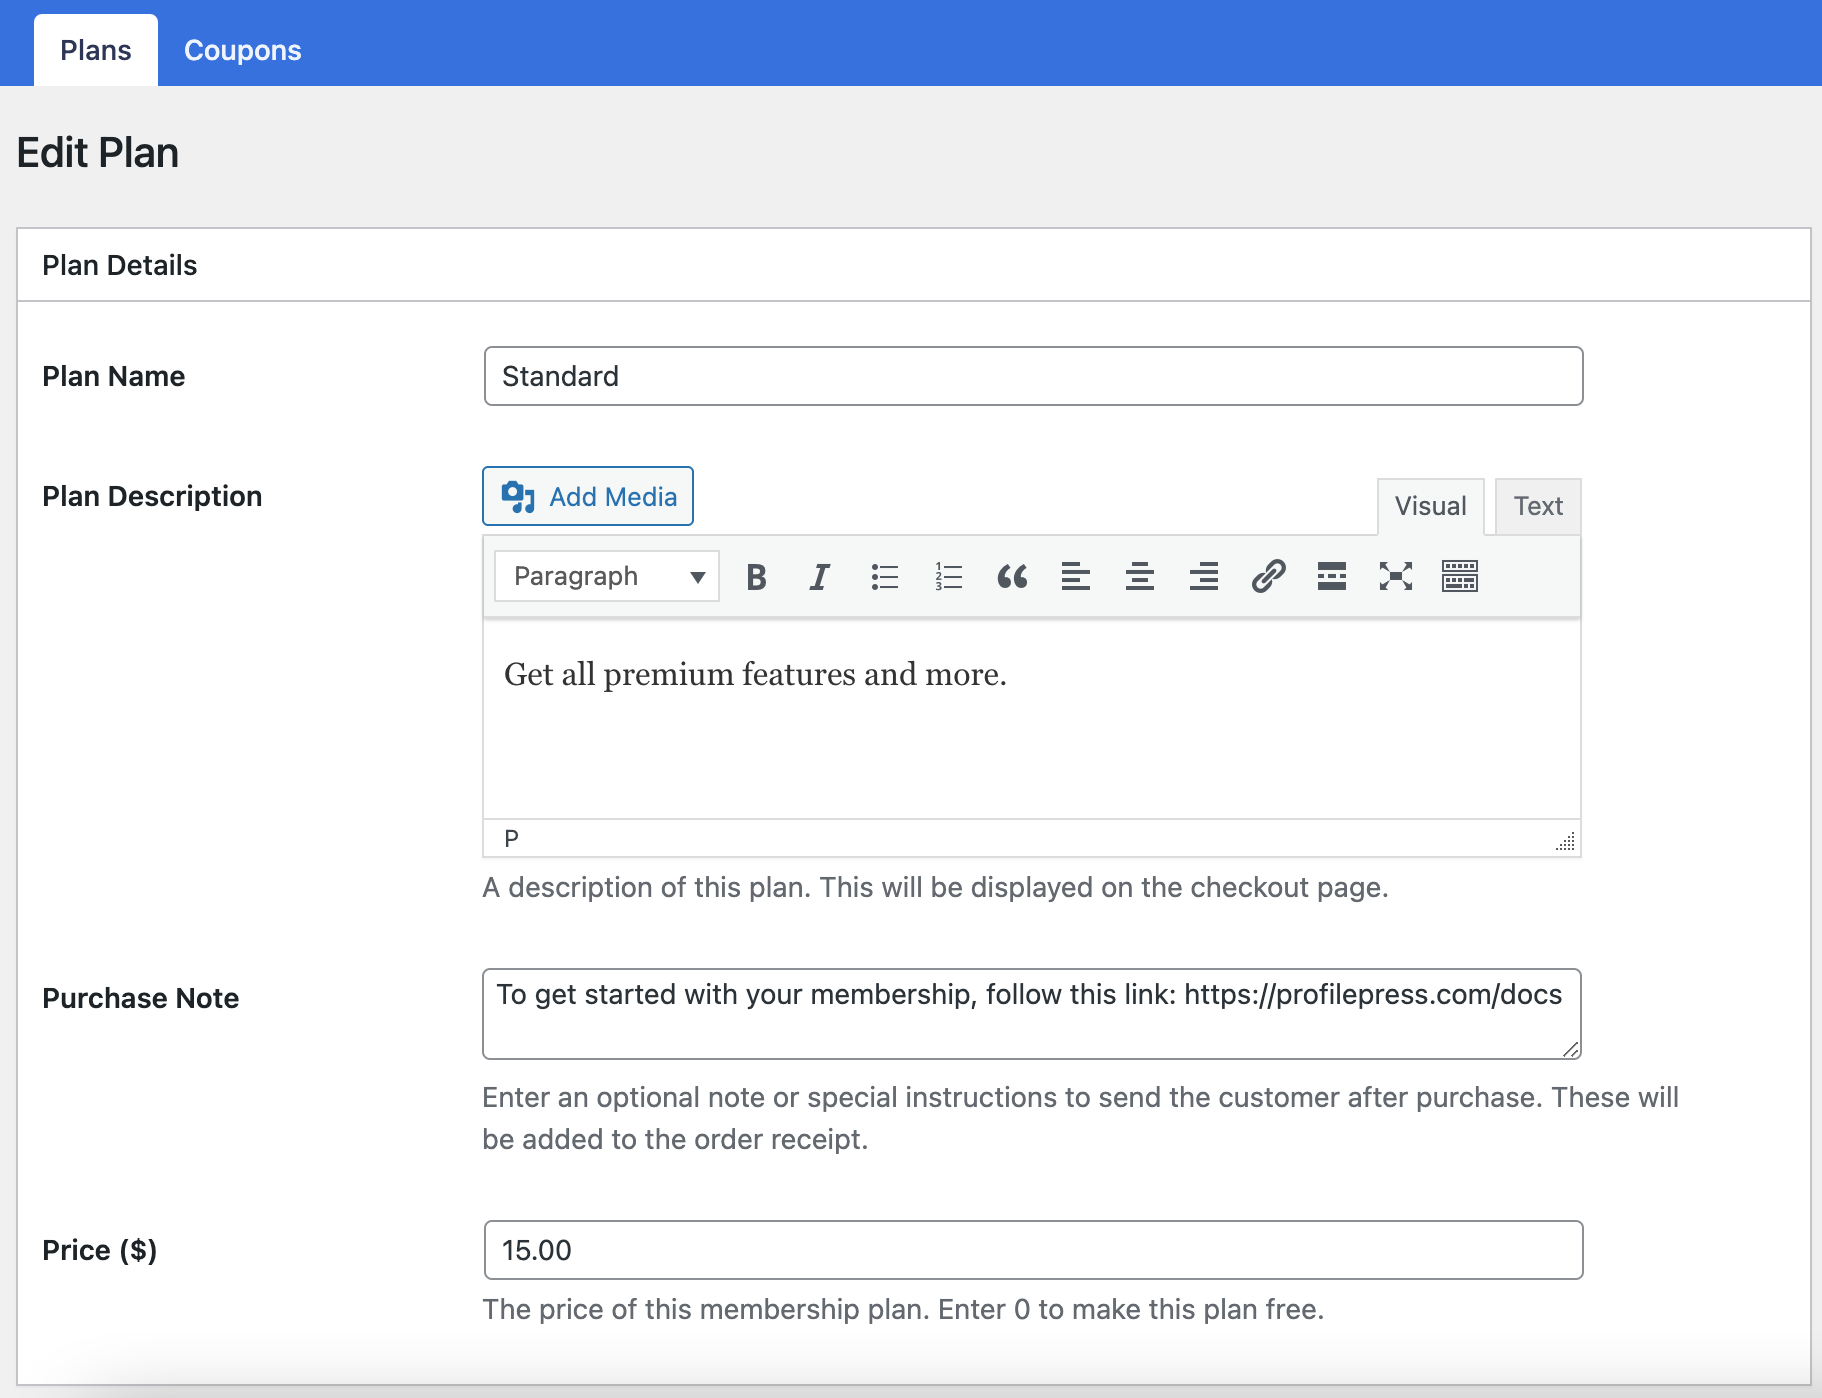
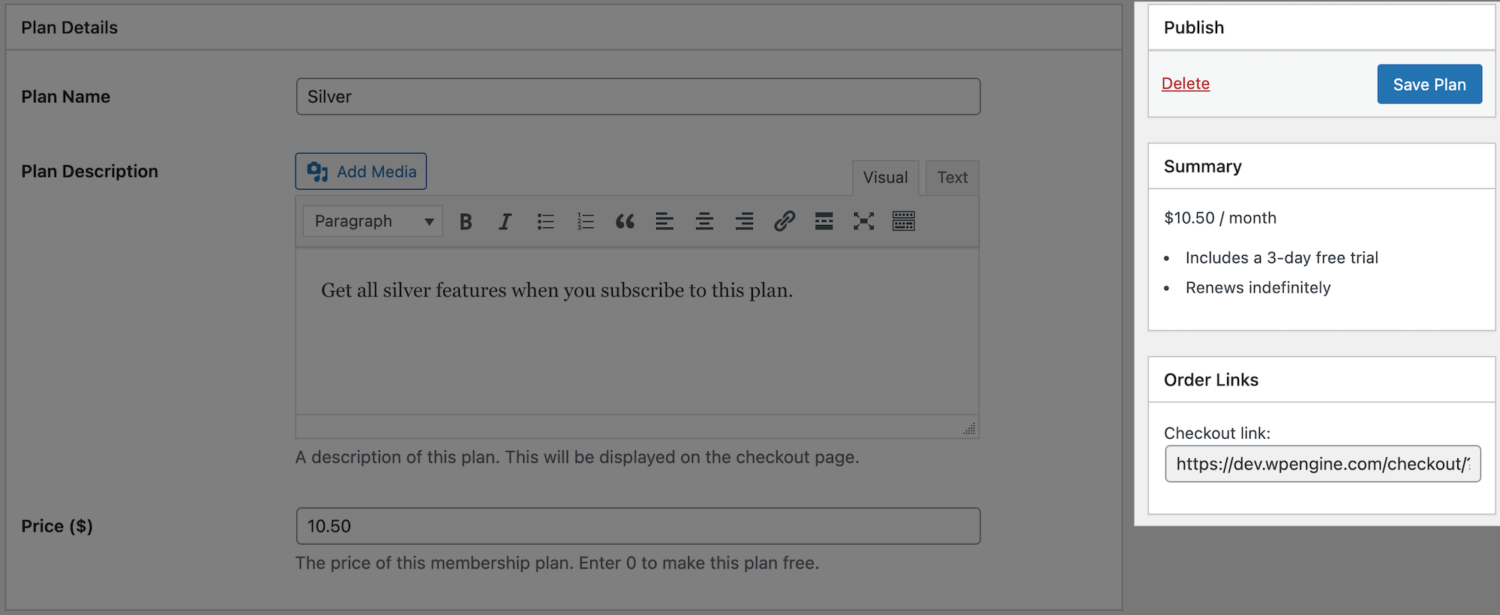
On your WordPress dashboard, go to ProfilePress > Membership Plans > Add New Plan. On the next page, you need to fill these two sections: Plan Details and Subscription Settings.
Under Plan Details, add a name to the plan, describe the plan and set a price for the plan.
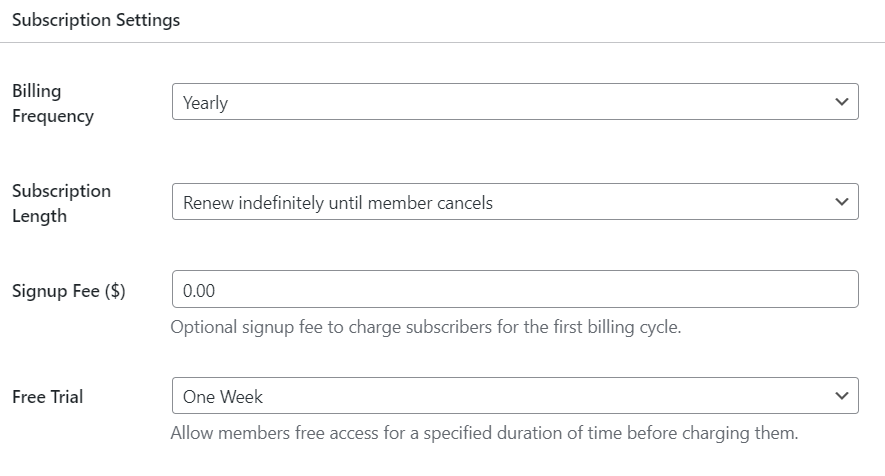
Under Subscription Settings, you can set the billing frequency where you can ask customers for a one-time payment or a monthly, quarterly, half-yearly, or yearly subscription.
With the Subscription length option, you can set a fixed number of payments or allow users to renew indefinitely until they cancel their subscription.
You can then set the signup fee and choose to offer free trials.
When you are ready, hit the Save Plan button.
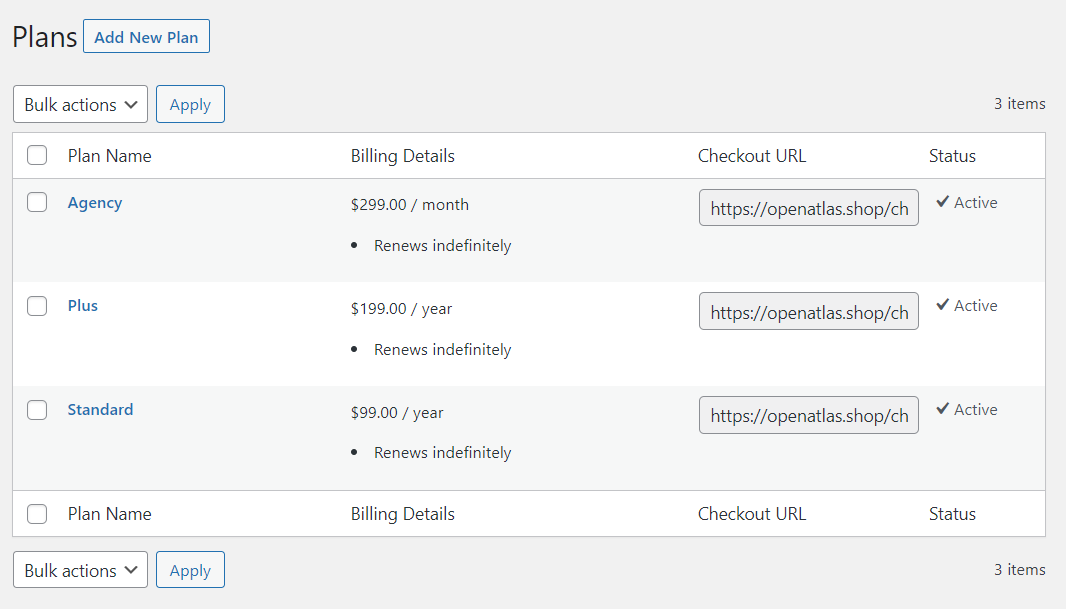
You can create as many membership plans as you like using the steps above. For example, on our demo site, we created three plans.
Create a Pricing Page & Add Checkout Links
By now, you have the checkout form and the membership plan ready. The next step is to create a pricing page and add the membership form checkout links to the page.
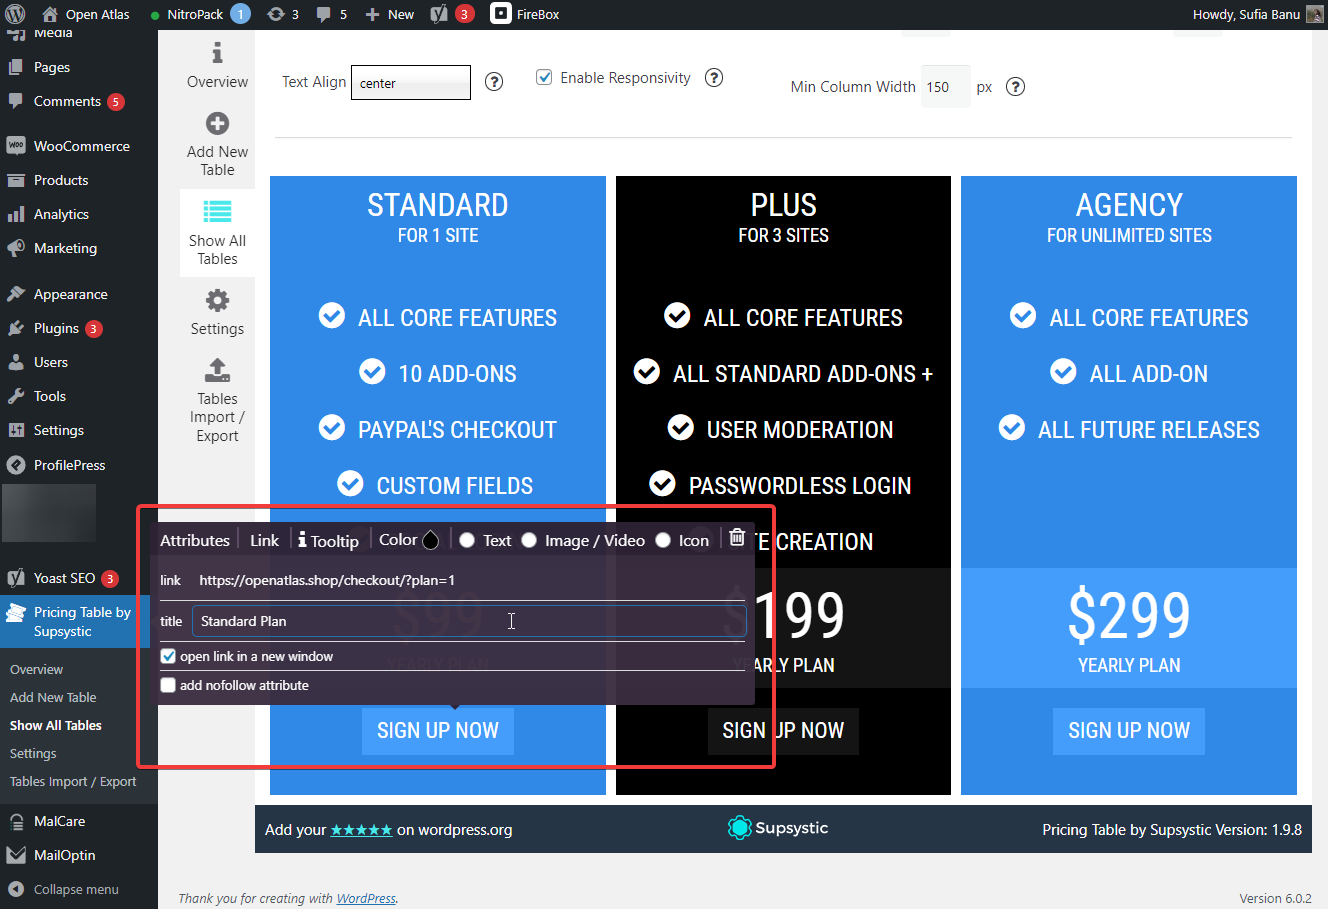
We recommend using a pricing table page plugin to create a pricing page. Once the page is up and running, go to ProfilePress > Membership Plans and open the plans you created in the previous step.
Copy the checkout link, open your pricing page and add the links to the pricing table.
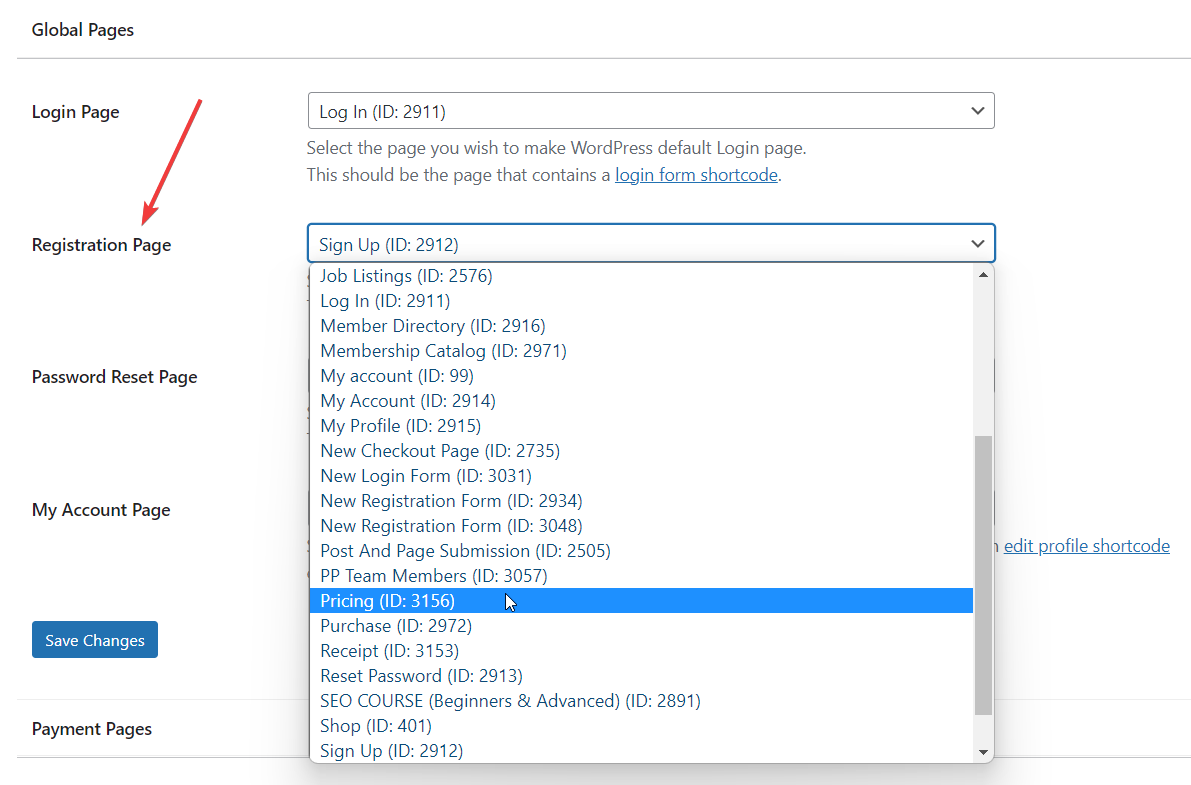
Replace Default Registration Page With Pricing Page
To ensure that everyone who signs up for your website is a paid member, you need to replace your default registration page with the pricing page.
Go to ProfilePress > Settings > Registration Page, and select the pricing page you created in the previous step from the dropdown menu. Save your changes.
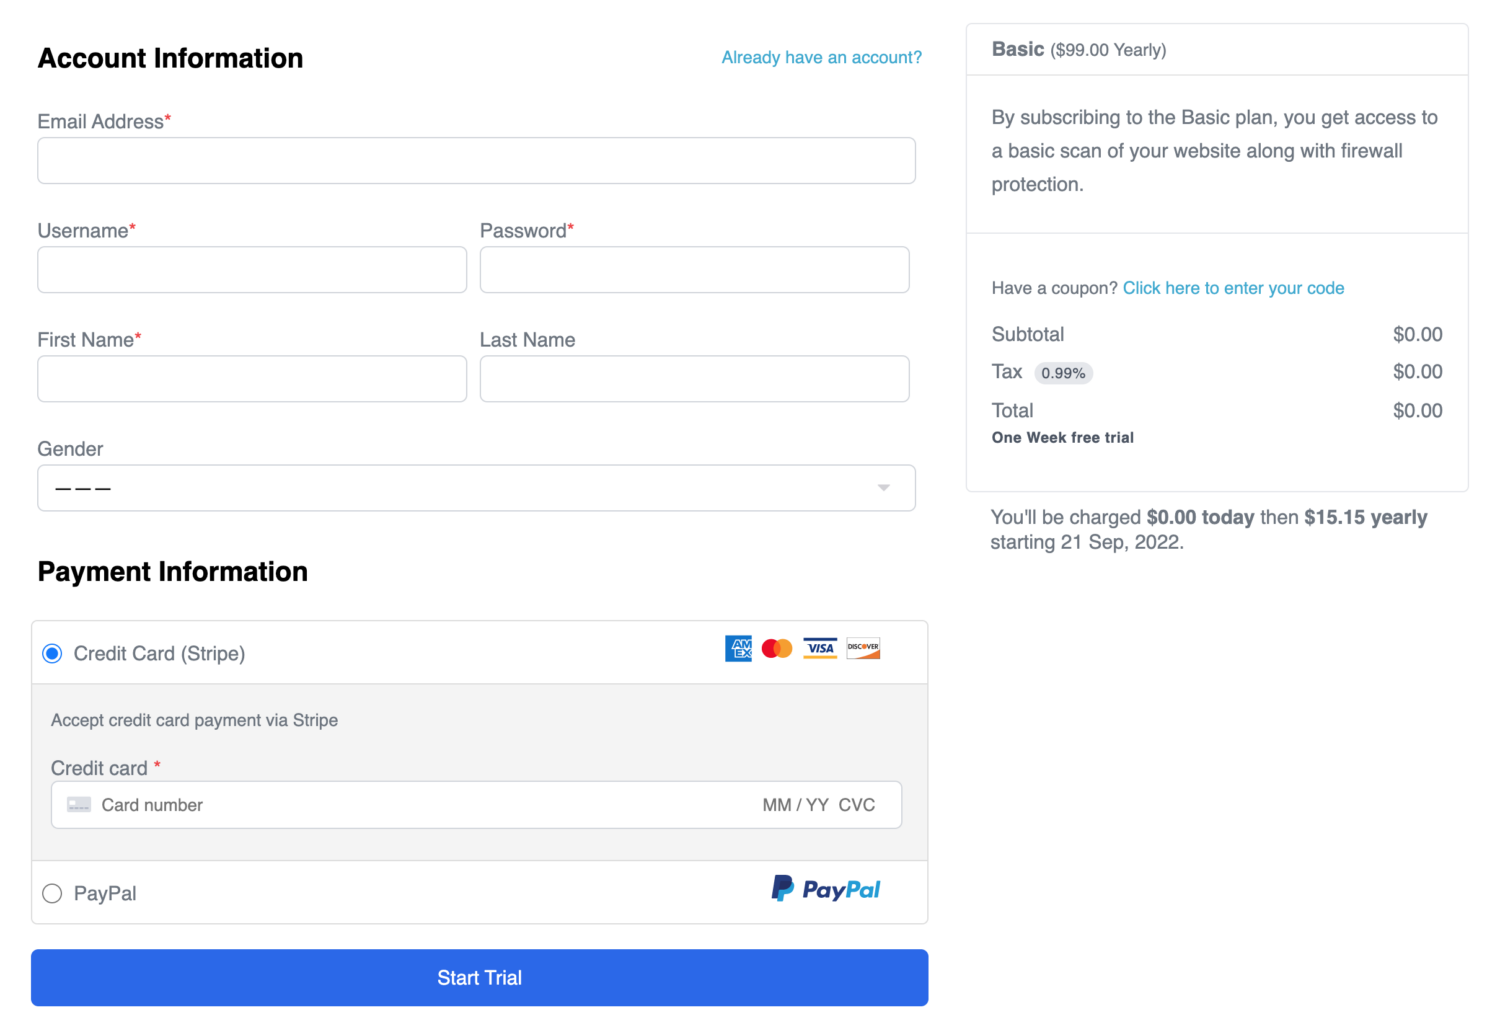
We created three membership plans on our demo site and added checkout links to the plans on our pricing page.

When a visitor clicks on the “Sign Up Now” button, they are taken to the checkout page of that particular plan. For instance, if someone selects the standard plan on our demo site, they are shown this checkout page:
Creating Custom Registration Form Without Payment Options
Having both the registration and payment fields in the same form is super helpful, but if you want to create a custom registration form without the payment option, ProfilePress will help you.
We have a separate article covering how to create a custom registration form. Please check that out.
The article also covers creating a custom login page for registered users.
Create Custom User Profiles & My Account Page
Now that you have custom registration and login forms, you may want to create custom user profiles and my-account pages.
If so, take a look at our guide on creating custom user profiles and my-account pages for the registered users of your website.
Conclusion
Creating a custom registration form with a payment option is easy if you have the right tools to assist you.
ProfilePress is one such powerful form-building plugin out there. The plugin can create custom registration forms with or without payment options. You can also use it to create custom login forms, user profiles, my-account pages, and much more. Take a look at all the features that ProfilePress has to offer.
Give ProfilePress a spin!