How to Create LearnDash Custom Registration Form & Login Form
Do you want a LearnDash custom registration form and login form for your online course website?
LearnDash is a popular LMS (learning management system) plugin or platform for creating and offering courses within WordPress. If you have a WordPress website and want to offer online courses to your audience, LearnDash is probably your best option.
However, while LearnDash takes care of all your needs as far as creating and offering courses is concerned, there are other areas you do need help with. One of them is creating custom WordPress user registration and login forms.
You must use a third-party solution to create frontend WordPress login forms and custom registration forms for your LearnDash. Let us walk you through how you can do that with ProfilePress.
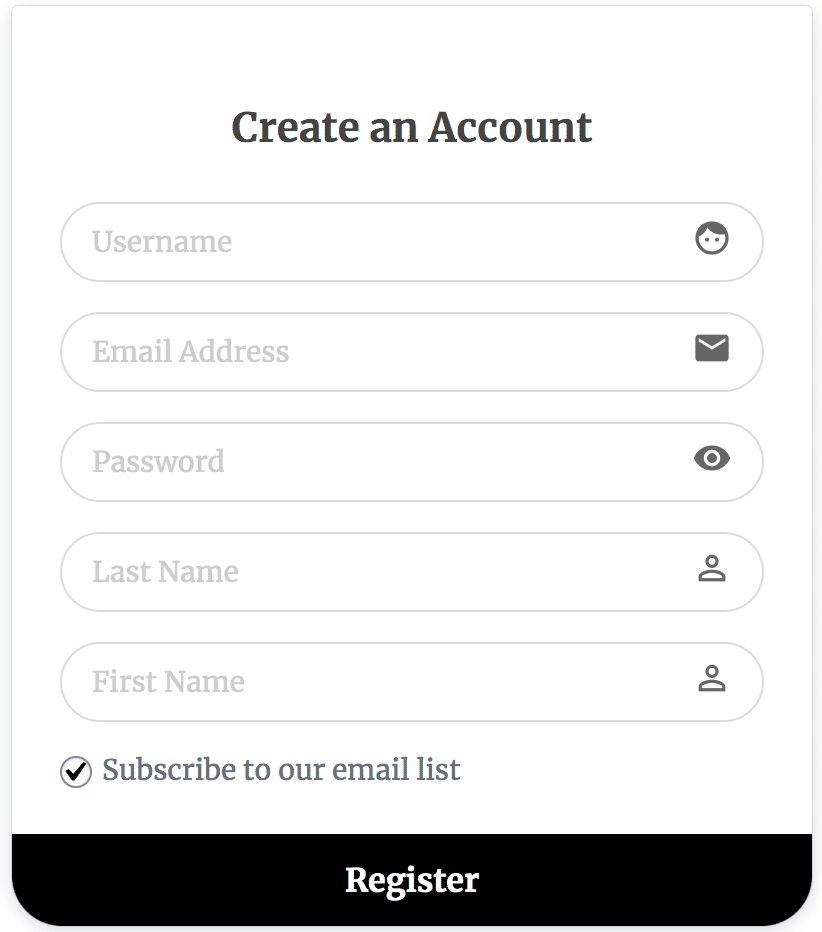
ProfilePress lets you create a WordPress registration form for your LearnDash site in just a few easy steps. If you use our default registration form option, you will be able to capture all the standard details you would need from your users, as you can see in the below image.
However, if you feel the need to add more fields to this form, then you need to use the custom fields addon. It will give you full control over the fields in your registration and login form and allow you to add as many custom fields as you like.
However, you must keep in mind that adding too many unnecessary fields can be a bit off-putting for users looking to register on your site.
Now, let us get to the actual process of setting up a registration form for LearnDash.
Creating a LearnDash Custom Registration Form
To create a LearnDash custom registration form, start with installing the ProfilePress plugin on your WordPress site if you haven’t already done so. You can upload the plugin directly or download it from within your WordPress dashboard.
Hover your mouse on the Plugins option and click on Add New. Then put “ProfilePress” into the search box and click on the Install Now button next to it.
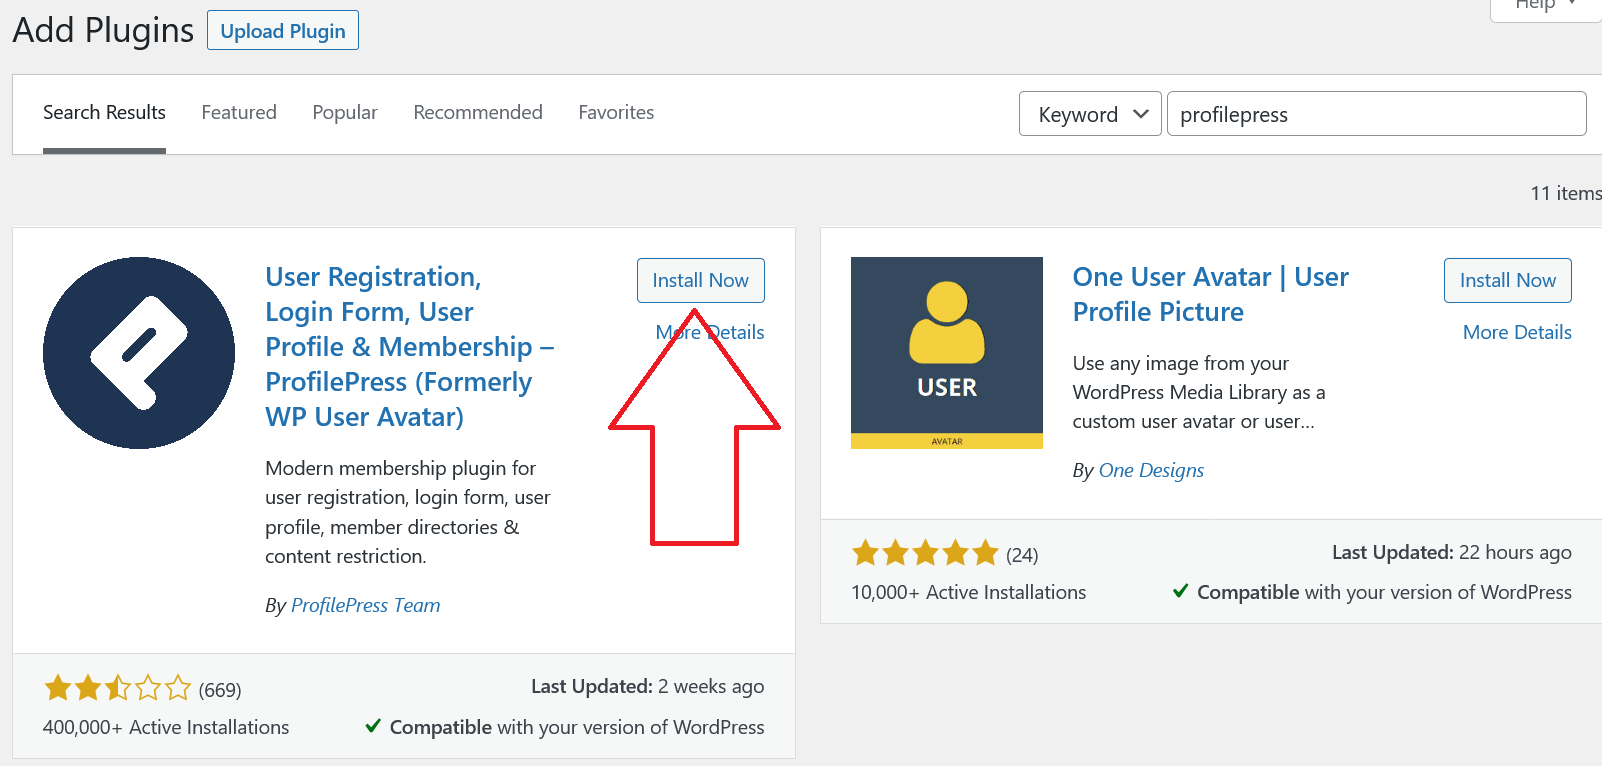
Then click on the Activate button that appears in the same place. Once installed and activated, you can follow the steps below to create a frontend user registration form.
Hover your mouse on the ProfilePress option and click on Forms & Profiles.
Click on the Add New button you see at the top.
This will take you to the following screen, where you can choose your preferred form builder.
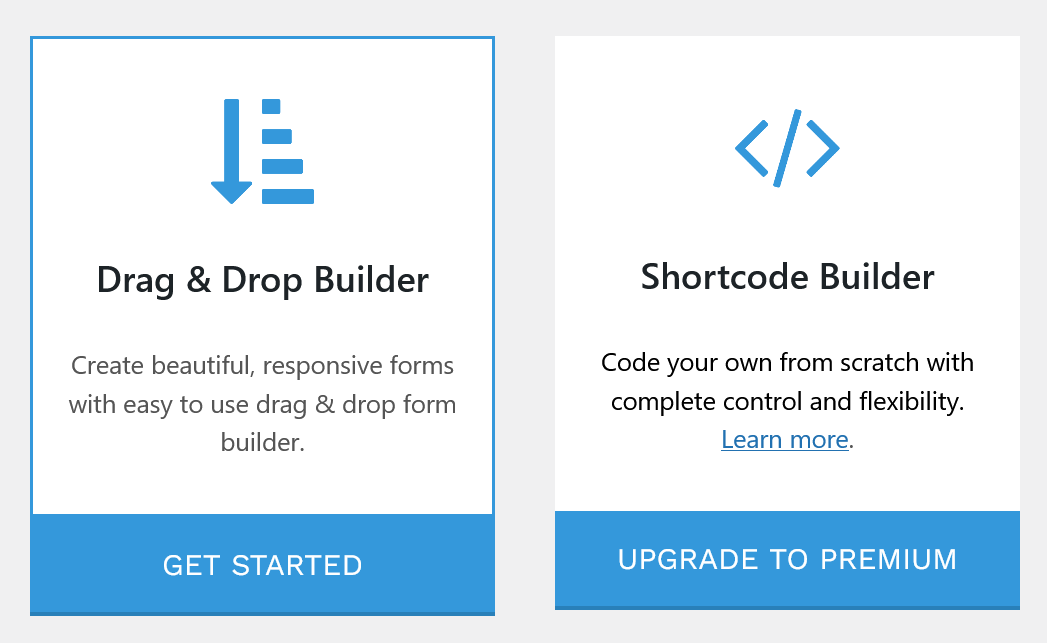
As mentioned above, you will have to upgrade to Premium if you want to add custom fields and be able to make customized changes to your custom LearnDash registration form using the Shortcode Builder.
You will need to put the name for your form as well as choose the form purpose (which in this case would be “Registration”) before you can proceed.
After choosing your desired form type and putting in the required details, you will have many templates to choose from, including one that allows you to build your LearnDash custom registration form from scratch using many standard user details.
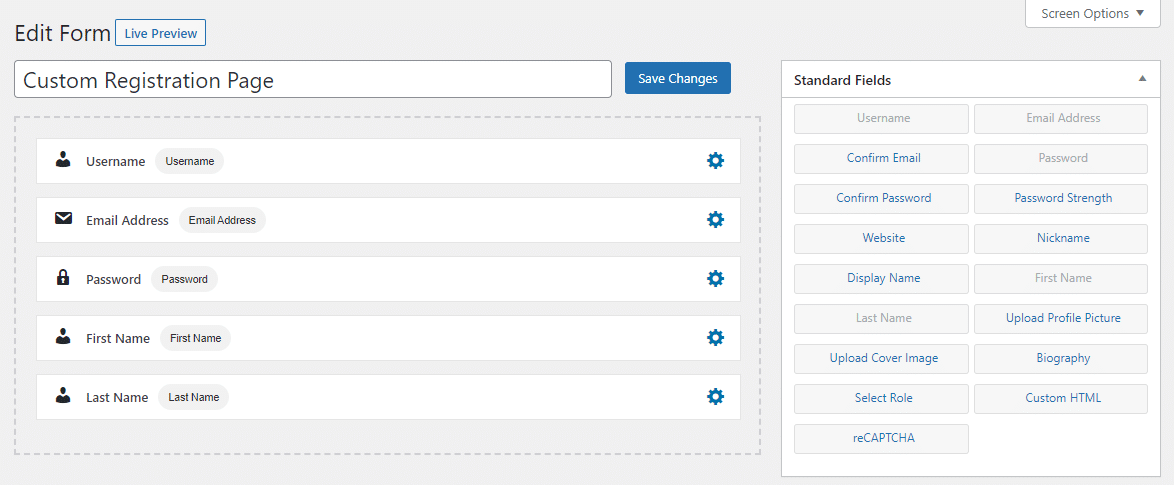
At any point when making your form, you can check it out in real time by clicking on the Live Preview button at the top. If you’re worried about fake registrations or spam, you can use our Google reCAPTCHA add-on and add it as a block right before the Register button.
Form Settings
The Form Settings section at the bottom of the screen allows you to change some important settings for your registration page. These settings include things ranging from the title of your registration form to assigning a specific role to the user being registered.
Under these settings, there are four tabs—Appearance, Colors, Submit Button, and Registration Settings—and you can go through all of them and make any changes as needed before finally creating your registration page.
Creating the Custom LearnDash Registration Page
Once the custom registration page is live, you will get a shortcode to embed the form.
Create a new WordPress page or edit an existing one. Save the form shortcode, and you are done.

NB: If you are using Block Editor, you need to add the Shortcode block and then paste the shortcode in the field.
Creating a Custom LearnDash Login Form Page
Like the registration form, you can easily create a custom login form for LearnDash. The process of creating one remains pretty much the same as creating a registration page, but you just have to select the Login option when creating a new form.
Again, you will have many ready-made templates to choose from and the option to create your own LearnDash login form from scratch, just like with the registration form. Below is what a standard login form looks like, something that you can create with just a couple of clicks.
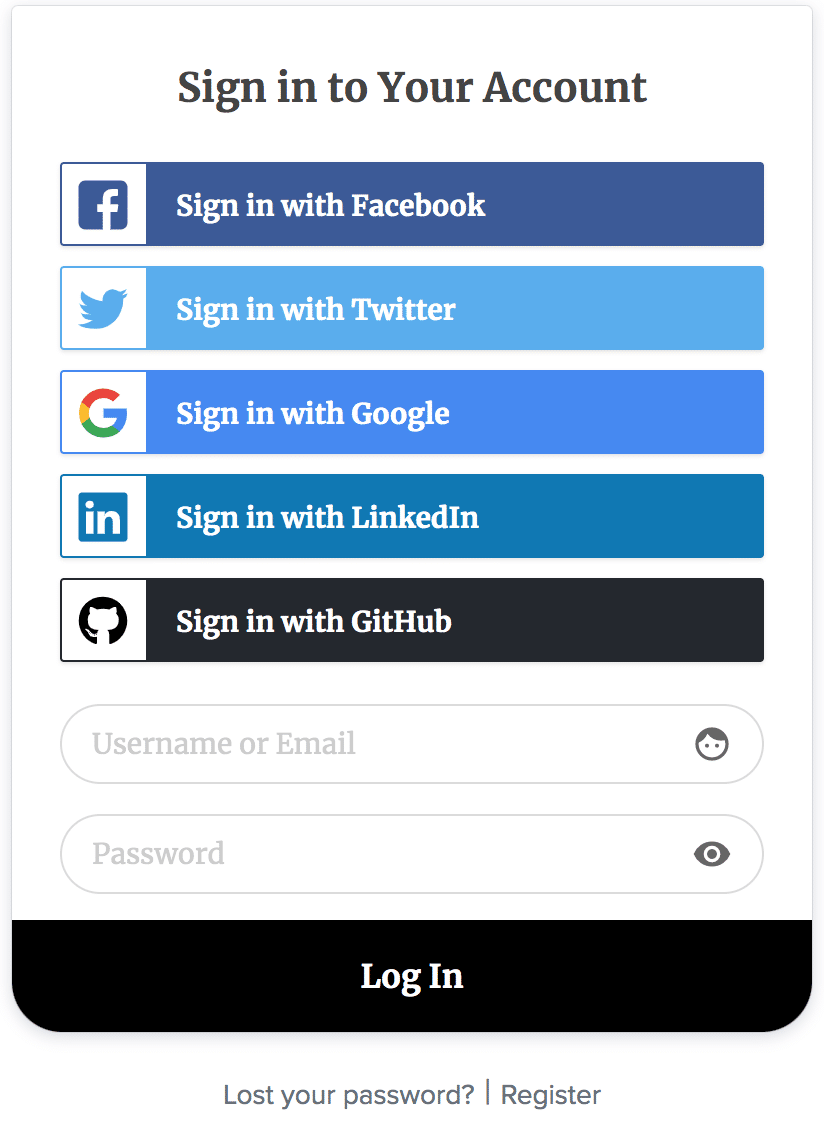
If you have the Google reCAPTCHA add-on, you can include the captcha block on your login form as well. This will help prevent spam and increase the security of your user accounts.

What if you want members or students to log in via social login? The social login addon is there for you.
Form Settings
Just like with the registration form, ProfilePress lets you have full control over many different settings of your login form as well.
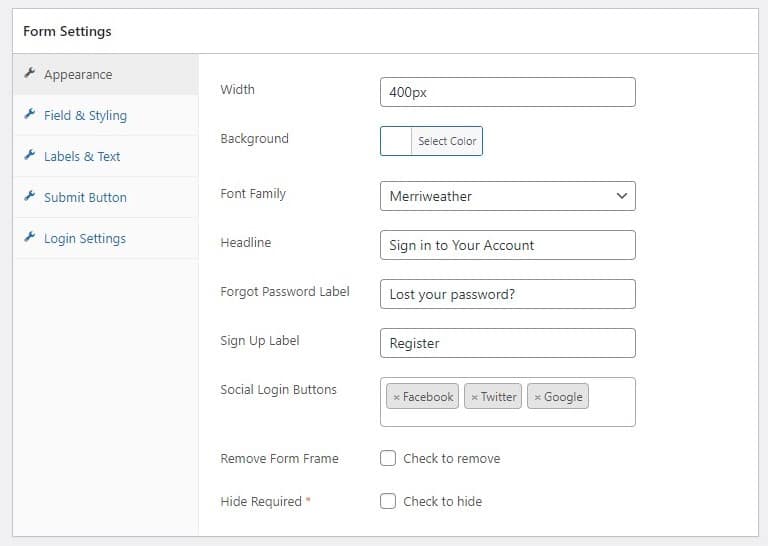
You can change the font, title and design of the login form in the Appearance tab, besides some other functionalities as well, including being able to enable Social Login.
The Field & Styling, as well as the Labels & Text, allows you to change further and modify the design of your login form.
To your surprise, you also have a lot of control over how the submit button on your login form looks. To some course creators, every little detail is important.
We understand this well and allow course creators and site owners like you to have full control over every little detail of your user registration and login forms.
The last of Form Settings is the Login Settings option that lets you make your login form a password-less form. Most course creators won’t want to use this option.
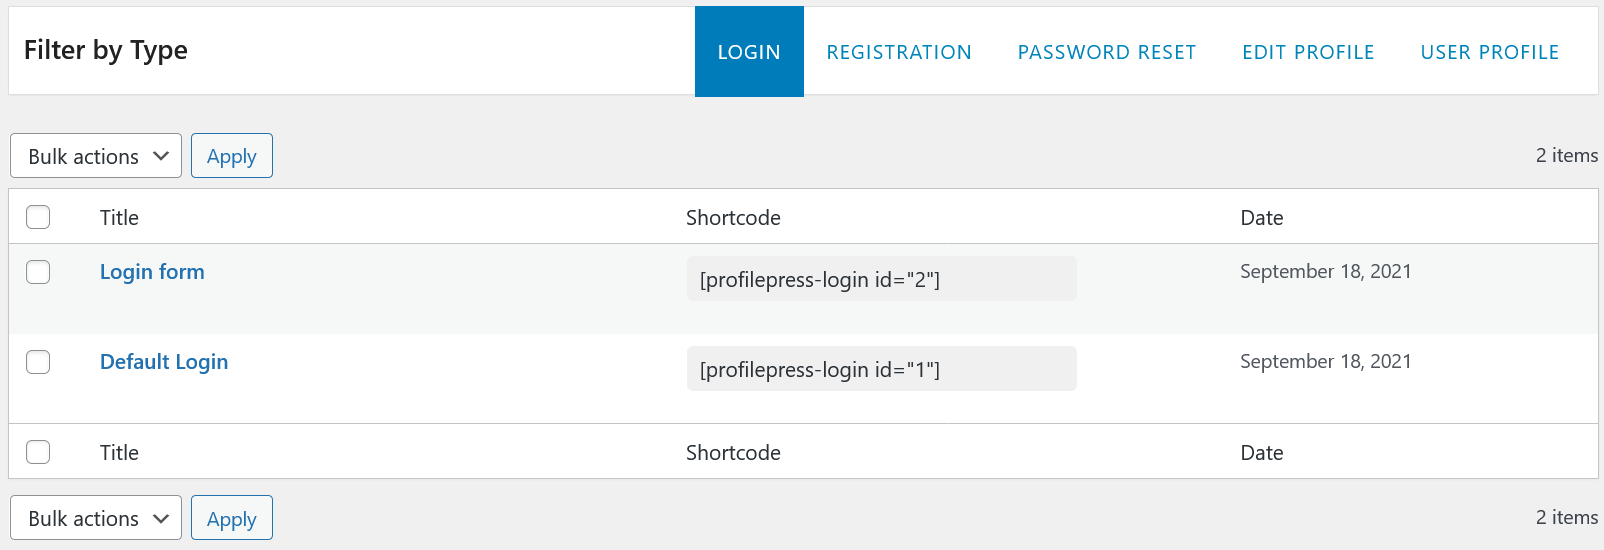
Finally, you will get a shortcode that you need to add to the page you want to set up as the login form. You will also find all the shortcodes you have created (be it for registration forms or login forms) in the Forms & Profiles section under the main ProfilePress menu.
Replacing LearnDash Login & Registration Links
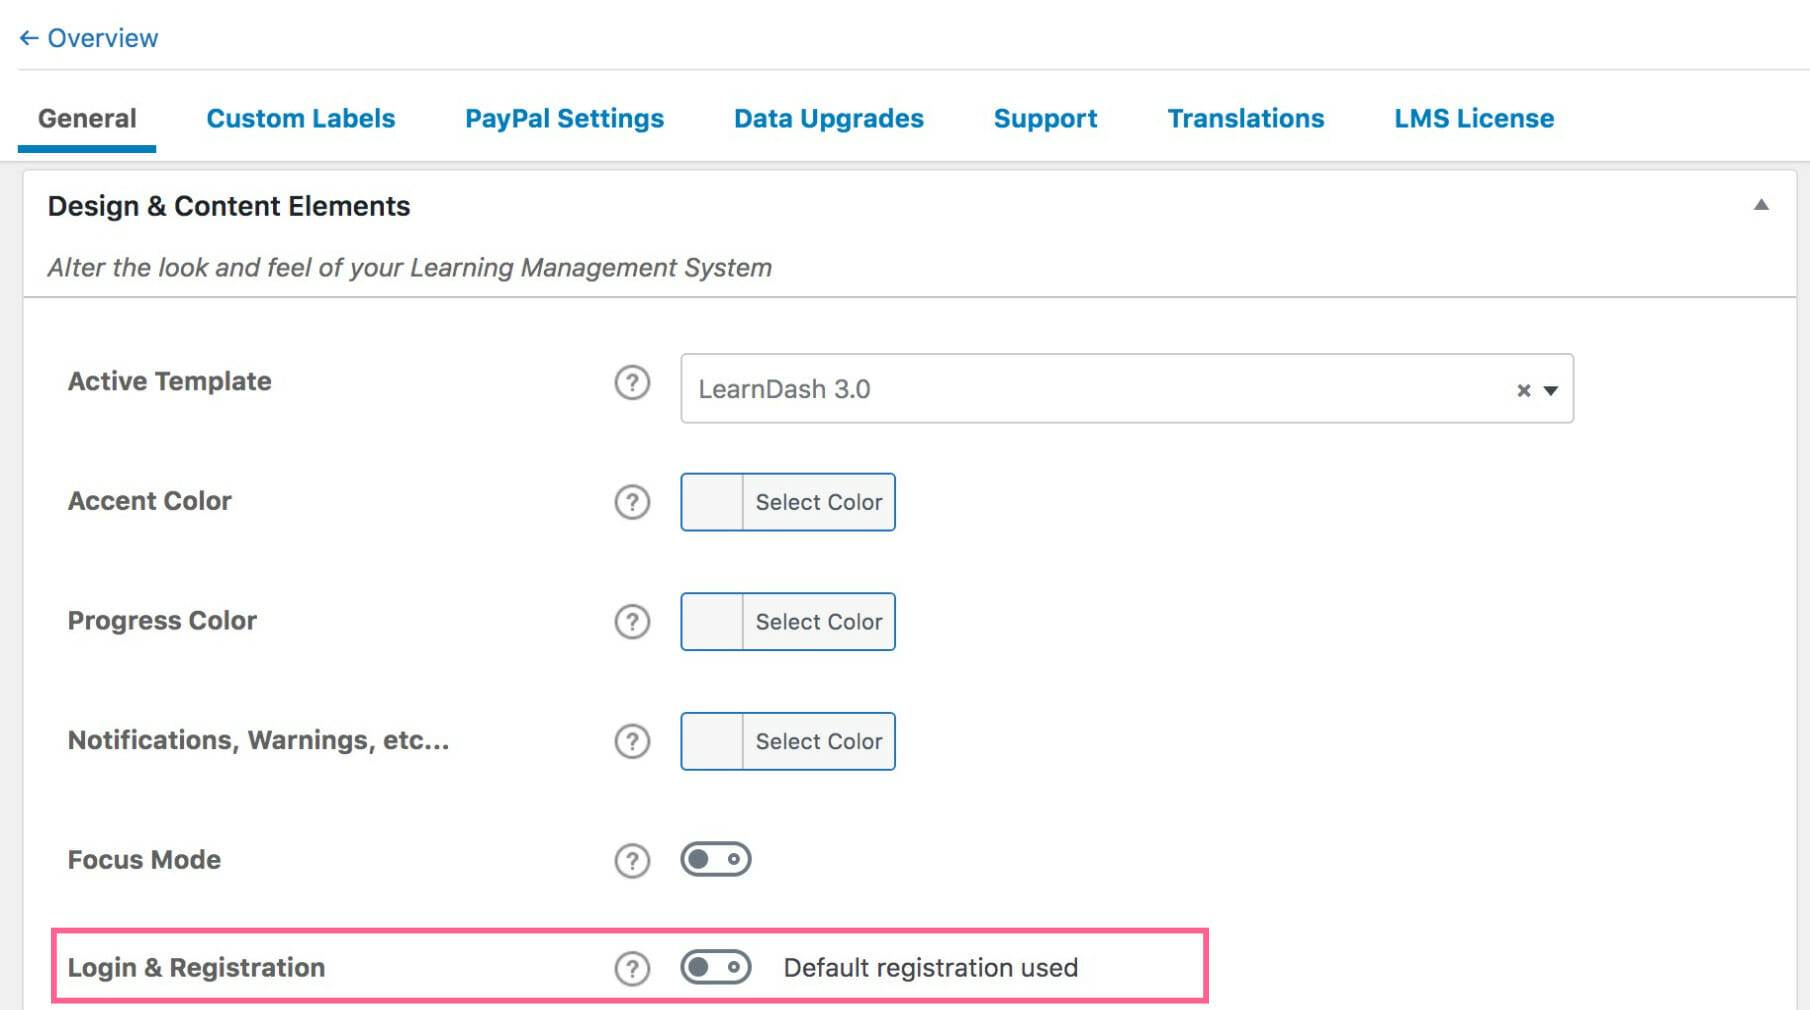
To replace the default LearnDash Registration and Login forms with your custom one created above, Go to LearnDash Settings >> General and ensure the “Login & Registration” option is disabled.
Finally, go to ProfilePress Settings >> Global and ensure the pages with the custom registration and login form shortcodes are selected.
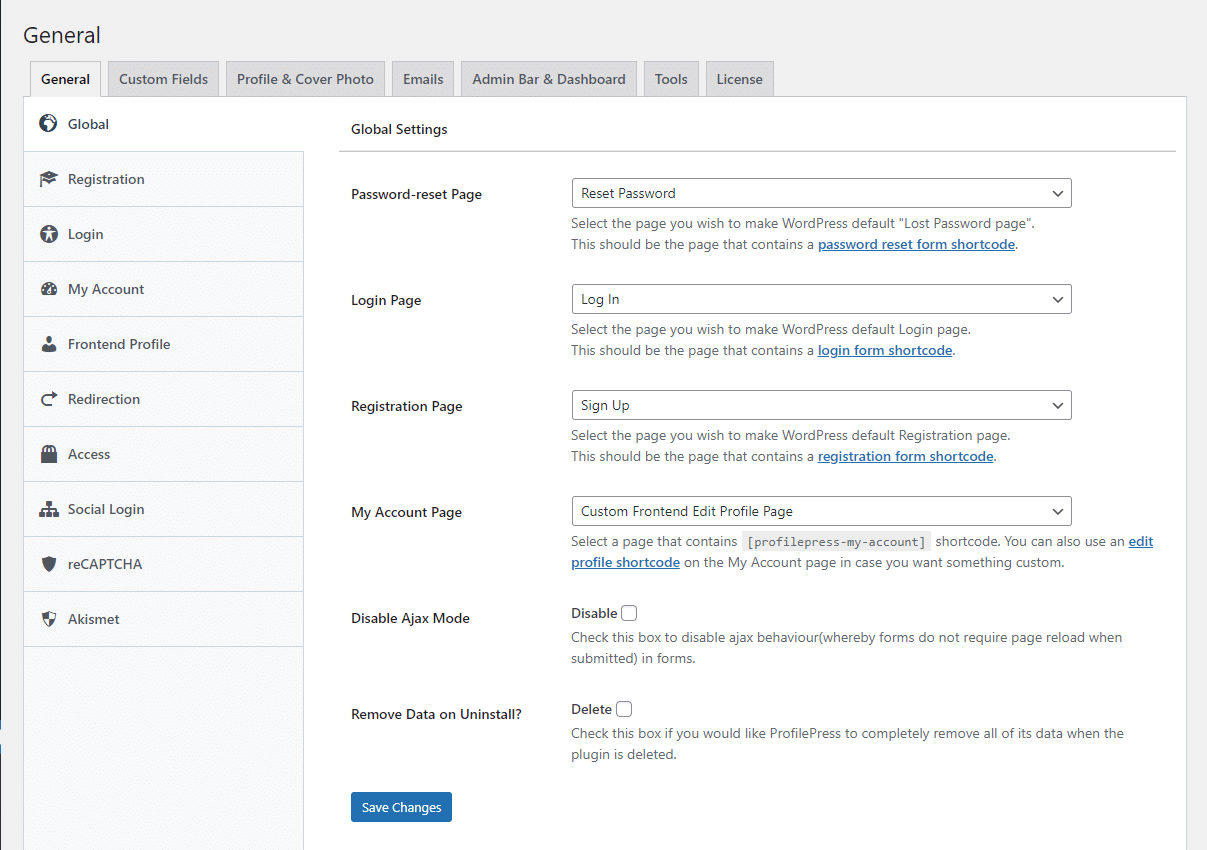
The purpose of setting these pages in Global settings is so that all login and registration page links on your LearnDash LMS site point to the custom ones you created.
Enrolling Users in Courses & Groups after Registration
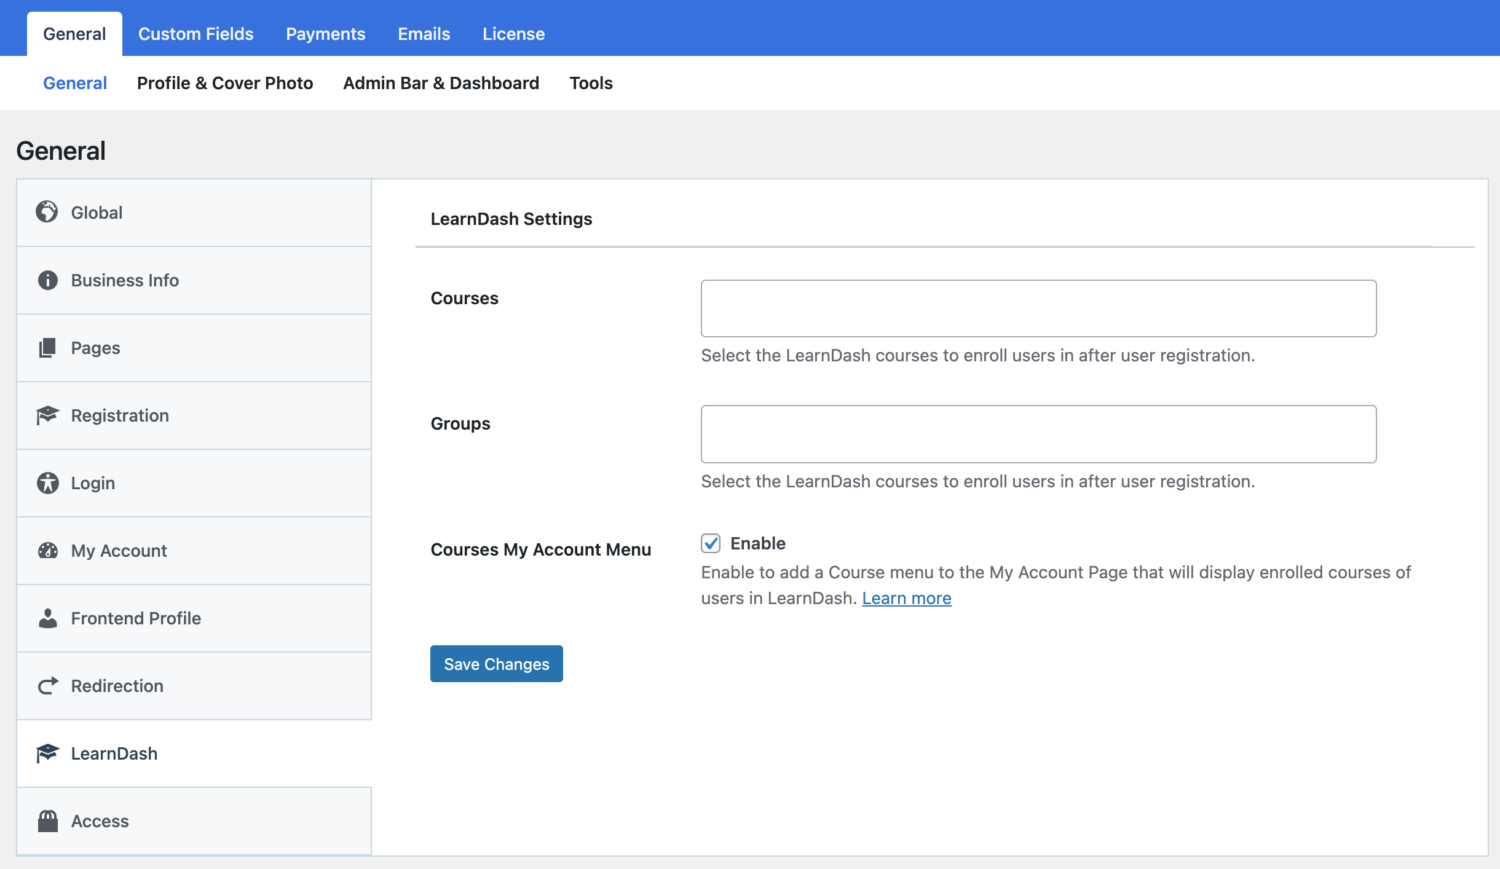
ProfilePress has a LearnDash addon that lets you sell access to LearnDash courses and groups and allows your users to view their enrolled courses from the My Account page.
The LearnDash addon also allows you to automatically enroll users to specific courses and/or groups in LearnDash after registration, regardless of the custom registration form they registered through. To do this, ensure the addon is activated and navigate to ProfilePress >> Settings >> LearnDash.
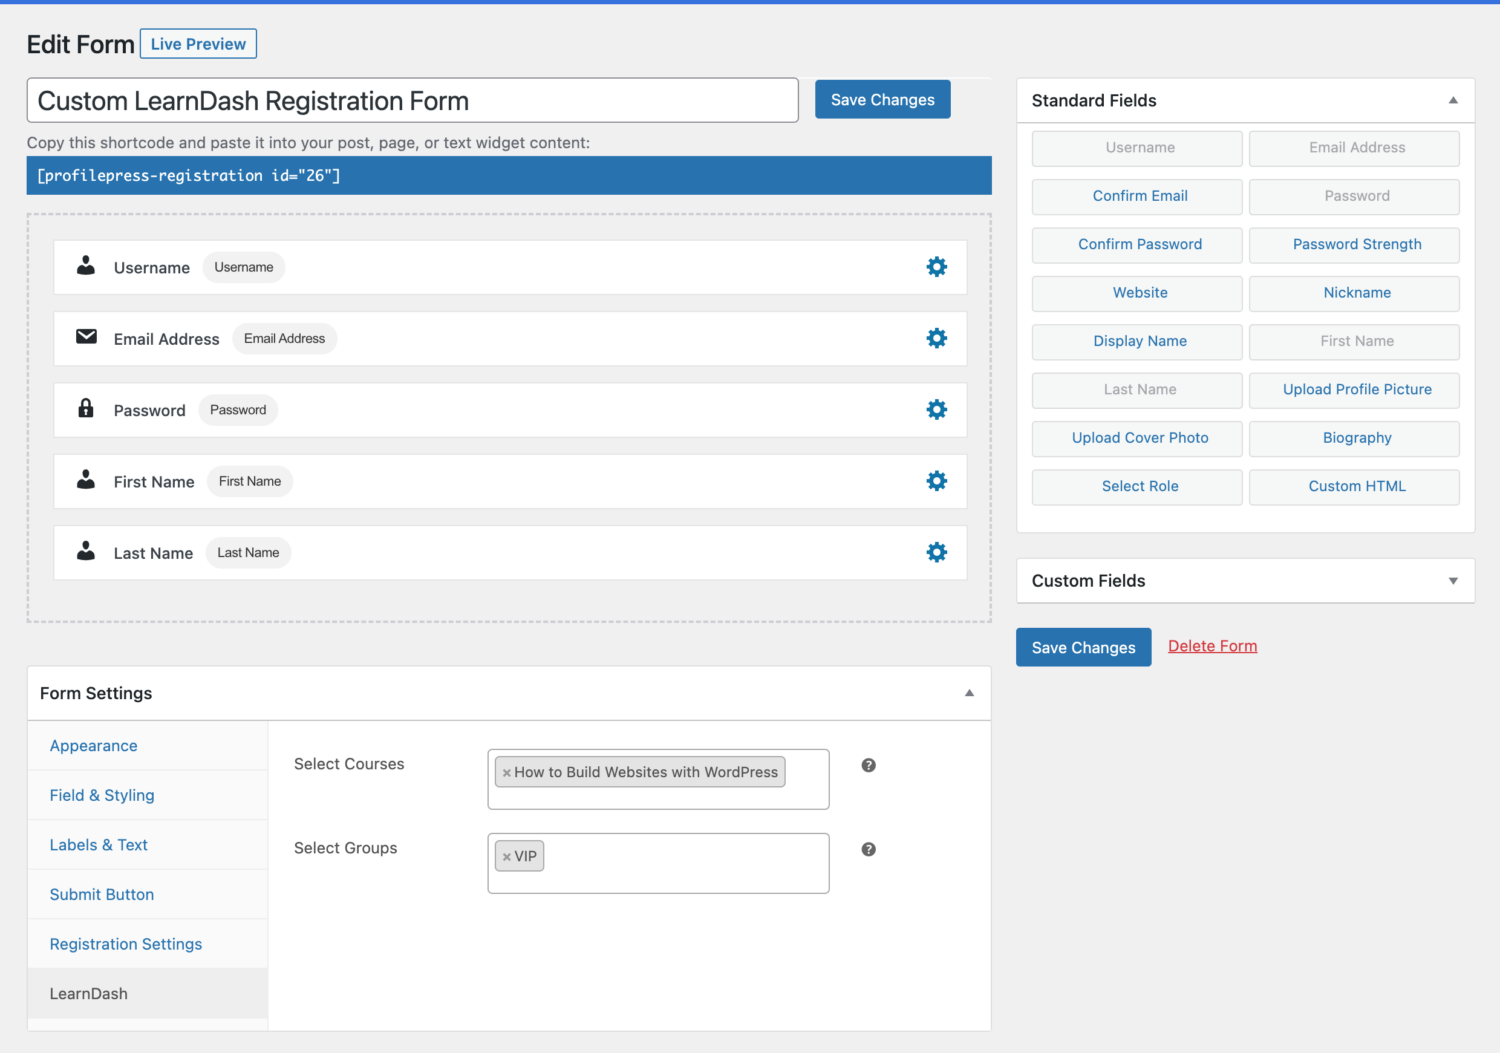
Enrollment Based on WordPress Registration Form
The LearnDash addon also integrates with the registration form to enroll users in specific courses and groups based on the registration form they signed up through.
More than Just Custom Registration and Login Form for LearnDash
ProfilePress doesn’t only let you create LearnDash custom registration forms and login pages. It also offers a variety of add-ons that simplify the user registration and management process.
Some of these include being able to make your users confirm their email after registering, the ability to approve or reject user registrations, allowing users to log in using their social media accounts, and so on.
And if you’re a premium user, know that if you ever need help with anything, it will just be a short email away!