How to Create a WordPress Stripe Payment Form
Do you want to create a Stripe payment form for your WordPress site?
WordPress does not have built-in support for payments. That’s why using a dedicated membership plugin like ProfilePress is highly recommended. ProfilePress allows you to create a payment form that integrates with Stripe as the payment gateway. With ProfilePress, you can customize the payment form and provide a smooth payment experience for your customers.
This article outlines the steps for creating a membership plan and integrating Stripe payment with ProfilePress, which then provides a checkout or payment form for charging payments via Stripe.
ProfilePress: Stripe Payment Form Plugin
ProfilePress offers an all-in-one solution for creating a full-fledged membership site in WordPress, with a checkout form that integrates with Stripe.
With the ProfilePress plugin, you get complete control over the configuration and design of your membership website. The plugin allows you to create one-time or recurring subscription plans, offer free trials, and set a sign-up fee for your membership plans. ProfilePress is also robust and provides the functionalities needed to set up some of the most popular payment methods on your membership site, such as Paystack, PayPal, Mollie, and Razorpay.
ProfilePress provides the Stripe Checkout add-on, which enables you to receive payments via your Stripe account and enables members to pay using Visa, Mastercard, bank transfers, and USSD.
How to create a WordPress Stripe payment form
In this guide, we will demonstrate how to create a Stripe payment form on your WordPress website using ProfilePress.
Step #1: Install and activate the ProfilePress plugin
Go to Plugins > Add New and click on the Upload Plugin button.
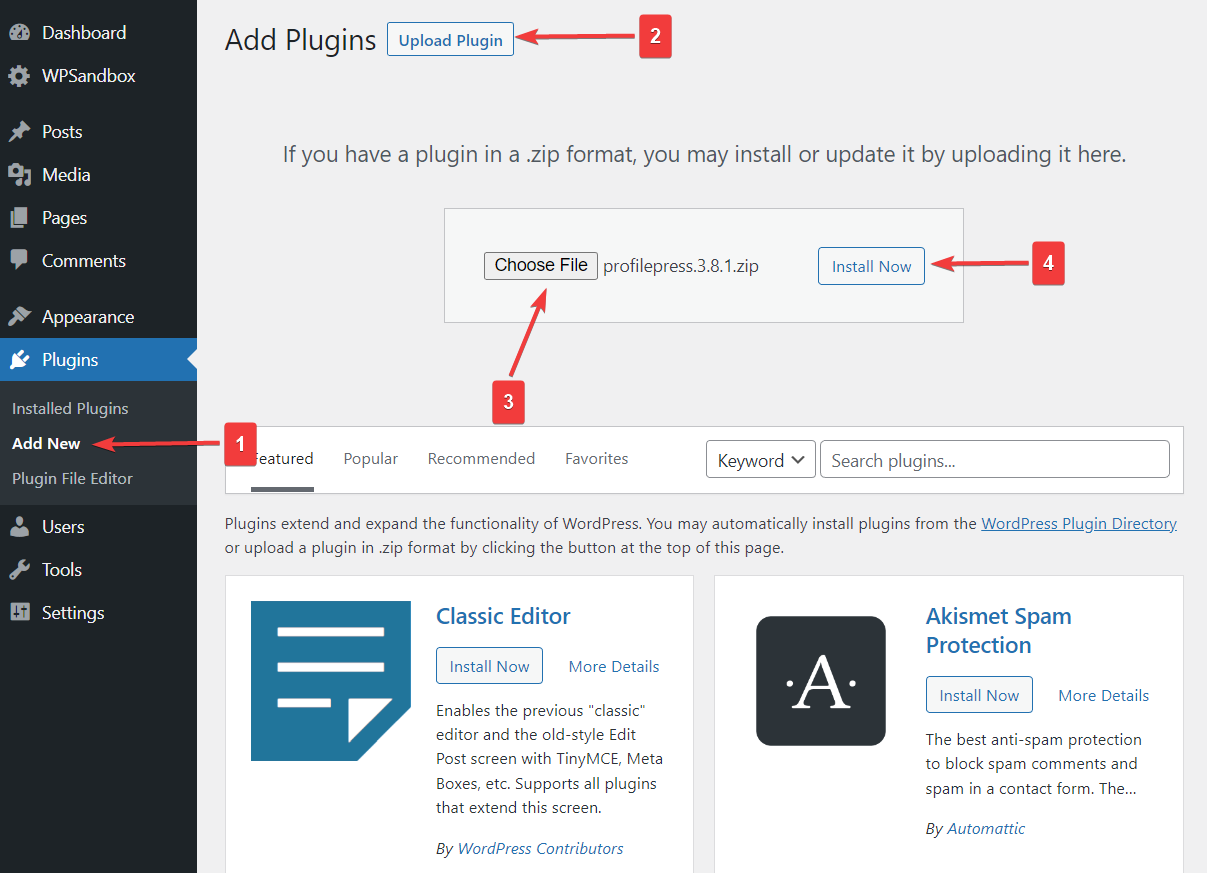
Choose the plugin zip file and click Install Now.
Once installed, click Activate.
Step #2: Create membership plans
To charge payments via the Stripe payment form ProfilePress provided, you must first create a membership plan. To do this, go to ProfilePress → Membership Plans and click on the Add New Plan button.
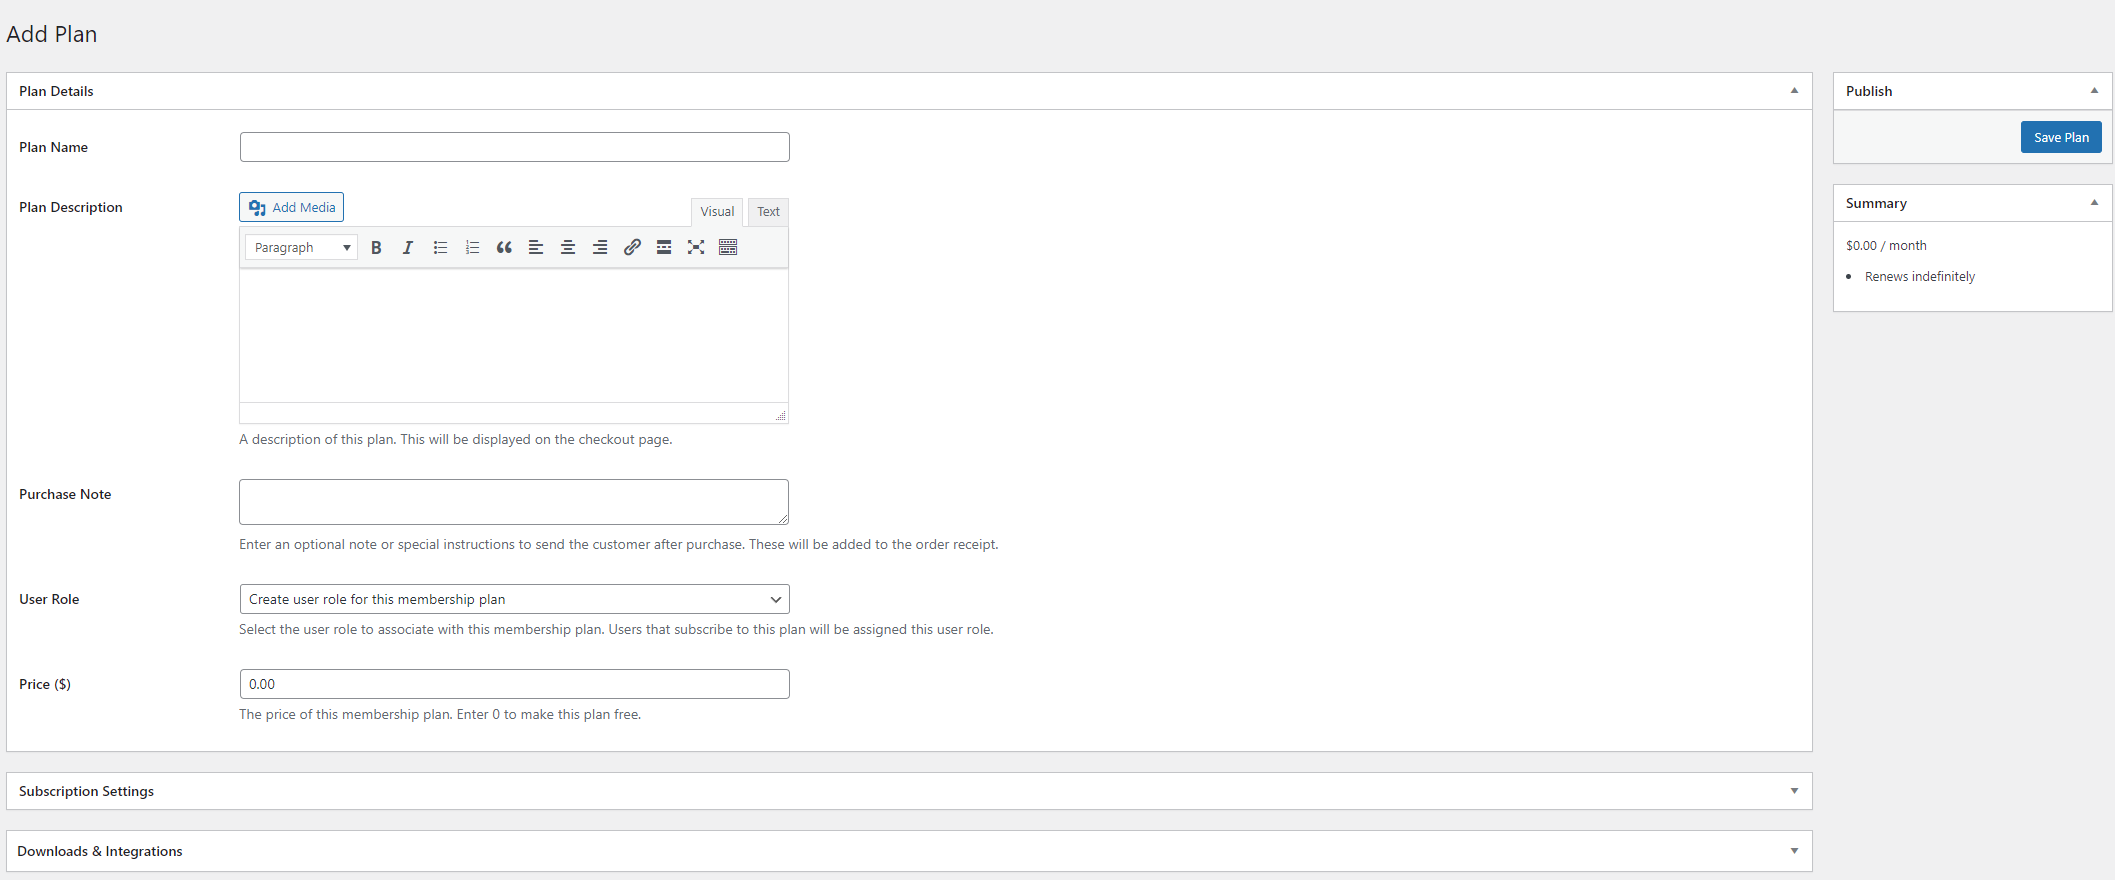
The Plan Details meta box lets you set basic membership plan details such as the name, description, and price of your membership plan. You can also offer membership plans for free if you set the Price ($) field to “0”. Once you’re done setting up your membership plan details, click on the Subscription Settings meta box.
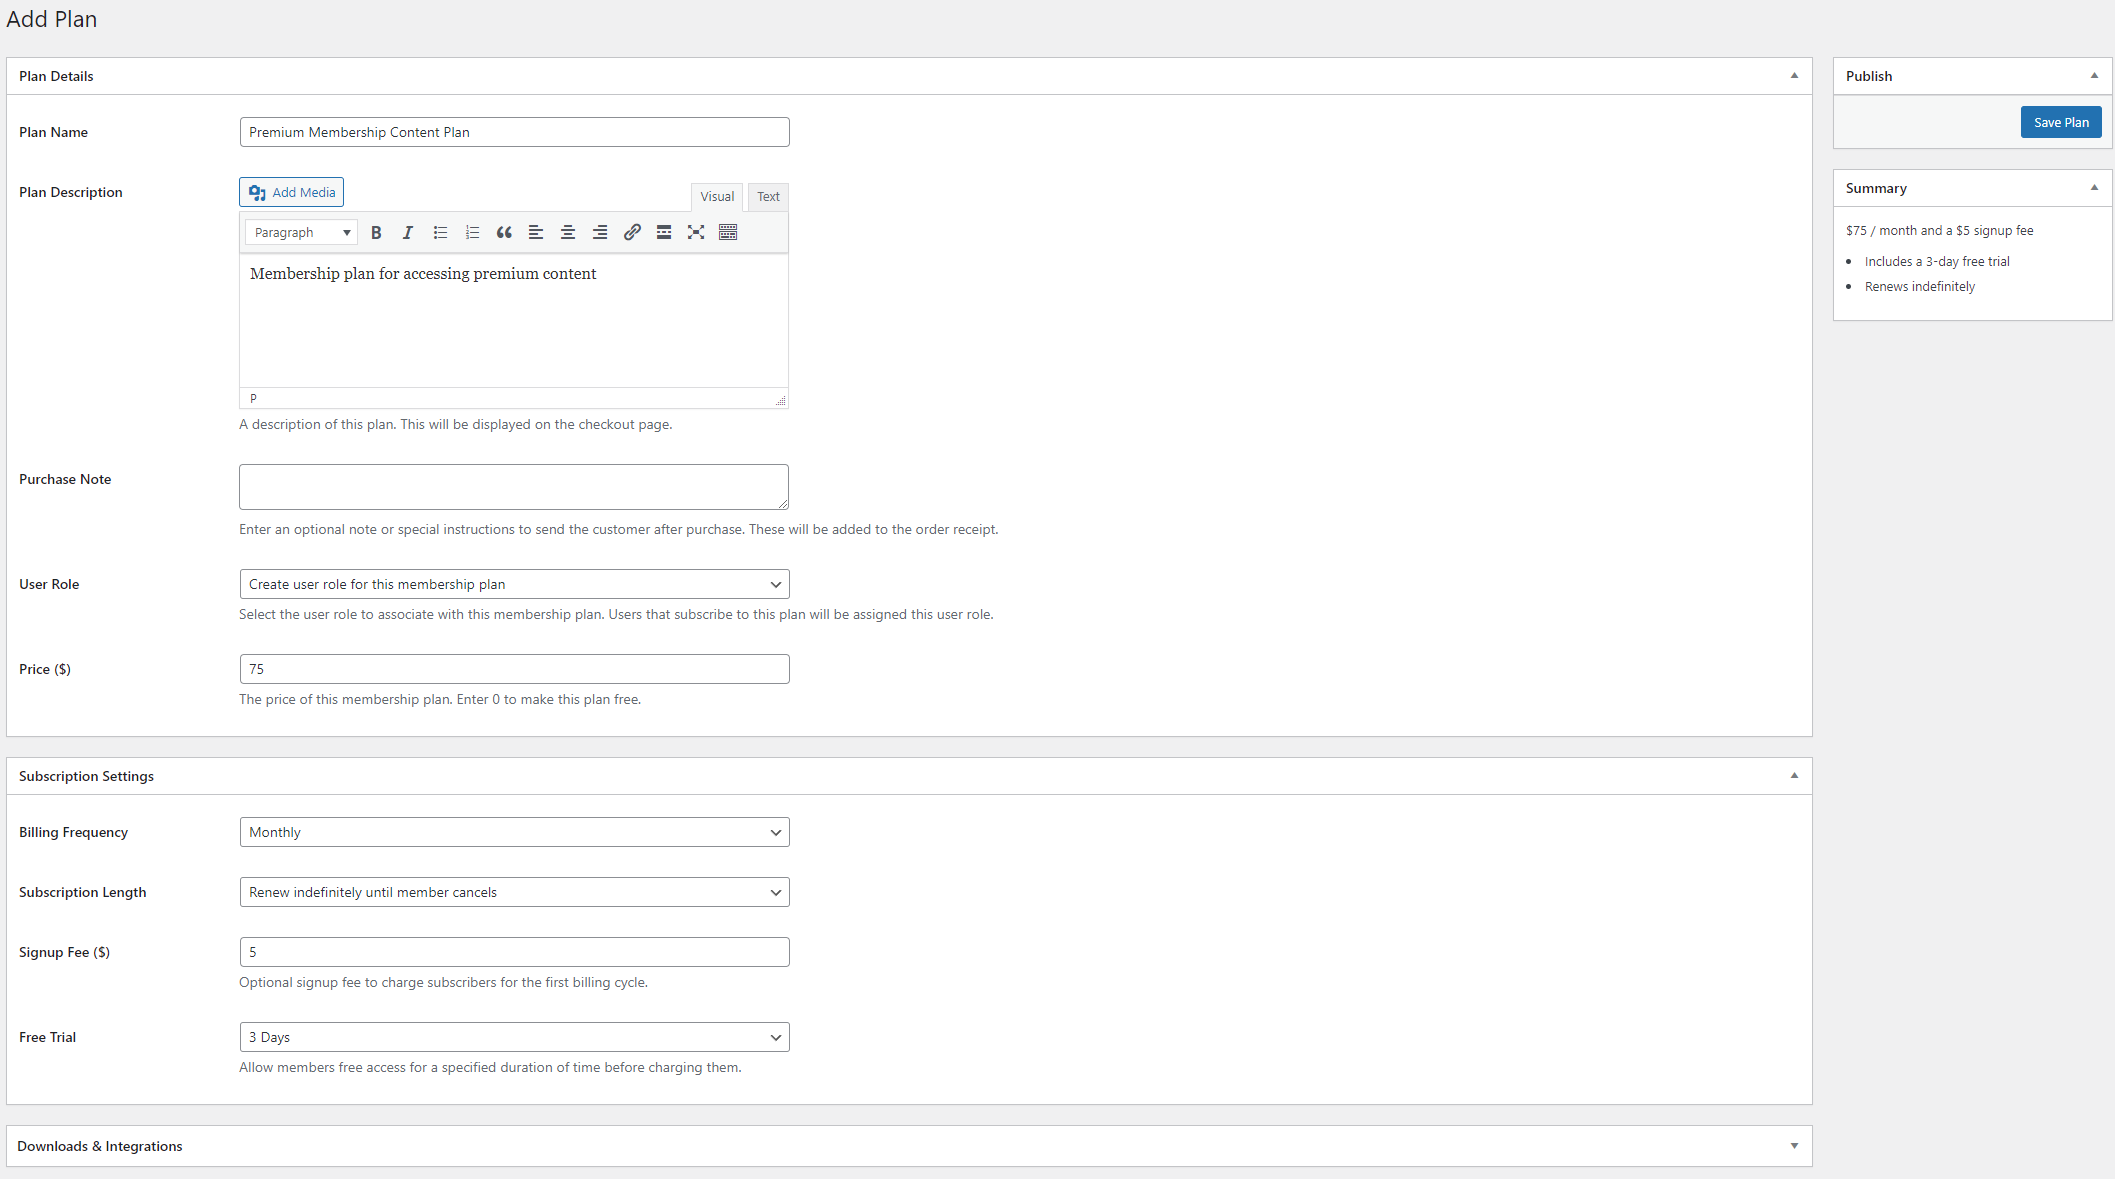
From the Billing Frequency dropdown menu, you can choose the payment frequency for your membership plan, such as monthly, weekly, annually, or every six months.
Furthermore, the Signup Fee field can be configured to require a one-time sign-up fee for all new users, effectively preventing spam submissions. Additionally, you can set the length of the free trial period using the Free Trial dropdown menu. Remember to save your membership plan by clicking the Save Plan button.
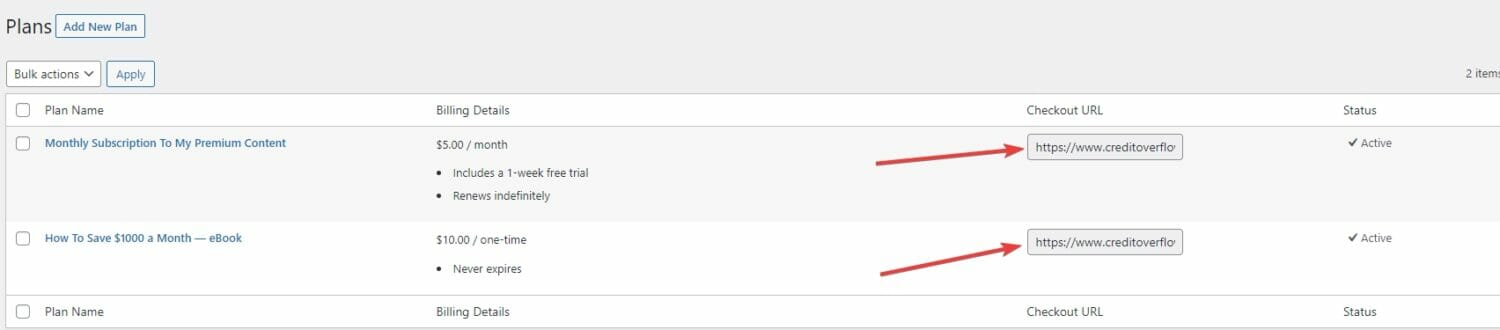
Upon saving your membership plan, a unique checkout URL will be generated. You may use this URL to create a pricing page or share it with your potential customers so they can complete their payment for the membership plan.
Step #3: Integrate your Stripe account
After creating a membership plan for your WordPress website, You need to connect your Stripe account with ProfilePress so that the payment form can display Stripe as a payment option during checkout.
To get started, navigate to ProfilePress → Settings in the WordPress admin dashboard and select the Payments tab from the top menu.
If you want to test the setup before going live, ensure you activate “test mode” before proceeding with the setup.
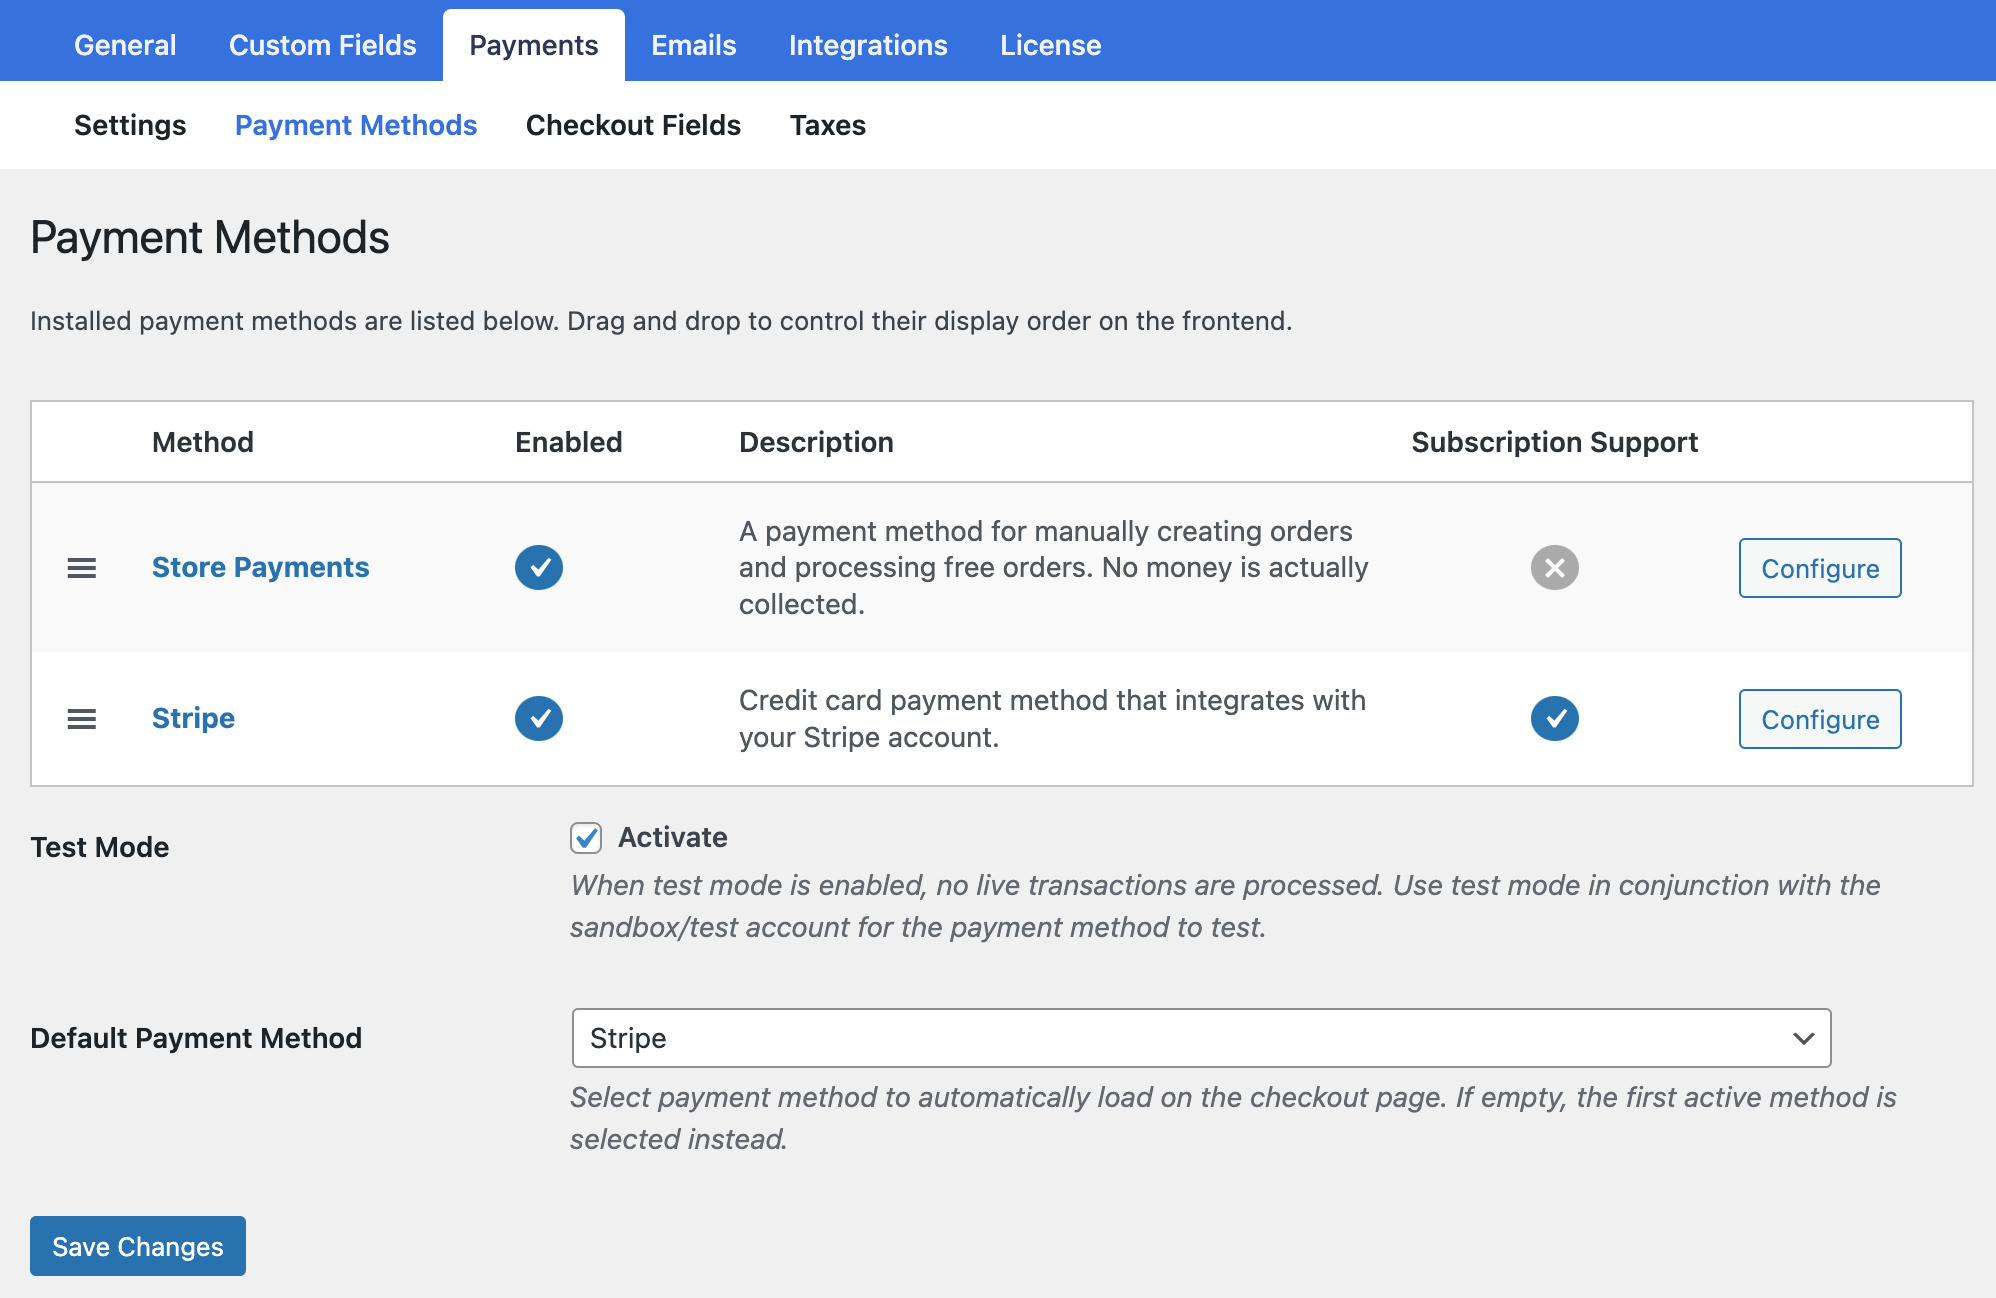
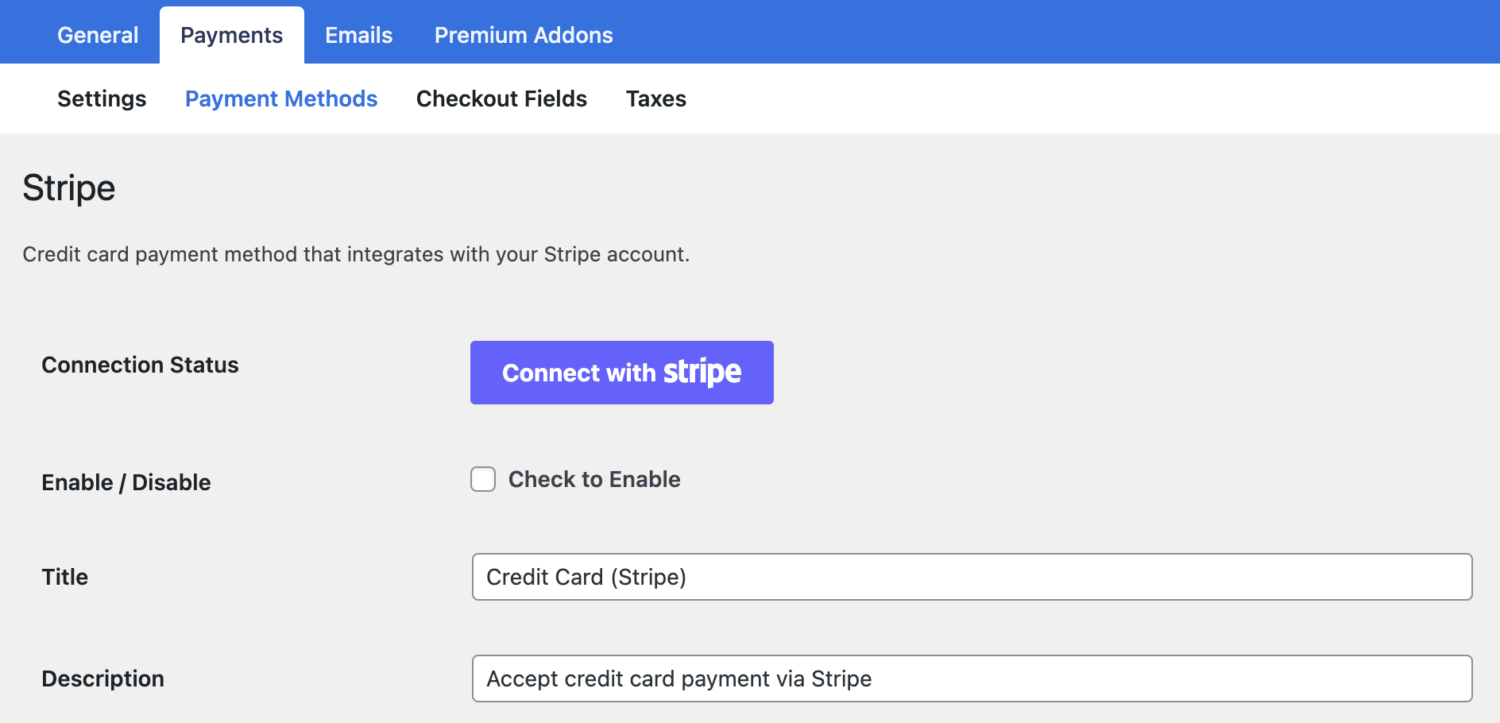
Next, click the “Connect with Stripe” button to connect ProfilePress to your Stripe account.
You’ll be taken to Stripe.com, where you’ll be prompted to create a new Stripe account or log in to your existing one.
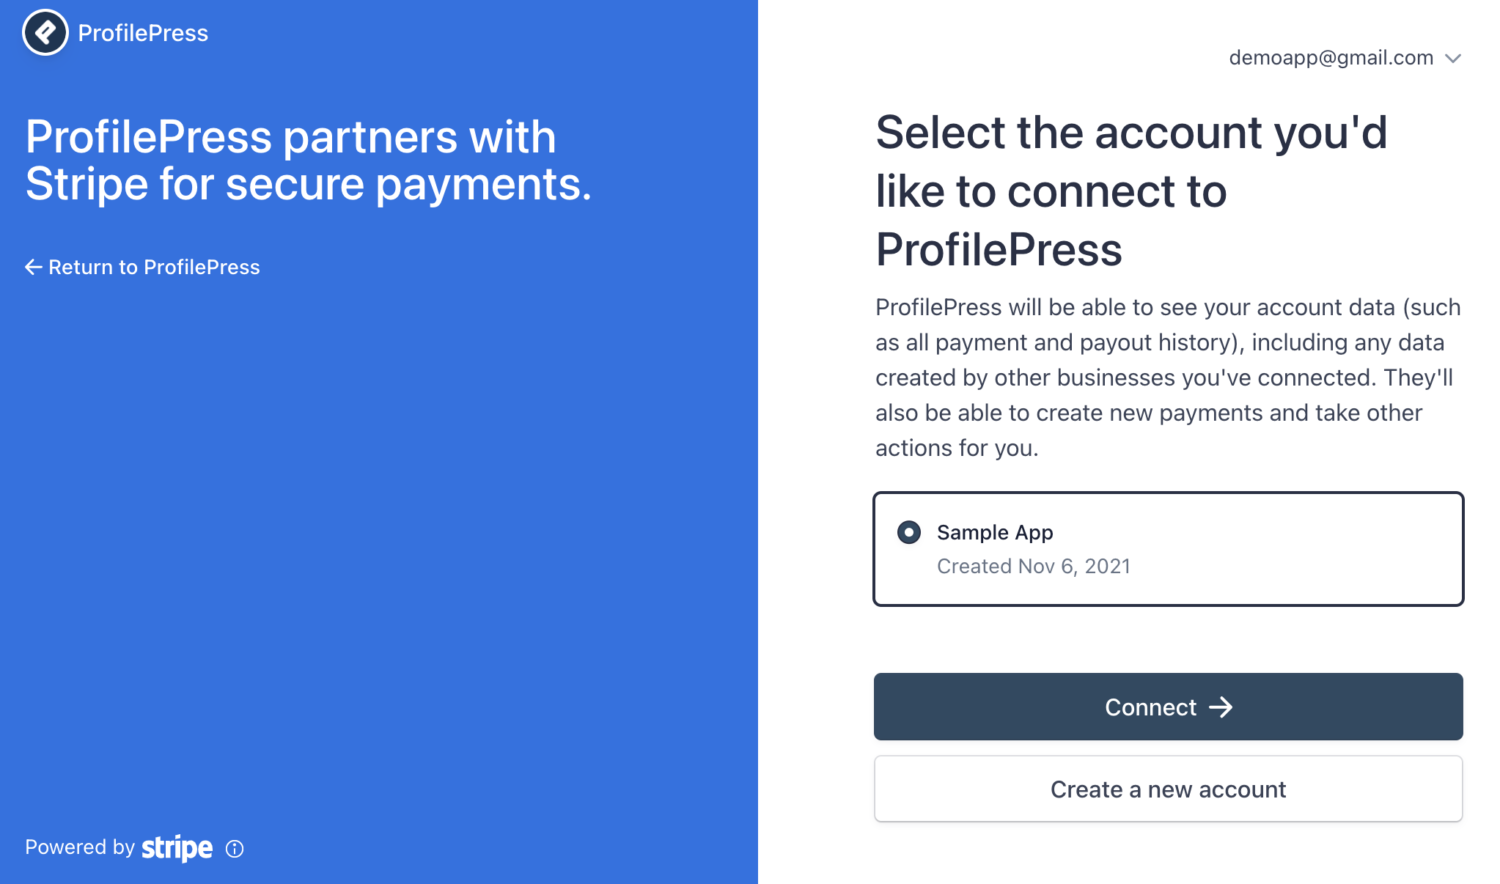 Once you complete the form, you’ll be taken back to your website.
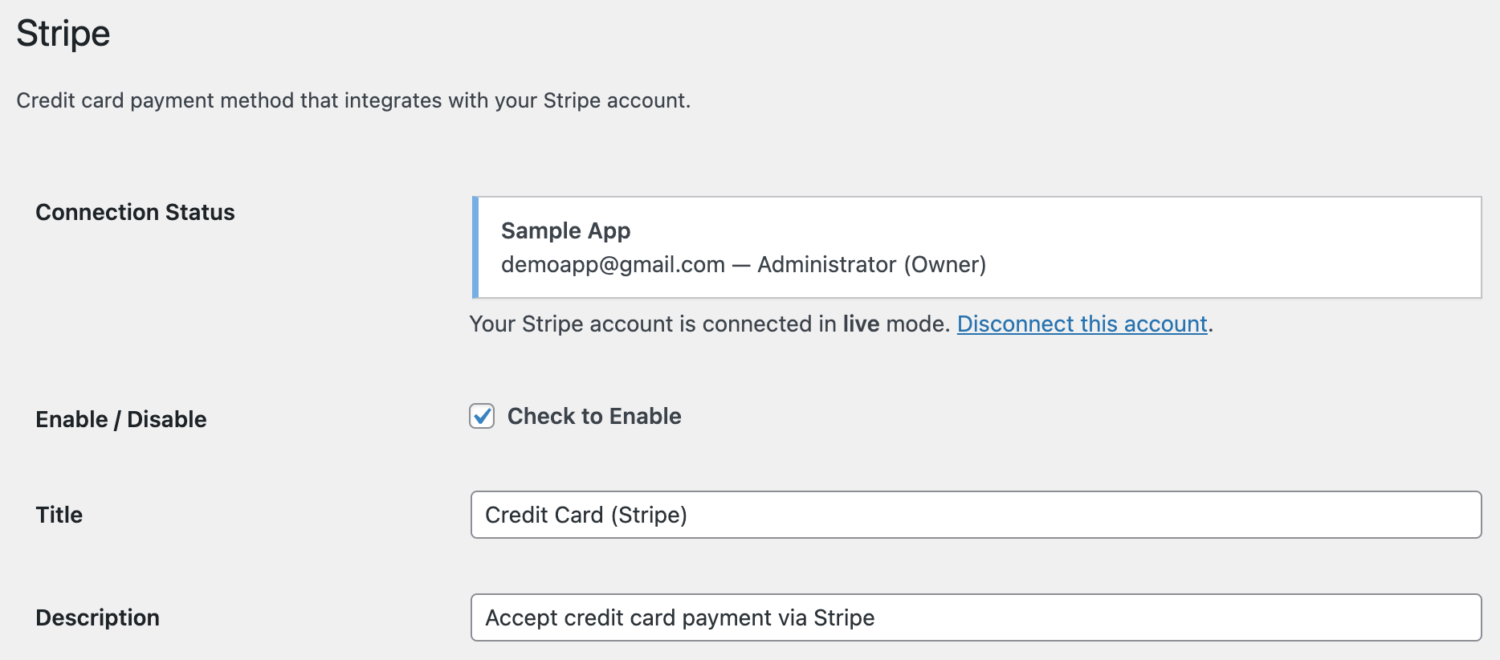
Enable the Stripe integration by checking “Enable / Disable,” Don’t forget to set a title and description.
Step #4: Restrict membership content
With the membership plan created and the Stripe payment gateway configured as the only payment option, you may set up content protection rules using the ProfilePress plugin. To begin, go to ProfilePress → Content Protection and click on the Add a Protection Rule button.
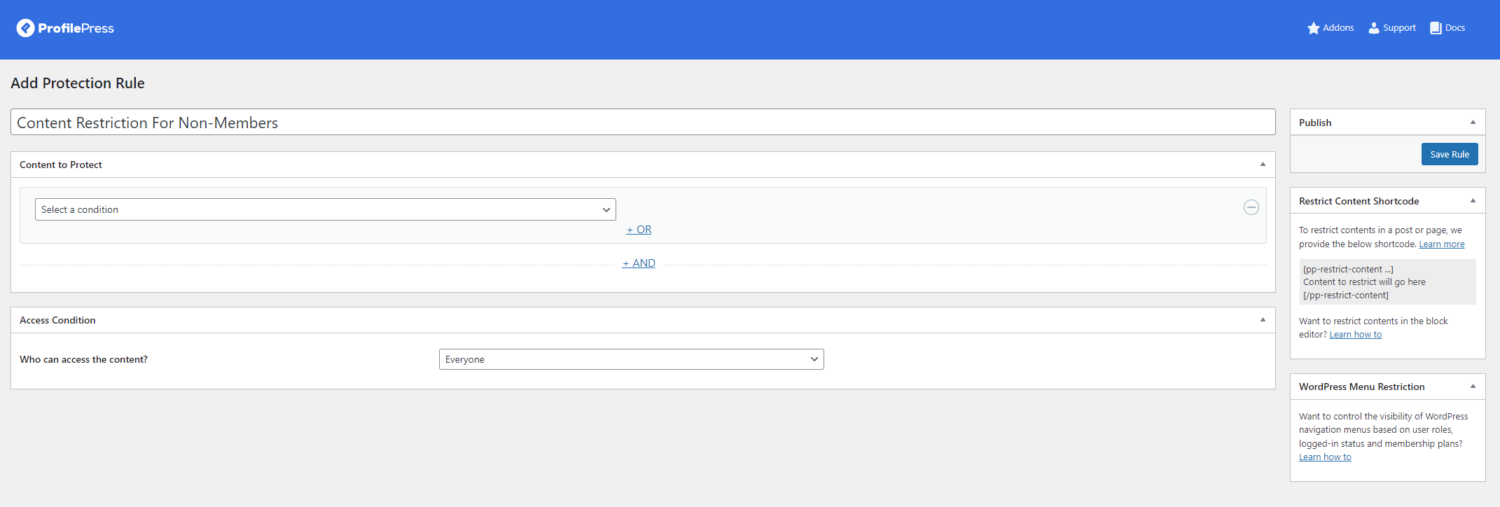
After giving your content restriction rule a new title, use the Content to Protect section to specify which content will be restricted to members only.
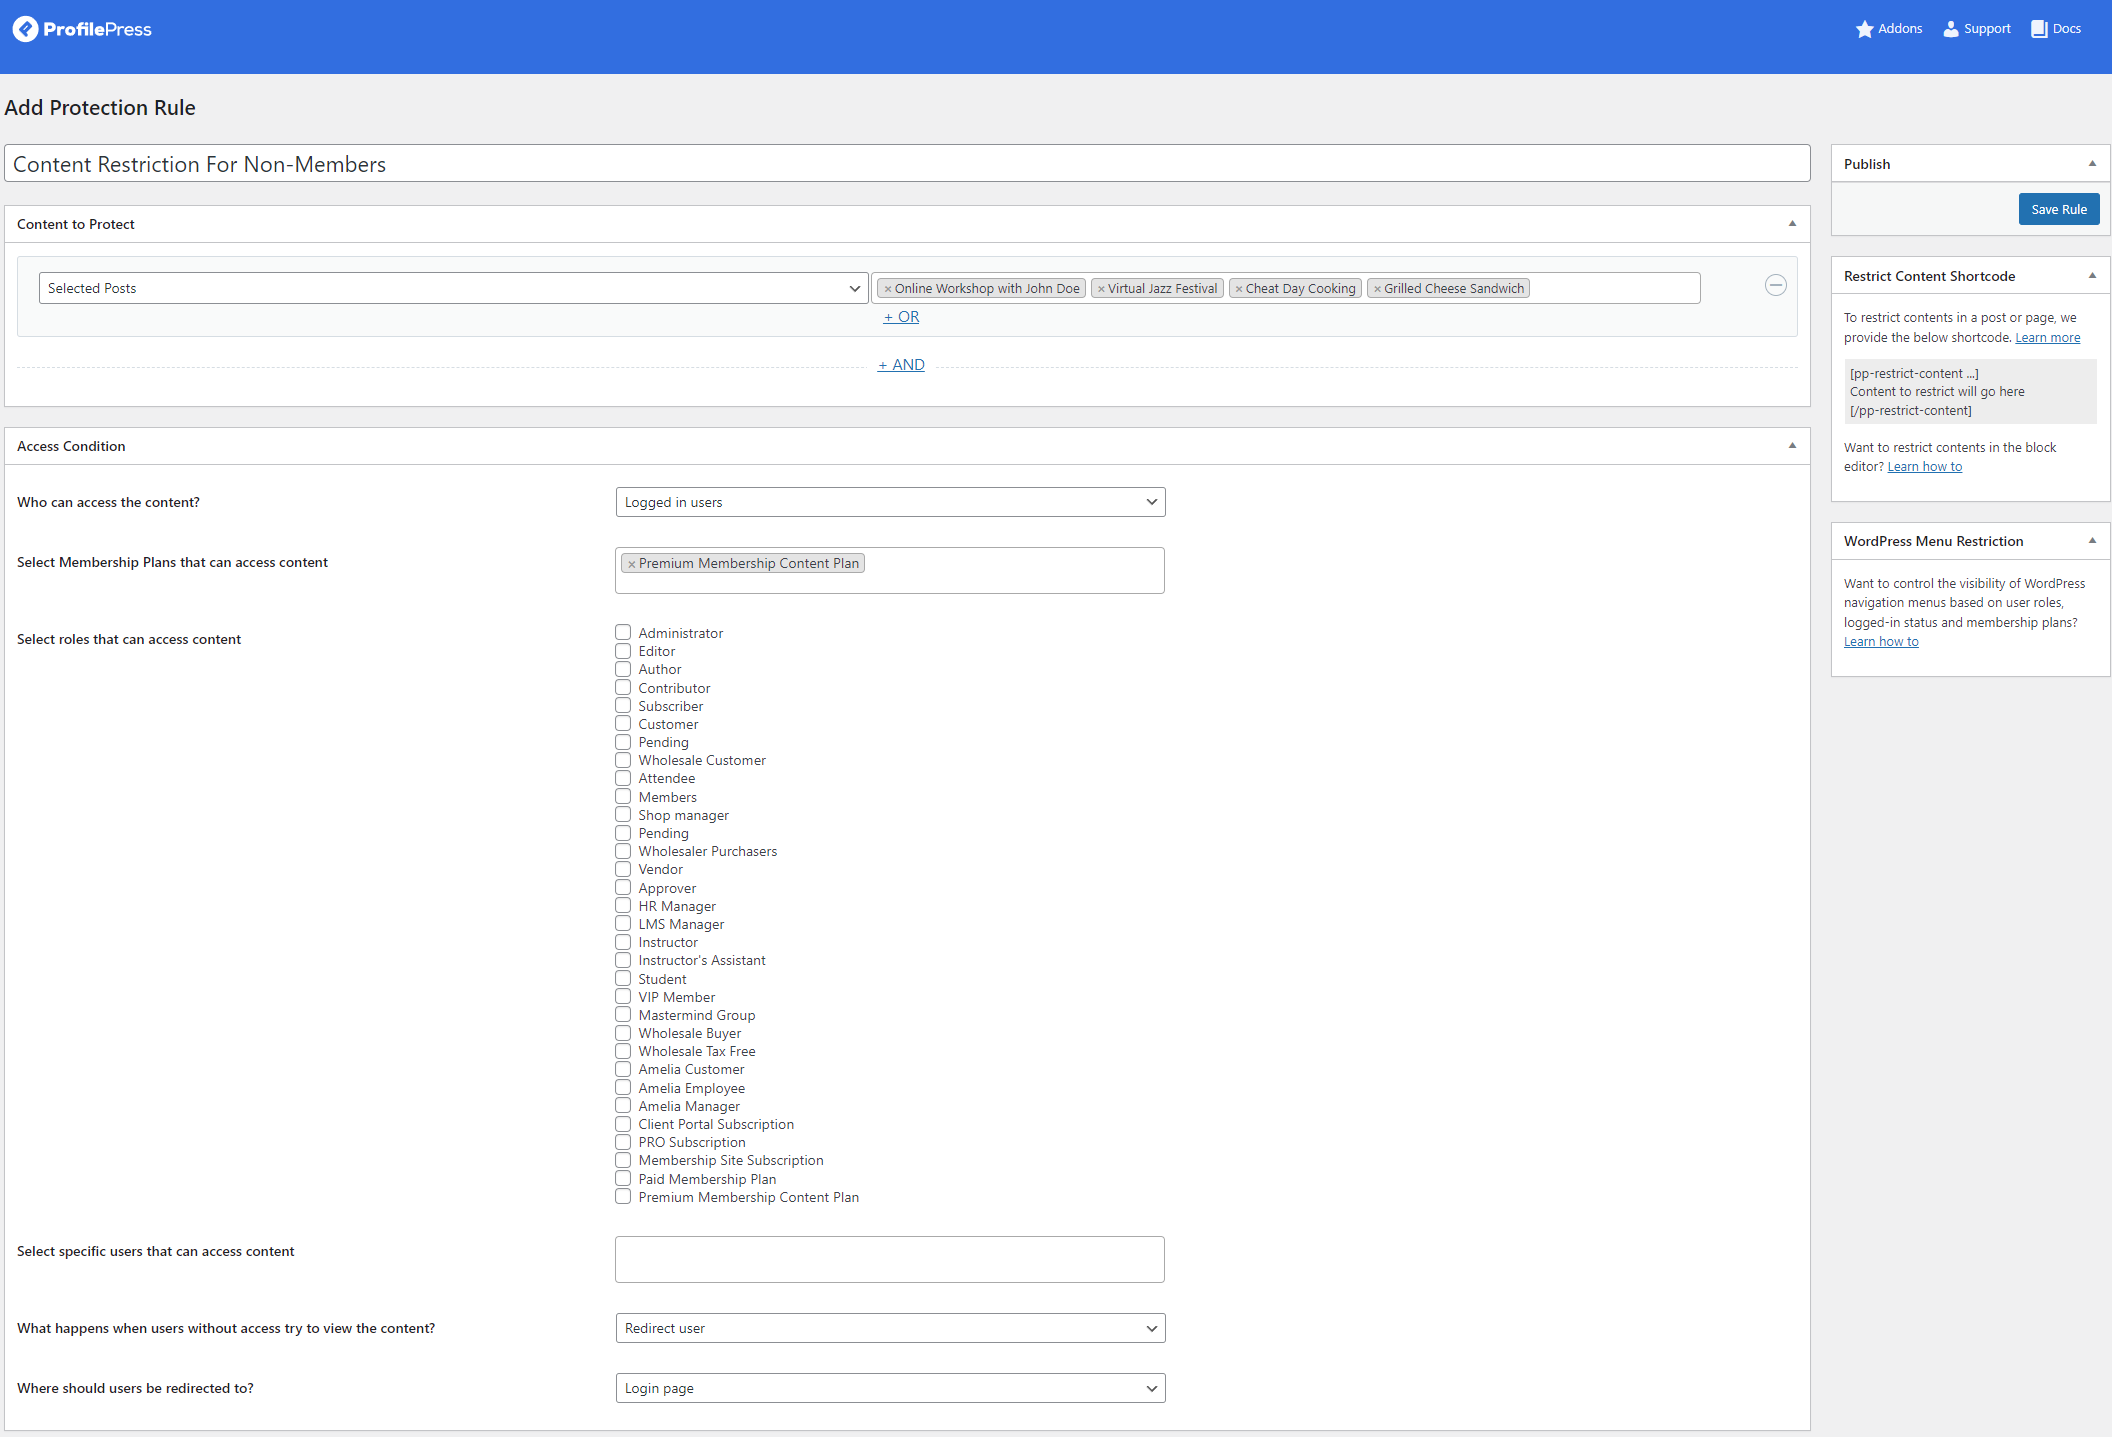
When creating a content protection rule, you can protect specific pages containing membership content by selecting “Selected Posts” and specifying the pages in the field next to the dropdown menu. Afterward, choose “Logged in users” from the “Who can access the content?” dropdown menu.
Subsequently, select the membership plan you created previously using the “Select Membership Plans that can access content” field. You can then indicate the action to be taken when unauthorized users attempt to view restricted posts or pages on your WordPress website by selecting an option from the “What happens when users without access try to view the content?” field at the bottom.
Click on the Save Rule button when you are done.
Step #5: Let users pay for the content via the Stripe form
Now that everything is set up, you must create a checkout page on your WordPress which will display the Stripe payment form so users pay and subscribe to membership plans.
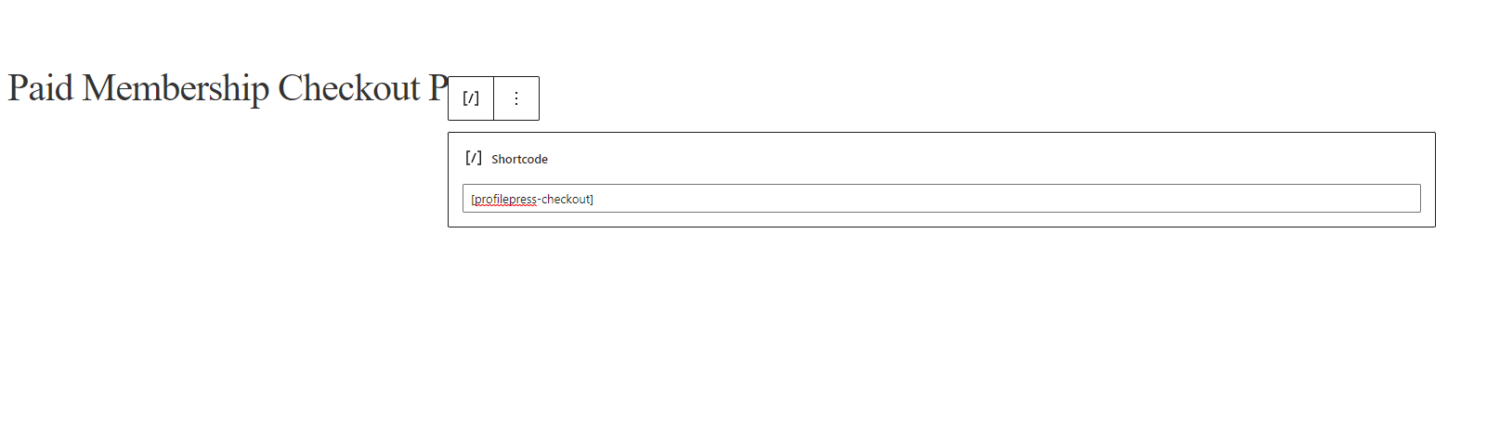
If a checkout page wasn’t created by default in ProfilePress, create a new page by navigating to Pages → Add New and paste the checkout shortcode.
Once that’s done, navigate to ProfilePress → Settings and click on the Pages section under the General tab.
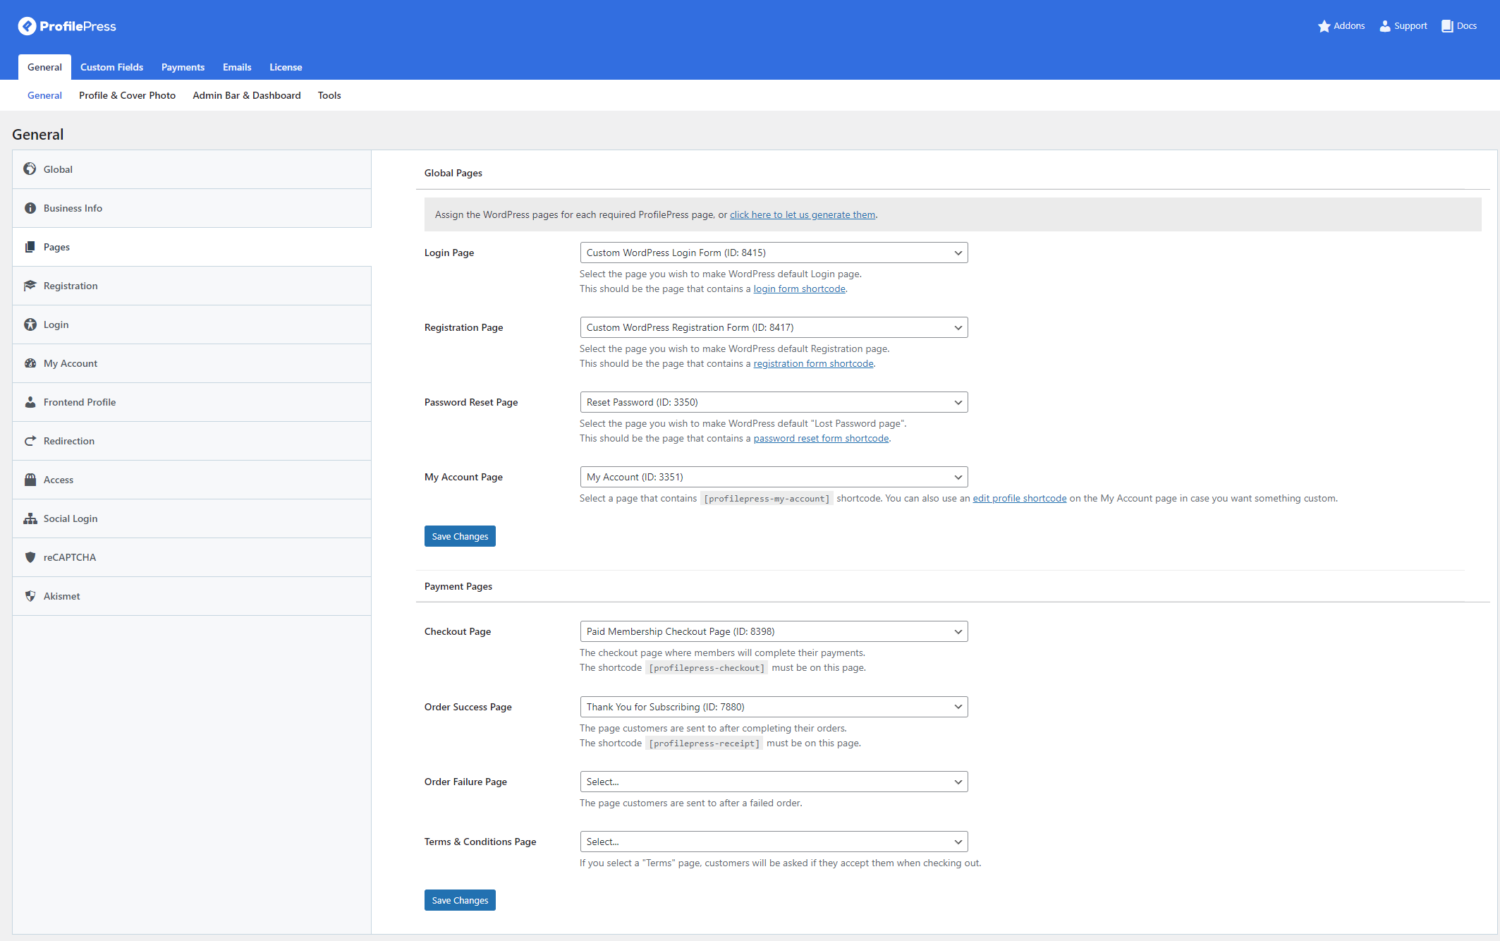
Specify the page you just created that has the ProfilePress shortcode using the Checkout Page dropdown menu and click on the Save Changes button to continue.
So when your users, website visitors, or prospective customers visit the checkout URL of any membership plan, they will see a checkout page with the Stripe payment option.
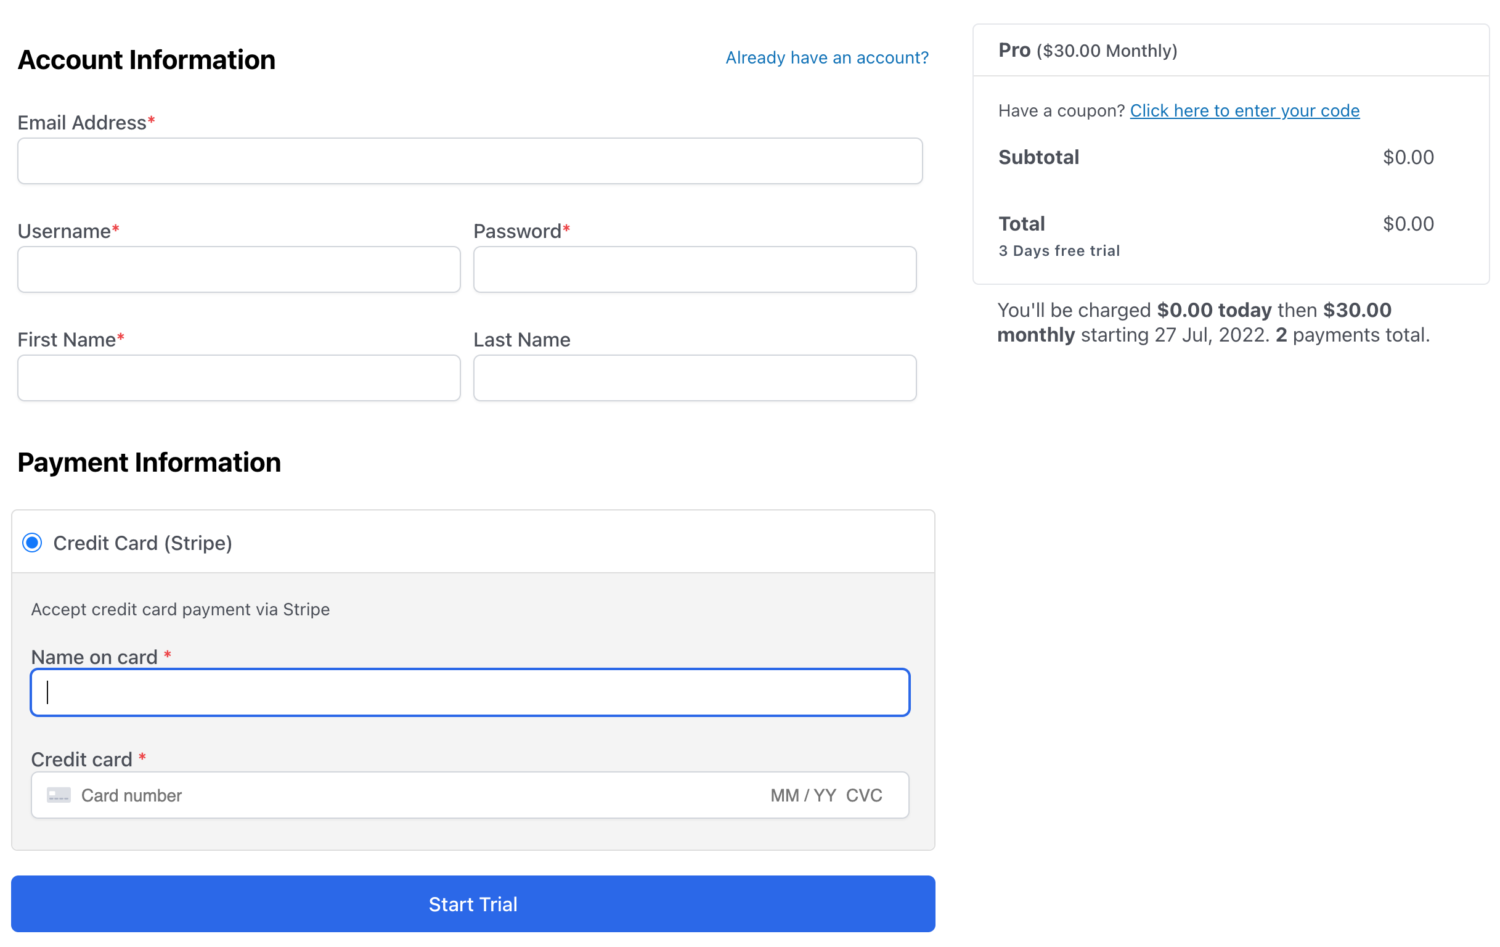
Enabling Stripe payments as a payment option and setting up membership content protection rules will allow your customers to pay via the Stripe payment form provided by ProfilePress.
Create a WordPress Stripe Payment Form Today
Building a Stripe payment form for your WordPress membership site can be effortless, thanks to the ProfilePress plugin. This handy tool streamlines the process and makes it simple to follow.
With ProfilePress, anyone can easily create a WordPress Stripe payment form without extensive technical know-how.
Create member-only content and a subscription plan, and then connect your Stripe account to the ProfilePress plugin. This will allow your users to conveniently pay for their memberships from your WordPress website, and you will receive the payment in your Stripe account.
Are you ready to use this convenient solution to create Stripe checkout forms? Get ProfilePress now!