Letting WordPress Users Select Membership Plans to Purchase on Checkout
As the world of online business continues to evolve, creating membership plans for your site and visitors is one of the most effective ways to monetize your website. However, enabling users to select the right membership plan during checkout can be daunting. Fortunately, with the ProfilePress plugin, you can easily create multiple membership plans, integrate various payment methods, and allow group checkout on your WordPress site.
This comprehensive guide will walk you through setting up membership plans, creating plan groups, and integrating payment methods using ProfilePress.
By the end of this article, you’ll have all the knowledge you need to create an entire membership site that maximizes your revenue potential.
Integrating Payment Methods
Before creating membership plans, you need to integrate your preferred payment methods. ProfilePress supports several payment gateways, including Stripe, PayPal, Razorpay, Paddle, Paystack, Direct Bank Transfer, Mollie, and lots of others are being added.
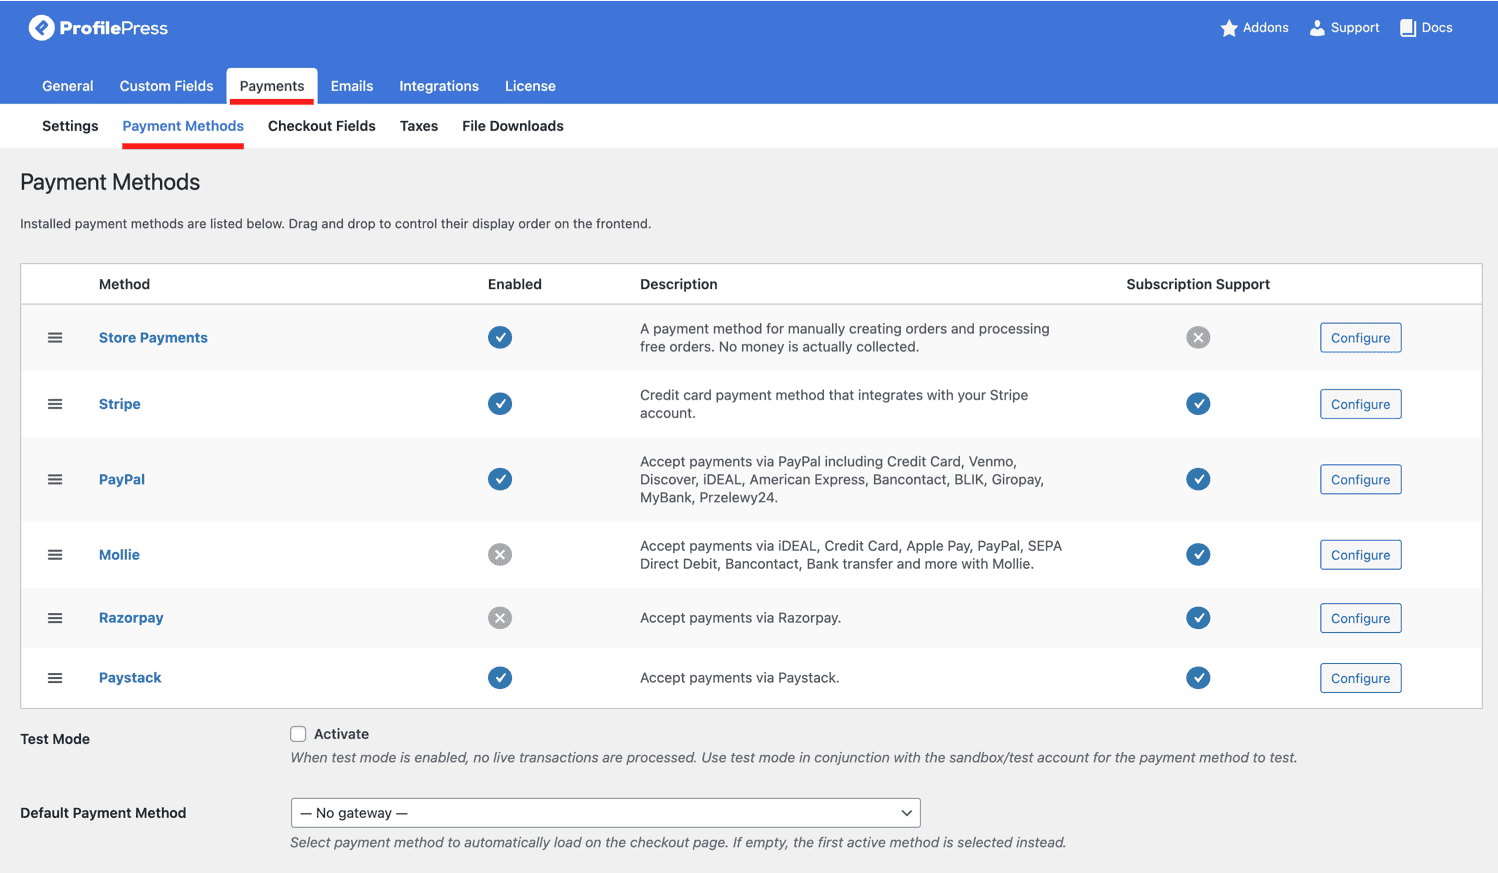
To configure a new payment method or manage an existing one, go to ProfilePress>>Settings>>Payments>>Payment Methods in your WordPress dashboard. Once you have integrated and enabled your payment gateway, you can create membership plans.
Creating Membership Plans
With the integrated payment method(s), you can now create membership plans for your site visitors. You can create multiple plans with different prices, subscription durations, and access levels.
Membership plans are created and updated from ProfilePress > Membership Plans. This page lists all membership levels you have created.
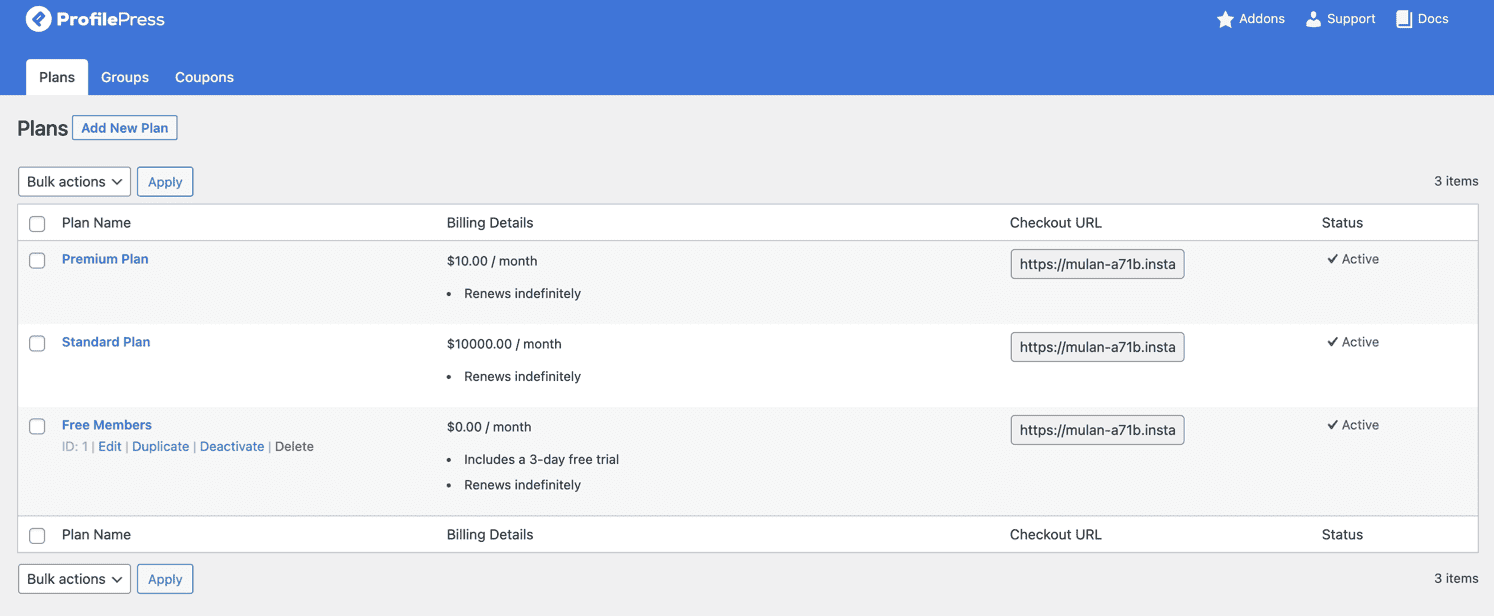
You can activate and deactivate a plan at any time. Deactivate a plan if you want to stop selling it.
Click the “Add New Plan” button to create a new plan.
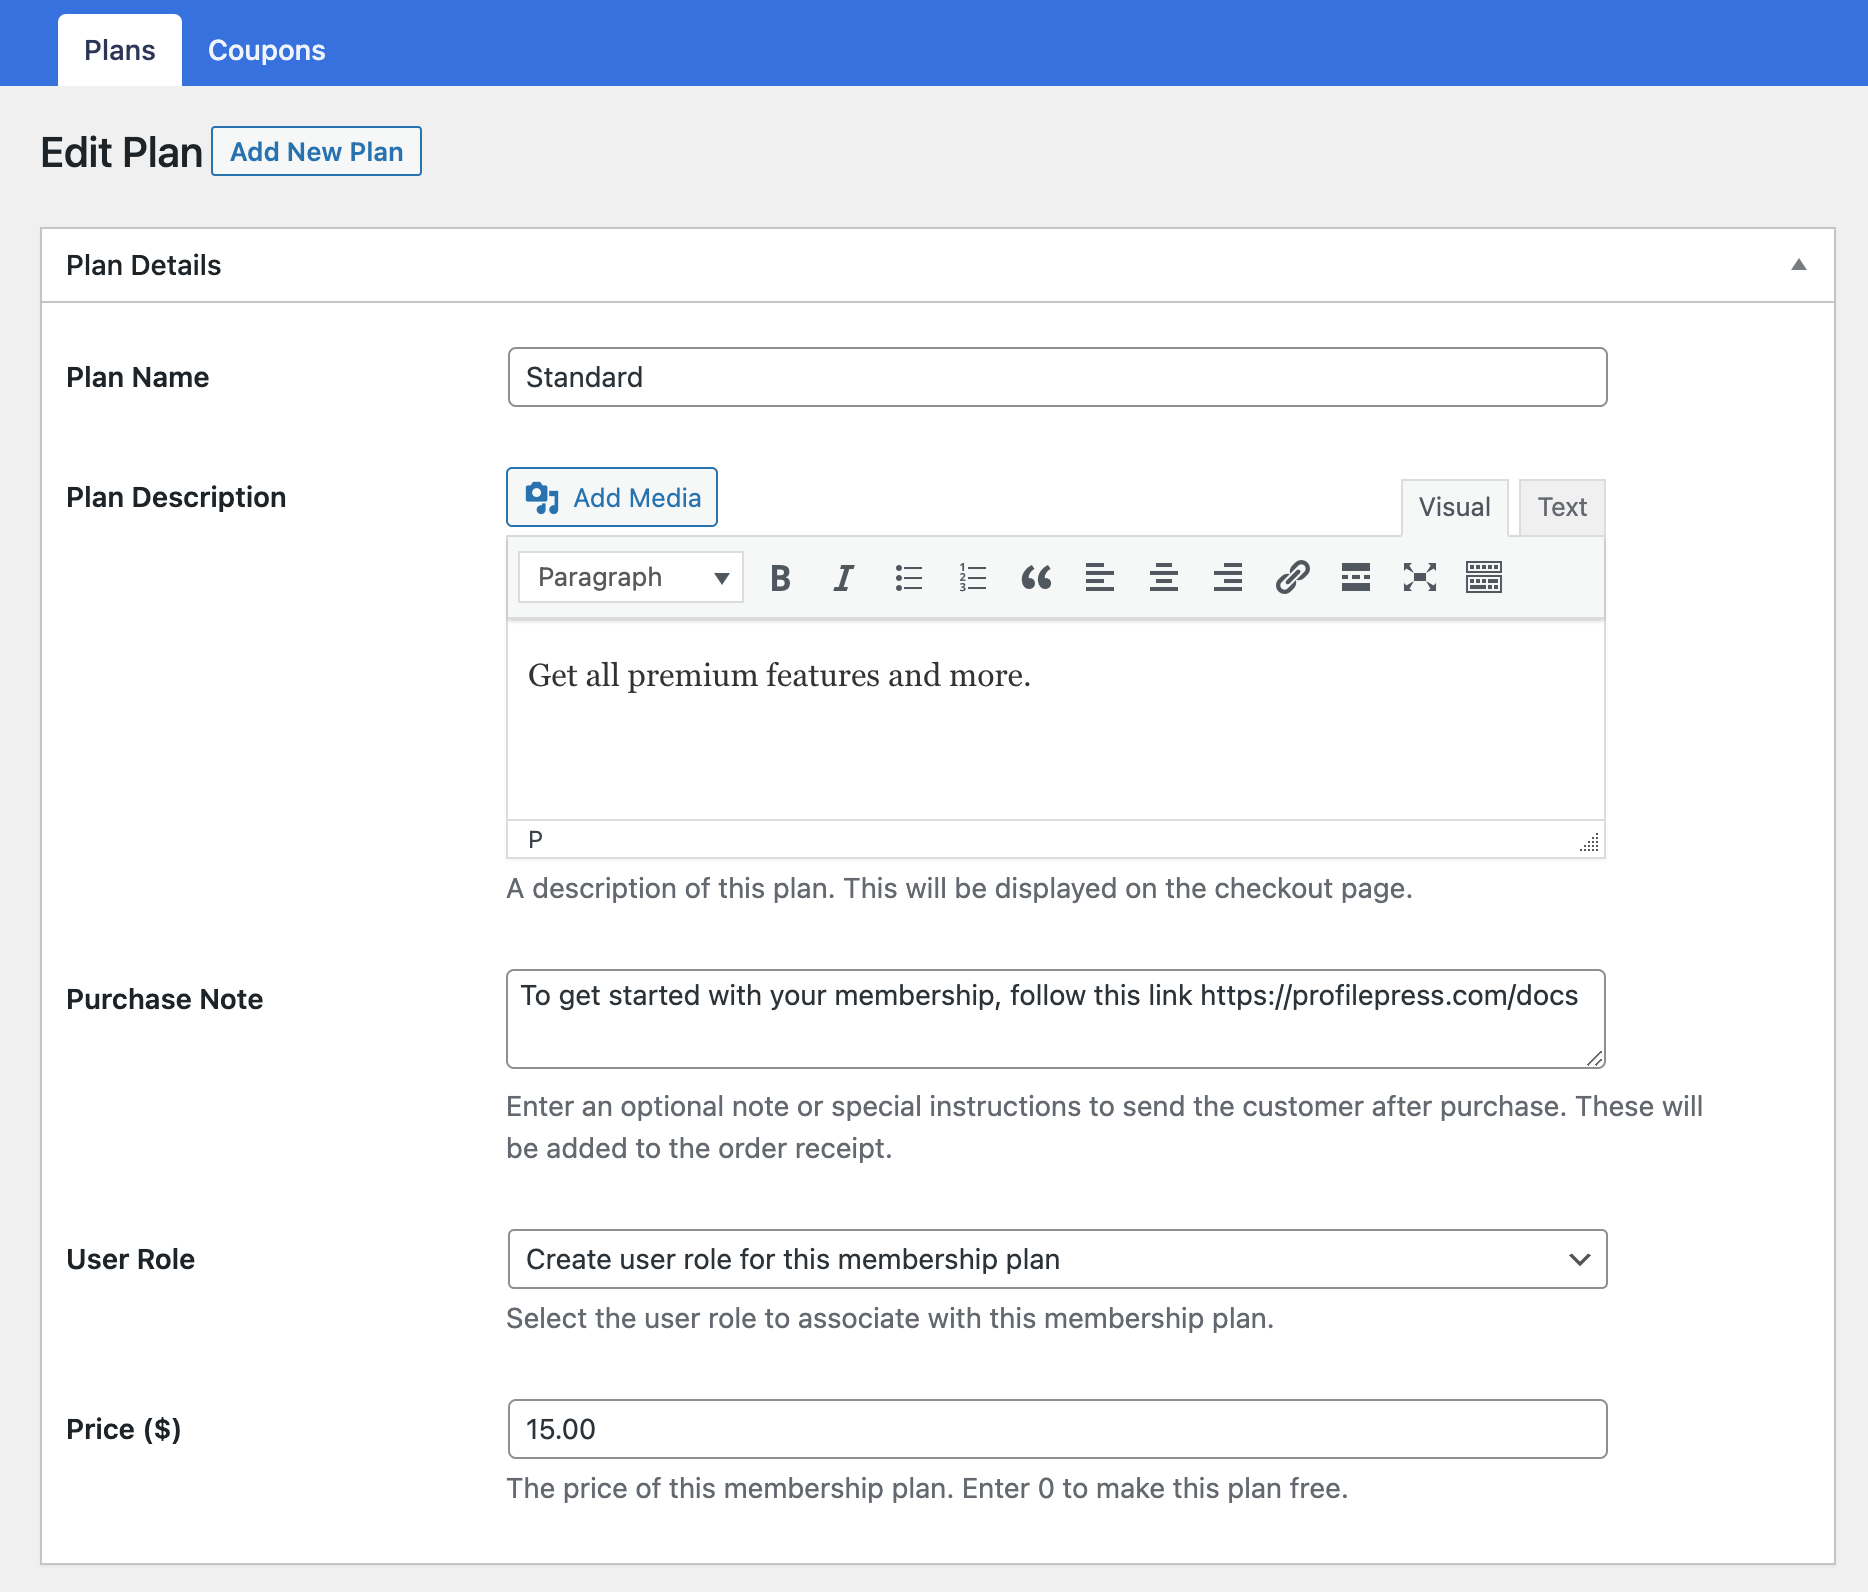
Enter the name, description, and price of the plan. You can also enter a Purchase Note, which is a great place to add a thank you note, usage instructions, or a request for review.
User Role Sync
Finally, select the user role to associate with the plan. The recommendation is to select “create a user role for this membership plan” to create and associate a new role based on the plan name. Users that subscribe to this plan will be assigned this user role. This is particularly useful if you use plugins that offer a conditional display of elements and contents or trigger specific actions based on user roles.
Choosing Billing Frequency & Subscription Length
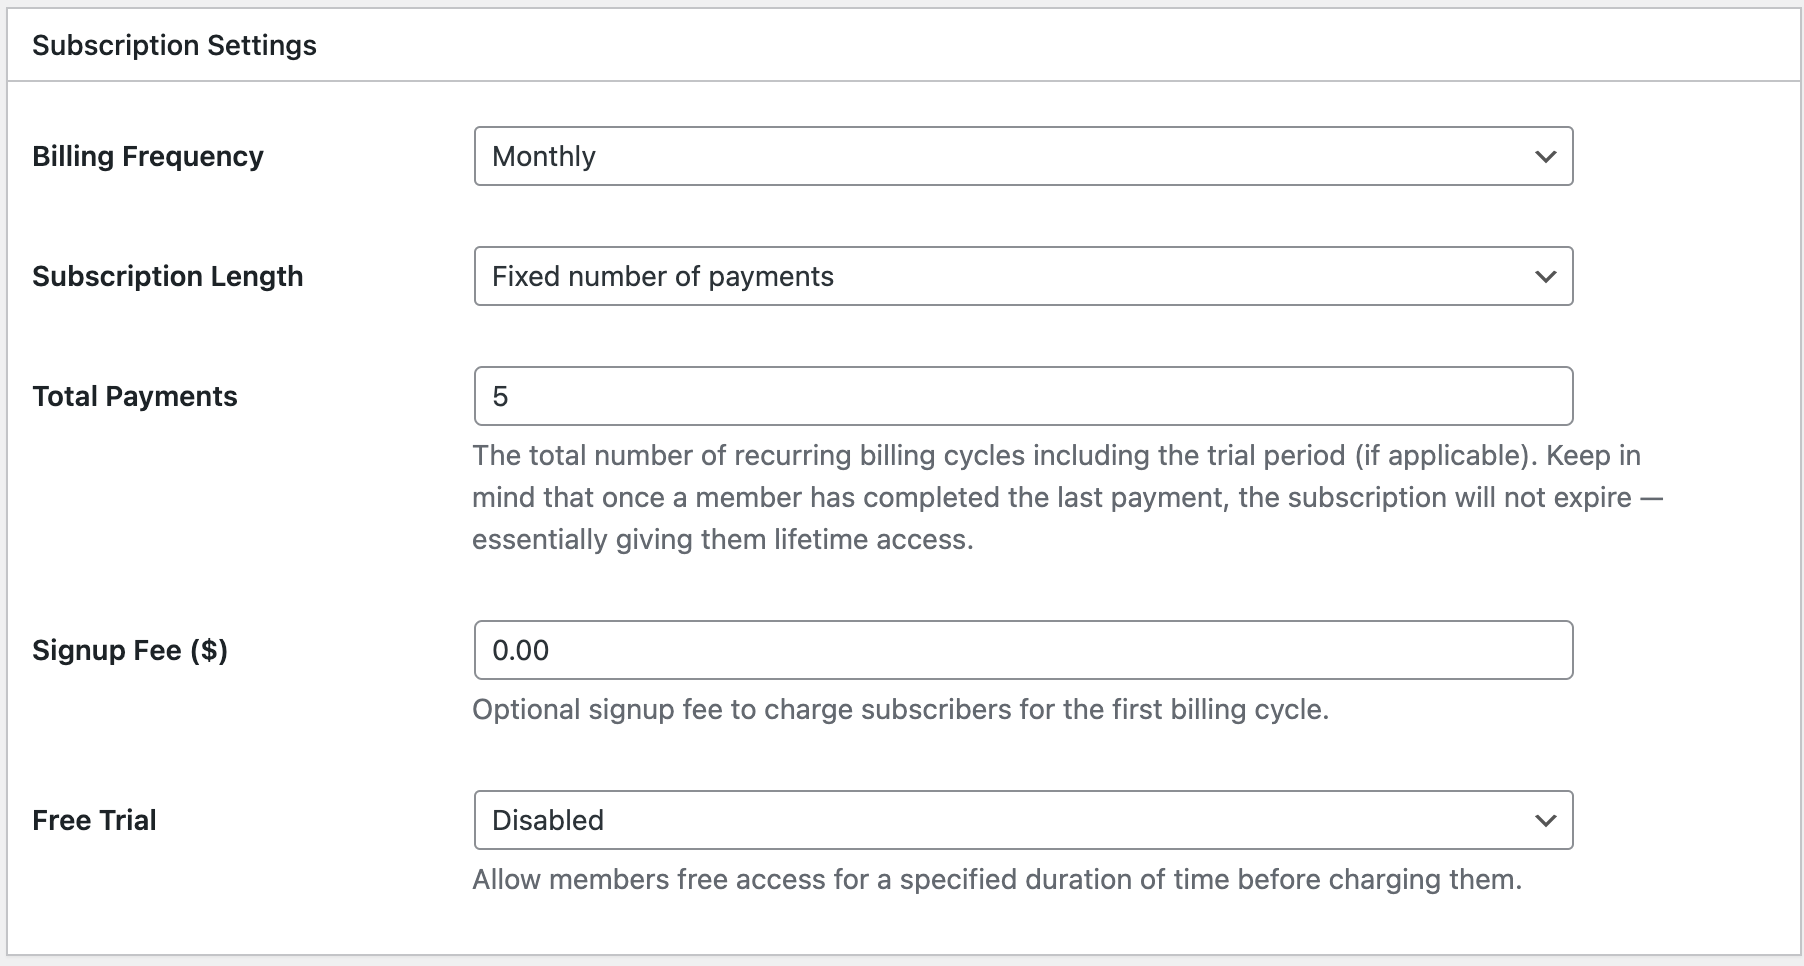
Scroll to the “Subscription Settings” metabox.
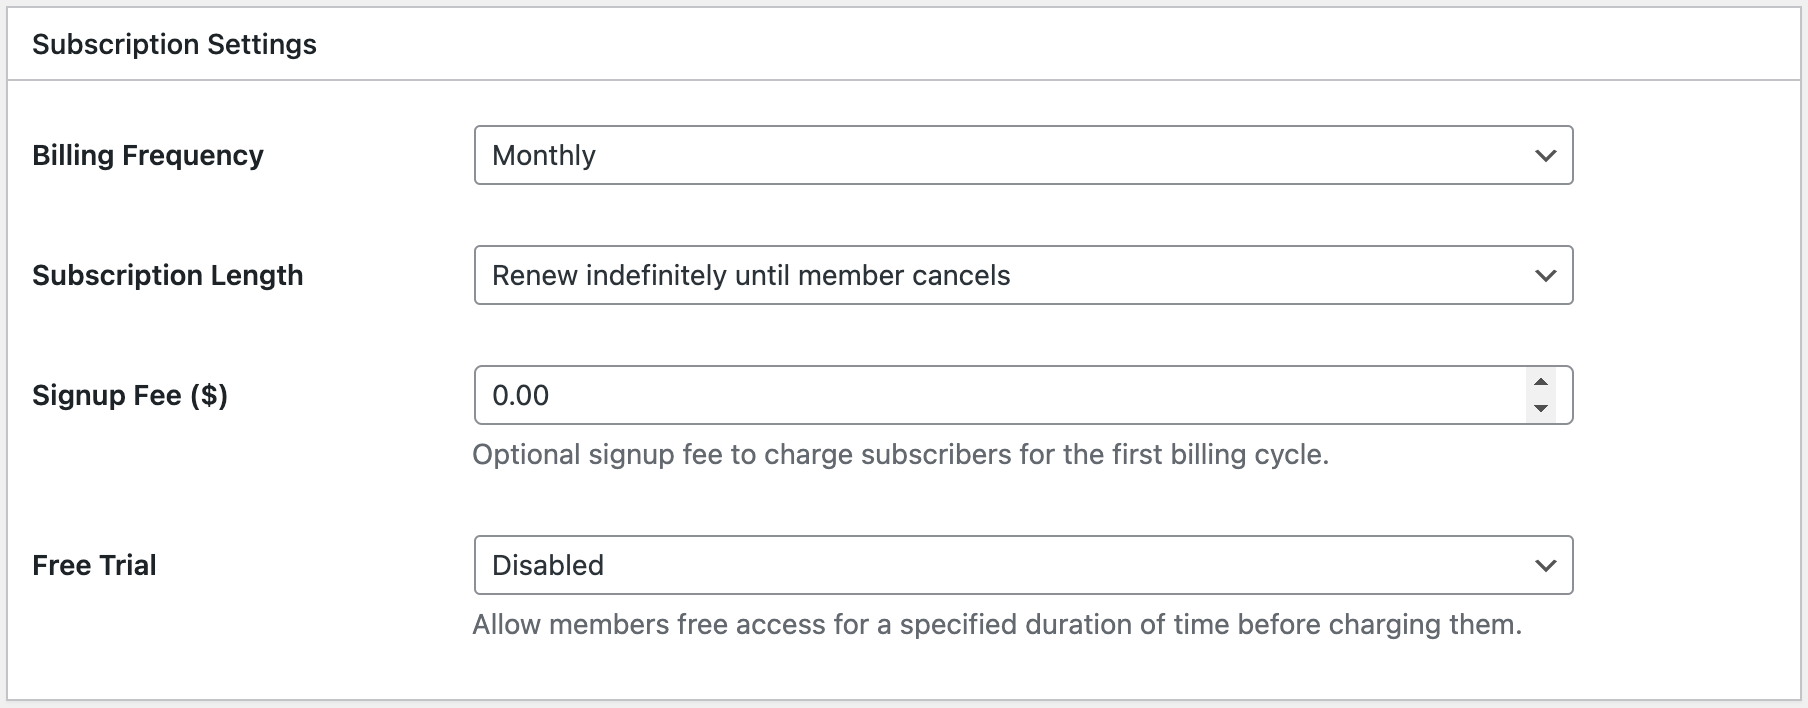
- Select a billing frequency: daily, weekly, monthly, yearly, or one-time payment.
- Select a subscription length: renews indefinitely until a member cancels or fixed number of payments.
Remember that once a member has completed the last subscription payment with a fixed number of payments, the subscription will not expire—essentially giving them lifetime access.
For Plans that renew indefinitely, the default setting is for the Plan to renew automatically until the member cancels their subscription or membership.
Enabling Signup Fee
Enter the amount in the Signup Fee setting if you want to charge a one-time fee in addition to the membership plan price.
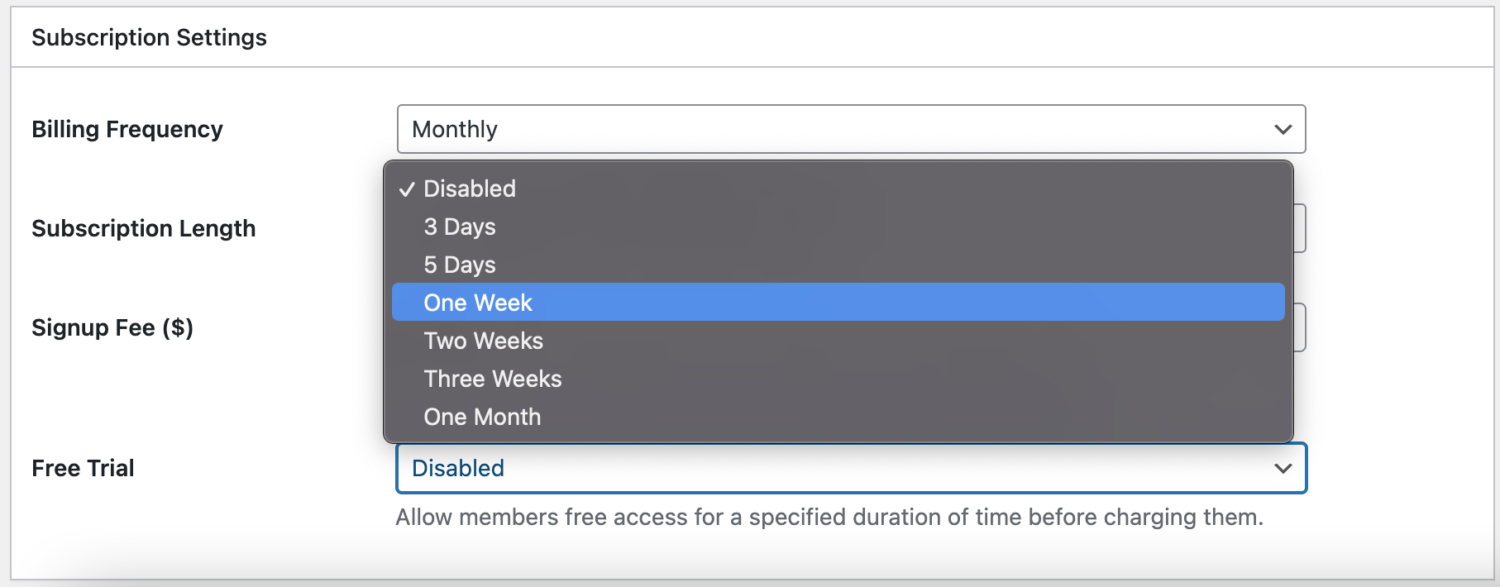
Enabling Free trials
If you want to offer your members or customers a free trial before they are charged, enable the free trial by choosing the trial length.
After you fill in your settings, click the Save Plan button. Once you do, you’ll see a full Plan Summary so you can review your settings at a glance and access your Plan purchase links.
Creating Plan Groups
Plan groups allow you to group multiple membership plans for easier checkout. For example, you can create a plan group that includes a basic, premium, and ultimate plan, and users can select the planning group they want to purchase. This also prevents members from inadvertently subscribing to more than one plan at a time since they can only subscribe to one plan in a Plan Group.
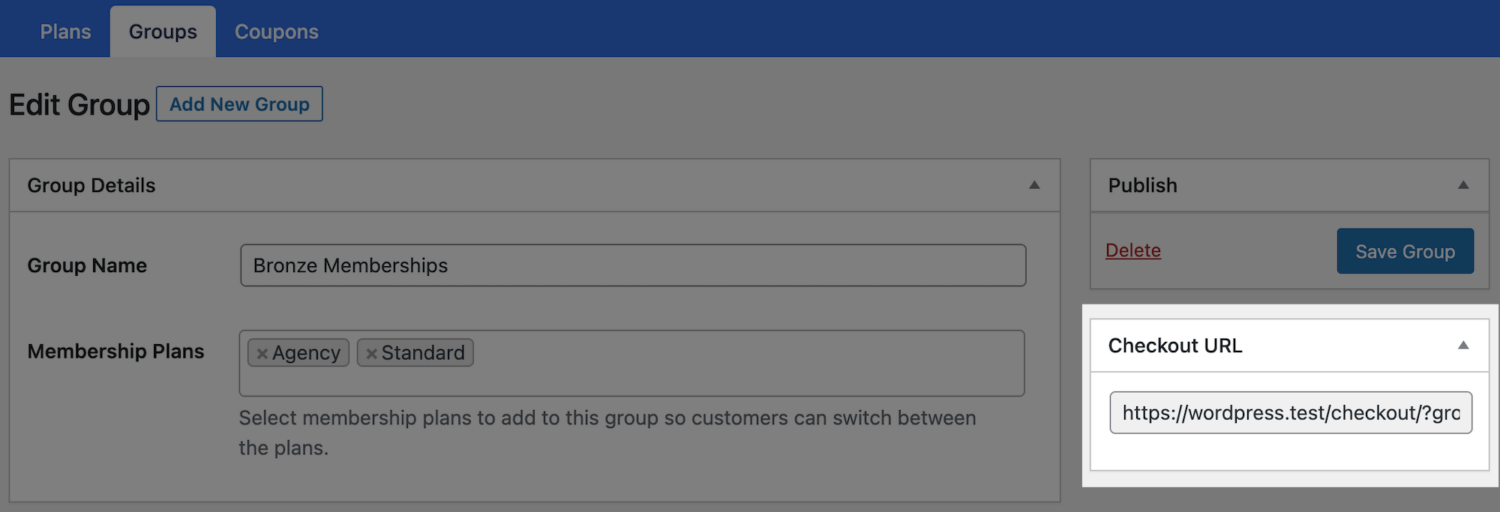
In your WordPress dashboard, go to ProfilePress > Membership Plans >> Groups and click the Add New button to create a new group.
Enter a name for the group and select the membership plans to include in the group.
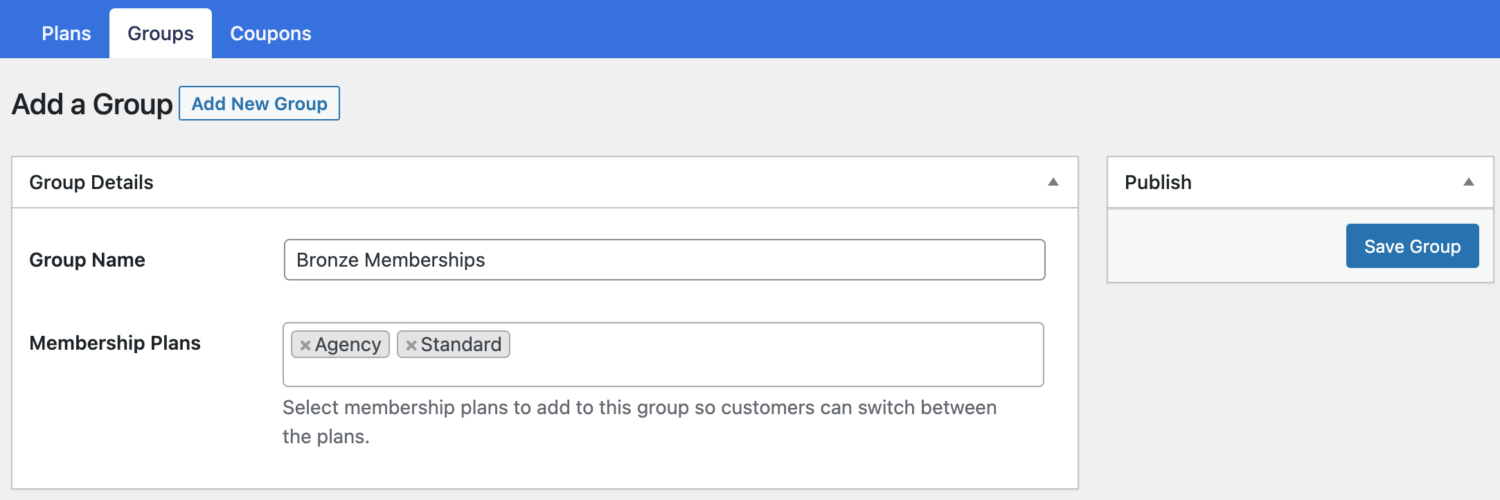
Finally, save your changes.
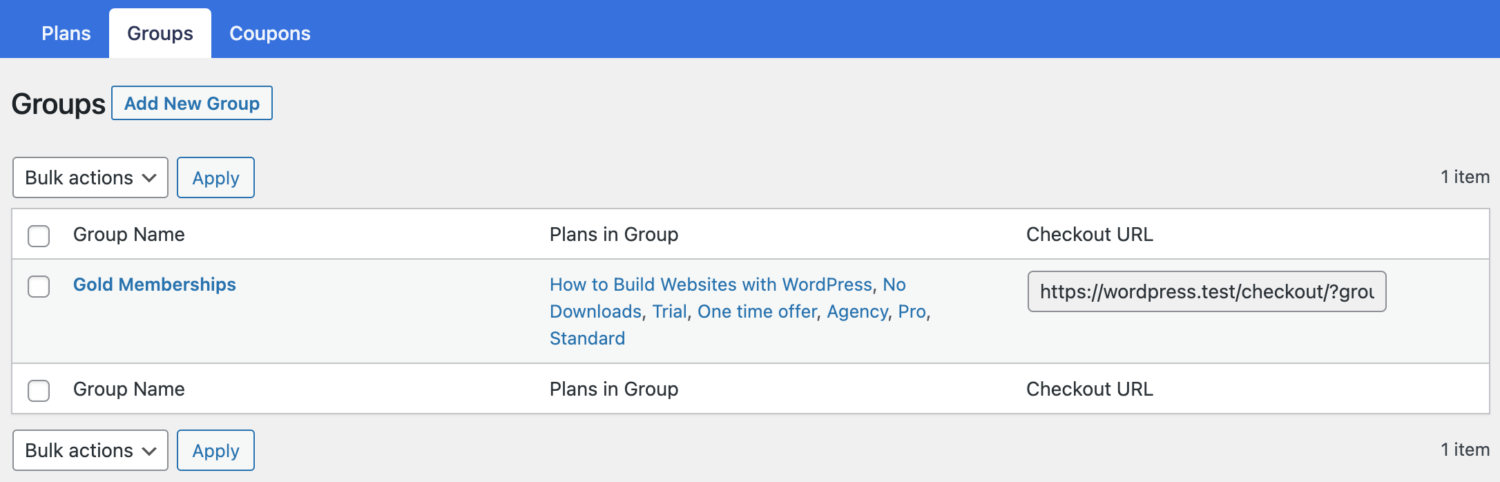
Group Checkout
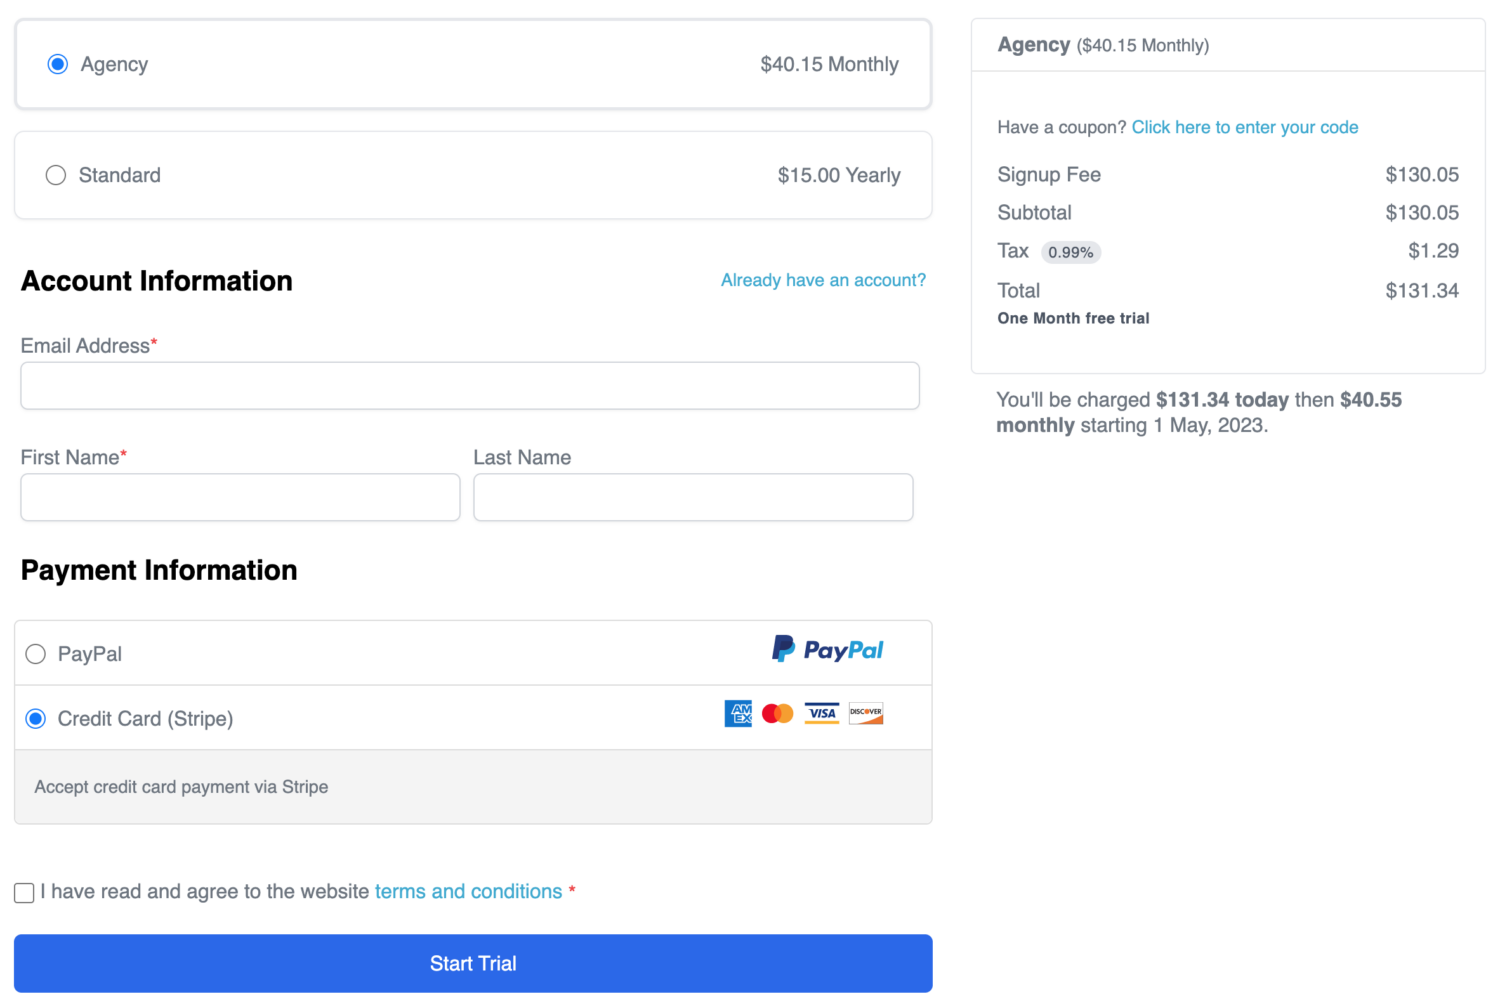
When you create a group, a corresponding checkout URL is created so your users, members, or customers can select a membership plan to purchase from the list of plans during checkout.
You can send the checkout URL via email or text to your prospective customers or add it to the pricing page of your membership or e-commerce website.
Below is a preview of the Group checkout page.
Switching Plans (Upgrades & Downgrades)
When a user upgrades to a plan that costs more than their current plan, the fee they pay will be prorated. That is, they only pay the price difference.
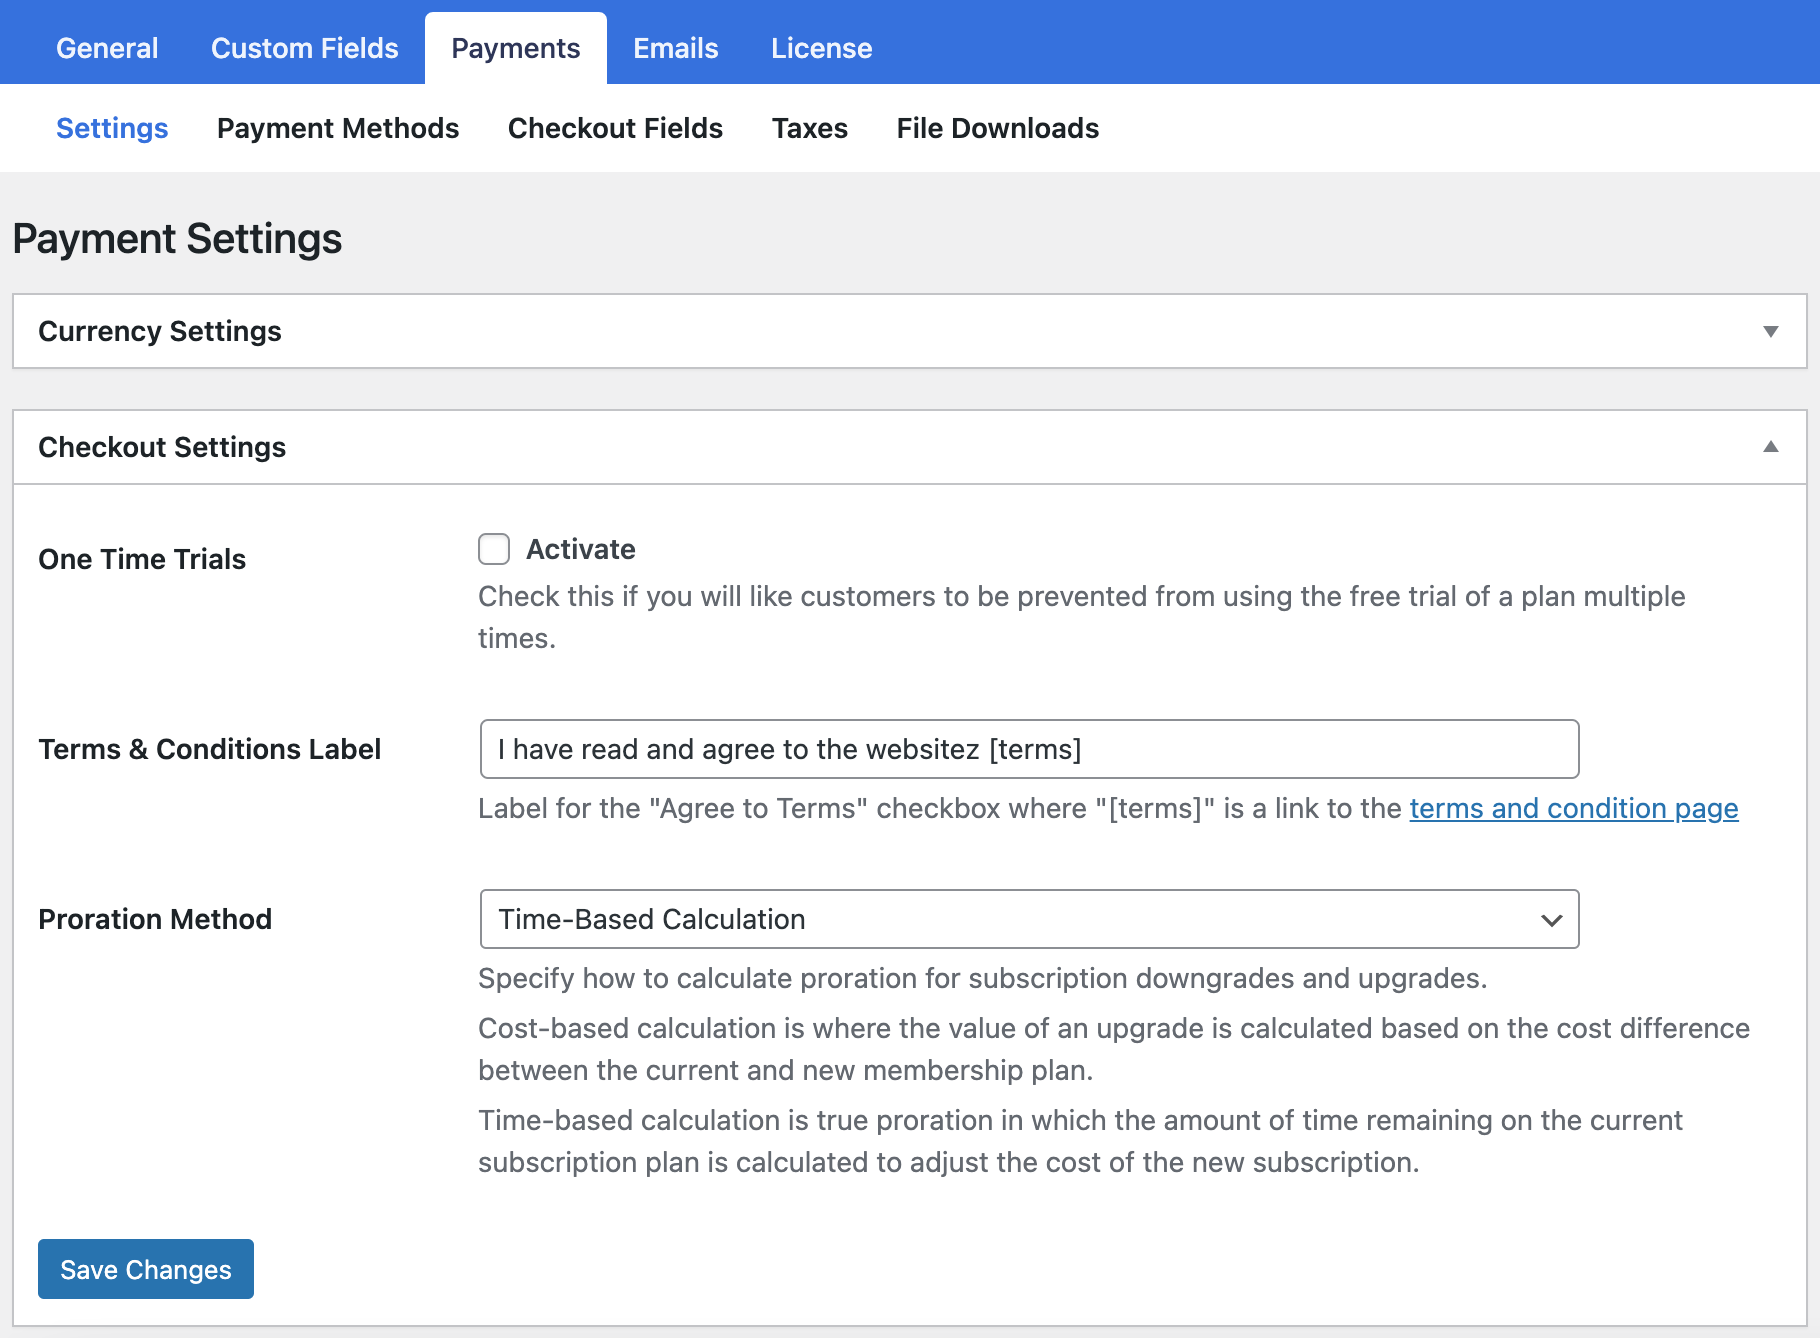
ProfilePress provides two proration methods, Time-based and cost-based calculations.
The cost-based calculation is where the value of an upgrade is calculated based on the cost difference between the current and new membership plans. While the time-based calculation is true proration in which the amount of time remaining on the current subscription plan is calculated to adjust the cost of the new subscription.
To configure the proration method to use on your membership or e-commerce website, go to ProfilePress >> Settings >> Payments >> Checkout Settings.
How Users Can Switch Plans
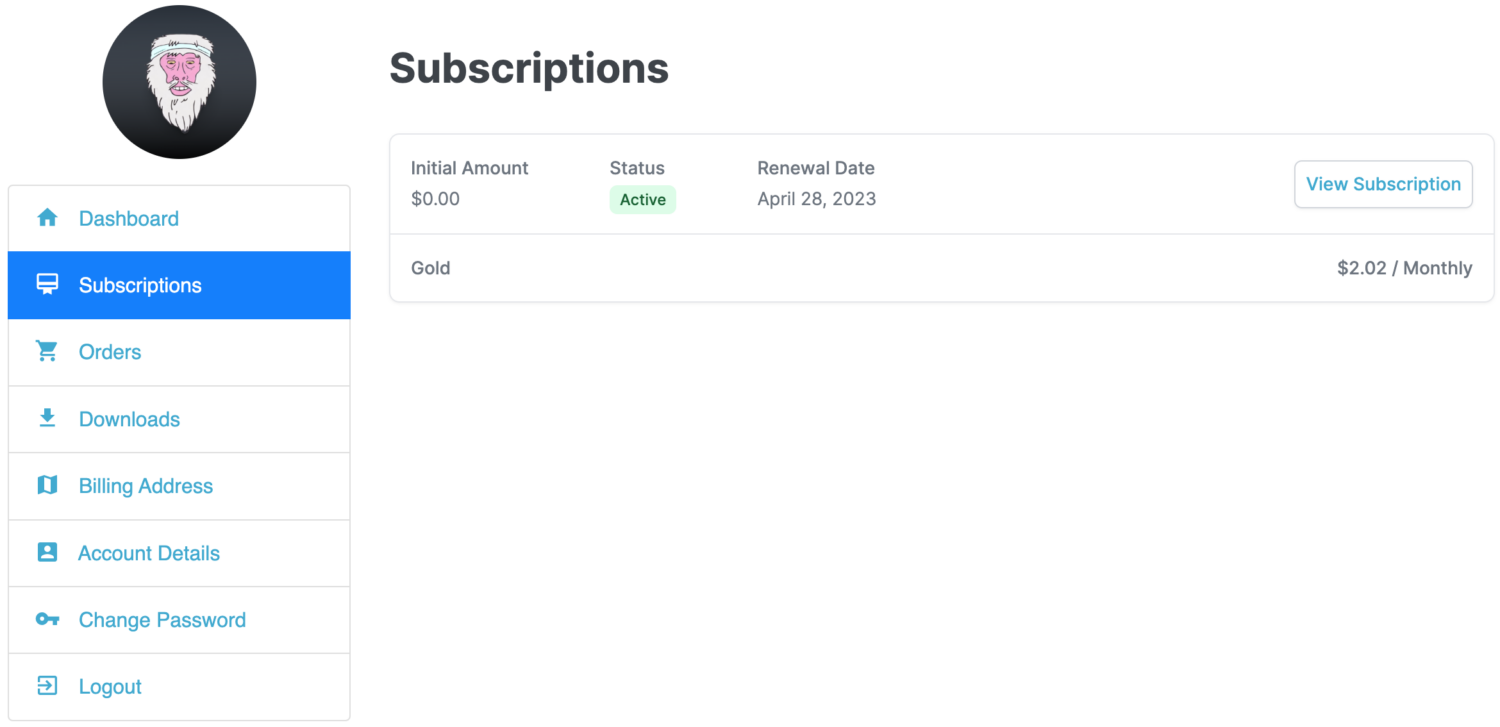
Your users can upgrade and downgrade between plans from the My Account page.
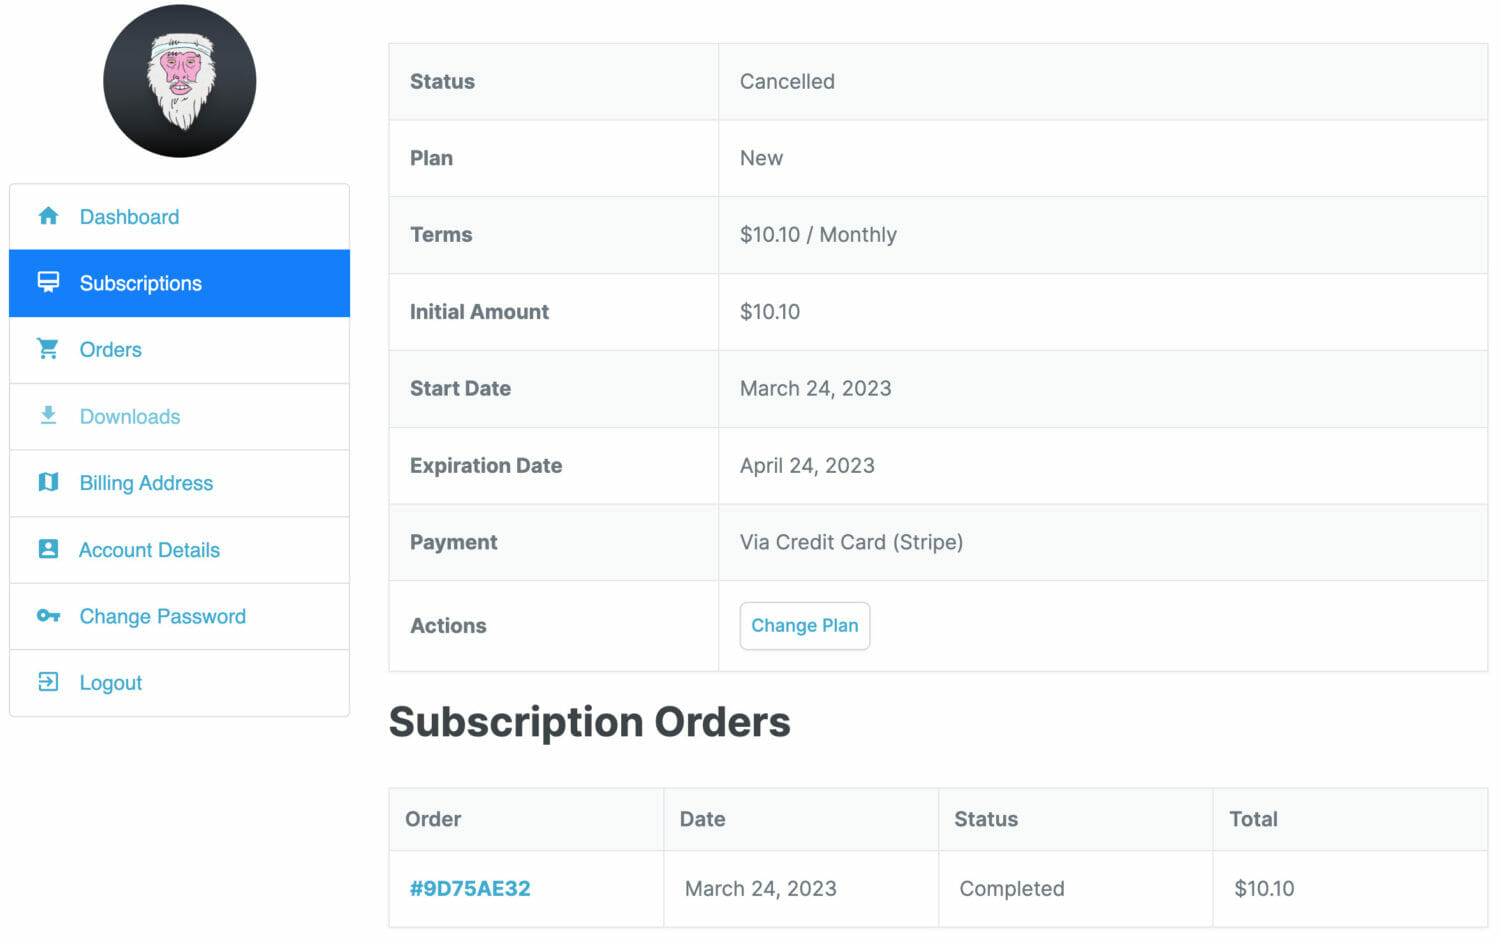
On the My Account page, they will need to click the Subscriptions menu item.
Next, they need to click the “View Subscription” button on the subscription they want to switch from or upgrade/downgrade.
On the subscription page, they would see the “Change plan” button, which they need to click on that would redirect them to the checkout page where they can select a plan to upgrade to.
And below is the checkout page where they can select the plan to switch to.
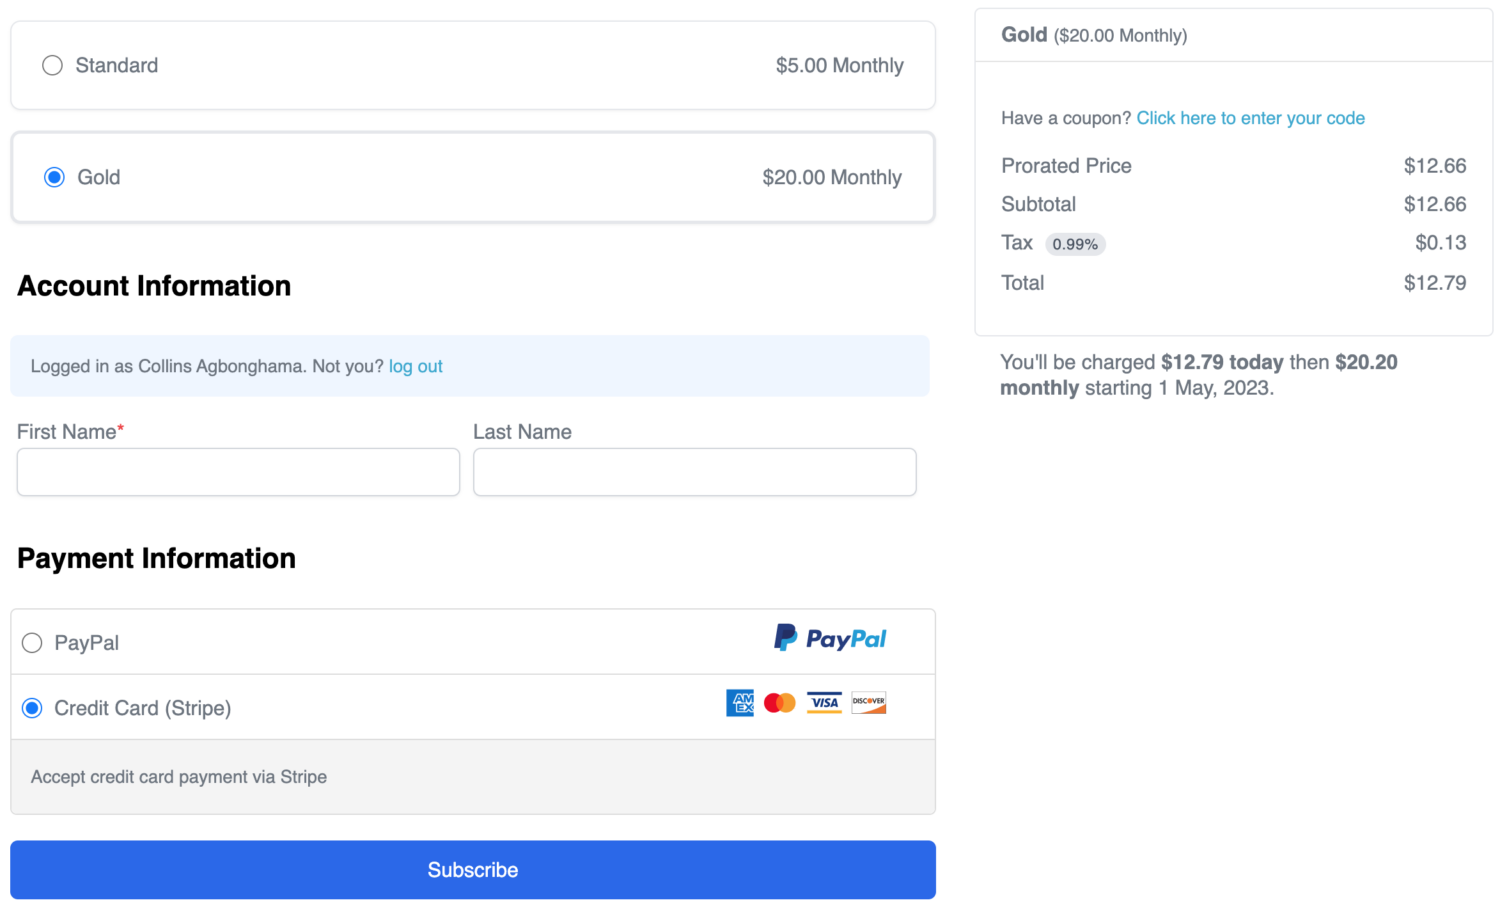
After they go through the checkout, their subscription to the previous membership plan will be canceled while they become active on the new membership plan.
If you have any questions, let us know.