How to Add Paid Content to Your WordPress Site
Do you want to add paid content to your WordPress site and turn your website into a reliable source of income?
Many creators, educators, and business owners are discovering that premium content is one of the most effective ways to monetize their websites. Whether it’s exclusive articles, online courses, digital downloads, or members-only resources, paid content not only generates revenue but also builds a loyal audience that values your work.
ProfilePress makes adding paid content to your WordPress website easy. It brings together payment processing, membership management, and content restriction in one powerful plugin so you can start charging for your best work in no time.
With support for multiple payment methods, flexible membership plans, and advanced access control, ProfilePress gives you everything you need to create a thriving paid content WordPress site that works exactly the way you want.
In this guide, you’ll learn what paid content is, why ProfilePress is an excellent choice for managing and delivering it, and the exact steps to set it up. You’ll also get proven tips to help you sell your premium offerings. By the end, you’ll have the knowledge and confidence to turn your WordPress site content into a profitable online business.
What is Paid Content?
Paid content is any material that you make available only to users who have purchased access or subscribed to a membership plan. Unlike free content that anyone can view, paid content sits behind a paywall and is reserved for those who see enough value in it to invest their money.
It can take many forms depending on your niche and audience. For example:
- Premium articles and tutorials that go deeper into a topic than your free content.
- Online courses and training programs are designed to teach specific skills.
- Downloadable resources like templates, eBooks, stock images, or audio files.
- Exclusive community access, including private forums, mastermind groups, and member-only live events.
- Special services or digital products that are only available to paying subscribers.
The purpose of paid content serves two primary goals. First, it allows you to generate income directly from your expertise, creativity, or unique resources. Second, it creates a sense of exclusivity and added value for your audience.
Why Use ProfilePress for Paid Content?
When it comes to monetizing your WordPress site with paid content, the plugin you choose to manage memberships and payments makes all the difference.
ProfilePress is the best choice because it is a complete ecommerce and membership solution designed specifically for WordPress, making it ideal for creating, managing, and delivering premium content.
Here are the reasons why ProfilePress is a great option for selling paid content:
Ecommerce and Membership Solution: With ProfilePress, you don’t need to install multiple plugins for different features. It integrates payment collection, membership plan creation, content restriction, and member management into a single system. You can set up free and paid plans, charge one-time or recurring payments, and even sell digital products, all from a single dashboard.
Multiple Payment Options: ProfilePress supports various payment gateways, including Stripe (supports Credit Card, Apple Pay, Google Pay, Klarna, and ACH Direct Debit, etc), PayPal, Paystack, Razorpay, Mollie, and Direct Bank Transfer. This range enables you to accept payments globally using trusted methods.
Powerful Content Restriction: ProfilePress comes with excellent content restriction features that put you in complete control of who can access your content. You can lock down entire pages, posts, or categories, use shortcodes to hide specific content sections, and even set up a metered paywall that allows visitors to view a limited number of premium posts before prompting them to pay.
LMS and WooCommerce Integrations: If you want to sell courses, ProfilePress integrates with popular course plugins such as Tutor LMS, LearnDash, LifterLMS, Sensei LMS, and Academy LMS. You can automatically enroll members in specific courses after they sign up. ProfilePress integrates with WooCommerce, enabling the creation of membership sites that offer exclusive discounts and products to members.
Enhanced Member Experience: ProfilePress helps you create a professional membership experience. You can design custom registration and login pages, offer social login, create user dashboards, and even set up member directories. These features make your site feel more like a complete online community rather than just a basic membership page.
In short, ProfilePress gives you everything you need to create a paid content site that works smoothly for both you and your members. You can focus on producing quality content while ProfilePress handles access control, payments, and the entire membership experience.
Adding Paid Content to Your WordPress Site
In this section, we’ll guide you through setting up paid content on your WordPress site with ProfilePress.
First, visit the ProfilePress website to purchase the plugin. Once your order is complete, download the ZIP file from your account.
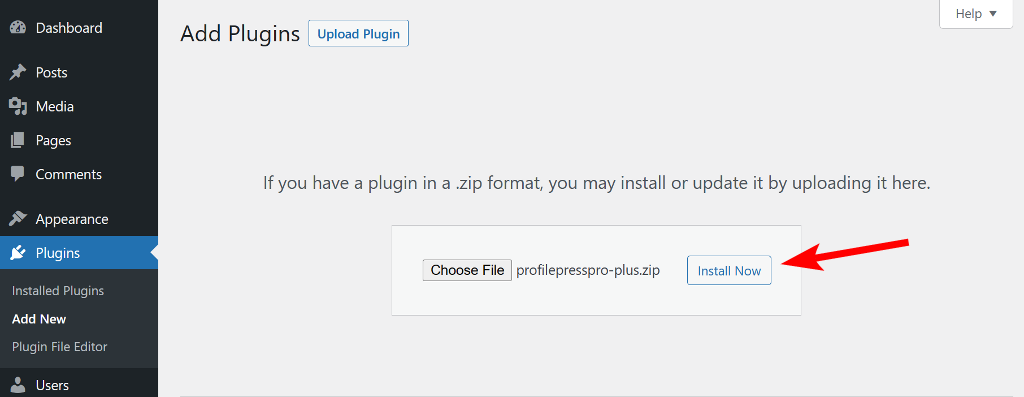
Next, log in to your WordPress dashboard and navigate to Plugins > Add New. Click Upload Plugin, then either drag and drop the ZIP file into the upload area or click Choose File to select it from your computer.
Click Install Now, and when the installation finishes, click Activate.
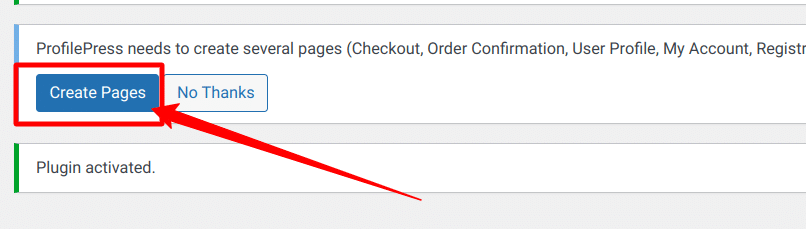
Next, you’ll see a notification at the top of your WordPress dashboard that says, “ProfilePress needs to create several pages to function properly.” Click Create Pages to proceed.
Now that we’ve installed and activated ProfilePress, the next step is to configure the essential settings to turn your website into a fully functional membership site.
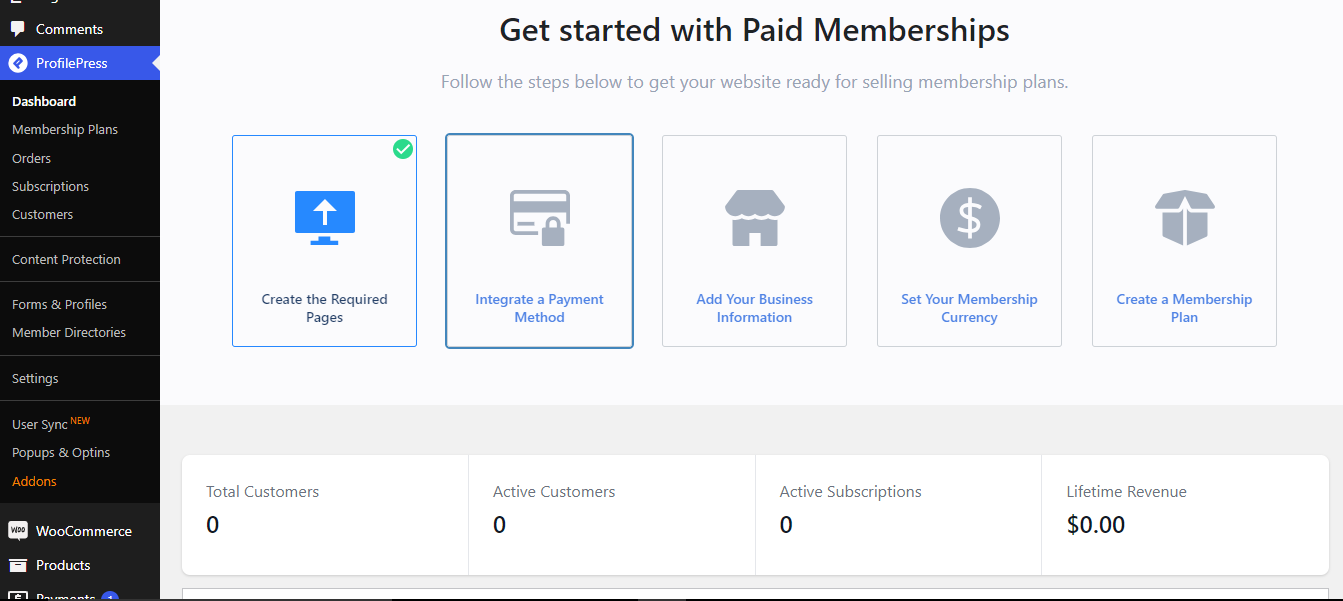
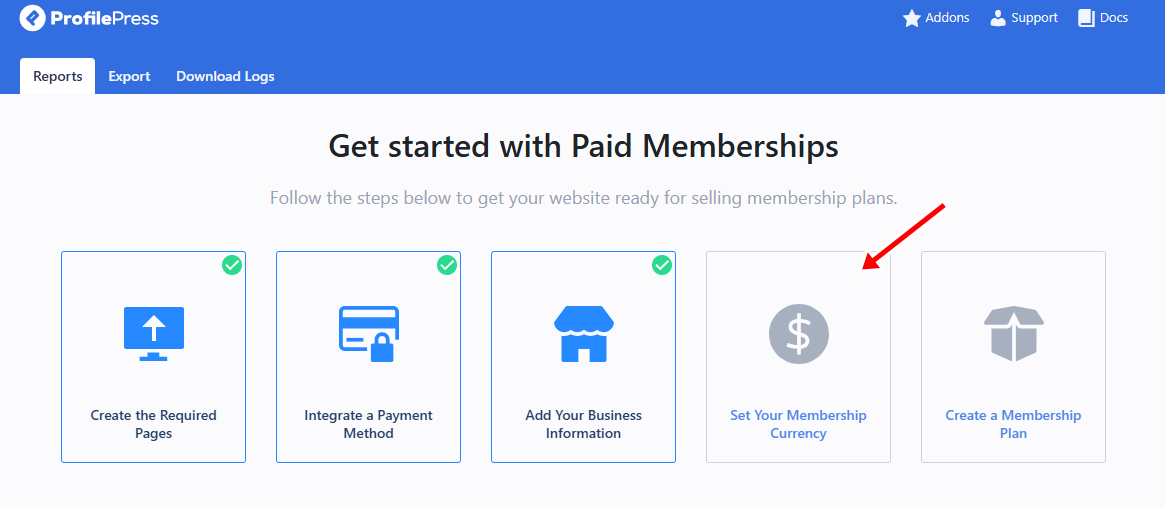
ProfilePress includes an intuitive setup wizard that makes this process easy. It guides you through creating the necessary pages, integrating a payment method for secure transactions, adding your business information, setting your preferred membership currency, and making your first membership plan.
Integrate a Payment Method
To set up paid content in WordPress, you will need to charge a fee for access, which means we need a payment method to accept payment.
To set up a payment method, go to ProfilePress > Settings > Payments > Payment Methods.
Choose your preferred payment gateways and enable them. Then, connect your accounts by entering the required API keys or login credentials provided by each payment service.
Once your payment methods are set up, click Save to apply the changes and start receiving payments.
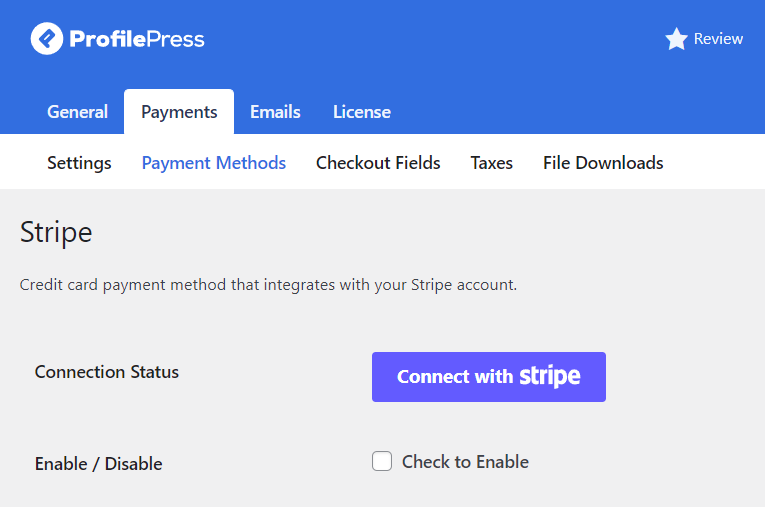
Below, we’ll walk you through integrating Stripe to charge for access to paid WordPress content.
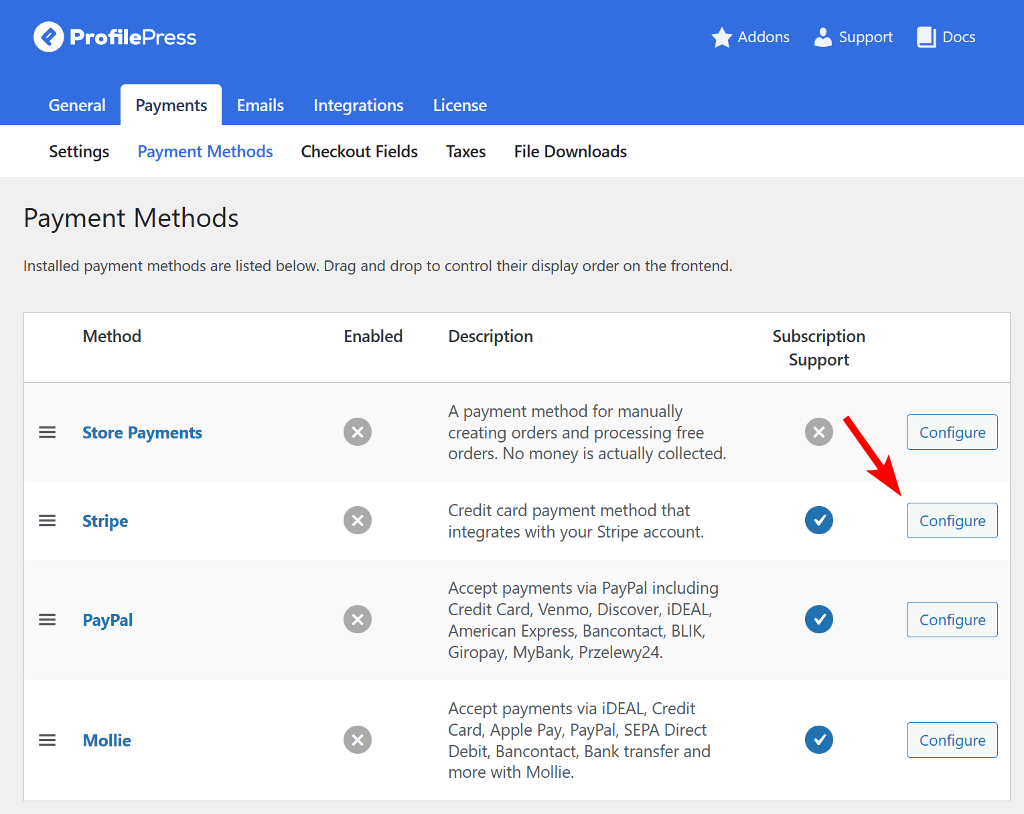
Click Configure next to the Stripe option. This will take you to a new page where you can select Connect with Stripe to continue.
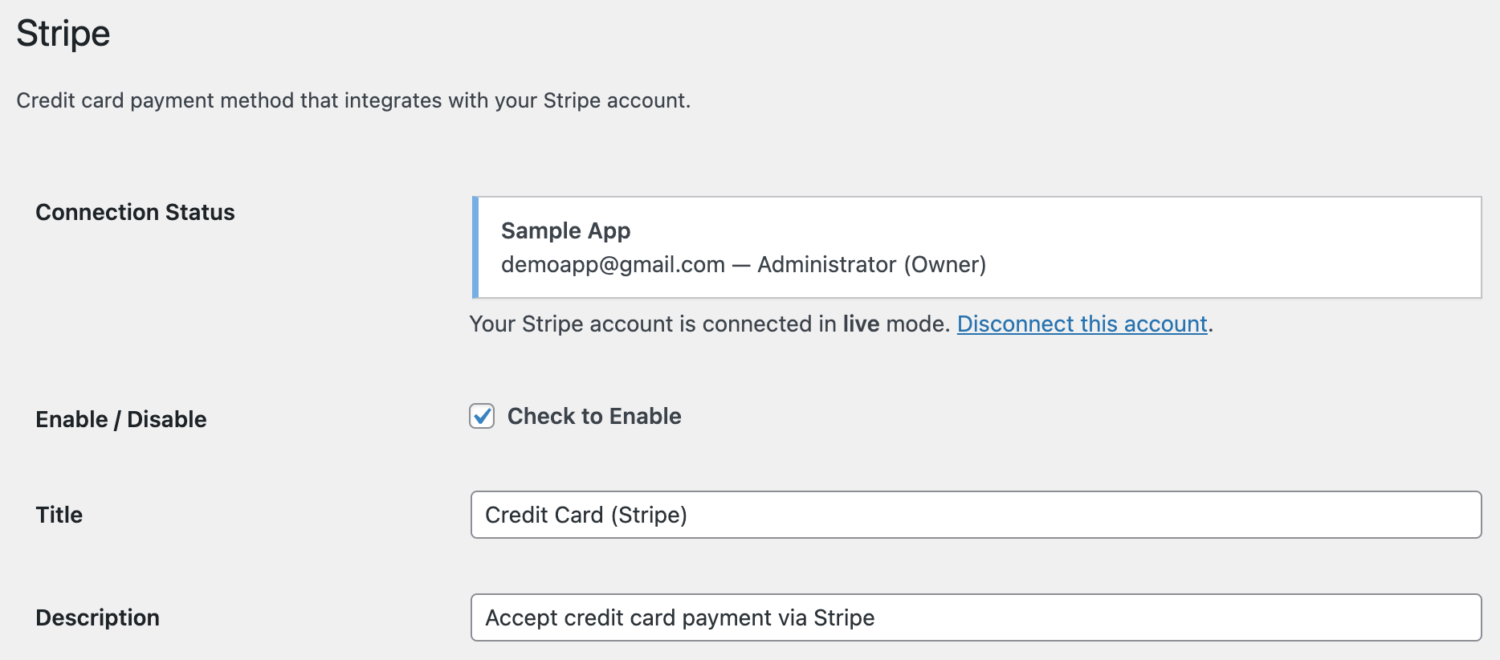
You’ll be redirected to the Stripe website, where you can either create a new account or log in to an existing one. Once this process is complete, you’ll be taken back to your website.
From there, enable the payment method by checking Enable, and then customize the title and description that will appear on your site’s checkout page.
Next, set up a webhook so ProfilePress and Stripe can communicate without interruptions. For complete instructions, see the guide on setting up the Stripe payment method.
Add Your Business Information
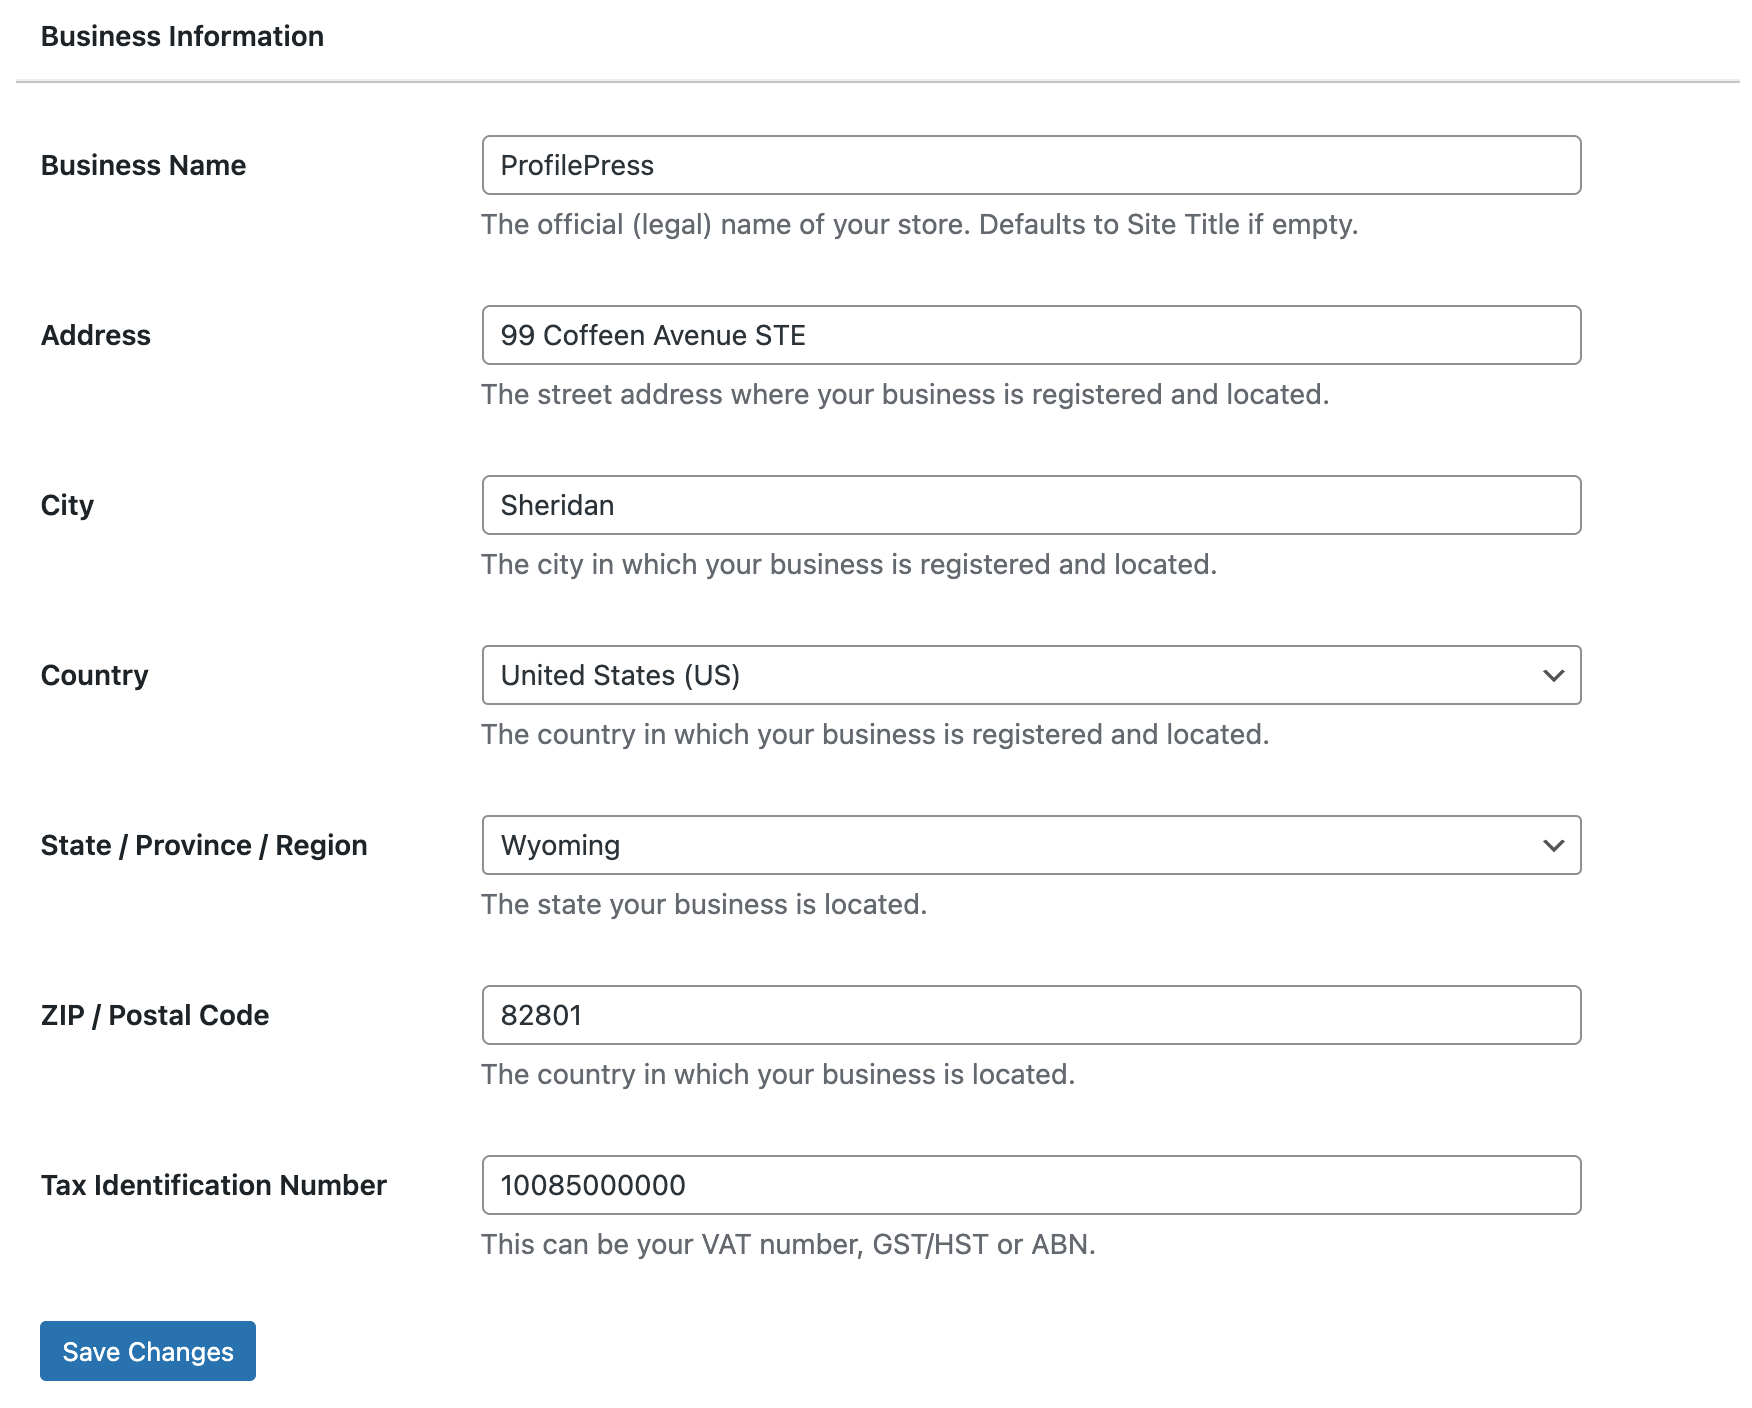
After connecting your preferred payment gateway, the next step is to enter your business details.
In your WordPress dashboard, go to ProfilePress > Dashboard and click Add Your Business Information. Fill in your business name, complete address, and tax identification number in the provided fields. Once done, click Save Changes to update your settings.
Set Your Membership Currency
ProfilePress lets you choose the currency in which you want to charge customers.
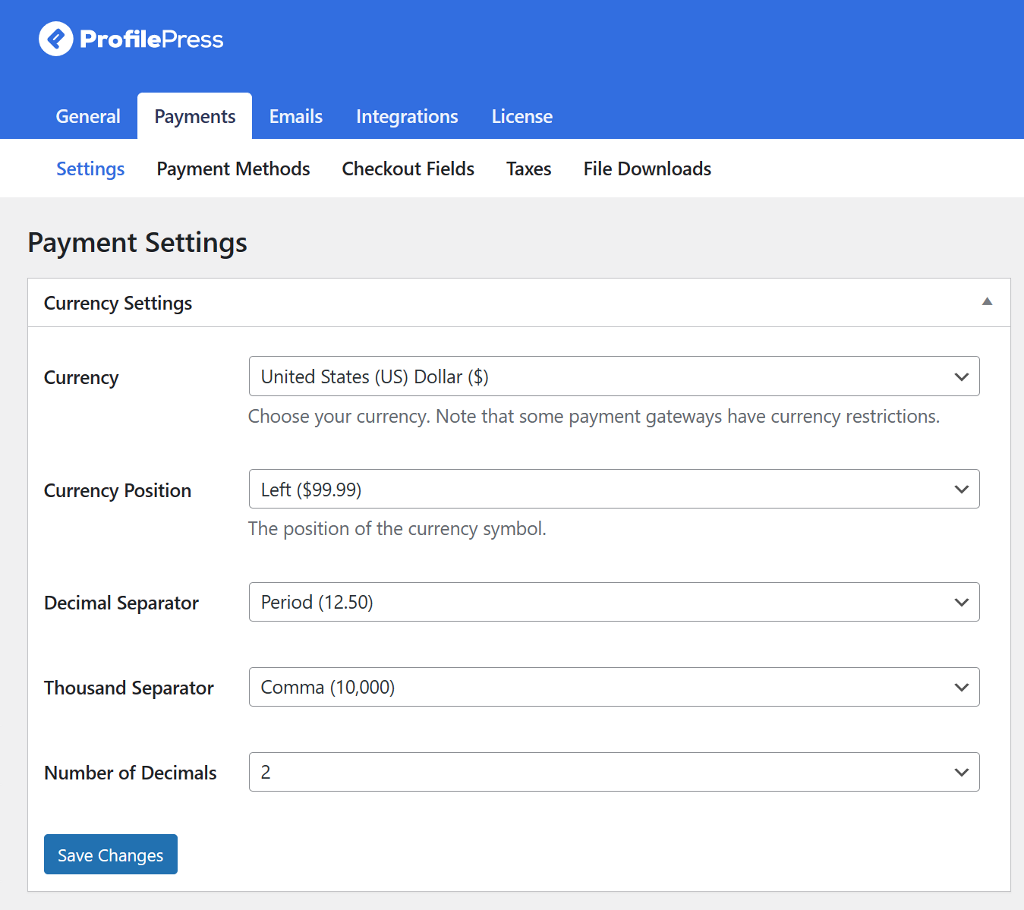
To set this up, go to ProfilePress > Dashboard and click Set Your Membership Currency.
In the Currency Settings section, choose your preferred currency, set where the currency symbol appears, and adjust formatting options like decimal and thousand separators.
You can also set the number of decimal places to make sure your pricing is displayed clearly and accurately, giving customers a consistent and professional experience.
Next, scroll to the Checkout Settings section to adjust your payment preferences.
Here, you can enable one-time trials, set the label for the terms and conditions checkbox, choose a proration method, turn off auto-renewal for subscriptions, and allow customers to be automatically logged in after completing checkout.
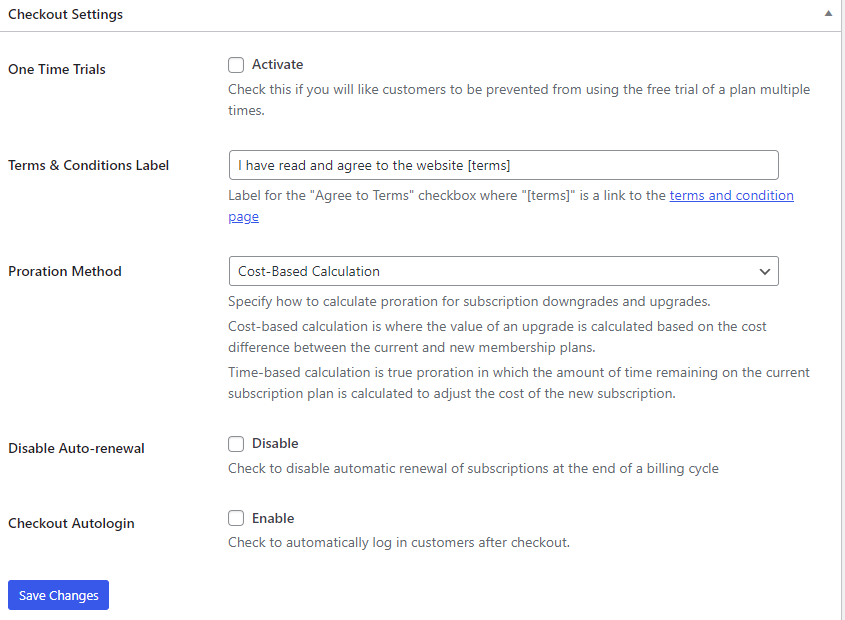
Once you’ve made your adjustments, click Save Changes to apply them.
Creating a Membership Plan
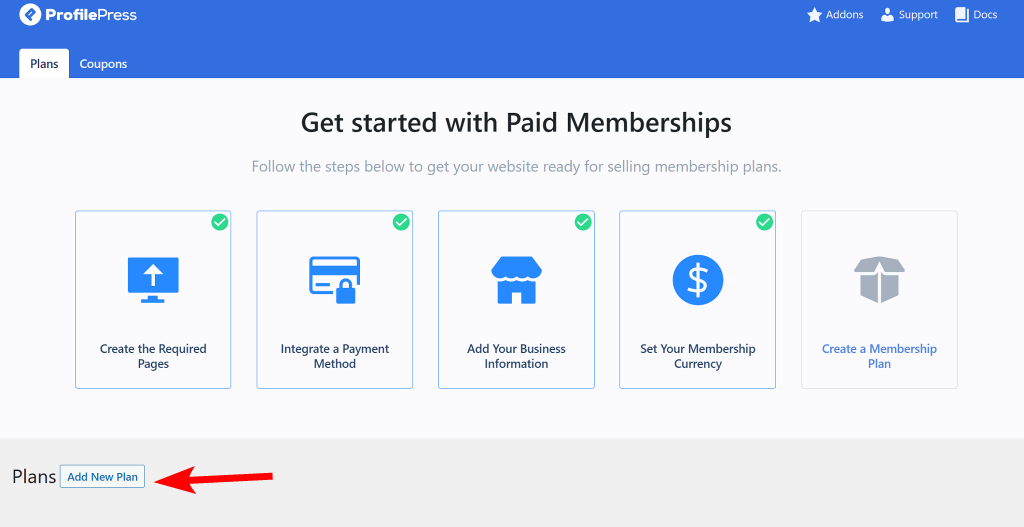
To accept payment from users and grant them access to paid content, you will need to create a membership plan. To do this, go to ProfilePress > Membership Plans and click the Add New Plan button.
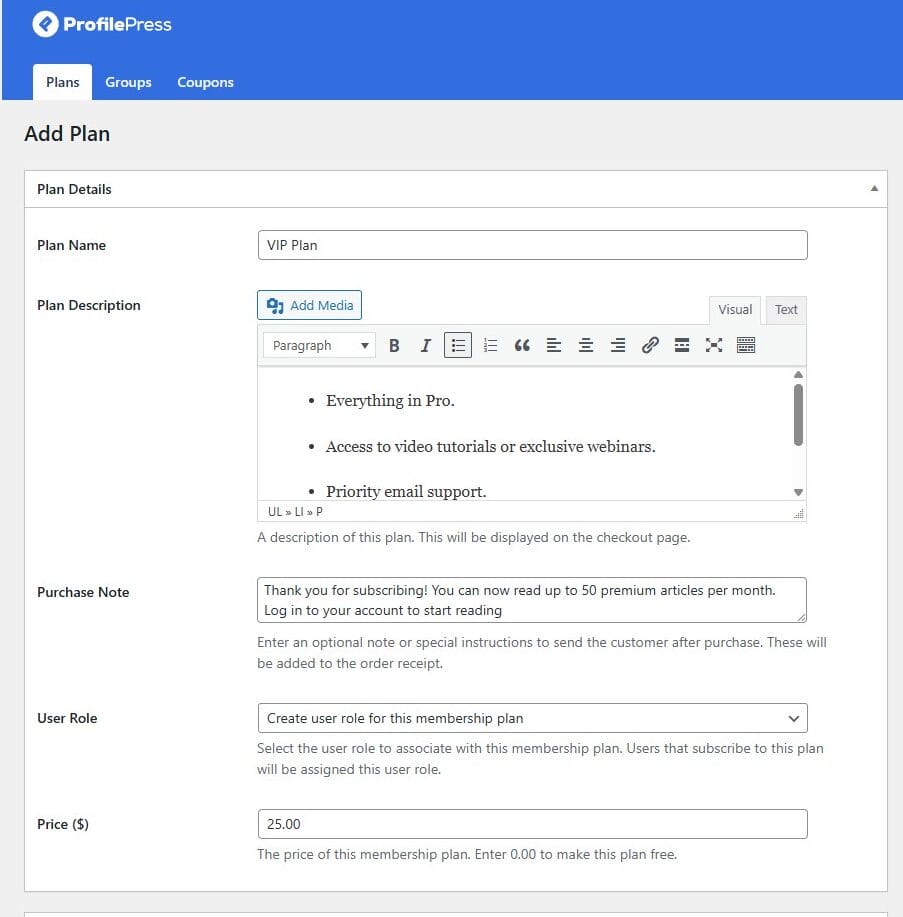
Enter a name for the plan, a description, a purchase note (a note or instructions that will be sent to customers after purchase), and a user role to assign to users.
You also need to specify the cost of the membership plan. Ensure your content reflects its value while remaining attractive to your audience.
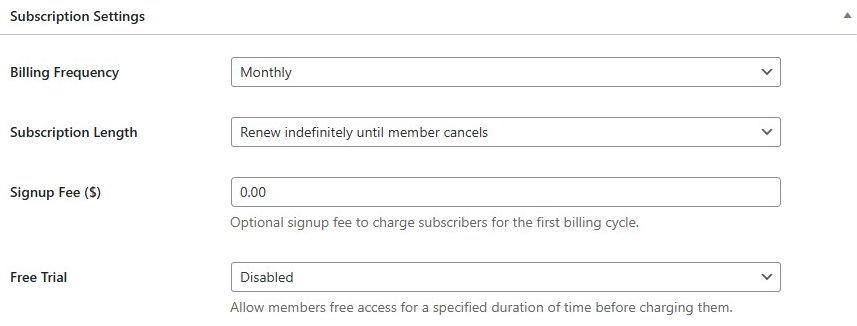
The Subscription Settings is where you set up the billing cycles, payment frequency, and whether you want to offer free trials or charge a signup fee.
The Downloads & Integration section is where you manage any digital products included with your membership plan. If your paid content includes downloadable files such as eBooks, templates, videos, or other resources, you can upload them here.
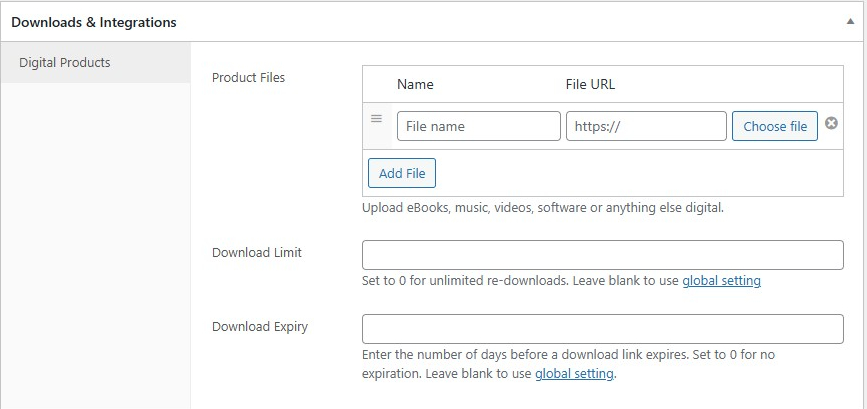
You’ll also be able to set a download limit and choose an expiration date for file access. When you’ve finished configuring your membership plan, ensure you save your changes.
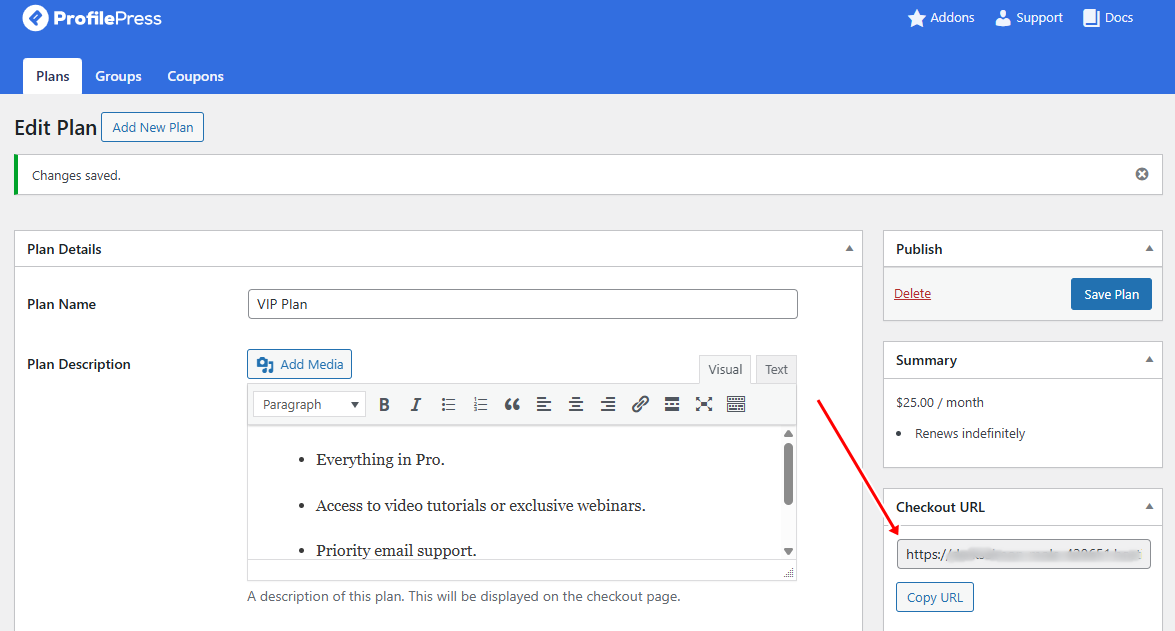
Once you save your changes, ProfilePress will create a checkout link for that plan. You can add this link anywhere on your website, including buttons, pricing pages, posts, or any other page on your WordPress site, to begin accepting payments from new sign-ups immediately.
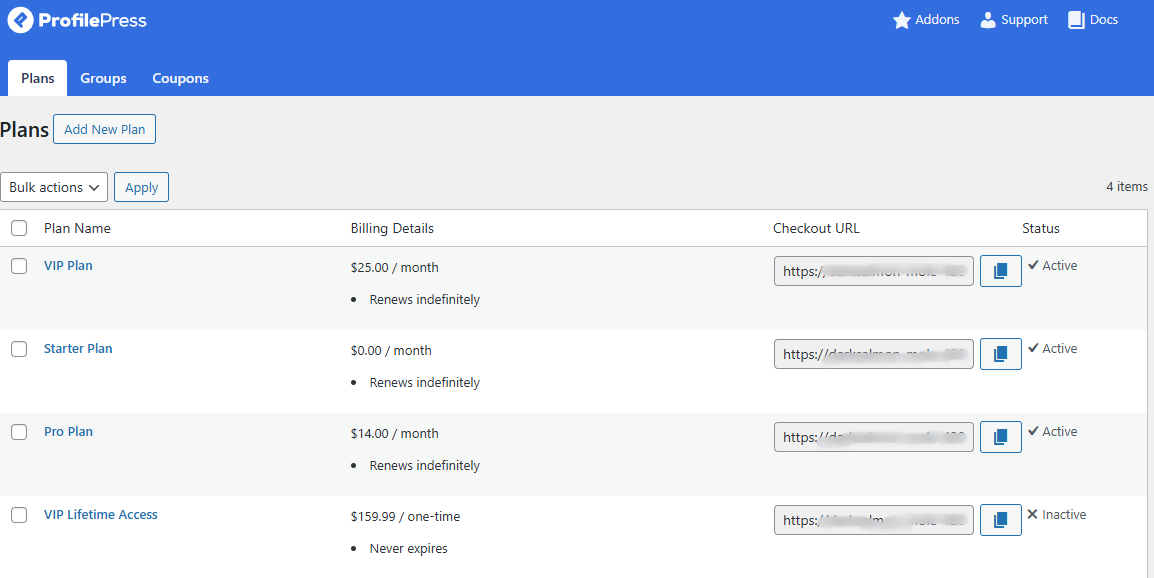
You can repeat these steps to create additional membership plans as needed.
Now that your membership plans are set up, the next step is to control access to your premium content.
Making WordPress Content Premium Resources
ProfilePress provides a powerful content protection feature that allows you to manage paid content in WordPress and control who can access it. You can fully lock content so that only members with the appropriate subscription can view it, or you can implement a metered paywall that permits visitors to read a limited number of posts before they need to subscribe for continued access.
Setting Up a Content Protection Rule
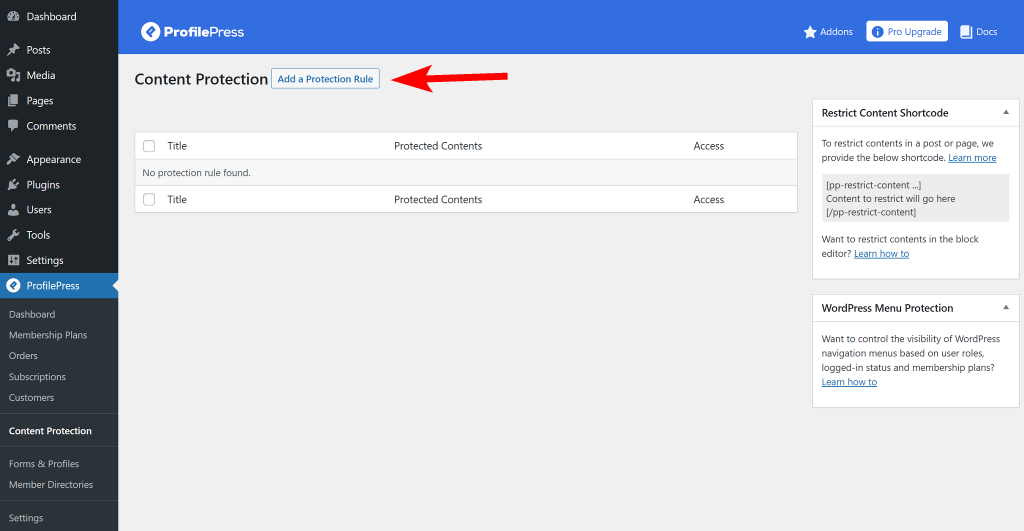
To create your first restriction, go to ProfilePress > Content Protection in your WordPress dashboard and click Add Protection Rule at the top of the page.
Next, give your protection rule a clear, descriptive name. Then choose the content you want to restrict.
ProfilePress lets you set conditions based on categories, tags, archives, formats, and more. For greater precision, you can combine conditions using AND or OR rules.
After selecting the content, decide who should have access. You can make it visible to everyone, limit it to logged-in members, or restrict it to logged-out visitors only.
Depending on your selection, additional settings will appear. You can link the protection rule to a specific membership plan, assign it to a user role, or manually grant access to selected usernames.
In the example below, we’ve chosen to protect all posts under the “Pro Access” category and allow access only to members subscribed to Pro, VIP, and VIP Lifetime Access plans.
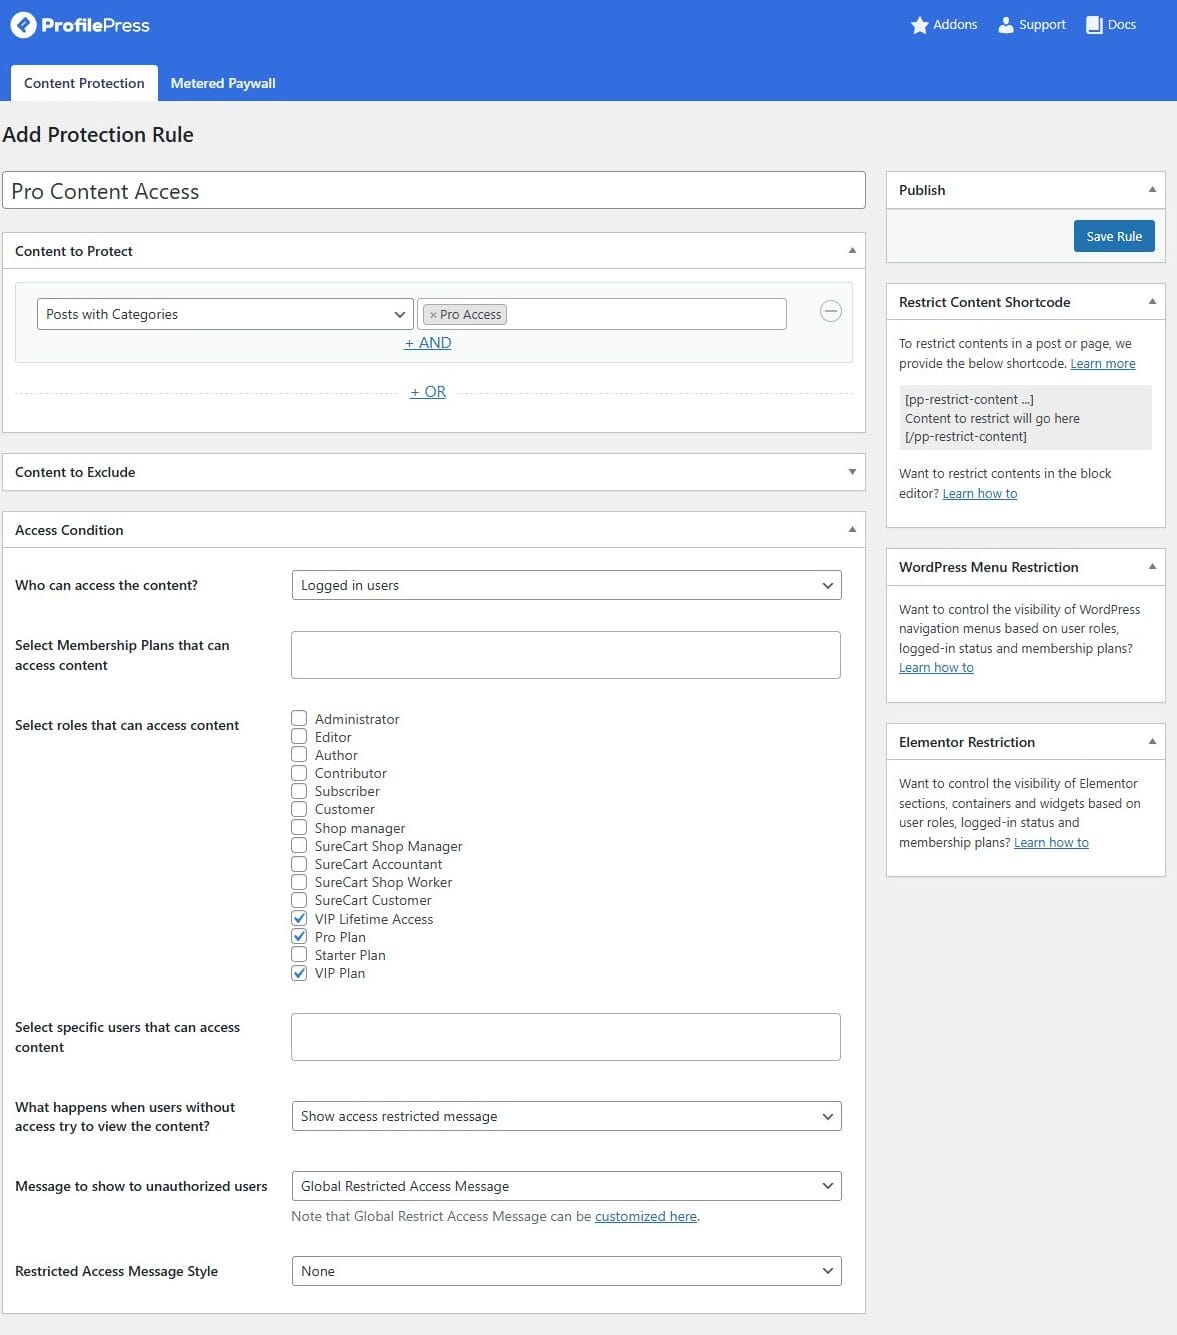
Next, you need to decide how you want to handle unauthorized visitors. You can either display a custom message or redirect them to another page. For example, you might redirect them to your pricing page, prompting them to subscribe to access your paid content. Alternatively, you could show a short excerpt along with a note explaining that the full content is for members only and how they can subscribe to gain access.
Once you’ve configured the rule, click Save Rule in the right sidebar to apply your changes.
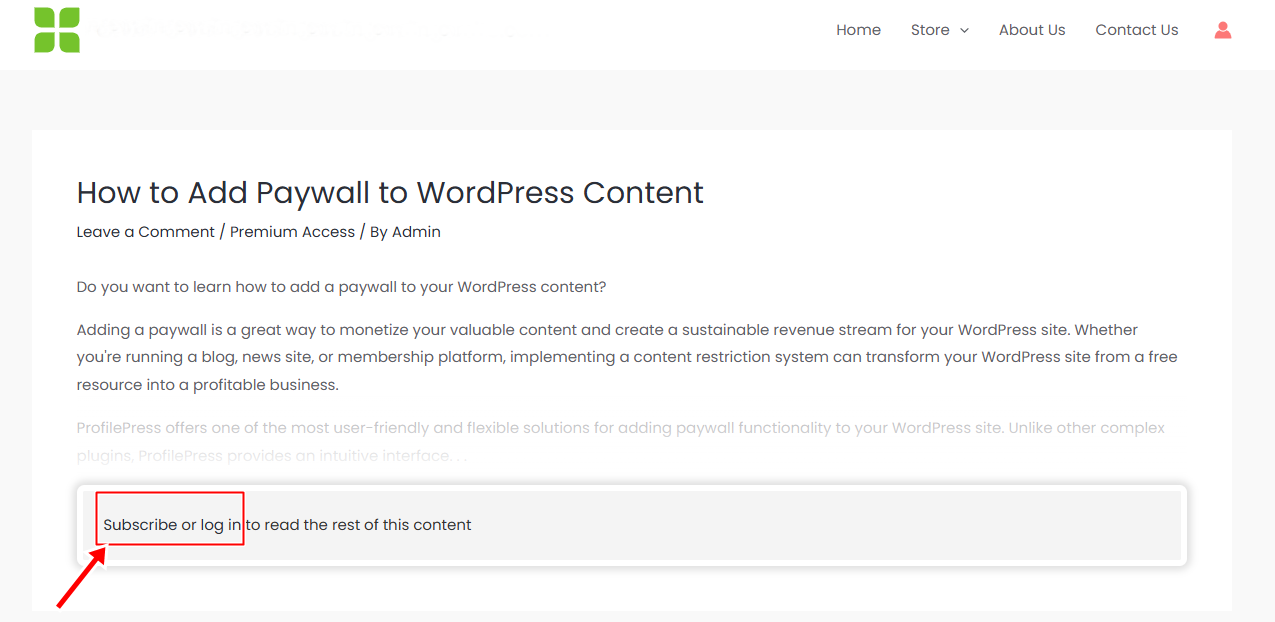
From this point on, any post published under the restricted category will display a prompt asking unauthorized users to sign up or log in to access the content.
But what if you want to give visitors a taste of your premium content before asking them to subscribe? A metered paywall makes this possible by allowing limited free access. In the next section, we’ll show you how to set up the metered paywall in WordPress using ProfilePress.
Setting Up a Metered Paywall in WordPress
ProfilePress’s metered paywall allows you to offer limited free access to your paid content. Instead of blocking access immediately, you can let visitors view certain premium content a specific number of times before the restriction kicks in.
This approach is especially effective for attracting new readers, building trust, and encouraging them to subscribe after they’ve seen the value of your content.
To enable this, go to your WordPress dashboard and navigate to ProfilePress > Addons. Locate the Metered Paywall addon and toggle the switch to activate it.

Next, click Settings to open the configuration page. You can also access it by going to ProfilePress > Content Protection and selecting the Metered Paywall tab.
Note: Before setting up a metered paywall, ensure the post types and taxonomies you plan to meter are already restricted under your Content Protection rules. Otherwise, users will still be able to access them freely even after reaching their view limit.
Now let’s set up the metered paywall. The first option, Reset limitation after, determines how long a restricted user must wait before regaining free access to protected content after hitting their limit.
Next, under Restriction, choose which post types and taxonomies can be viewed for free and how many free views each user is allowed. Use this setting to control which content is restricted and how it connects to your membership plans.
The Total Free Views field allows you to set an overall limit on free views across all content types and taxonomies. For extra protection, enable IP Blocker to stop users from bypassing these limits by tracking their IP addresses and restricting access from private or incognito browsers.
In the Countdown Slide section, you can enable the Slidebox feature to display a message along with a button that links to the checkout URL of the membership plan that will grant them unlimited access to premium content in your WordPress site.
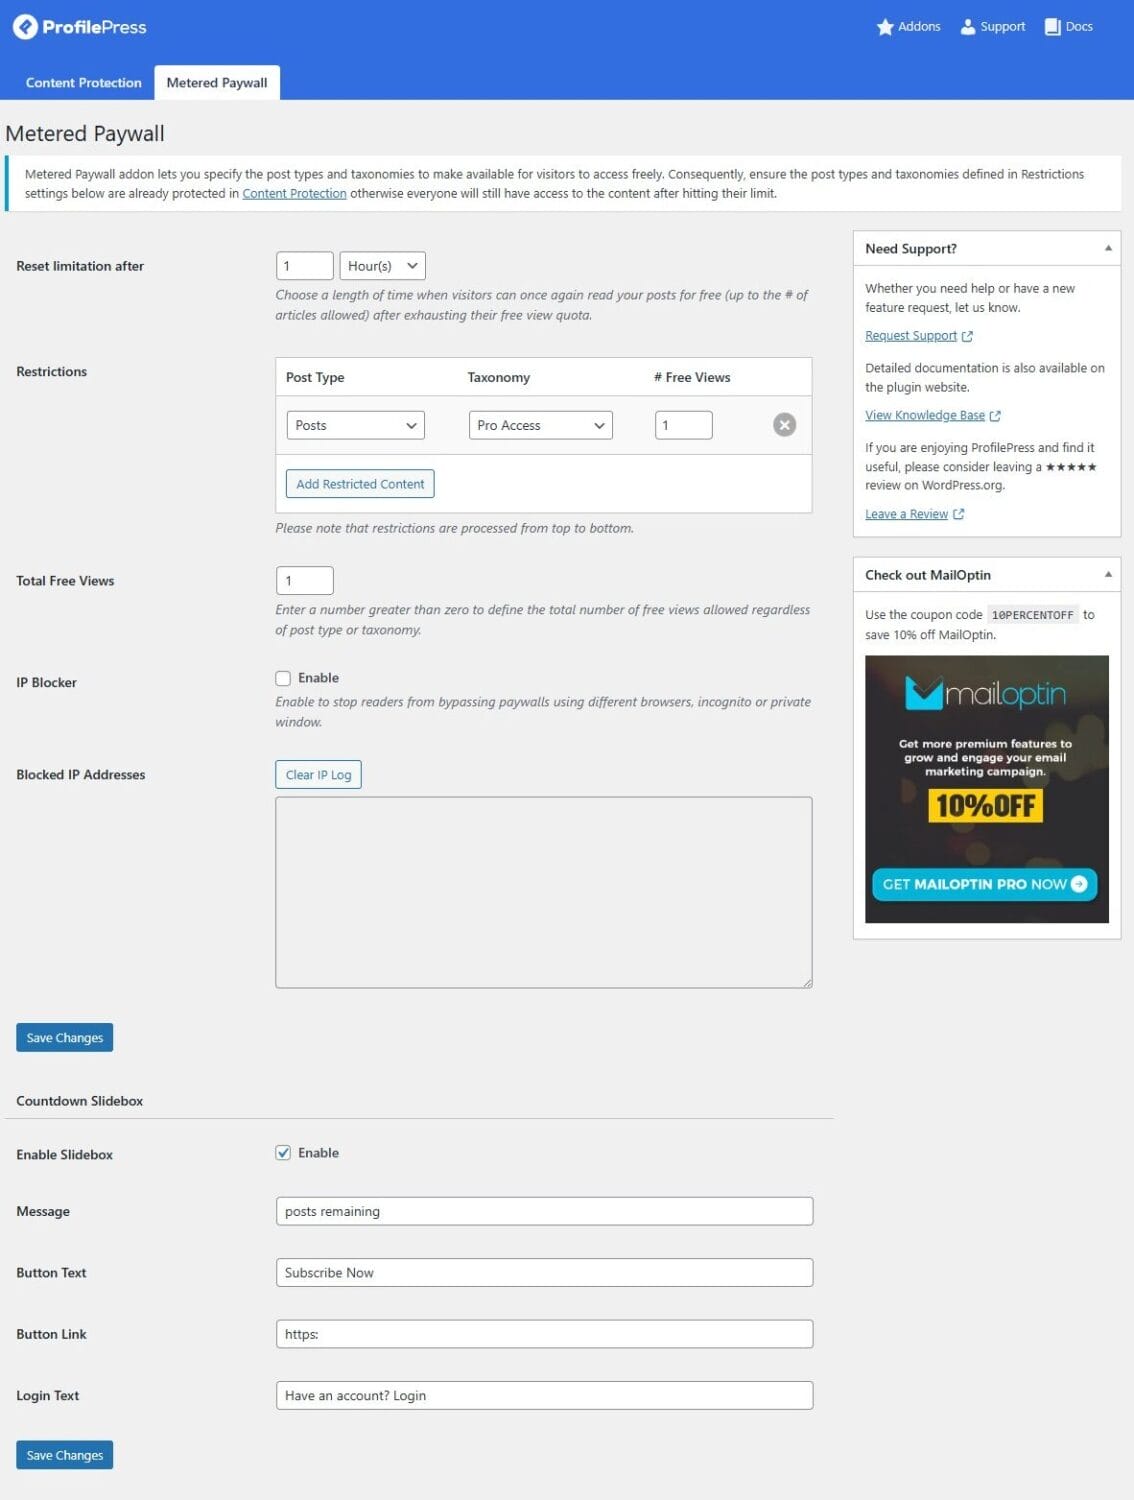
After adjusting the settings, click Save Changes to apply them.
From the image below, you can see a notification box informing the reader that they no longer have access to more paid content.
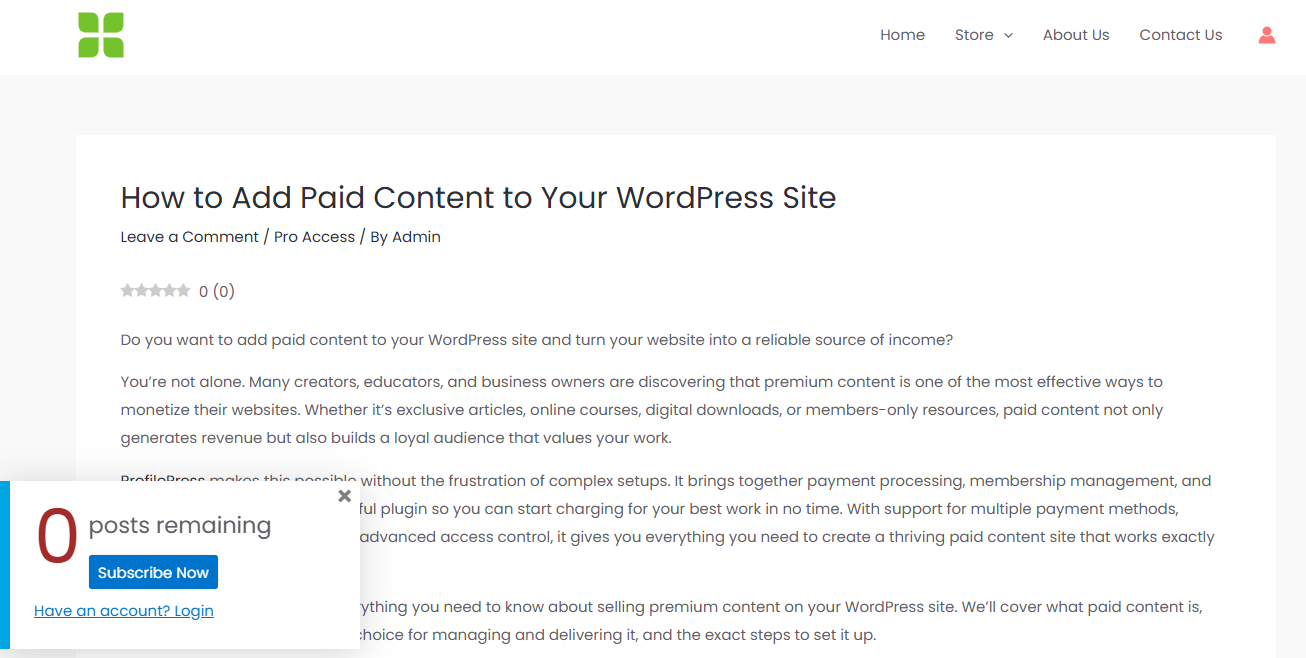
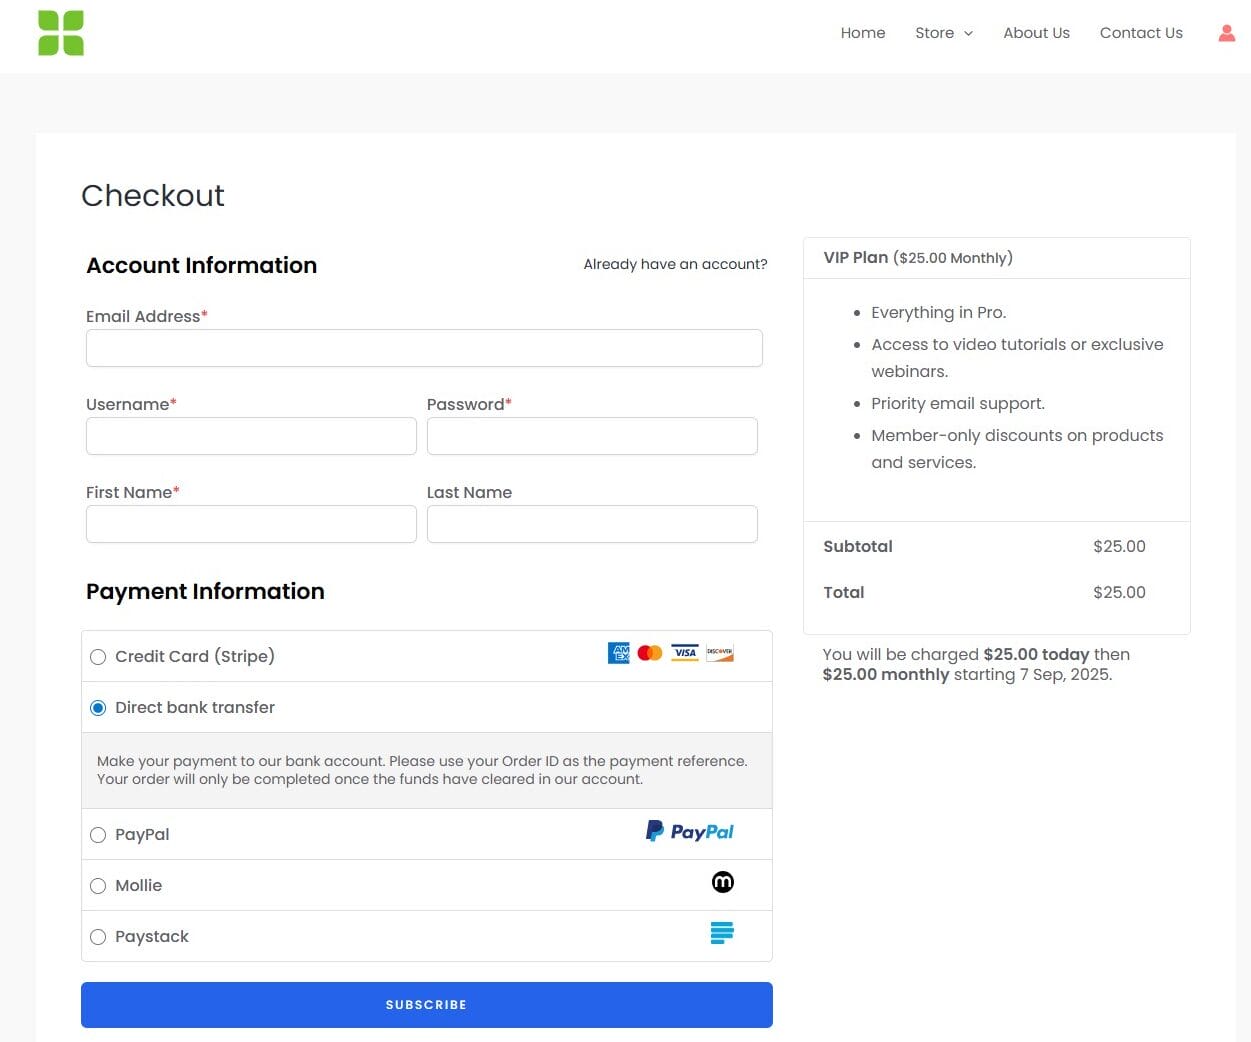
When the reader clicks on the Subscribe Now button, they will be taken to the checkout page you included in the Button Link field when setting up the metered paywall.
Below is our sample VIP plan checkout page.
There you have it! With the steps above, you can add paid content to your WordPress site. Next, we’ll share proven tips for selling paid content.
Proven Tips for Selling Paid Content
Setting up paid content with ProfilePress is a solid first step, but maximizing its potential requires a strategic approach. Here are some tips to help you succeed:
Offer a Mix of Free and Paid Content: Give visitors a taste of your premium content through free samples, excerpts, or limited-time access. This builds trust and encourages them to subscribe.
Highlight the Value of Your Membership: Clearly explain what subscribers gain, such as exclusive articles, downloads, courses, or other perks. Use your sales pages, pop-ups, and CTAs to showcase these benefits.
Optimize Checkout Experience: Keep your checkout page short and easy to complete. Remove unnecessary fields and make payment options clear to reduce cart abandonment.
Use Social Proof: Display testimonials, subscriber counts, or case studies to show that others find value in your paid content.
Monitor and Adjust Your Plans: Use ProfilePress’s reports to track sales, active members, and cancellations. If a plan isn’t performing well, tweak the pricing, features, or promotion strategy.
Keep Your Content Fresh: Regularly publish new premium content to give members a reason to stay subscribed and new visitors a reason to join.
Conclusion
Turning your WordPress site into a paid content platform doesn’t have to be complicated. With ProfilePress, you have everything you need to create membership plans, restrict premium content, manage payments, and deliver a smooth user experience.
Now that you’ve seen how it works, it’s time to take action.
Decide what type of premium content your audience will find most valuable, set up your membership plans, and start promoting your new paid offerings. The sooner you launch, the sooner you’ll begin to generate recurring income from your expertise, creativity, and hard work.
Get ProfilePress today!